
The Cart Module in EZO CMMS empowers you to stay on top of your jobs and events, greatly simplifying equipment management. You can mark these jobs and events on your calendar, have a list of required equipment and inventory, collaborate as a team, and do so much more.
1. Common events/jobs tracked with Carts
For construction, engineering and service industries, it’s common to distribute their work in “jobs”. Here are some common examples from our user base.
Job 001: Drilling work at Griffith Park
Job 002: Maintenance of air conditioning at Lawrence Cape library
Job 003: Photoshoot of new products launched in March
For technology, education, furniture, exporting and other industries, Sales and Marketing departments are participating in different “events”. Common examples from our user base:
Event 001: Sep 2016 Sales Conference in Vegas
Event 002: Products showcase at TechCrunch Disrupt SF
Event 003: Bridal Shower for Melissa
Event 004: Annual Products Launch Event
Event 005: ‘Come in and try out our devices’ sales event
2. Enabling Carts
To enable Carts in CMMS Beta, head to the gear icon on the top navigation bar and select Add Ons from the dropdown menu. From the side navigation bar find the Cart Module and enable it. Scroll to the bottom of the page and click update.
3. Planning and managing an event/job
1. Identify the items: (Assets, Asset Stock, and Inventory) you require for the upcoming job or event. If it’s a photoshoot, you’ll probably add a few cameras, reflectors, props, and lights. If it’s a conference, you’ll be adding items such as the devices you’re showcasing, some giveaways, and some branding material.
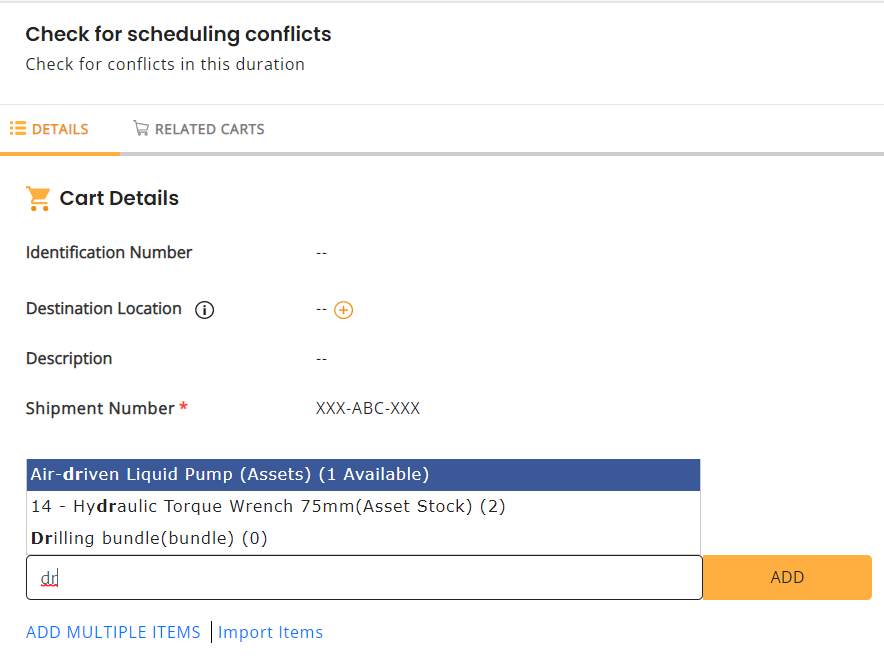
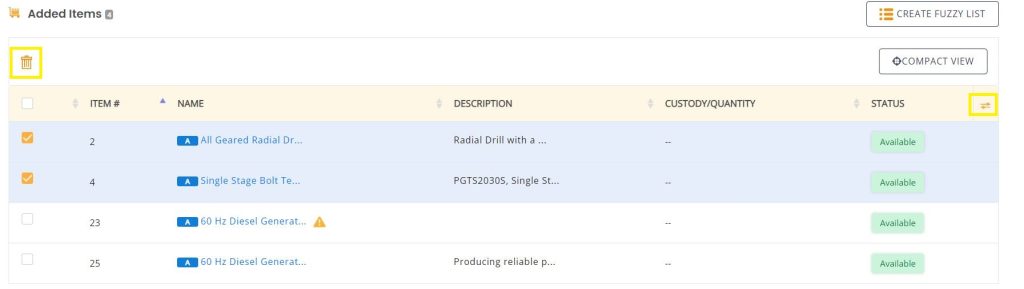
2. Add them to the Cart: You can do so from the items’ listings page. Add multiple items to a cart via mass action.

Or you can add items in from the cart.
3. Moving Cart Items: Transfer new or drafted carts seamlessly between different locations. Move items between different locations from the Cart details page as many times as you want (see image below). An overlay will appear where you can update location data (Note: Location of assets will be updated and specified stock quantities of the Asset Stock and Inventory will be transferred to the selected Stock Location).
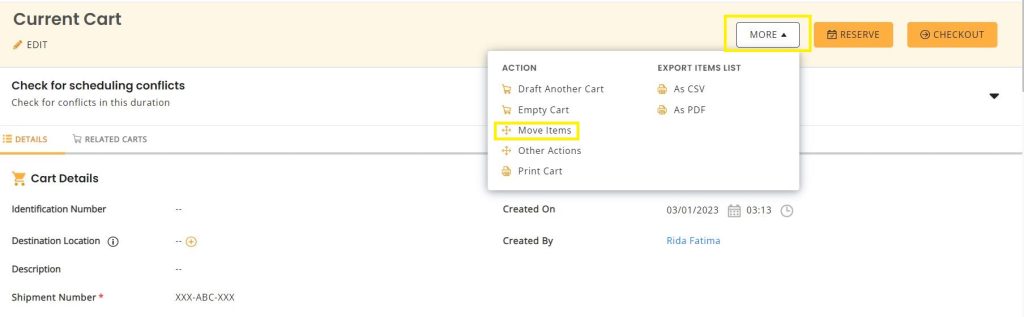
This is useful in cases where equipment (as a cart) may be needed at a different location, say from the company HQ in San Jose to the CES exhibition in Vegas. These can be then shipped to San Jose, with the equipment manager transferring the entire cart to this new location. This comes into play when ‘Transfer of Asset Stock’ and “Transfer of Inventory” is enabled from Add Ons.
4. Check for scheduling conflicts: to make sure that their items will indeed be available on your event day, or when your team will be heading out on a job.
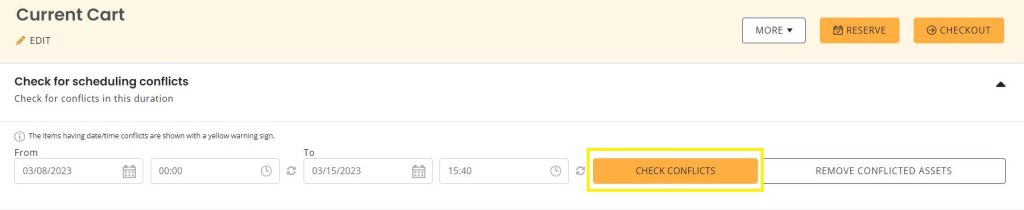
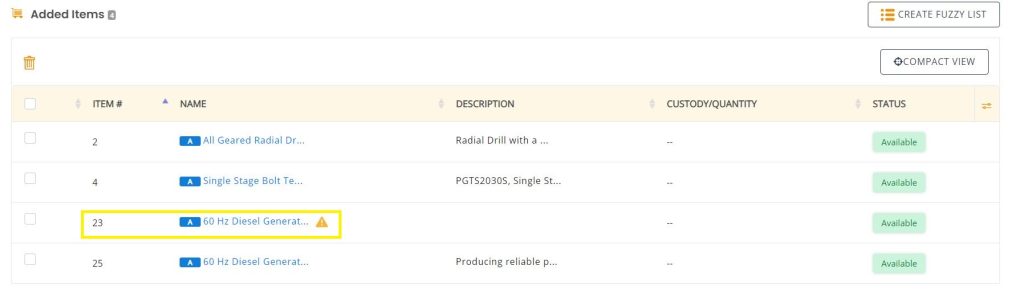
The conflicts are indicated as the yellow warning sign. Hovering over this sign shows the exact conflict.
5. Reserving a Cart: If you’re planning ahead for an upcoming job or event, reserve the cart. If you’re heading out right away, check out the cart. Reserving a Cart will make the selected items unavailable during the reservation dates; ensuring that they don’t get scheduled for any other use. When the reservation time arrives, you can check out the reserved cart. Enable conflict free reservations for assets, asset stock and inventory from Company Settings → Reservations.
Reserved cart items can be edited on the fly. Items can be removed or added, giving businesses more control over their equipment management. Say you reserved items for a CES exhibition but underestimated the number of VR headgear you’d need. With the latest enhancement, last minute reservations to a cart are nothing to fret over.
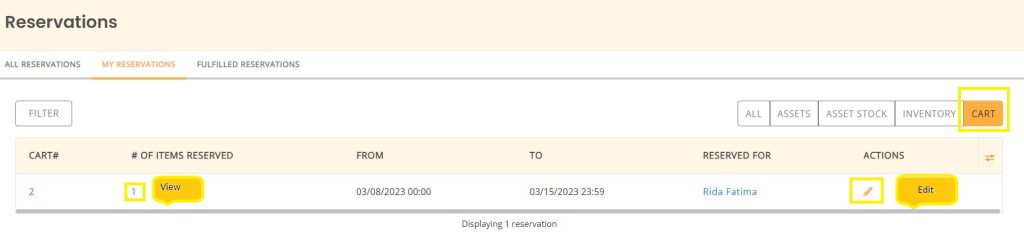
You can also view/edit a cart on the ‘Reservations’ page under the notifications bell – helping you make quick edits in the carts section. Clicking ‘edit’ will take you directly to the cart in question and clicking ‘view’ will also give you the same option, under ‘Show Details.
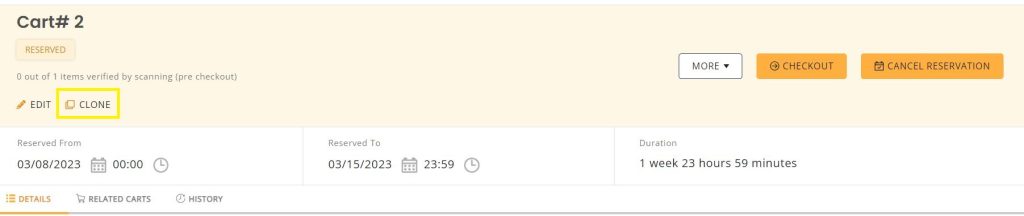
6. Cart Cloning: You can also clone a cart (reserved, checked out, completed, canceled, or moved) from its details page.
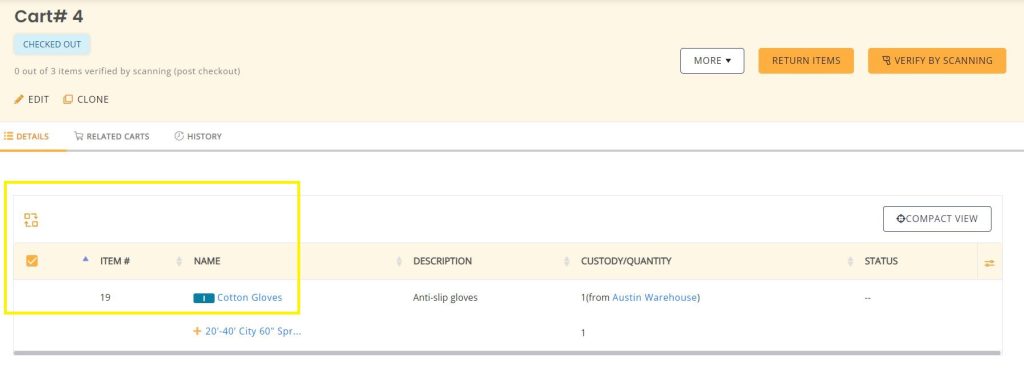
7. Swap Assets in Checked out Carts: The process of replacing an asset in a checked out cart can be a bit complex for some users. To overcome this, the swap functionality is used to enable exchanging multiple items in a checked out cart. Useful in cases where damaged or incorrect items need to be replaced by a cart. To use this feature, enable ‘Swap Checked Out Items’ from Settings → Add Ons. This feature enables you to swap assets only in checked out carts from the detail pages (see image below).
– Select items you want to replace or swap. Click the swap icon as shown in the image below.
– An overlay will appear. Choose items you want to replace the assets with, e.g. Item # 4 – Acoustic Guitar was checked out by mistake. Therefore, a Camcorder can be updated to the cart now. Hit ‘Update’.
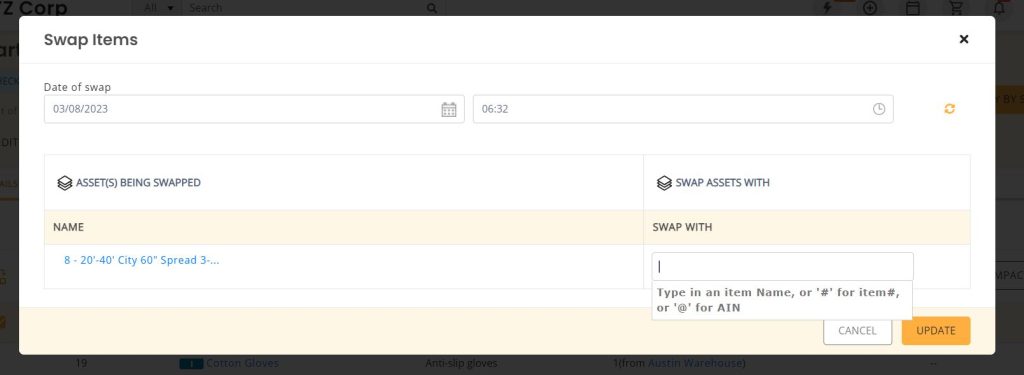
– Item # 4 is now replaced by Item # 17.
Note: Items can only be swapped by members who have created the cart. For example, Member AA cannot swap assets in a checked out cart created by Member BB. However, Admins have greater control over Carts so they can swap items in a Cart.
Items within Packages cannot be swapped, but bundled items are swappable in a checkout Cart.
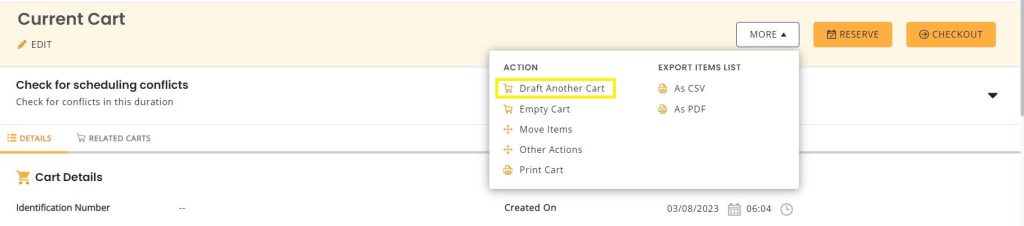
8. Draft a new Cart: To enable seamless workflows, you can draft a new Cart while working with an old one. Simply go to the Carts details page → More → Draft Another Cart. You can also ‘Create a New Cart’ from the Cart Transactions page.
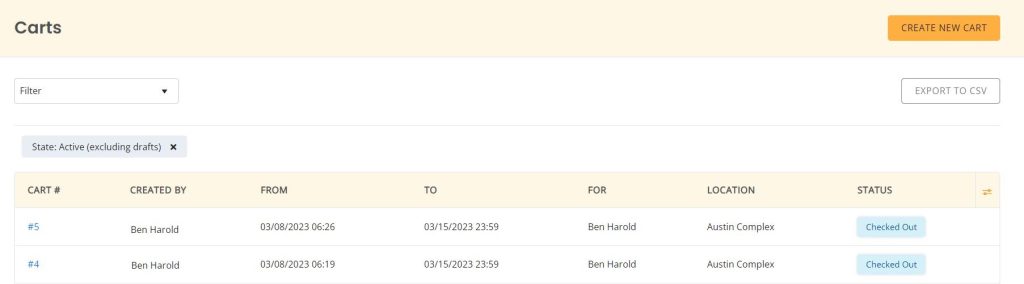
9. Sort Carts by Date values:
At the carts listings page, users can sort the cart by following fields:
- From
- To
- Created on

4. Tracking events/jobs
4.1. Upcoming Events
Your upcoming events/jobs are the reserved carts.
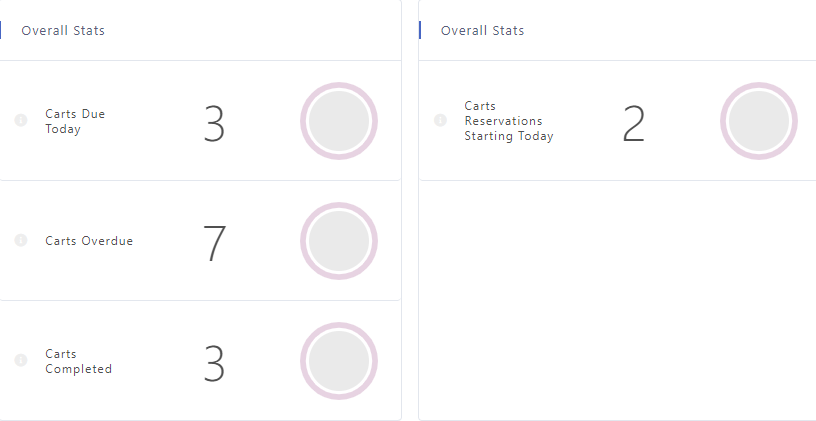
The dashboard calendar shows the upcoming reservations. You can view the dashboard calendar ‘by cart’ as we’ve added a widget for it. Toggle between actionable metrics for carts and items and stay on top of which carts are coming in, going out or overdue on return.
You can also enable the following email alerts from Alerts tab in your account.
a) Reservations starting today
b) Reservation alert in advance (say 3 days before a reservation starts)
c) Reservation request
d) Cart reservation
e) Reservation of cart pending
d) Reservation approved
f) Reservation denied
e) Reserved cart changes
4.2. Ongoing events
Your ongoing events/jobs are the checked out carts. The dashboard calendar shows the carts that are due back. You also receive an email alert listing the items when they are due. When you return a cart, all assets and asset stock which are part of that cart are checked in. The cart is marked “Completed”.
5. Cart actions
1. Add custom fields such as Event Venue or Shipment Charges from More → Customize → Custom fields → Custom Fields → Cart.
2. Print the cart details as a PDF. The layout can be configured from More → Cart printouts → Add a new template.
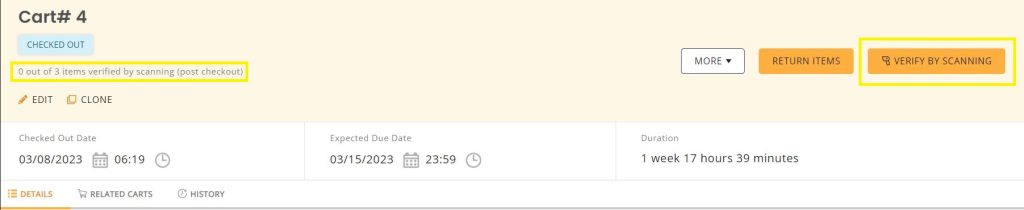
3. Verify items in a reserved cart before sending it out. Use the Verify by Scanning button on the Cart Details page. Then, Scan items → Submit the scanned list → items are verified. You will need a Barcode or QR Code scanner to scan items.
4. Attach documents like user manuals, and add comments to highlight any points for concern.
5. Relate one cart to another. Say, you’re shipping 5 containers for the same event. Each container can be a cart, with a separate list, and a different person responsible for it. But they can be related so that you can tell that they’re going to the same event.
6. Track Cart history. This information is maintained in our logs, viewable under History → Cart History on the Cart Details page.
7. Edit Active Carts if you’re an Admins. Admins have greater control over carts. Account owners and admins can delete moved Carts.
8. Use Cart ID instead of Cart#. We offer you Cart# to help you keep tabs on Carts easily. However, if your workflow primarily uses Cart Identification Numbers (CIN) to keep track of carts, you can always use them instead of the Cart# in Cart listings. This can be changed from Company Settings → Advanced Settings → Cart Identifier. Learn more
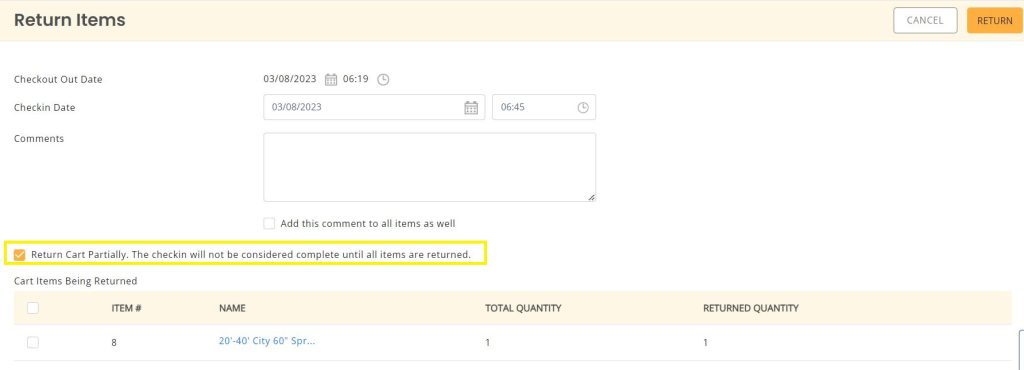
5.1 Partial return of Cart Items

Partial return of Cart Items enables users to directly return asset/asset stock from a Cart instead of going to the Details page and looking for the line item to check in. Simply go to Return Items on the Cart details page.
Select Return Cart Partially and choose the items you want to return.
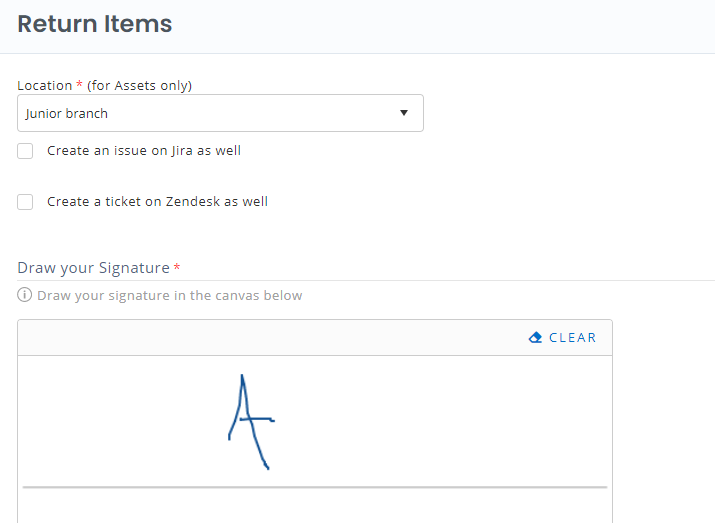
You will be asked to fill in the Custom Fields and Signature for the returned items.

Once returned, the items will be marked through on the Cart details page.
6. Make Carts mandatory
If your workflow dictates that you use Carts all the time, make them mandatory for actions such as check-ins, checkouts, reservations, and reservation requests.
To do this, go to Add Ons → Cart Module → Force Cart Actions. You can then choose whether you’d like to force cart actions for Staff Users, Administrators, and Supervisors, or both:

With this setting enabled, all prompts for Check-ins, Checkouts, Reservations, and Reservation Requests will be removed for the chosen user category from the following pages, forcing users to use Carts instead:
- Item detail pages (Asset, Asset Stock, Inventory)
- Listing pages (for Mass Actions)
- Package pages (both Detail Pages and Mass Actions)
- Dashboard
- Group pages
- Vendor pages
- Location pages
Note: This setting is disabled by default. Before it can be enabled, you must first resolve all active reservations and checkouts related to Carts.
7. Carts for project management
Large teams can use Carts to manage all of their projects. Harness the power of custom fields!
7.1. Creating a custom field for Project Number
We’ll create a Project Number field to work with our Carts.
To get started, create a custom field from More → Custom Fields → Cart. Here, click on ‘Add Custom Field’. Call this ‘Project Number’ and specify the type as Single Line Text.
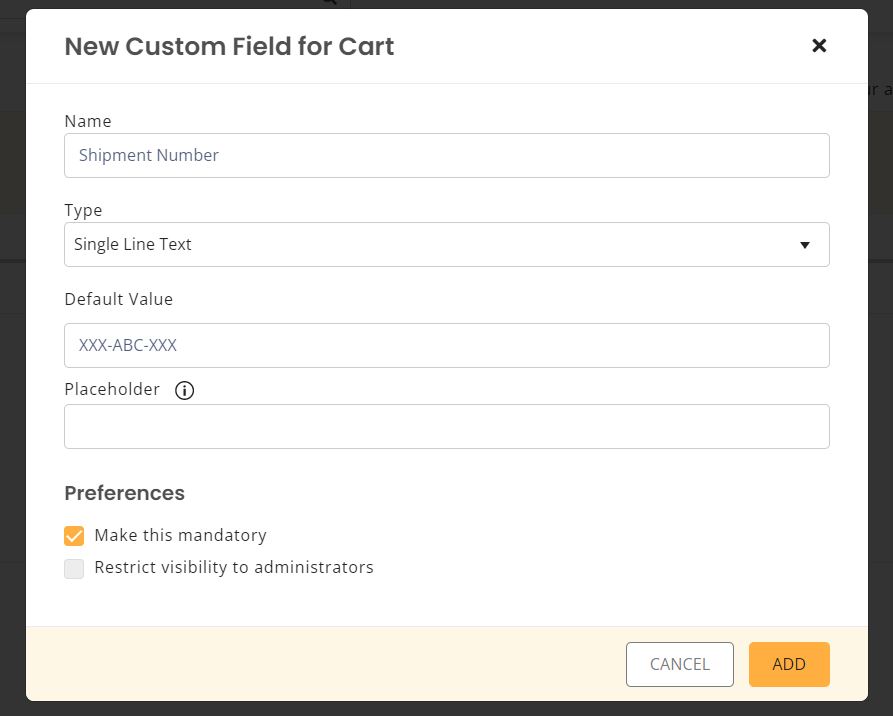
You can also select the Preference checkboxes to make this field mandatory or restrict its visibility to administrators only.
Once done, hit Add.
Now, to test this out, go to the Current Cart from the Cart icon at the top-right of the page. You’ll be able to see a new data field under the Custom Field section.
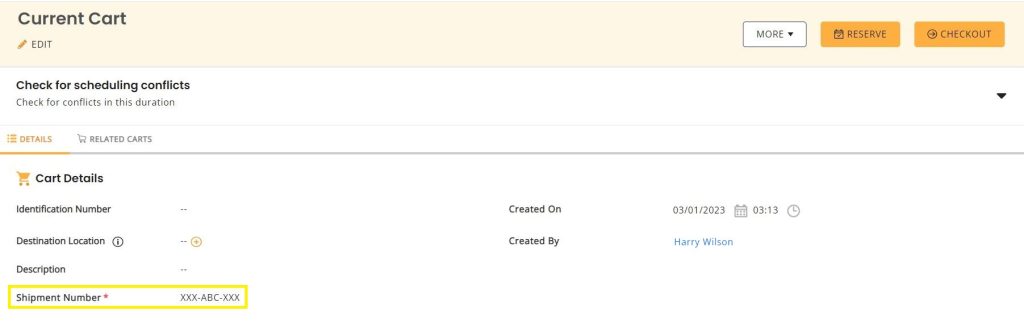
Note: Ours is a mandatory field so this Cart cannot be checked out unless a Project Number is assigned to it.
To assign a Project Number to this Cart, double-click on the Project Number field dashes to edit it. We’ll assign it ‘CON-183’ since the Cart is meant for a technology conference.
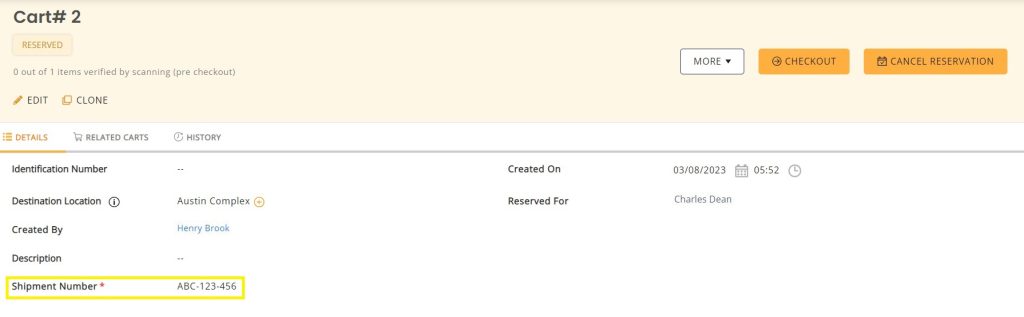
Similarly, assign a descriptive Project Number to each Cart and make item referencing and project management a breeze.
7.2. Analyzing project progress
You can also generate a custom report on Carts to verify the project progress with respect to Carts checked out. For this, we’ll create a Cart Project Number report.
To get started, go to Reports → Custom Report. Here, choose ‘Carts’ as the primary module and ‘Locations’ as the secondary module. We’ll add the following columns to the report:
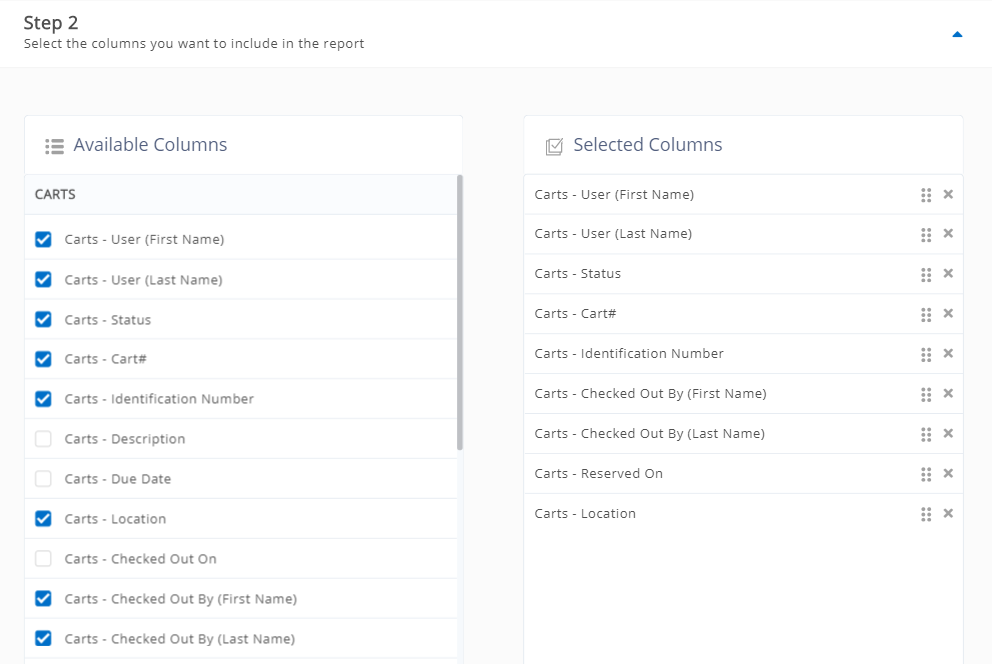
Additionally, you can apply filters and group by line items as well. For the purpose of our Project Number report, we won’t be doing this.
Let’s run our report!
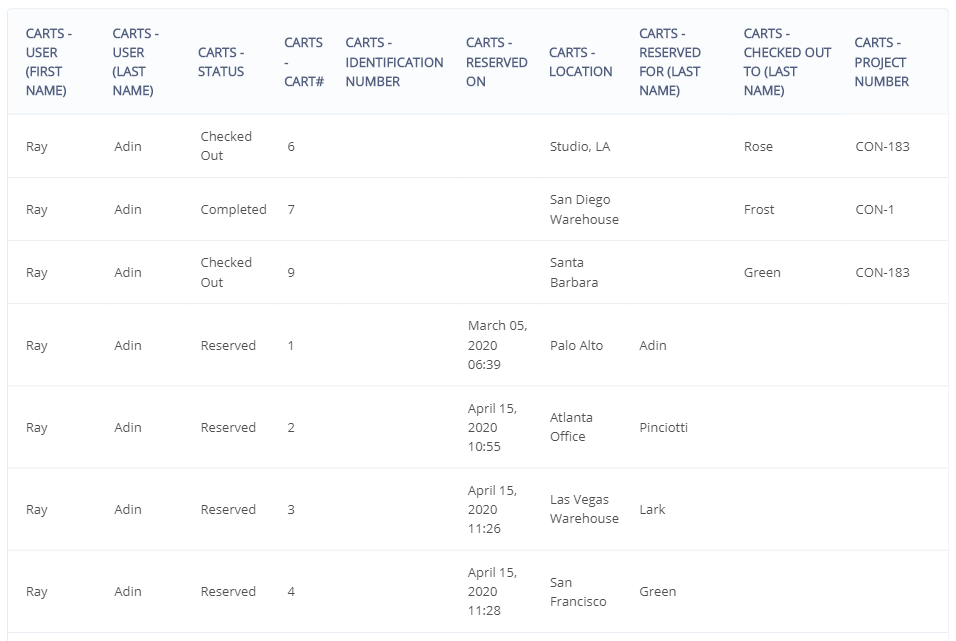
The final report let’s you view the Cart status and Project Number so you can easily examine pending, ongoing and completed projects.
8. Carts for Staff Users
Being responsible for multiple projects scattered across different locations can be a difficult job. Whether you’re tracking items across warehouses or job-sites, you need to have a way to oversee the movement, arrival dates, and contents of company Carts.
To this end, Administrators can view Drafted Carts created by Staff Users in different locations. Of course, only the user who has drafted a cart can take actions on it. However, Administrators can apply the ‘Active Carts (Including Drafts)’ filter to get a bird’s eye view of all the Drafted Carts in their system, including those drawn up by Staff Users wherever they are. This can make managing projects across different locations a lot easier.
Please note that the ‘Print Cart and Export Items List’ buttons are part of the View-Only functionality in CMMS Beta.
9. Item recommendations for Carts (BETA)
Ever feel like you’ve skipped an item or two when checking out assets? Our Item Recommendation feature highlights missing equipment for specific business activities. You can, therefore, make better-informed choices by pulling on previous company-level preferences and increasing the discoverability of business assets.
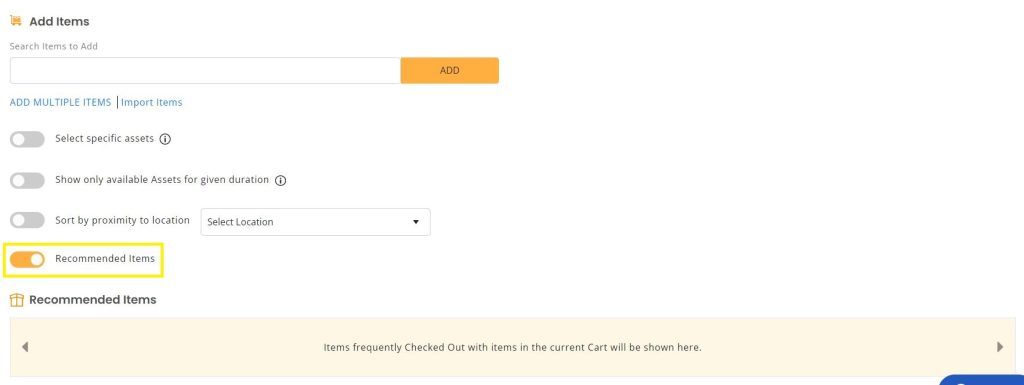
The recommendations will be shown when users add an item to a Cart.
Note: To enable this feature, go to → Add Ons → Item Recommendation for Carts → Enable.
10. CARTS TAB ON ITEM DETAILS PAGES
Each Item Details page has a Carts tab at the bottom. Using this, users can view all the Carts that an item is associated with. This gives you a bird’s eye view of all the Cart information for a specific item, and lets you jump to a specific Cart as needed. Along with asset history, you can check when an asset is reserved, when it is due to be returned, or which other items are being checked out with it.
In order to view these Carts, go to an Item’s detail page and click on the Carts tab:
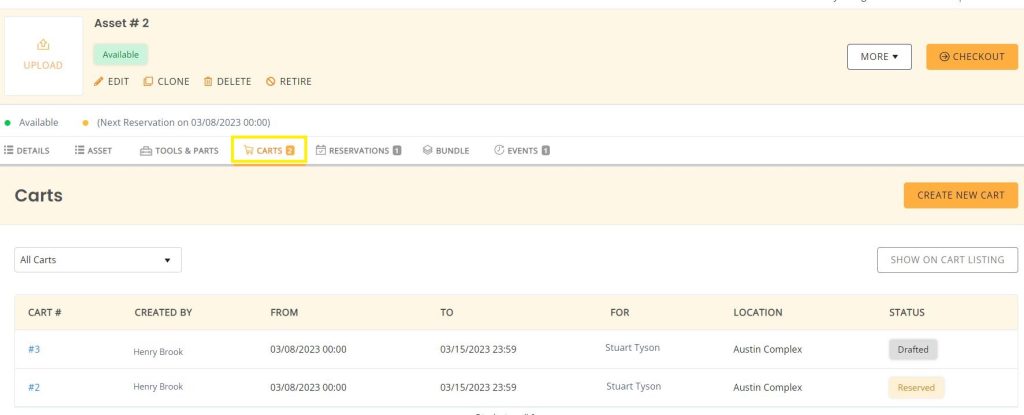
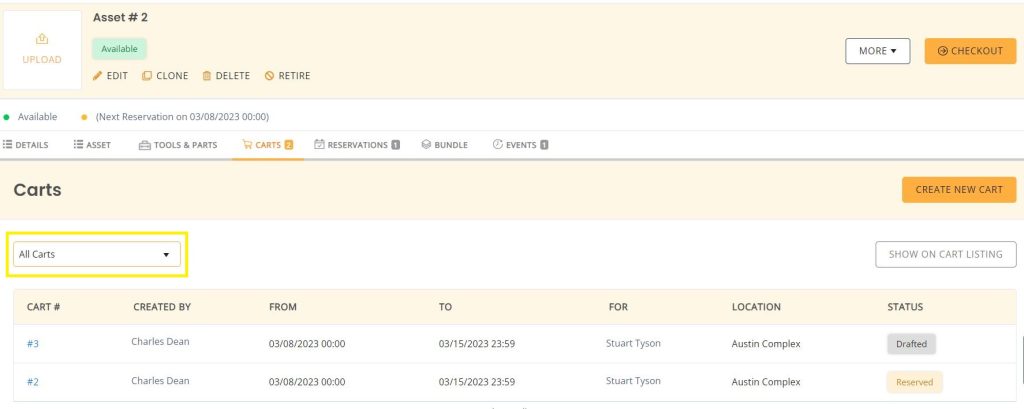
This is the default view which shows all Active and Drafted orders. Users can also change the filter using the dropdown menu right above the results table. Let’s change the filter to ‘All Carts’. This will show you Carts in all states – including Drafted, Reserved, Booked Out, and Completed – that this item has been a part of:
About EZO CMMS
EZO CMMS is the next generation maintenance management software. It does more than just simple maintenance, it empowers your teams with a central command center to assign and complete work orders to achieve optimal productivity.


