

Avery hosts an extensive collection of common printout templates for companies to build the perfect labels for their items. These are completely customizable and easy to make. Design Avery labels in minutes and populate them with your EZRentOut item data.
Contents:
1. Exporting Print Label Data
To get started, you need your print label data from EZRentOut. Get it from More > Printout Templates > Labels > Export print label data for commercial printing.
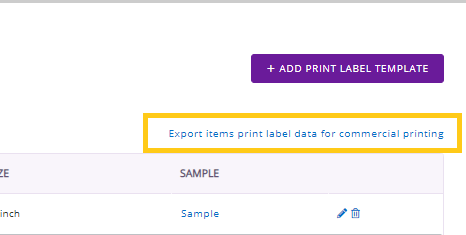
This action emails you a CSV file of your print label data. You will need this once you begin designing your Avery labels.
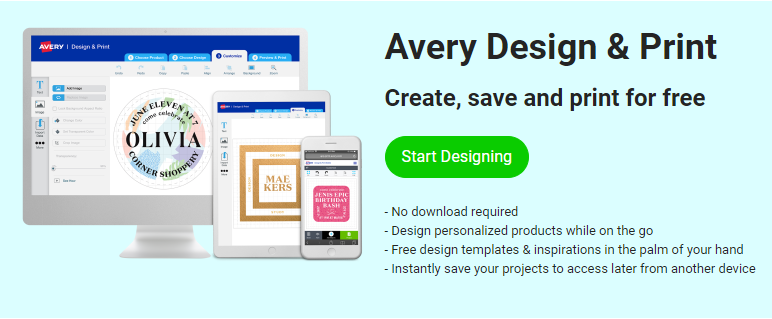
2. Start designing with Avery
Head to the Avery label designer and click on ‘Start Designing’. You might have to create an account if you don’t already have one – this only takes a minute.
3. Customize your design
It’s time to design Avery labels for your tags. Let’s get started.
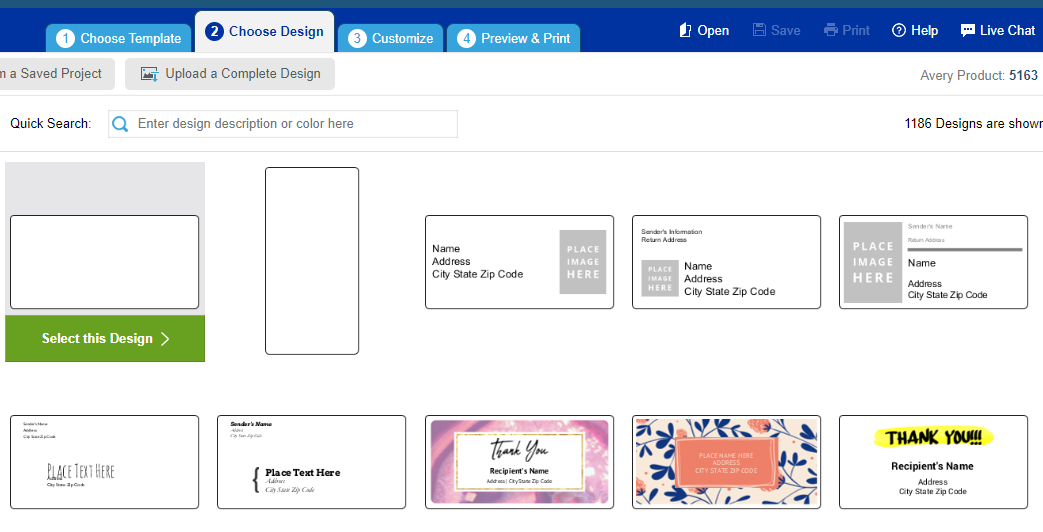
1. Choose a template that matches your layout, size, and color requirements.
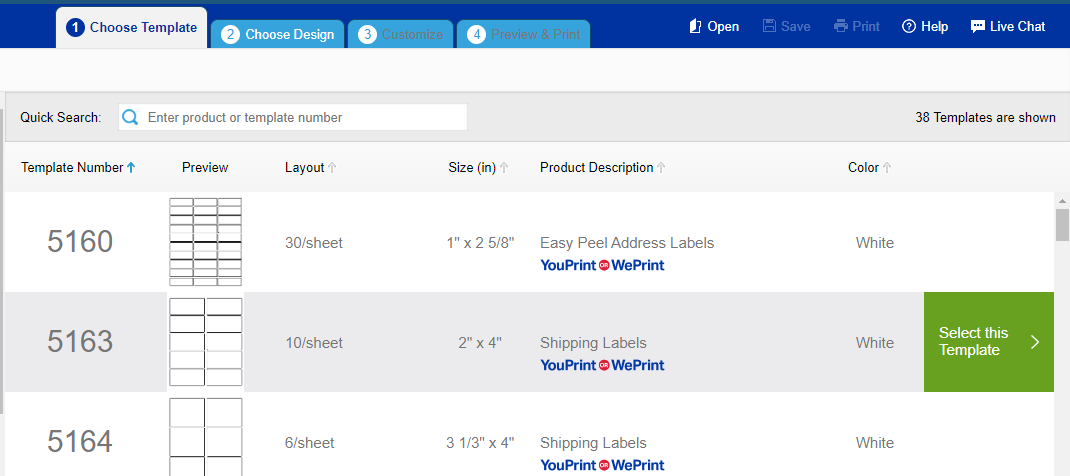
2. Pick an appropriate design for your labels.
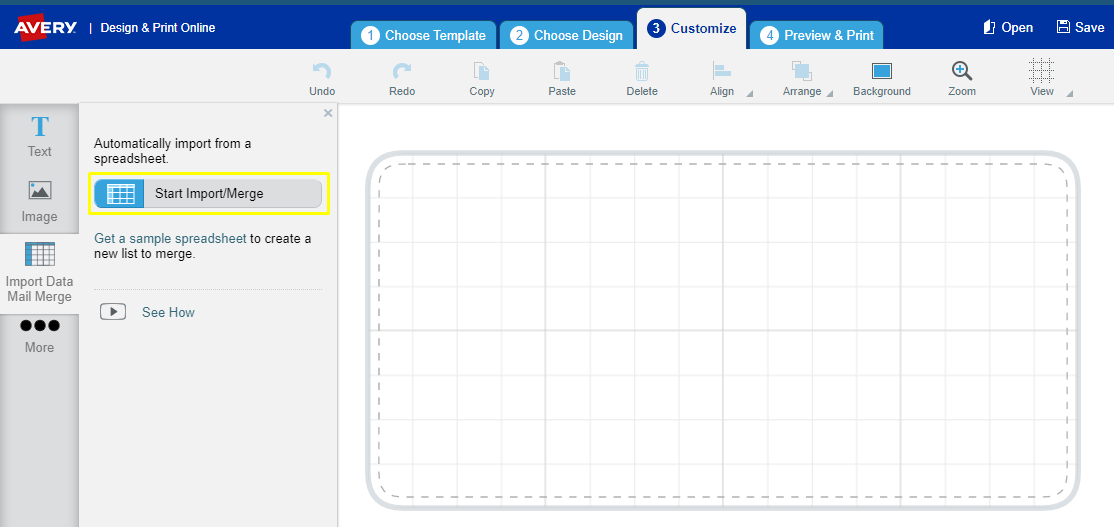
3. Next, you need your label data source. Click on ‘Import Data Mail Merger’ in the left panel, and then on ‘Start import/merge.’
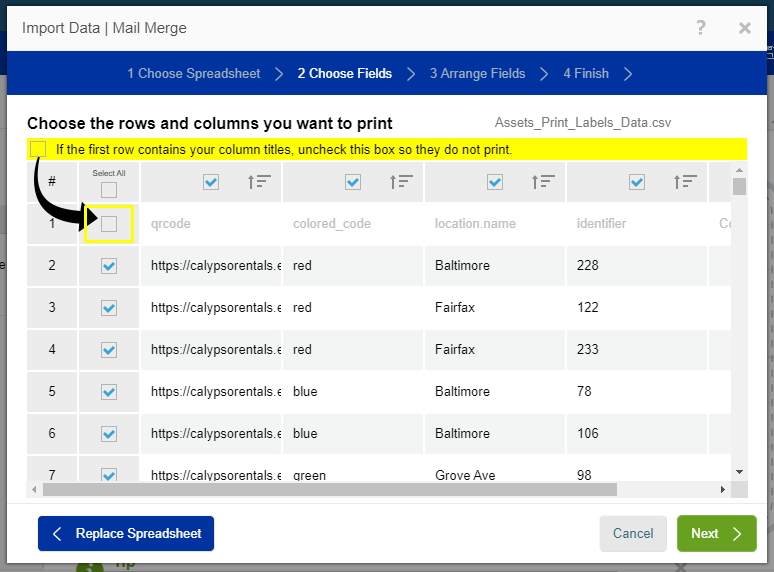
3.1. Upload a spreadsheet and then select the rows and columns to import. Be sure to deselect Row #1 if it includes your column titles.
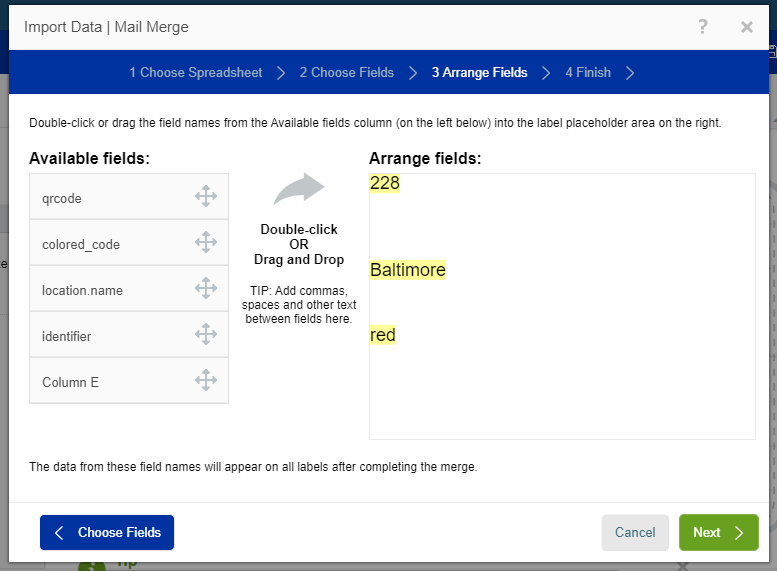
3.2. Now, you need to add relevant data points to your labels. Drag your desired fields to the placeholder area on the right. This enables you to arrange data points however you like. Click ‘Next’ once you are done.
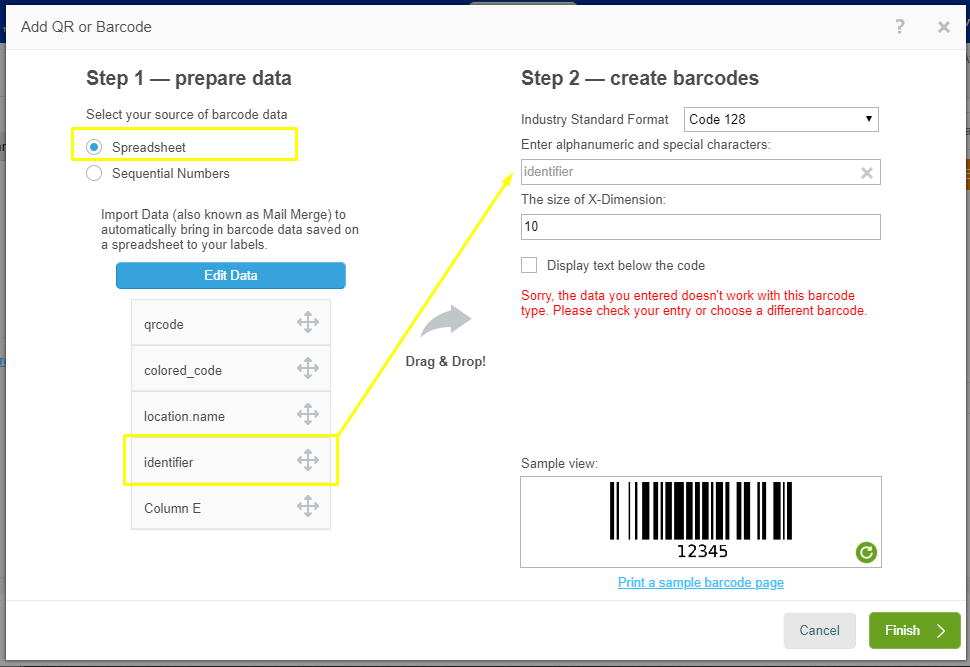
3.3. Your labels should include a barcode or a QR code so it can be scanned by a reader. From the left-side panel, click on More > QR and Barcodes > Add a Barcode or QR code > Spreadsheet or Sequential Number.
3.4. Next, select Spreadsheet in Step 1 and drag the identification number field to Step 2. Click on ‘Finish’ once you are done.
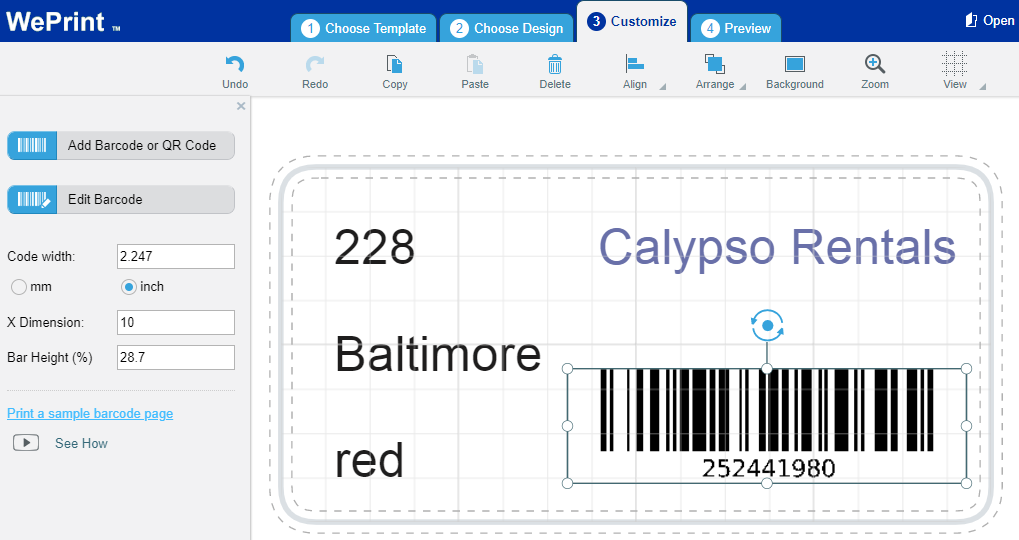
3.5. You’ll be able to see your barcode on the label. Drag and resize it according to your preferences. You can also use the settings on the left-side panel to adjust your barcode.
4. Once you’re done with that, click ‘Next’. You’ll be able to preview your labels. Here’s what they will look like.
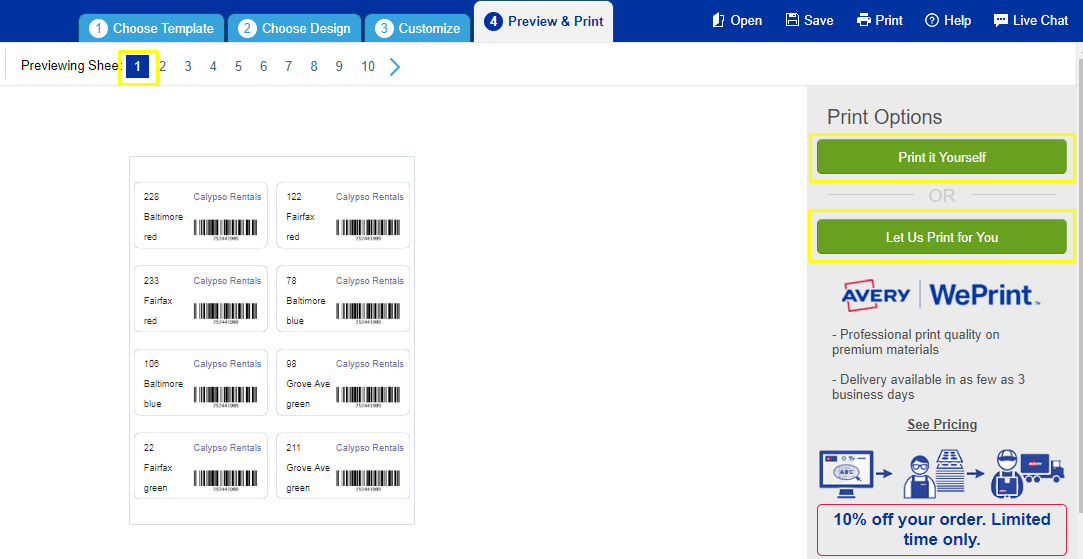
5. If you like the preview, choose between printing the labels yourself or having Avery print them for you.
Read more: Using EZRentOut’s label designer and printing on Avery labels


