![[How-To] Mass Deploy The AssetSonar Agent On Your Apple Devices with Jamf Pro](https://cdn.ezo.io/wp-content/uploads/2023/09/Jamf-Deployment.png)
The EZO AssetSonar Agent can be mass-deployed on all macOS devices across your organization, using the Apple enterprise mobility management tool, Jamf Pro. Save time and effort by sidestepping the cumbersome process of individually deploying the AssetSonar Agent in each device.
1. Prerequisites
Before proceeding, please note the following prerequisites.
- You should have Administrative user rights and permissions in your Jamf Pro account to mass deploy or install applications.
- While using your macOS device to deploy the Agent via Jamf Pro, you must:
- Have administrative permissions for that device.
- Be the Primary User for that device.
- Ensure that only one User (i.e., you) is logged onto that device at the time of deployment.
- You need a distribution point set up in Jamf Pro. For more information, see About Distribution Points.
2. Download the pre-configured EZO AssetSonar Agent
First, download the AssetSonar Agent PKG file from Dashboard → Deploy ITAM Agent → MacOS → Mass Deploy PKG on your own device. Once you have done that, you can mass deploy the AssetSonar Agent using Jamf Pro through the method detailed below:
3. Mass deploy the AssetSonar Agent using Jamf Pro
There are three main steps to mass-deploying the pre-configured AssetSonar Agent via Jamf Pro.
- Step 1: Upload the AssetSonar Agent to your Jamf Pro account
- Step 2: Add a script for installing the AssetSonar Agent
- Step 3: Create and configure a policy for installing the Agent
Let’s get started with Step 1.
3.1. Upload the AssetSonar Agent to Jamf Pro
If your master distribution point is the cloud distribution point, you can upload the AssetSonar Agent as a package directly to Jamf Pro. This adds the Agent to the master distribution point and Jamf Pro. To do so:
1. Log into your Jamf Pro account.
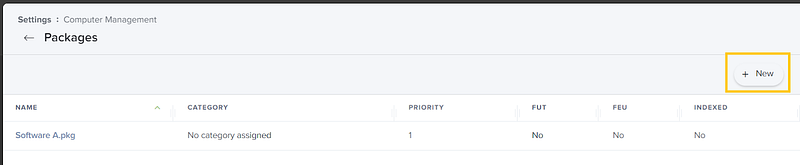
2. Now, go to Settings → Computer Management → Packages.
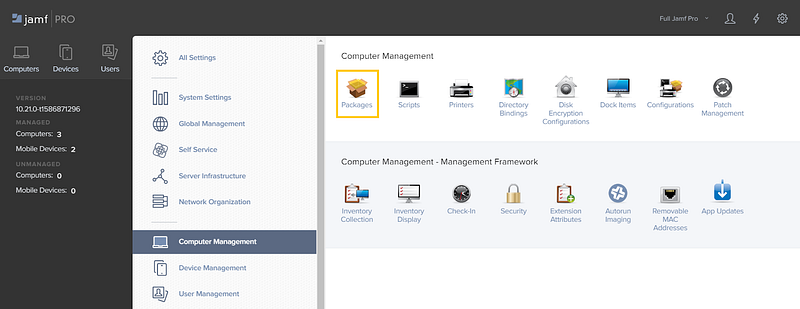
3. Click ‘New’.
4. Use the ‘General’ pane to configure basic settings for the package, including the Display Name and Category.
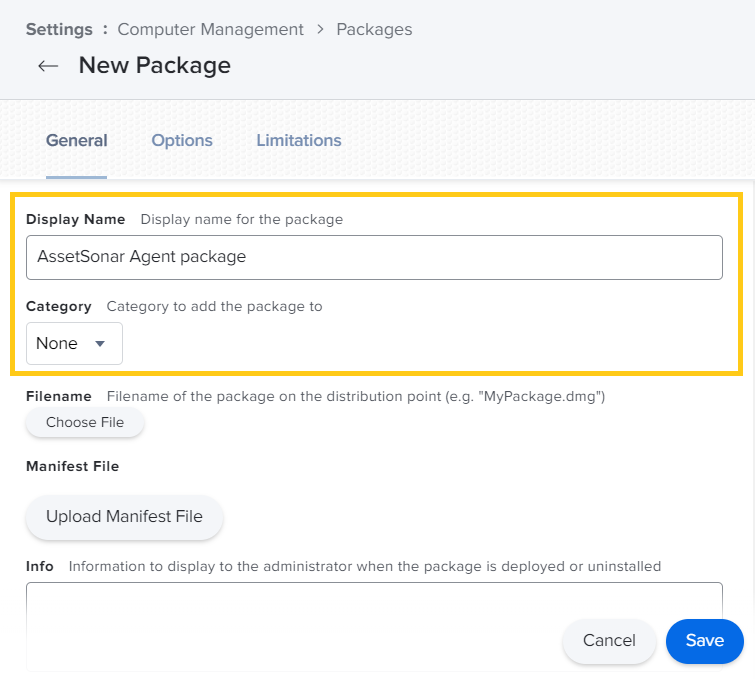
Note: If you do not add the package to a category, Jamf Admin displays the package in blue text in the Unknown category.
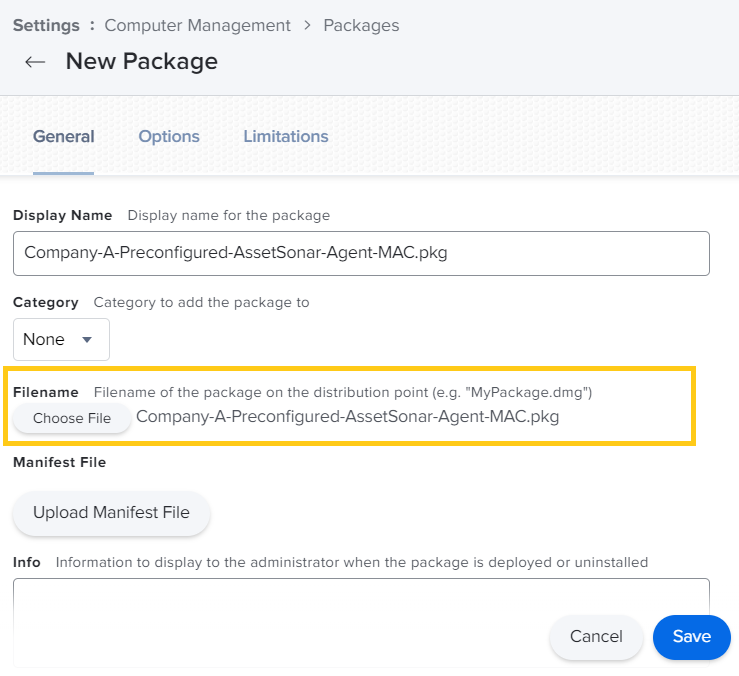
5. Click ‘Choose File’ to upload the package.
6. Click the Options tab and configure additional settings for the package, including the priority.
7. (Optional) Click the Limitations tab and configure limitations for the package, including operating system and architecture type requirements.
8. Click ‘Save’.
This shall upload the AssetSonar Agent to your Jamf Pro account.
3.2. Add a script to install the AssetSonar Agent package
Next, you need to create a script that prompts the installation of the AssetSonar Agent.
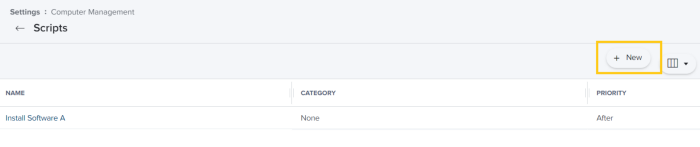
1. Go to Settings → Computer Management and click on ‘Scripts’.

2. Click ‘New’.
3. In the General tab, configure the Display Name and Category.
4. In the Script tab, specify the Script Contents (the script must be ‘Shell’) and add the Deployment Script from the AssetSonar ITAM Agent Deployment modal ( Dashboard → Deploy ITAM Agent → MacOS → Mass Deploy PKG).

5. In the Options tab, set the Priority level.
6. (Optional) Specify Limitations, if any.
7. Click ‘ Save’.
3.3. Create and configure a policy for installing the AssetSonar Agent
Now, you need to create a policy that governs the mass deployment of the AssetSonar Agent across all (or selected) Mac devices.
1. On your Jamf Pro dashboard, go to Computers → Policies and click on ‘New’.

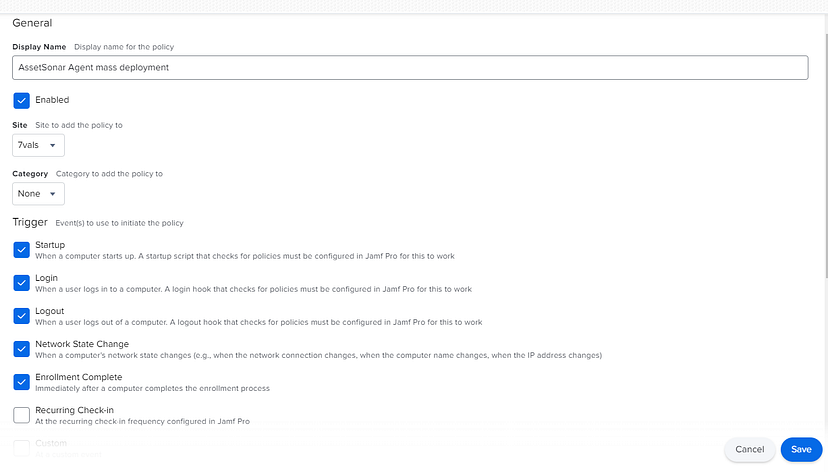
2. In the General section on the Options tab, specify the Display Name, Site, Category, Triggers, Execution Frequency, etc.
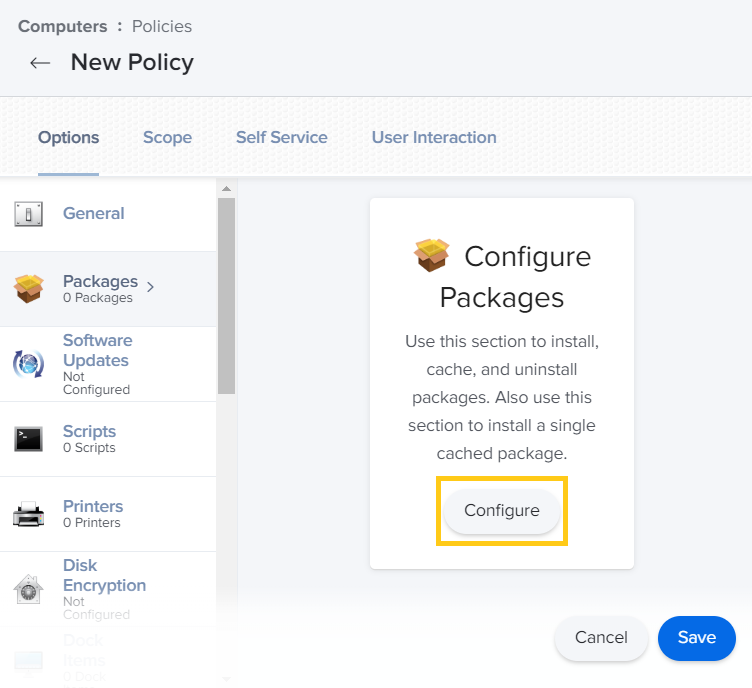
3. In the ‘Packages’ section on the Options tab, click on ‘Configure’.
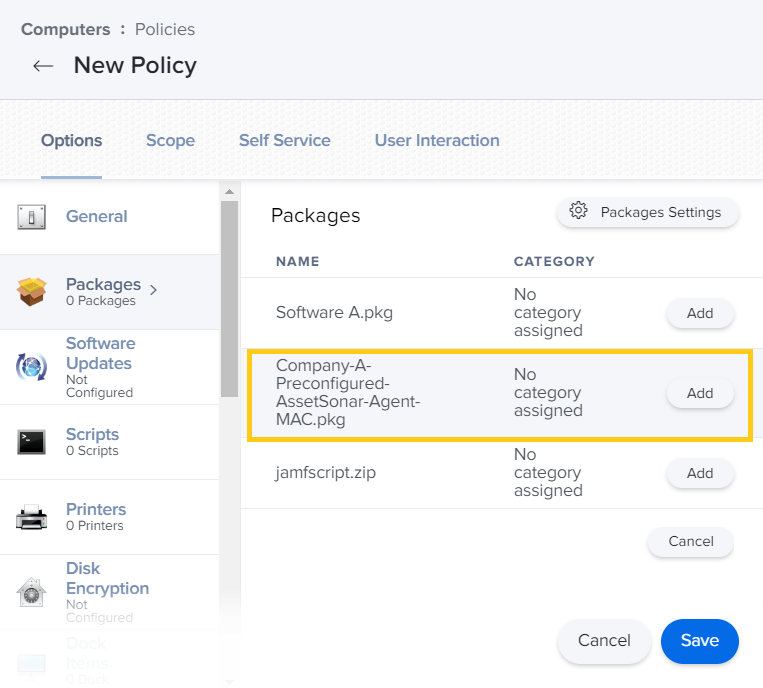
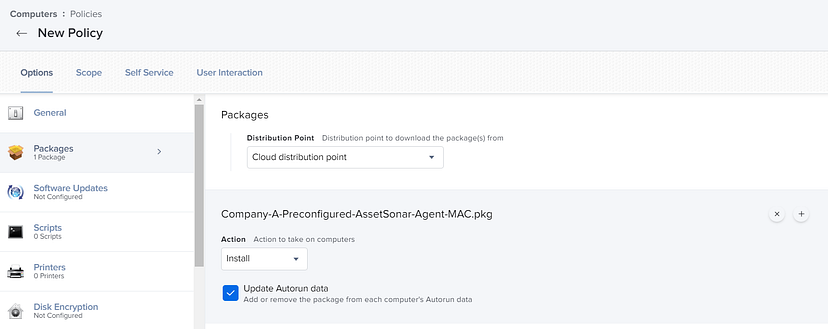
4. Select the AssetSonar Agent package and click ‘Add’.
5. After you’ve added the AssetSonar Agent package to the policy, configure the settings as follows. Set Distribution Point to ‘Cloud distribution point’, Action to ‘Install’, and select ‘Update Autorun data’.
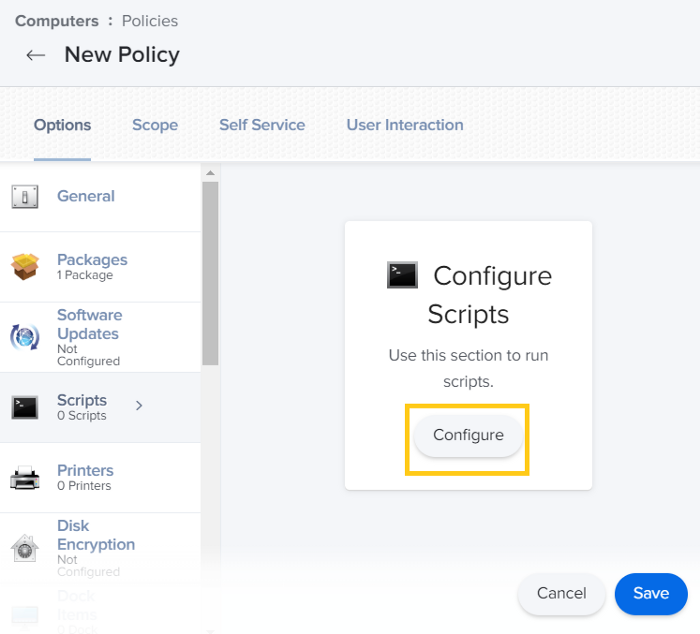
6. Now, go to the ‘Scripts’ section in the Options tab. Click ‘Configure’.
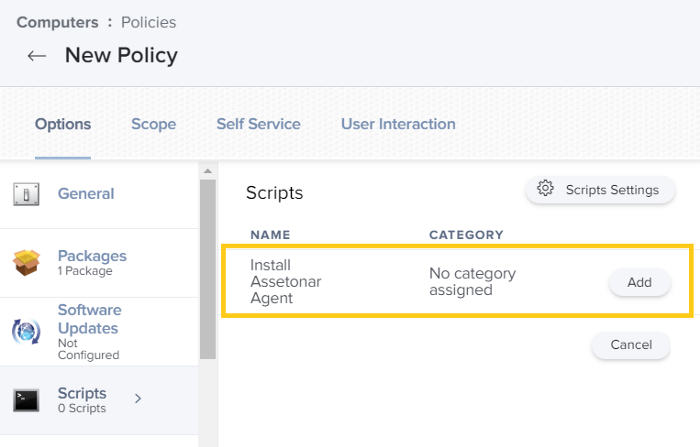
7. Select the relevant script and click ‘Add’.
8. Configure settings in the Scope, Self Service, and User Interaction tabs as needed.
10. Click ‘Save’ to save the policy.
4. Run the mass deployment of the AssetSonar Agent
Once the policy has been created, you need to prompt either of the triggers identified in the sections above to initiate the mass deployment of the AssetSonar Agent.
One way to do this is to restart all the Mac devices for which the policy had been created. The AssetSonar Agent shall be deployed in all the concerned devices as soon as users log into them.
5. Verify the deployment
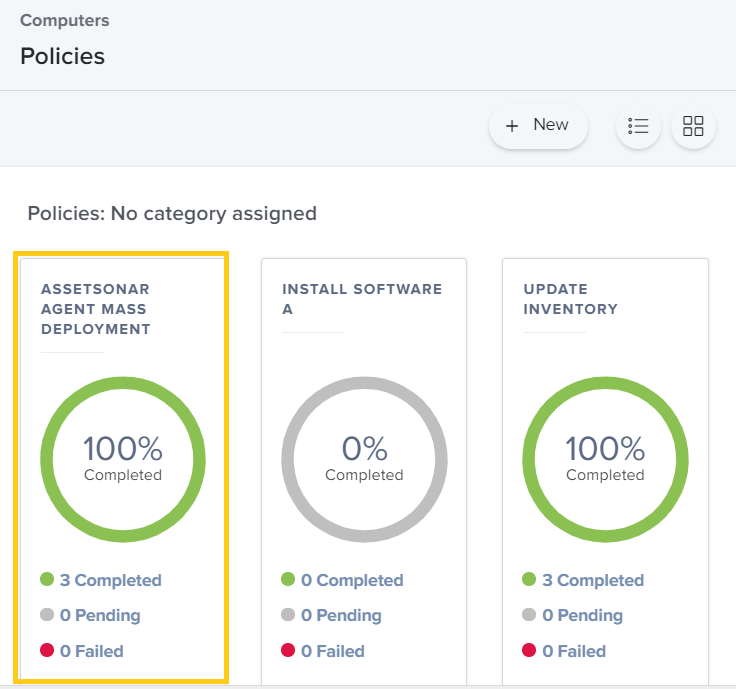
To verify whether the AssetSonar Agent has been successfully deployed across all Apple devices, go to Computers → Policies and click on the ‘Grid’ icon at the top left corner.
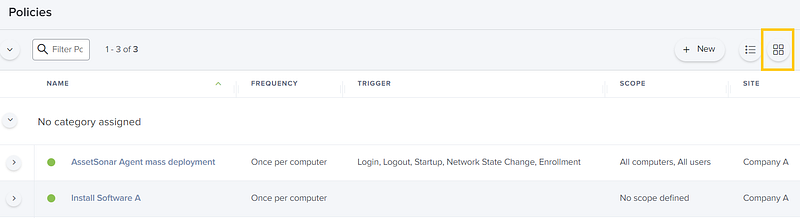
This shall prompt open the policies in a dashboard view. Here, you can view that the AssetSonar Agent has been mass-installed across all Apple devices (three, in this case).
Your Agent deployment is now successful.
Read more: [How-To] Mass Deploy The AssetSonar Agent On Windows Devices with SCCM

About AssetSonar
AssetSonar is the leading software asset management tool used by IT-intensive organizations and businesses all over the globe. It is easy to install and can be mass-deployed across your organization’s macOS endpoints using Jamf Pro. Sign up today for a free 15-day trial.
For more assistance, drop us an email at support@ezo.io. You can also visit our blog for detailed support posts.
Join the Conversation: Twitter | Facebook


