EZO Logo

Asset Intelligence, Reimagined

AssetSonar Blogs Software Management 3f683cfa16e5

Manage On Premise And Cloud Software With AssetSonar’s Software Management

Manage On Premise And Cloud Software With AssetSonar’s Software Management
Share:

1. The need for software asset management

As IT-intensive organizations evolve, their employee and asset base expands. To cater to this growth, companies now rely on business software to streamline their daily operations and enhance collaboration. These solutions range from accounting and CRM applications to project management software.

A software application is also a valuable asset for the company and thus, requires management. With multiple software being used in multiple IT devices across teams, it becomes hard to keep tabs on the use, licensing details, and payment schedules of each software.

Simply put, tracking can be tedious. You can’t go around inspecting each of the laptops used in your company to find out who has unauthorized access to an application.

Although most businesses keep spreadsheet logs of such data, sifting through them for relevant information simply takes too much time. Hefty true-up costs and legal suits may even follow in case of unidentified license violations.

This makes software management a crucial aspect of modern-day businesses that rely heavily on various software assets to carry out their daily activities.

2. AssetSonar simplifies software asset management

AssetSonar’s Software Module maintains an exhaustive and centralized account of all software instances across your organization. This enables different teams in your business to view, retrieve, and update software and related licensing data all from one place.

It helps you answer the following questions:

  1. How many people in the organization are using specific software?
  2. Which IT devices is the software installed in?
  3. Is the software licensed? If yes, what does the license fee schedule look like?
  4. What version(s) of the software do we have currently running in the organization? Do they need to be updated?

Consolidated software information means you don’t need to spend hours looking for relevant data. AssetSonar’s Software Module helps you increase your operational efficiency, make faster decisions, stay on top of your licensing requirements, and avoid unnecessary costs.

This article serves as a detailed guide for you to set up and reap the benefits of dedicated software management using AssetSonar.

Before we head on any further, it’s important to distinguish between the two main types of software.

3. Types of software

Enterprises generally use two major types of software. These are:

  1. On Premise software: This consists of software applications installed and running on the premise of IT devices being used in your organization. Examples include applications such as the laptop manufacturer’s Support Assistant or Microsoft Office.
  2. Cloud software: This consists of software applications hosted and running at a remote facility such as a server farm or a cloud. Salesforce and Google Suite are a few of many examples.

AssetSonar gives you the ability to record, track, and manage both on-premise and cloud software. It uses an ITAM Discovery Agent to detect on-premise software and integrates with G Suite to detect instances of cloud software.

Note that to detect on-premise software, you must install the AssetSonar ITAM Discovery Agent on each of your IT devices. The system runs an auto-scan every 24 hours to update software details. You can also choose to manually sync and update the data if needed.

To learn more about how to set up the ITAM Discovery Agent.

4. On premise software

Once you’ve installed the ITAM Discovery Agent and run the sync, the Agent will populate the software details of all the on premise software it has detected in your AssetSonar account.

4.1. Detected On Premise software

You can view details of detected on premise software by following the pathway, Software → On Premise Software → Detected. This leads you to the Software Listings page.

Here’s a glimpse of what you should see:

Detected On Premise software 1

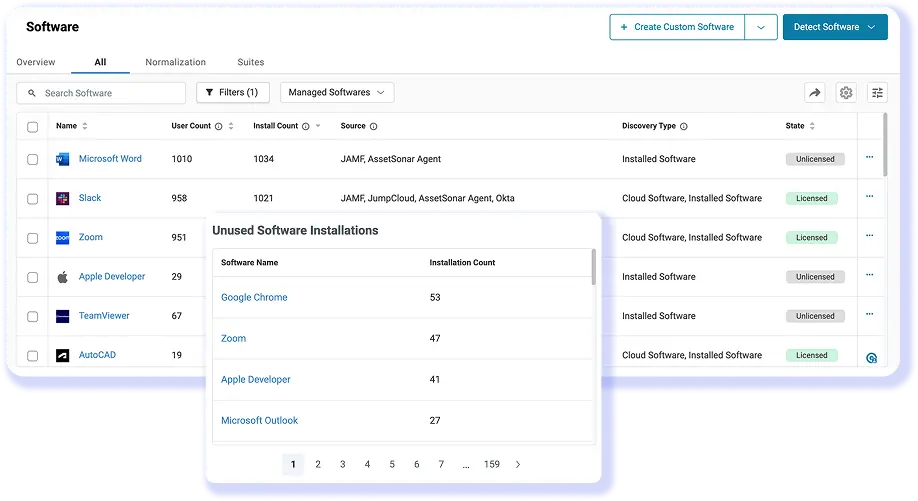
The Software Listings page reflects the user and compliance status of each software by showing its install count and licensed or unlicensed state. You can filter the software list and click on a selected software name to reveal more details about it.

Let’s say, you want to know which IT devices in your organization have the AssetSonar Agent installed in them. To achieve this, filter the software list by Software Name i.e. AssetSonar Agent as shown:

Detected On Premise software 2

This will lead you to the following:

Detected On Premise software 3

Click on the name and you’ll be directed to its Software Details Page. Here, you can view which IT Asset has AssetSonar Agent installed in it.

Detected On Premise software 4

You can also view additional information like the Available Version(s) of and Software Licenses associated with each software.

If you click on the License Name, the system will lead you to the Software License Details page. Here, you can scan over the payment schedule of the concerned license and see when an upcoming license payment is due.

To learn more about Software Licenses, click here.

4.2. Custom On Premise Software

There may be instances when an On Premise Software solution may not get detected in-between the Agent auto-syncs. In such a case, AssetSonar gives you the option to add Custom On Premise software.

To do this, go to Software → On Premise Software → Add Custom Software. Fill out the given data fields as shown and hit ‘Submit’.

Custom On Premise Software 1

Custom software is listed in the ‘Custom’ section of the On Premise Software tab.

Custom On Premise Software 2

Here too, you can click on the relevant software name and head to the Software Details page for more information on the use and licensing information of the software.

Okay but, what if your organization is using not just on-premise but also cloud software? AssetSonar takes care of that too, as we’ll learn in the next section.

5. Cloud software

AssetSonar detects all the Cloud software applications being used on the IT devices within your organization via its Google Workspace and Okta integrations.

5.1. Enabling the Google Workspace integration

5.1.1. Pre-requisites

Since AssetSonar imports Cloud software data based on the user email IDs that are added to your company’s Google Workspace account, you must make sure that you have the following settings enabled:

  • Enable the Google Workspace users integration from Settings → Add Ons → Google Workspace Users Integration → Enabled.
  • Select the domains you want to import users and associated Cloud software from. (See 5.1.2.)

To enable the Google Workspace integration, follow the pathway Settings → Add Ons → Google Workspace Cloud Software Integration → Enabled and hit ‘Update’.

Enabling the Google Workspace integration 1

Click on ‘Add Credentials’ and AssetSonar will direct you to sign in with your Google Workspace account. Select the relevant account.

Enabling the Google Workspace integration 2

This action will sync your Google Workspace account with AssetSonar and the system will detect and log details of any cloud applications associated with the selected Google account if you go to Software → Cloud Software → Detect Cloud Software → Google Workspace.

5.1.2. Managing cloud software by domains

By default, AssetSonar imports users and their respective Cloud software data from all the domains linked to your company’s Google Workspace account.

In case you only want to import user and software information from select domains, you can do so by picking and choosing the domains you’d like to sync with AssetSonar. Go to Settings → Add Ons → Google Workspace Users Integration → Domains and select the relevant option as shown.

Let’s say, you want to import Cloud software data for users that belong to the Austin office only and not the Denver office. You can select the domains as follows:

Enabling the Google Workspace integration 3

Note: Clicking on ‘Refresh Domains’ will populate in the Available Domains section any domains that are recently added to your Google Workspace account.

Now, hit ‘Update’. Go to Software → Cloud Software → Detect Cloud Software → Google Workspace to update your Cloud software repository in AssetSonar.

5.2. Enabling the Okta integration

To do so, go to Settings → Add Ons → Detect Cloud software from Okta integration and hit ‘Enabled’.

Enabling the Okta integration 1

This action will further reveal two data fields, namely the Subdomain of Okta account and API Token. In order to successfully enable the integration, you must fill these data fields.

  • Subdomain: This is basically the subdomain of your Okta account’s URL.
Enabling the Okta integration 2
  • API Token: This value can be obtained from your Okta account by following the pathway, Admin → API → Tokens → Create Token → Copy Token Value.
Enabling the Okta integration 3

Click on ‘Update’.

You are now ready to fetch Cloud software data from your Okta account into AssetSonar. Head to your AssetSonar account and go to Software → Cloud Software → Detect Cloud Software → Okta.

Note:

  • When a license is created in AssetSonar, the Assigned users in the Okta app will automatically be entitled to AssetSonar.
  • If a user is assigned to an application in Okta and the admin removes him from the AssetSonar license, then he would automatically be removed from Okta’s assignments as well.

5.3. Detected Cloud software

You can view the details of the detected Cloud software by going to the software listings page in Software → Cloud Software → Detected.

Detected Cloud software

5.4. Custom Cloud software

AssetSonar also gives you the ability to manually add cloud software in case they are not detected by the system.

To manually add details regarding a cloud application, go to Software → Cloud Software → Add Custom Software. Next, clock in the relevant information. The system will list all your added applications as shown:

Custom Cloud software

5.5. Cloud software license

To add a Cloud software license, go to Software → Software Licenses → Add Software License, select a Cloud software from the Software Name dropdown, configure details, assign the Total Seats, and hit ‘Done’ when finished.

AssetSonar gives you the ability to add or remove users to Cloud software licenses and monitor software utilization. To do so, go to the relevant Cloud Software Details page → Assigned Users. Now, click on ‘Add or Remove Users’.

Cloud software license 1

Select from the Available Users and click ‘Update Users’. The system detects and retrieves Available Users from your G Suite account. You have now assigned Users to the Cloud software license.

Note: You can add users up to the Total Seats limit that you’ve specified while creating a Cloud software license.

You can also add as many users as you want to your cloud software licenses from the Entitlements tab and then track Assigned and Unassigned users as shown below:

Cloud software license 2

Once you click the ‘Reconcile’ button, Entitled users that have logged into a cloud software application will appear in the Assigned Users tab.

Alternatively, the Unassigned Users tab will show users who attempted to log into a software application but were not given the entitlement rights to do so.

The Assigned and Unassigned Users tabs will also show the date and time of the last login attempt made by users.

5.5.1. Licenses for Cloud software fetched from Okta

  • When a Cloud software license is created in AssetSonar, the users assigned to that software in Okta will automatically be entitled to AssetSonar.
  • All users that have been synced via SCIM from Okta appear in AssetSonar. The users created in Okta and synced via SCIM can only be entitled to licenses of Okta-imported software in AssetSonar.
  • One member cannot be entitled to multiple licenses when having multiple licenses for a single cloud software in AssetSonar.
  • If a user is assigned to an application in Okta and the AssetSonar Admin removes them from the license, then they will automatically be removed from Okta’s assignments as well.

6. Searching and filtering software

The Software Listings page catalogs the entire inventory of your software assets — both Cloud and On Premise once you’ve added them to your AssetSonar account. You can search or filter through this catalog to only view relevant information.

To search the relevant software, enter the software name in the highlighted search box.

Searching and filtering software 1

You’ll get the searched results as follows:

Searching and filtering software 2

Furthermore, AssetSonar gives you the ability to apply filters by the following fields:

  • Status (Licensed, Not Licensed)
  • Publisher

Let’s say if you want to see how many of your software belong to Microsoft, you can apply the filter by that Publisher.

Go to the Filter dropdown → Publisher.

Searching and filtering software 3

Select ‘Apple’ as the Publisher in the dialog box and hit ‘Submit’ to update the list view per your requirement. You can see that the results have now been filtered by Apple as the Publisher.

Searching and filtering software 4

Alternatively, you can also search for On Premise software installed in a particular Device from the Asset Details page as shown.

Searching and filtering software 5

7. Control Software Installations

7.1. Ignore and Blacklist

There are two actions that Administrators can take on software:

  1. Ignore
  2. Blacklist

Choose the ‘Ignore’ status for software that you feel is irrelevant to the company. To blacklist software that you don’t want employees using on their machines, select ‘Blacklist’.

To change the status of the software, go to the Softwares tab and either click on ‘On Premise Software’ or ‘Cloud Software’. From here, select the relevant software and choose the appropriate status from the ‘Actions’ dropdown menu.

Ignore and Blacklist 1

You can also receive notifications when blacklisted software is detected on a device. To set up an alert for blacklisted software installation, go to the ‘Alerts’ tab, scroll down to the ‘Software’ section, and select the checkbox for ‘Blacklisted Software Installations’.

Ignore and Blacklist 2

You can monitor the ‘Blacklisted Software Installations’ metric right from the Dashboard. This metric shows the number of blacklisted software installed in the company’s IT assets.

7.2. Undo Ignore and Undo Blacklist

AssetSonar also gives you the option to undo these actions. You can undo the ‘Ignored’ status of software if your employees start actively using it and you need to monitor its license payment schedule.

To do this, go to the relevant Software Details page. Click ‘Undo Ignore’ and the software will revert to its previous state.

Undo Ignore and Undo Blacklist 1

Similarly, you can revert a blacklisted software to its original state. In this pursuit, go to the Software Details page of the Blacklisted software. Click on ‘Undo Blacklist’ as shown:

Undo Ignore and Undo Blacklist 2

Note: You can only take these actions on Unlicensed software.

8. Custom software imports

With the AssetSonar import wizard, you can add, update, blacklist, or ignore Custom software applications en masse using CSV imports.

8.1. Adding Custom software

To add Custom software in bulk, go to Software → Cloud/On Premise Software → Import from Sheet → Import New Custom Software.

Adding Custom software 1

Now, prepare an Excel sheet containing the following data for your Custom software applications.

  • Name (mandatory)
  • Publisher
  • URL
  • Software Type: Cloud Software/Installed Software (mandatory)
  • Description

It should look like this:

Adding Custom software 2

Note: You may also add data for any custom fields that are associated with the Software module in AssetSonar.

Next, upload the Excel sheet (CSV) by clicking on Choose File → Upload and Proceed.

Adding Custom software 3

Map the columns as shown.

Adding Custom software 4

Preview your import data and click ‘Import’ when you’re ready!

Adding Custom software 5

This shall add the Custom software applications, whether Cloud or On Premise in their respective database.

Note: By clicking on ‘Save Template’, you can avoid mapping of columns every time you carry out an Excel import in the future.

Adding Custom software 6

8.2. Mass updating Custom software

Custom software can be mass updated just as you would add it via CSV imports. For this, go to Software → Cloud/On Premise Software → Import from Sheet → Update Existing Custom Software.

Mass updating Custom software

Use the same import steps as mentioned in 8.1.

8.3. Blacklisting or ignoring Custom software

If there are multiple Custom software applications that you need to blacklist or ignore, you can do so with Excel imports as well.

Go to Software → Cloud/On Premise Software → Import from Sheet → Blacklist/Ignore Software. The columns available for mapping here are listed below:

  • Blacklist (Yes/No)
  • Ignore (Yes/No)

Note: You cannot blacklist or ignore the same Custom software simultaneously. If you try to input ‘Yes/No’ values for both actions for the same software, you’ll get this error:

Blacklisting or ignoring Custom software 1

Alternatively, you can mass blacklist or ignore software from the Software Listings page as shown.

Blacklisting or ignoring Custom software 2

9. Actions on Custom software

With AssetSonar, you can take the following actions on Custom software.

9.1. Edit

Before you have associated Custom software with a license, you can edit all its fields using the option highlighted below.

Actions on Custom software 1

However, once a license has been created against Customs software, you cannot edit the Name and Type of the software.

9.2. Delete

You can also delete the Custom Cloud and On Premise software that is no longer needed by clicking the ‘Delete’ button on the Details page.

Actions on Custom software 2

Note: You cannot delete Custom software that has a license created against it.

Mass deletion of Custom software can be done from the Software Listings page as illustrated below.

Actions on Custom software 3

10. Export software data

If you wish to transfer the software data stored in AssetSonar into another third-party application, you can export it directly from the Software Listings page.

Click on ‘Export to CSV’.

Export software data

This shall download your software data as a CSV file that you can later import to the third-party application.

11. Become audit-ready with better SAM

AssetSonar makes software asset management a breeze. You no longer need to sift through your spreadsheets or inspect each IT device in your organization to find relevant information about software.

It centralizes all your software data, ranging from software specifications to their licensing and payment schedules in one place. It also helps identify whether authorized employees are using particular software and if it is used according to its licensing conditions.

About AssetSonar

AssetSonar is the leading software asset management tool used by IT-intensive organizations and businesses all over the globe. Sign up today for a free 15-day trial.

For more assistance, drop us an email at support@ezo.io. You can also visit our blog for detailed support posts.

Was this helpful?

Thanks for your feedback!

Powerful IT Asset Management Tool - at your fingertips

Empower your teams, streamline IT operations, and consolidate all your IT asset management needs through one platform.
G2 leader summer 2024
Index

Personalized Demo For You

Please share your details below & let our Product Specialist get back to you