![[How-to]Enhance Enterprise Network Management with the Cisco Meraki and AssetSonar Integration](https://cdn.ezo.io/wp-content/uploads/2023/09/How-toEnhance-Enterprise-Network-Management-with-the-Cisco-Meraki-and-AssetSonar-Integration.jpg)
Cisco Meraki is a market leading cloud-managed networking solution that allows organizations to administer and manage configurations, and helps monitor network infrastructure remotely. Its seamless integration with AssetSonar aims to save time and improve efficiency by providing real-time visibility and control over network-connected devices.
It enables IT teams to import IT assets– mainly computer devices, and mobile and network devices– into AssetSonar. So, you can track and manage these devices, run company-wide reports, and streamline workflows.
1. Benefits of Cisco Meraki integration
Our integration with Cisco Meraki benefits network administrators, IT professionals, and system administrators across a wide range of industries including healthcare organizations, SMBs, and distributed enterprises. Here is how this integration can benefit your organization:
- Helps IT teams gain a 360 degree view by bringing all software, hardware, and network assets together in one place.
- Improves asset management, reduces asset redundancy, and optimizes asset utilization
- Streamlines IT workflows by automating several manual tasks, such as device discovery and asset tracking.
- Helps IT teams ensure all network assets comply with the organization’s IT policies and regulations.
- Saves time by importing a list of all network and mobile devices into AssetSonar leading to improved productivity, accuracy & efficiency.
- Enables IT teams to track and manage all network devices on a centralized platform.
2. Enabling Cisco Meraki integration
To enable the integration, follow the pathway: Settings → Add Ons → Cisco Meraki Integration and select ‘Enabled’.

Once enabled, click on ‘Add Credentials’ and the following popup will appear where you can enter your API key.

Follow these steps to get your API key from your Cisco Meraki account:
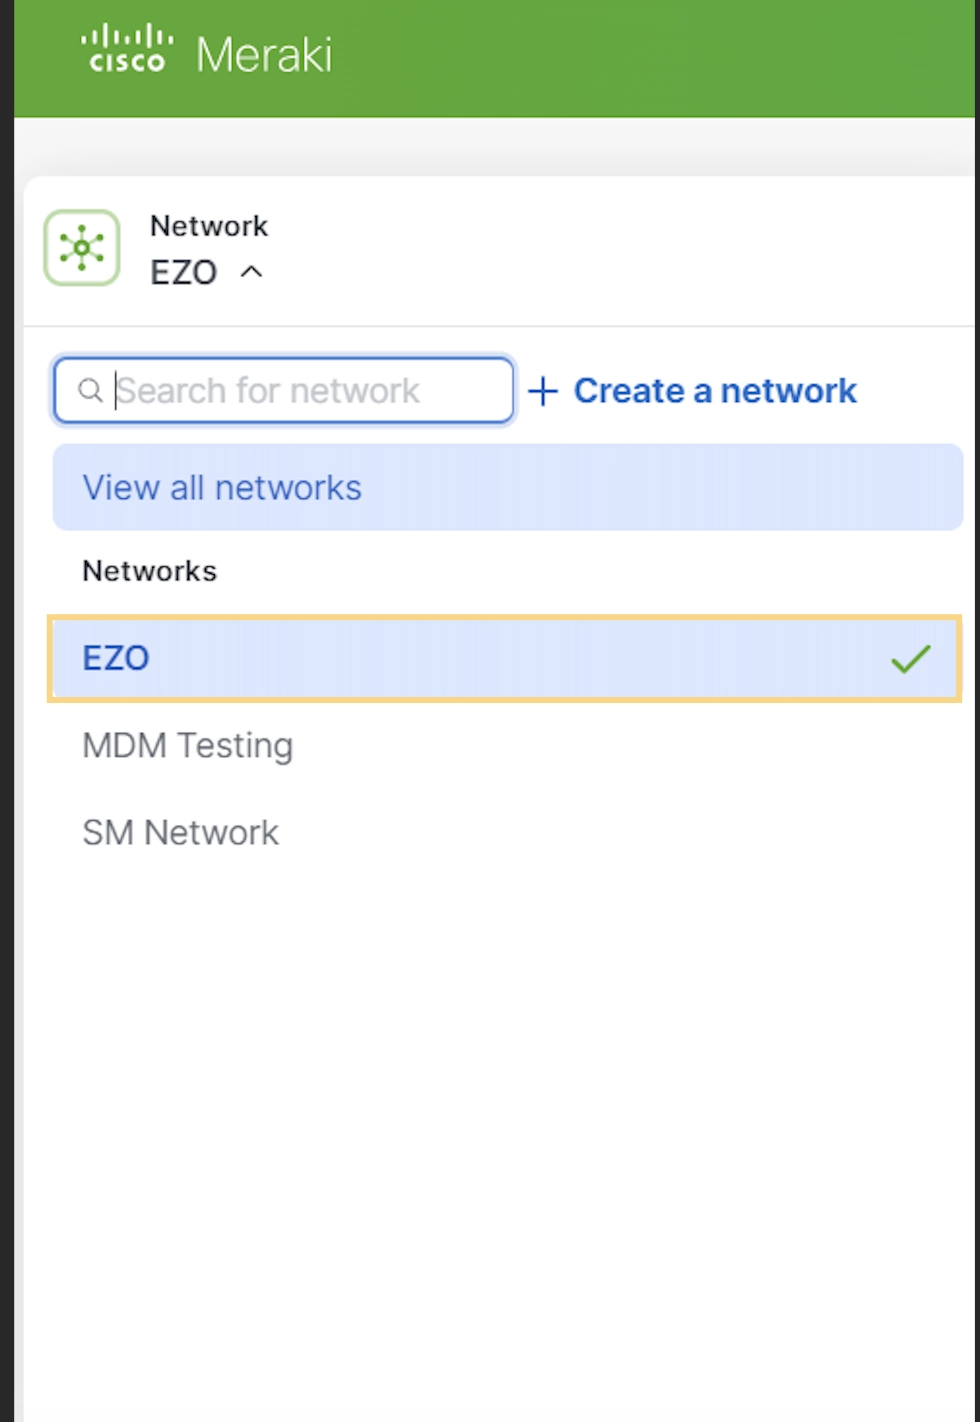
- From your Meraki application, go to ‘Network’ and choose your network.
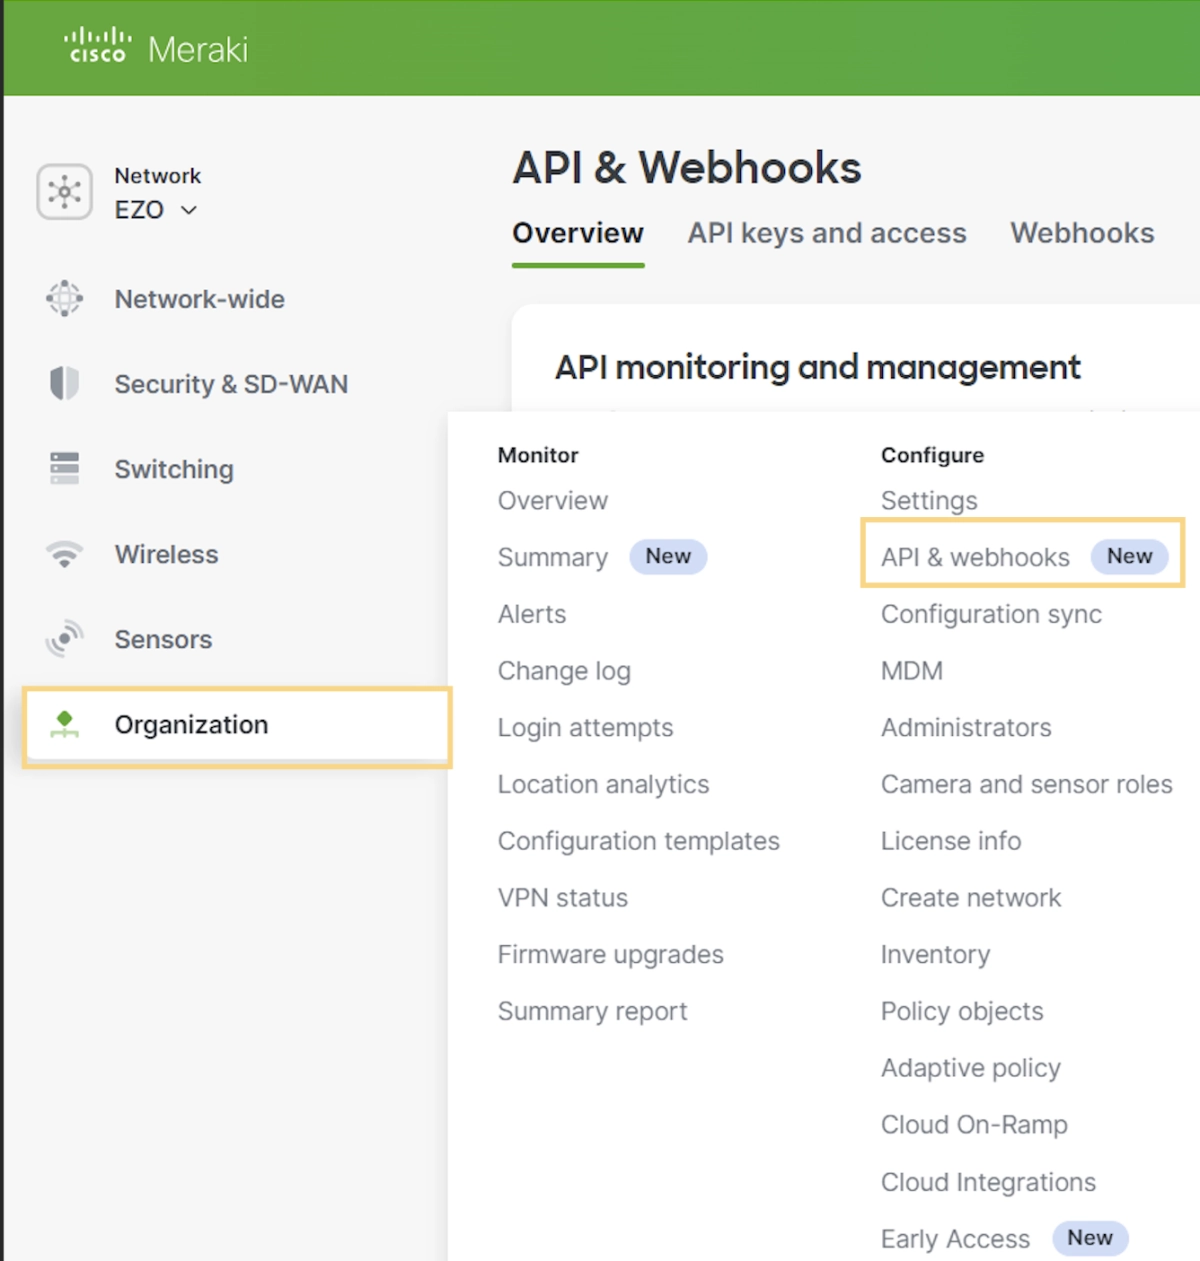
2. A new webpage will open up. Click on ‘Organization’ from the menu on the left and then click on ‘API and Webhooks’ option.
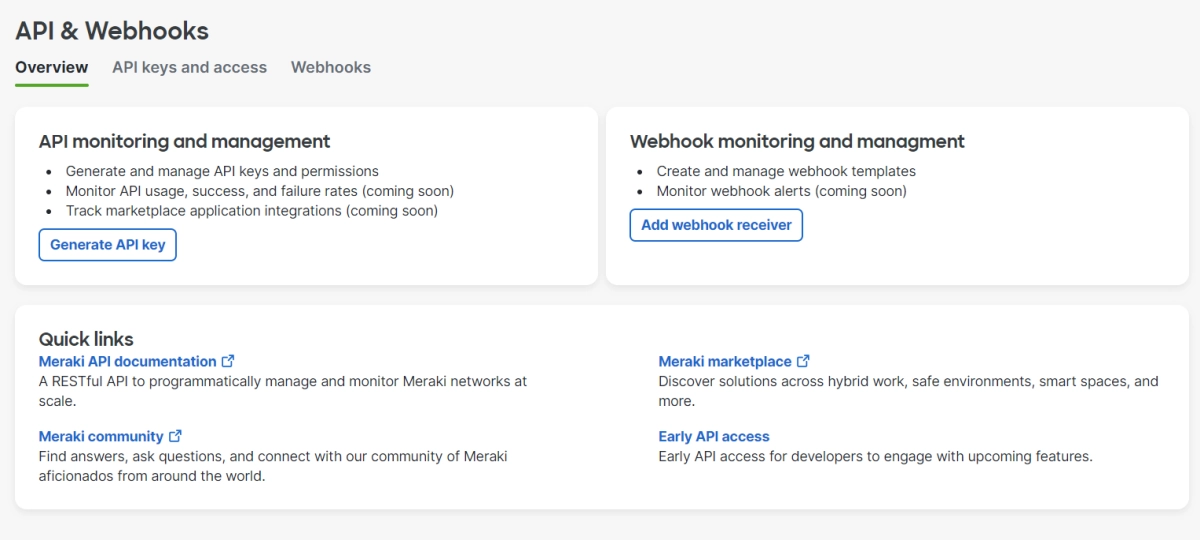
Now you’ll be able to see the details page of API and Webhooks. Here is a snippet of what this page looks like:
3. Go to the ‘API Keys and access’ tab and you’ll be able to view the already generated API keys. You can copy and paste one of these to your AssetSonar’s integration setting or you can create a new key if you have not already created two keys.
Please note that Cisco Meraki allows you to create only two API keys simultaneously. In order to create a third one, you’ll have to revoke one existing API key.

Once you enter the API key in your AssetSonar setting, you’ll be able to set up the integration. You’ll also be able to view and take actions on additional Cisco Meraki integration setting options.

From these additional settings, you can either choose to import all organizations and networks or you can select certain organizations and certain networks within them. Within one organization, there can be multiple networks. You can create multiple organizations from within your Cisco Meraki account.
One example of such a scenario would be for a company to have multiple locations and multiple floors and offices at one location. Different locations can serve as organizations while further compartmentalization (building floors) can be categorized as Networks.
If you don’t want to bring in all organizations, choose the ‘Selected Organizations and Networks’ option and you’ll see a list of organizations on your database. You can select the ones you want to import and they will appear in the right hand column. Here is what it looks like:

Once you have selected the organizations you want to import into AssetSonar, you can further drill down to specific networks. A new dropdown will appear from where you get the option to choose multiple or all networks from an organization. Click on ‘Get Networks’ to get a list of networks listed in a particular organization. Once populated, you’ll be able to select relevant networks in one organization.

Choosing networks is a similar process to choosing an organization. A list of selected networks will appear in the right hand table as shown above.
Although the Cisco Meraki integration is primarily for network devices, you can also bring in IT devices and other mobile devices through the integration. Check the relevant box in the setting and hit ‘Update’.
3. Viewing network assets
From the Assets detail page, filter the devices by network assets to view the assets brought in through the Cisco Meraki integration. Click on the relevant asset detail page and you’ll be able to view the last sync date and the last Meraki sync date. Here is what they stand for:
- Last sync date: The date of the last sync between Meraki and AssetSonar
- Last Meraki sync date: The date of the last sync between Meraki and relevant network devices

From the System Details page, you’ll be able to view the device type, model no., network, organization name, and other relevant information. Here is a snippet of the information that gets imported via the Cisco Meraki integration.


Read more: Streamline Your Apple Device Management with AssetSonar’s Kandji Integration
4. Make retired devices active
Once you have started syncing the data from Cisco Meraki to AssetSonar, you will be able to detect previously retired devices.
For example, if you have retired some IT assets but they are picked up by another department where they can be of use, they will be discovered by Cisco Meraki. During the next sync, AssetSonar will change the status of these devices from retired to available.
From the Cisco Meraki Integration setting, check the box for ‘Make Retired Devices Available if Discovered Again’ to turn on this option, as shown below:

About AssetSonar
AssetSonar is a powerful ITAM solution used by tech organizations and businesses all over the globe. Sign up today for a free 15-day trial.
For more assistance, drop us an email at support@ezo.io


