
AssetSonar’s automation capabilities offer a highly configurable way for organizations to automate IT asset management workflows across various operational processes. IT managers can create custom automations to streamline asset tracking, purchase order approvals, and work order management.
By allowing users to define triggers, conditions, and actions, automations reduce manual workload, enhance reliability, and minimize human error, ensuring that critical asset operations are executed automatically and consistently.
With EZO AssetSonar’s Workflow Automation Engine, you can now design powerful, visual workflows that automate these actions end-to-end.The new engine replaces the old trigger–sub-trigger model with a drag-and-drop, node-based canvas where you connect Triggers, Conditions, and Actions to create dynamic workflows.
Benefits of AssetSonar Automations
AssetSonar automations are ideal for organizations that rely heavily on IT asset management for optimized business processes and have a growing need for workflow automation to ensure scalability and efficiency. Here is how automated asset management workflows can add value to your business:
- Improved accuracy and reliability: Ensures critical workflows like device lifecycle tracking and compliance reporting are handled consistently, without human error.
- Customizability: Users can create highly specific automations to handle niche business needs, from custom triggers to multi-step workflows that span across different teams and systems.
- Scalability: As companies grow and scale their operations, the automation engine adapts, allowing more complex workflows and integration with additional software tools and systems.
- Cost Control: Reduces costs by automating the reclamation of unused software licenses, optimizing asset procurement cycles, and preventing overspending on IT resources.
- Increased efficiency: Update the asset attributes such as description, purchase on, cost, custom fields, etc., based on different asset events and use conditions to narrow down to which assets you want to automate things, hence saving time and increasing efficiency.
Now let’s delve deeper to see how we can build these automations and put them to test:
Enabling Automation Module
To enable the automation, please go to Settings → Company Settings & Add-ons → Automations and select Enabled.
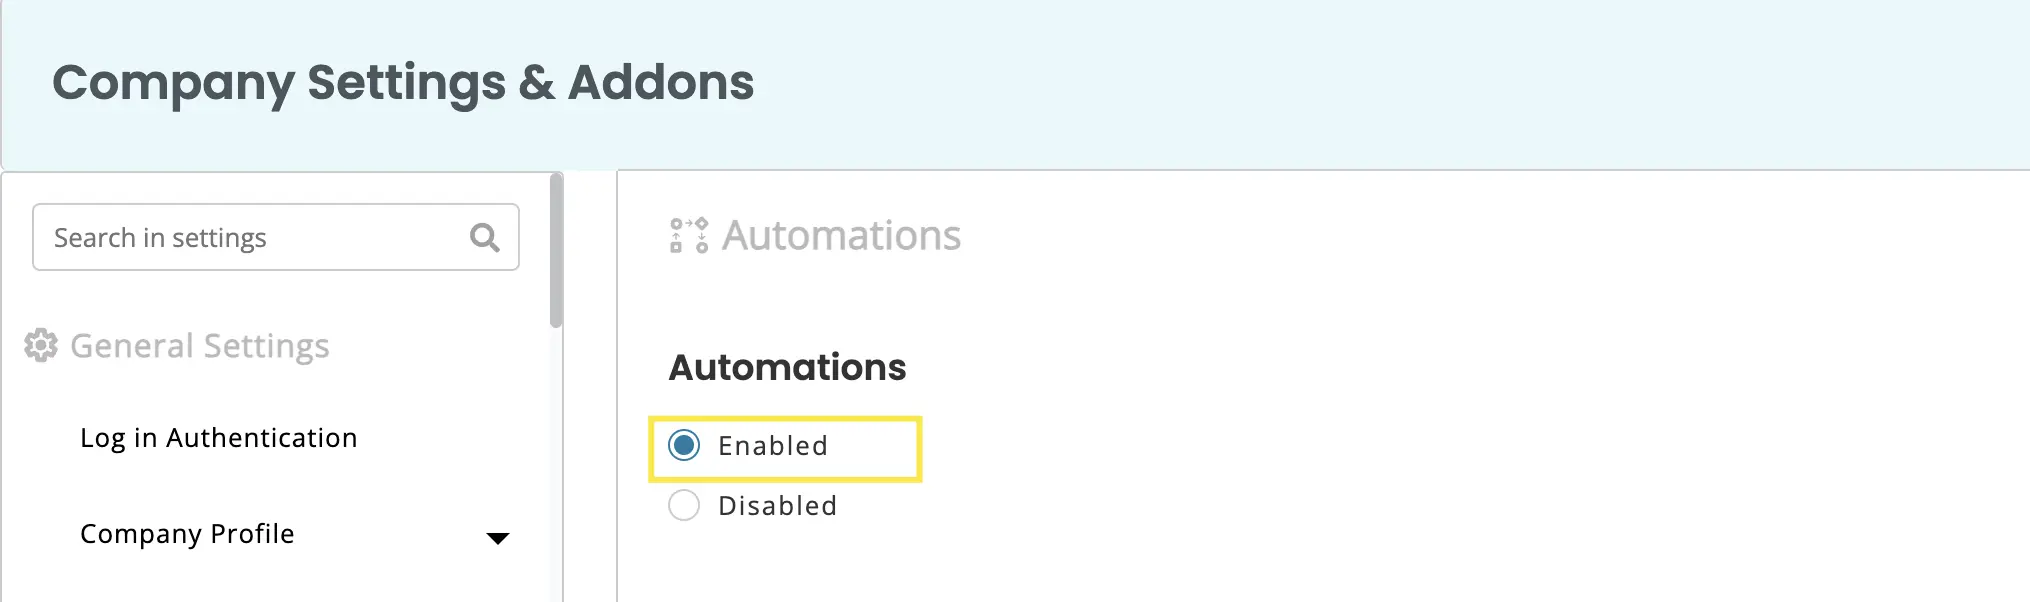
Click Update to save the settings.
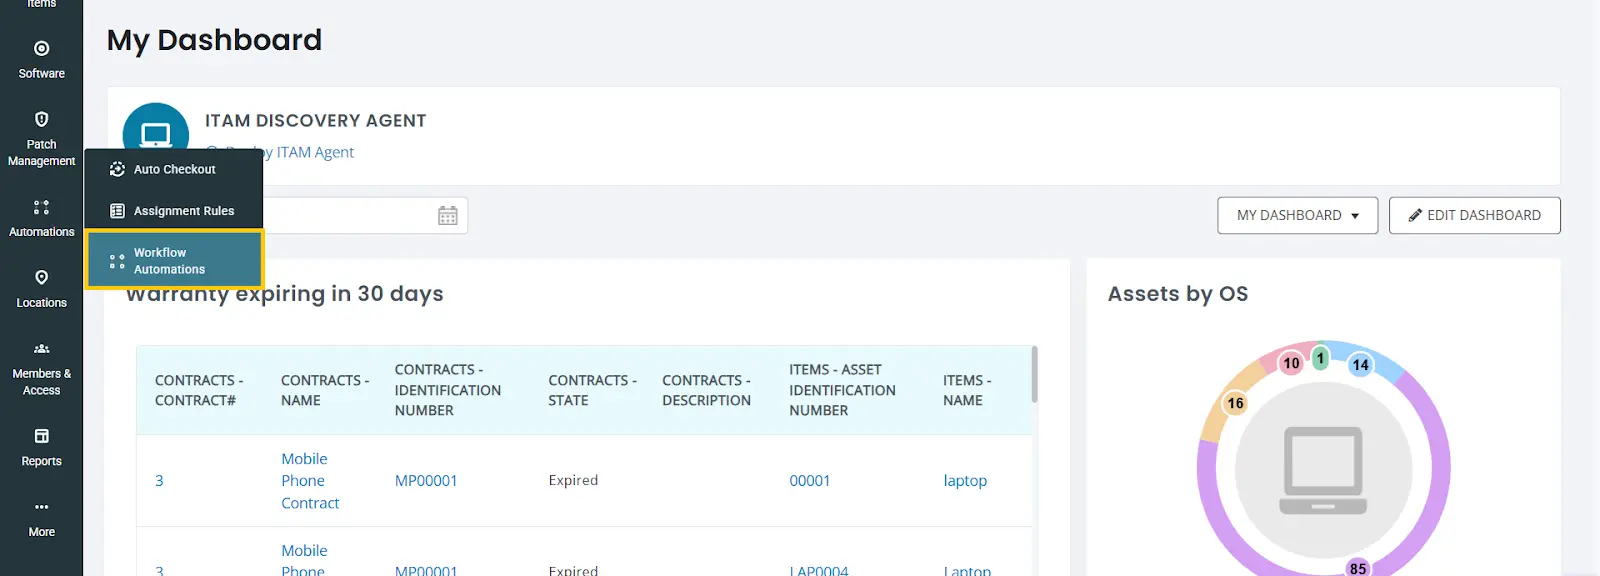
Now go to Workflows & Automations (Navigation Menu) → Automations.
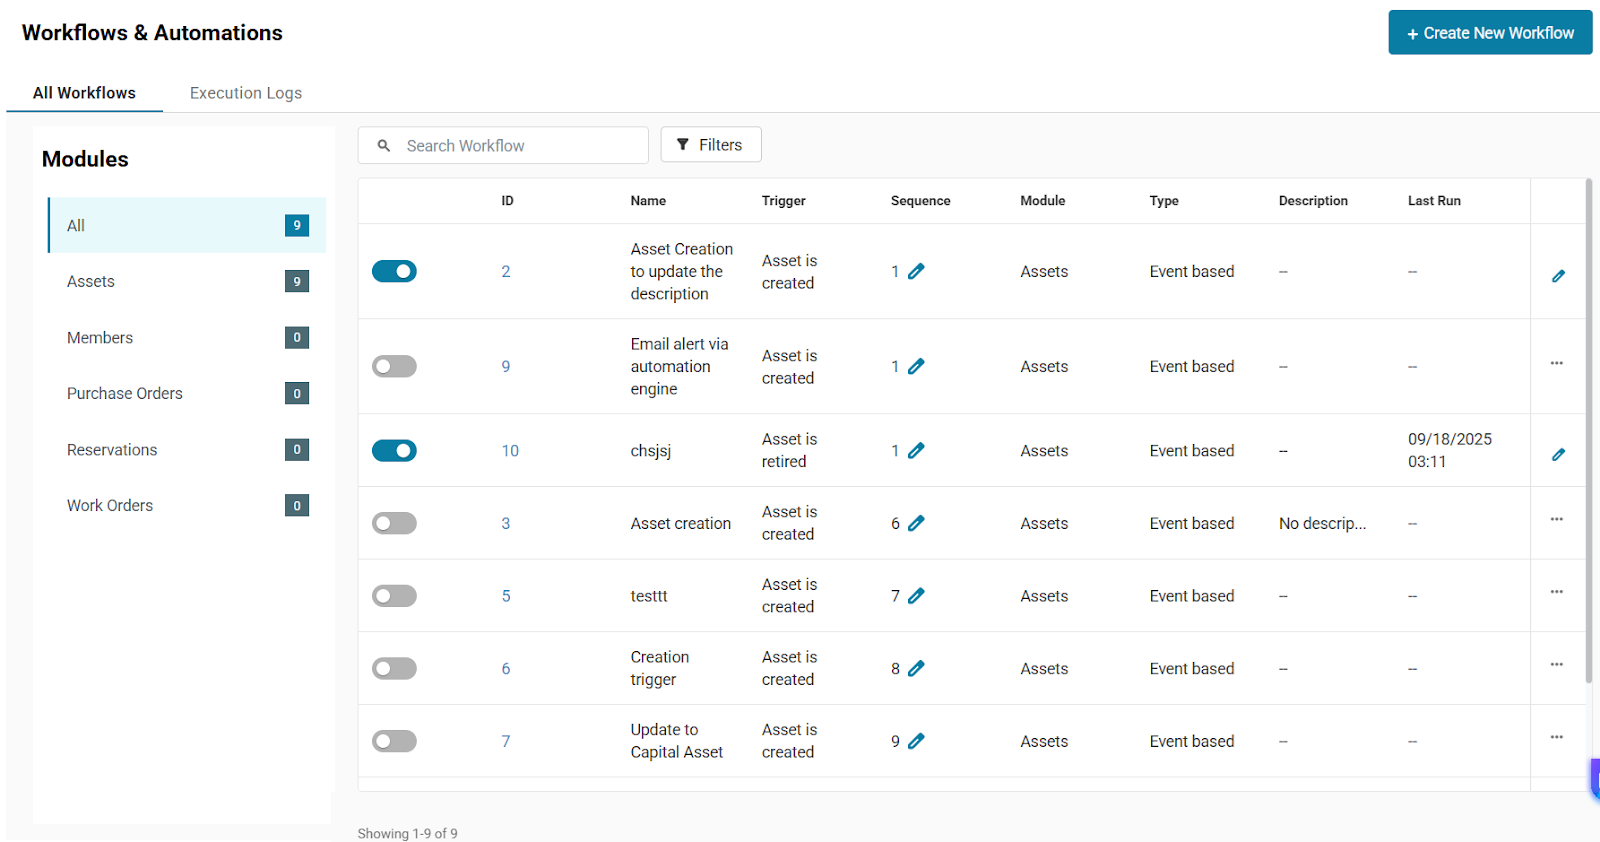
The Automations Listing has been redesigned for better visibility and control.
- Tabs:
- All Workflows – lists every workflow in your account.
- Execution Logs – displays all past workflow runs.
These can be further filtered by the modules from the left panel (Assets, Purchase Orders, Work Orders, etc.)
- Search & Filters: Use the Filter icon beside the Search bar to open the filter pane.
- Status: Active / Inactive
- Triggers: Search or select from all triggers of the chosen module.
- Type: Different types of workflows based on how they are triggered. Currently, the automation engine has Event-based and Time-based triggers.
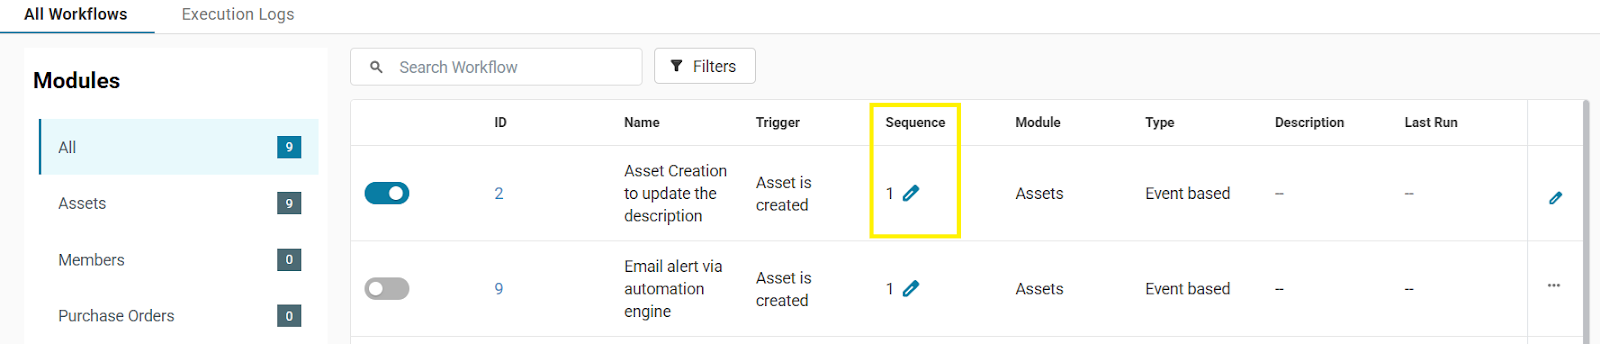
- Sequence Column: Determines the order of execution when multiple workflows share the same trigger.
Manage Workflows from the Listing
You can take quick actions on workflows directly from the Automations Listing without opening the editor:
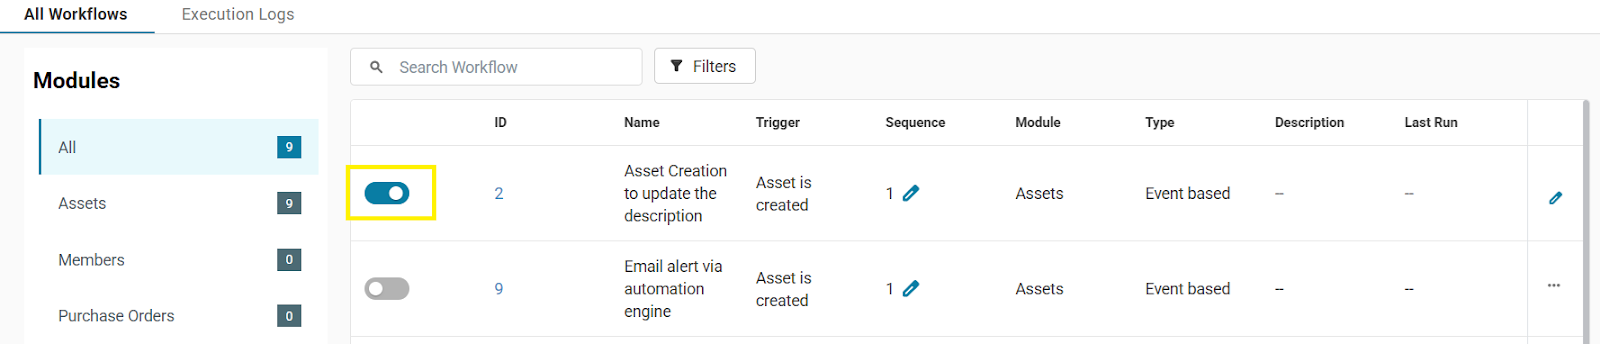
- Activate/Deactivate: Toggle the status switch beside each workflow to instantly enable or disable it.
- Reorder Sequence: Edit the Sequence number inline to adjust execution priority for workflows sharing the same trigger. Lower Sequence number means relatively higher priority. So, for multiple workflows with the same triggers, the workflow with the lower sequence will be executed first.
- Tip: When two workflows share the same trigger and sequence, they may execute in any order.
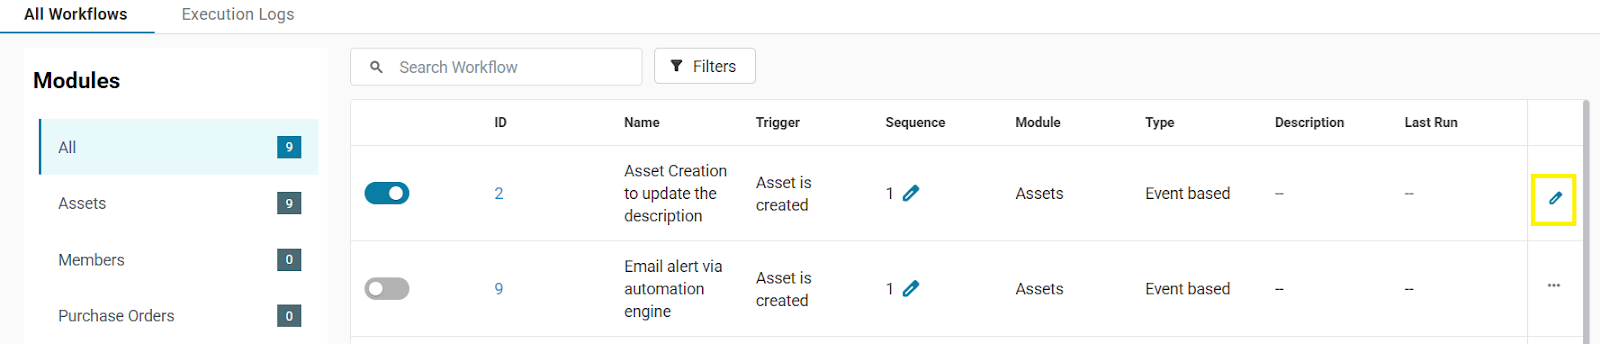
- Edit: Click the Edit icon at the end of a row to open that workflow in the visual editor.
Build a Workflow in the Visual Editor
Click Create New Workflow to open the canvas view.


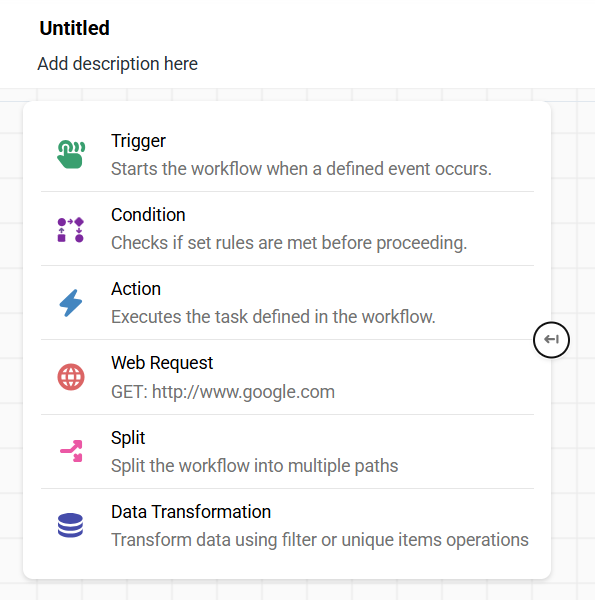
Enter a Title (required) and optional Description. Then start building by clicking and dragging the following nodes onto the canvas.
Note: Only one Trigger can be added to a workflow, and a Trigger and an Action are mandatory for setting up a workflow.
Add a Trigger
A trigger defines when the workflow starts.
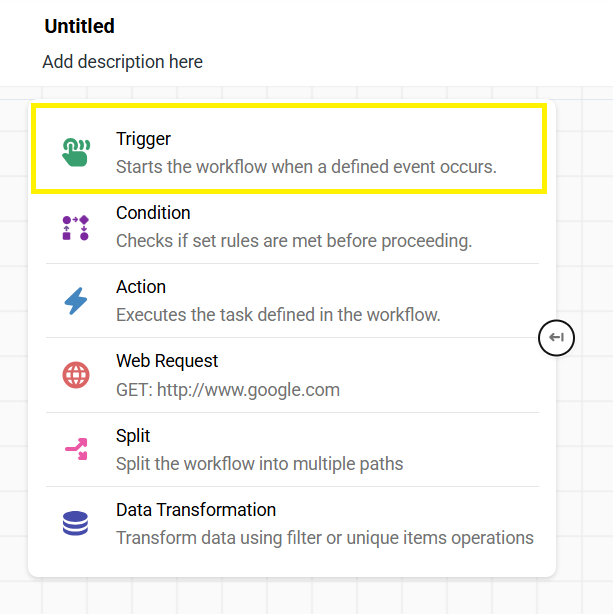
- Click the Trigger icon (shown below) and drag it onto the canvas.
- Next, click on the node you placed on the canvas.
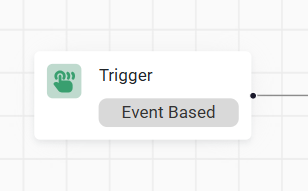
- It will display a modal where you need to enter the Title and select the Trigger Type and enter the relevant Module.
- The modal will update based on the Trigger Type you select.
- Enter the relevant details and then click on Create Trigger.
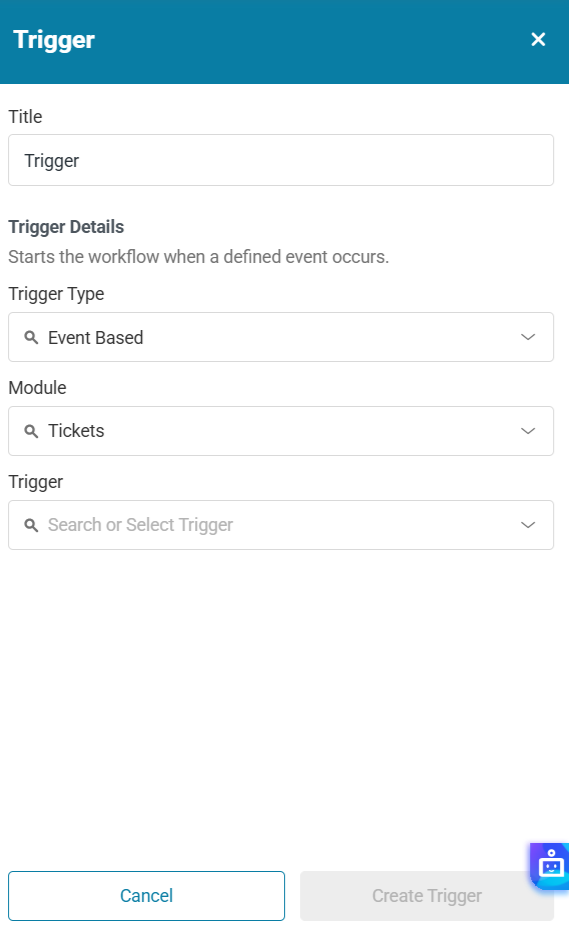
Note: You will not see any configuration options in the condition or action nodes until you select the module in the trigger. The options are configured based on the module selected in this node.
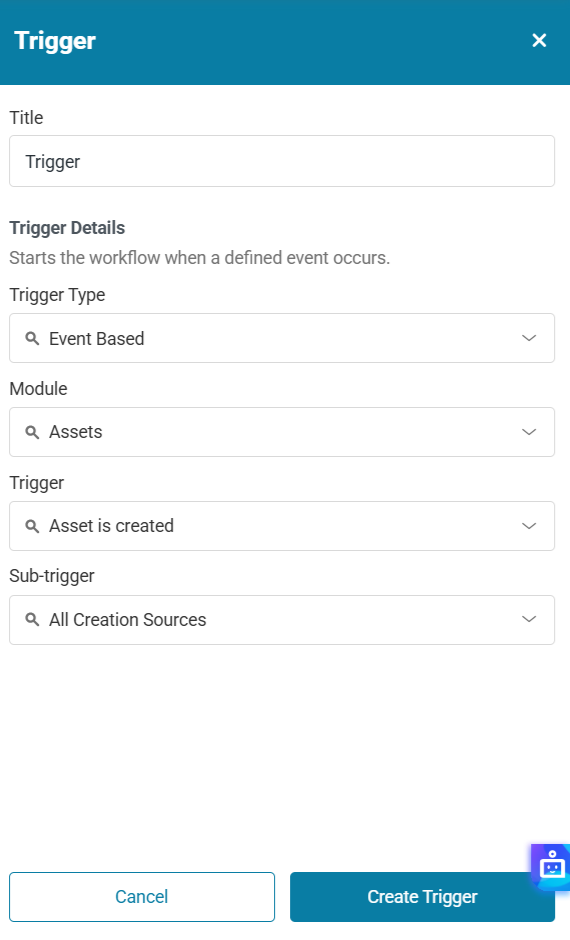
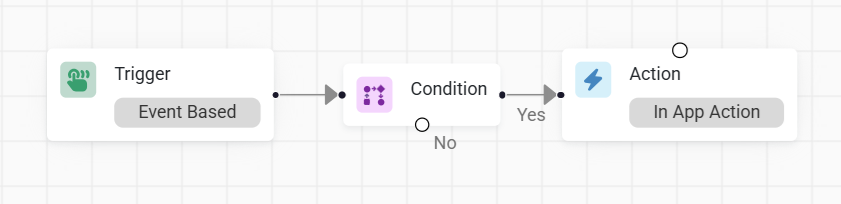
Let’s suppose you want to set up an automation where, if an asset is created, you receive an email for it. So you set up a trigger for when an asset is created, as shown above.
Trigger Webhooks
A particularly interesting example of a trigger is Trigger Webhooks. This will let another system know when an automation event has happened in Assetsonar. The other systems can then call AssetSonar’s API to fetch the data or start any actions on their own system.
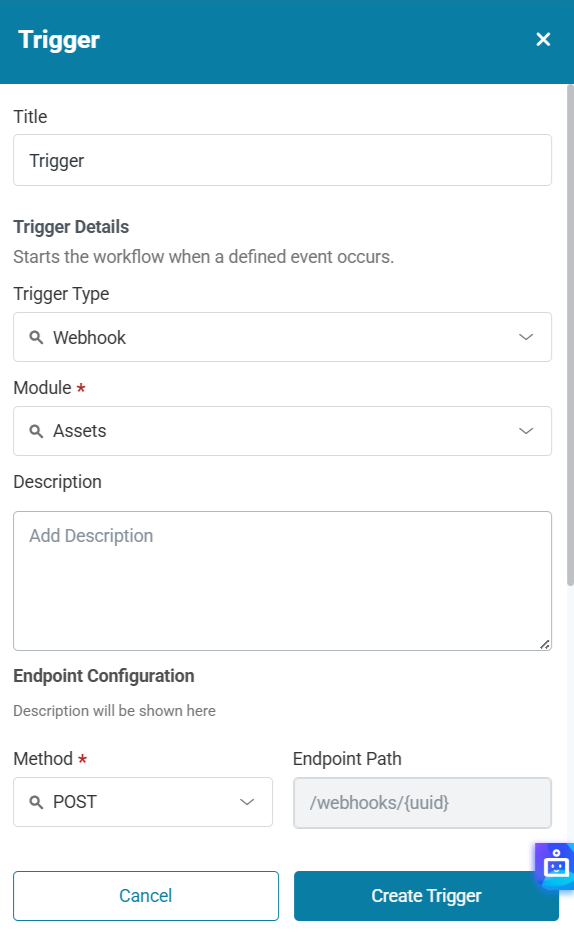
Scroll down to the Endpoint Configuration and enter all the relevant details.
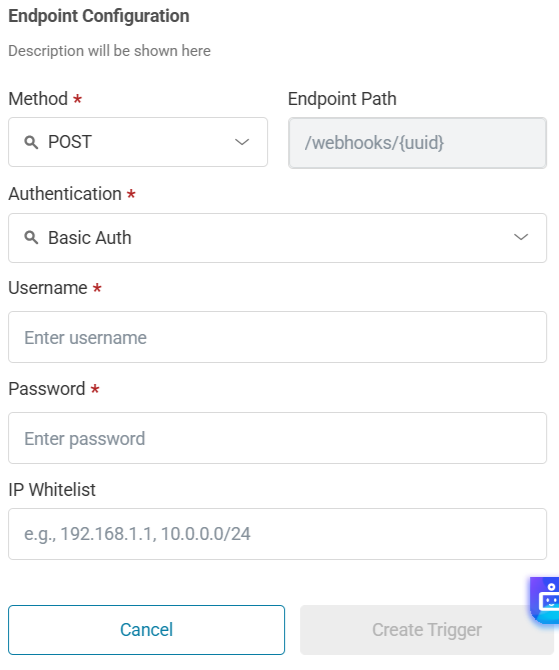
Click Create Trigger to save the Trigger Webhook.
Add Conditions
Next, you may add a condition. This will check that certain conditions are met after the trigger, before any action is taken.
- Click the Condition icon (shown below) and drag it onto the canvas.
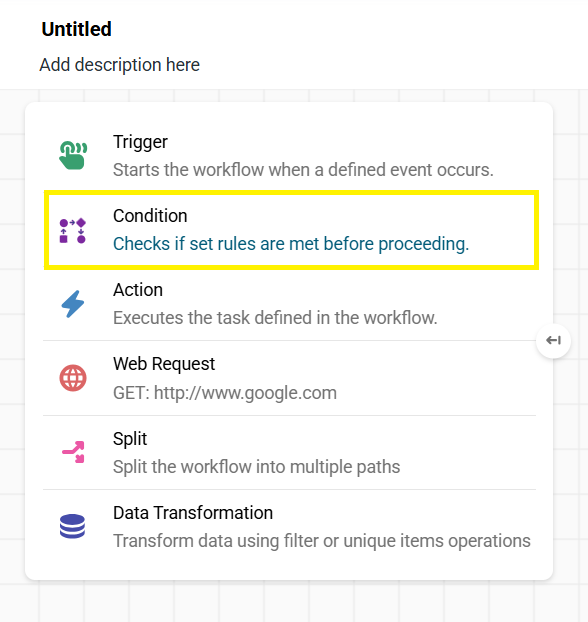
- Next, click on the condition node to configure it. You will see options relevant to the module selected.
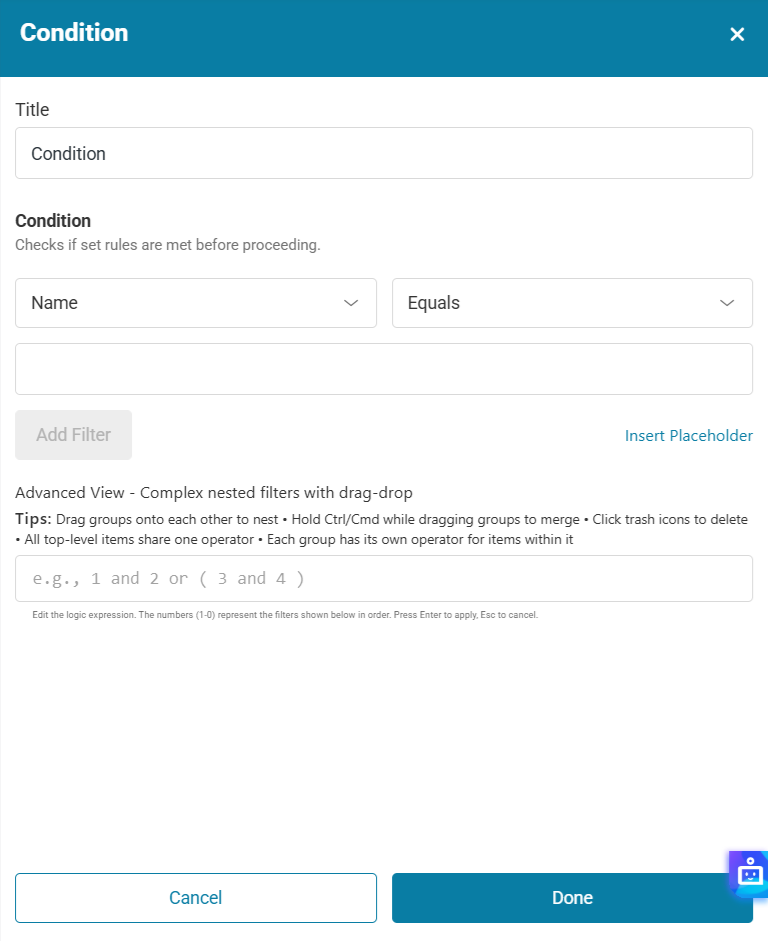
- You may add one or more filters here.
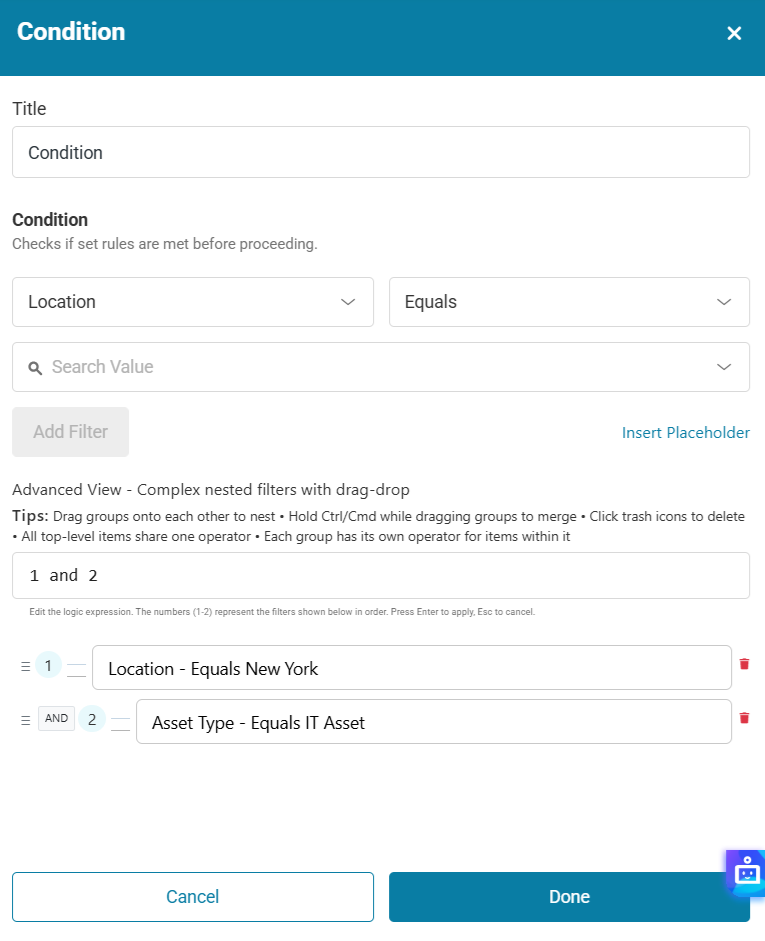
Continuing our example, when an asset is created, the above condition will be true only when it is located in New York and it is an IT Asset.
- You may also create a more complex permutation of AND/OR logic to create more complex nesting structures and groups.

Finally, link the Trigger and Condition together by dragging the arrow from one node to the other.
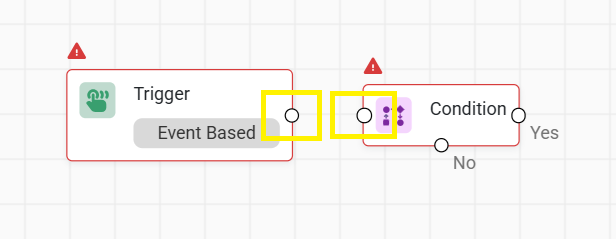
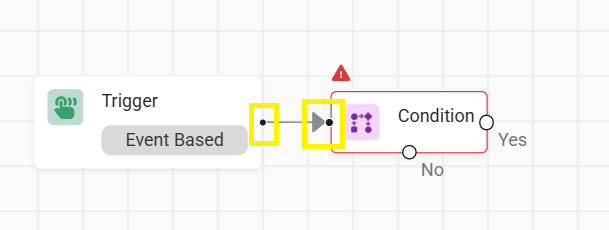
Note: You may delink the two nodes by double-clicking the arrow.
- The canvas also automatically creates Yes and No branches, which may then be linked to the relevant actions, depending on what you want to automate when the conditions are either true or false.
Add Actions (Results of the Workflow)
These are the actions that you want the system to take when the automation is triggered, provided the conditions (if any) are met.
- Click the Action icon (shown below) and drag it onto the canvas.
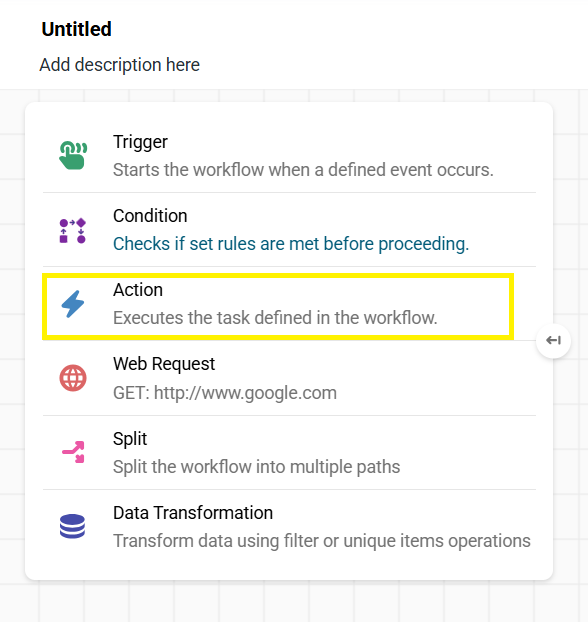
- Next, click on the Action node to configure it. You will see options relevant to the module selected.
Based on our example above, if someone wants to automate receiving emails when the assets are created. They will perform the following steps:
- Select Send Email and then Update Form.
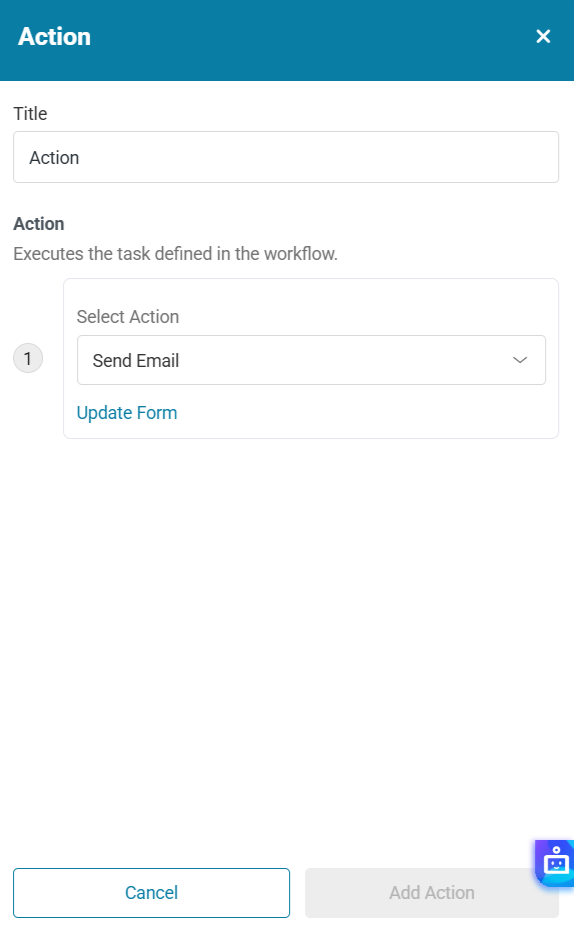
You will be displayed a form which you can fill out to update the recipients and the email that they will be sent.
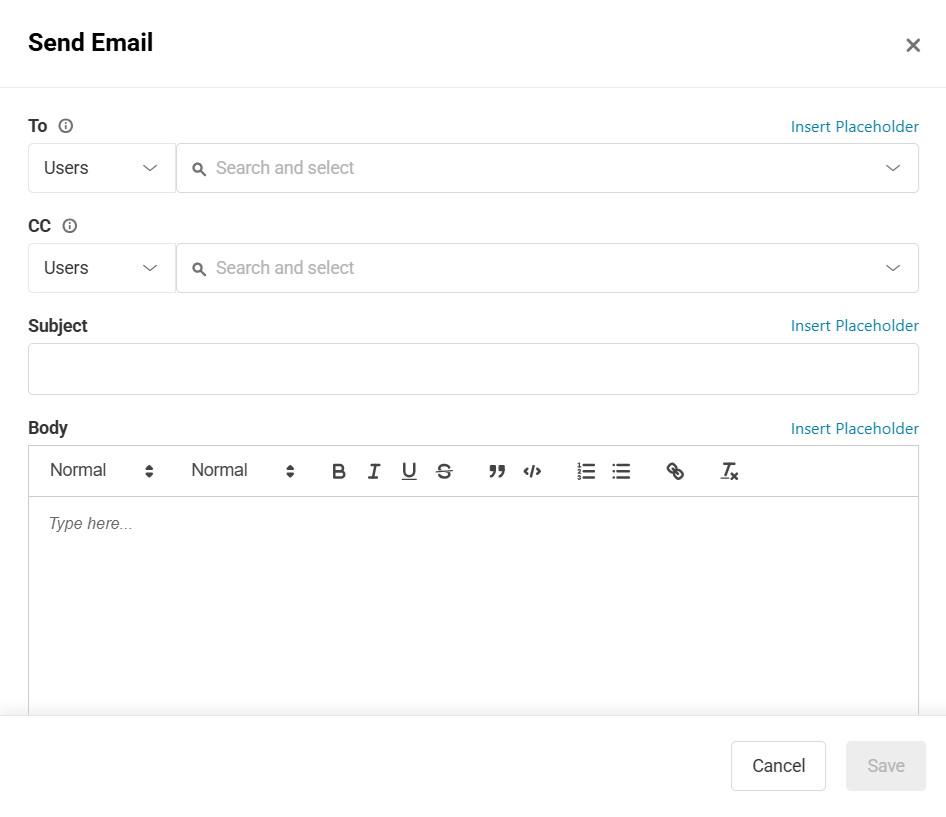
Tip: The email can be sent to specific users, teams, or roles by changing the recipient type from the To dropdown.
- Once you fill it out, click Save to save the email format.
- You may add multiple actions following the same workflow and then click Add Action to add the action(s).
- Finally, link the Action node with the Trigger or the Condition node to complete the full automation flow.
Use Case: Time-based Device Cleanup
You can use time-based triggers to automate recurring maintenance tasks.
Trigger: Time-based → Daily at 9:00 AM
Condition: Last Sync Date → More than 90 days ago
Action: Retire Asset or Send Email to notify IT.
This automatically retires assets that haven’t synced for 90 days, removing inactive devices from your system.
Tip: You can also create similar workflows for check-in due dates using the condition Check-in Due Date = Today.
Note: The automations module is extensive and has numerous permutations and variations. If you need assistance automating a specific workflow, you can reach out to us at support@ezo.io and we will help you set it up.
Using Success and Failure Branches
Every Action Node features binary branching. When you look at the node on the canvas, you will see two distinct outgoing connectors: On Success and On Failure.
This allows you to build sophisticated error-handling logic directly into your IT workflows:
- On Success: The workflow will execute this branch if the action executes without runtime errors, inputs are valid, and the system confirms the update was completed. On Failure: The workflow will execute this branch if there is a validation error, permission failure.
Branching Execution Rules:
- You can choose to connect only the Success branch, only the Failure branch, both, or neither.
- If an action fails and you have an On Failure branch connected, the workflow routes down that path (e.g., sending an alert email to an IT Admin).
- If an action fails and there is no failure branch connected, the workflow stops immediately and is marked as “Failed” in your Execution Logs.
- If an action succeeds and there is no success branch connected, the workflow ends successfully.
Note on Multi-Item Actions: For actions that process multiple items at once—such as sending an email to 3 different recipients or checking in a batch of items—the node operates strictly. If the action fails for any single item in that batch, the entire node is considered failed, and the On Failure branch will execute.
Chaining Multiple Actions
To perform multiple steps sequentially, simply link the On Success branch of your first Action Node to the input of your next Action Node.
Automation Placeholders
While creating an automation, you can copy data from one field and map it to another. If you don’t want to set specific values for a field, you can insert a placeholder instead. You’ll just have to choose a placeholder field, and the system will copy the value from that field.
So, for example, if you want the subject field to include the name of the asset created from the example above. You can add the relevant placeholder to both the Subject and Body of the emails sent. Refer to the images below:
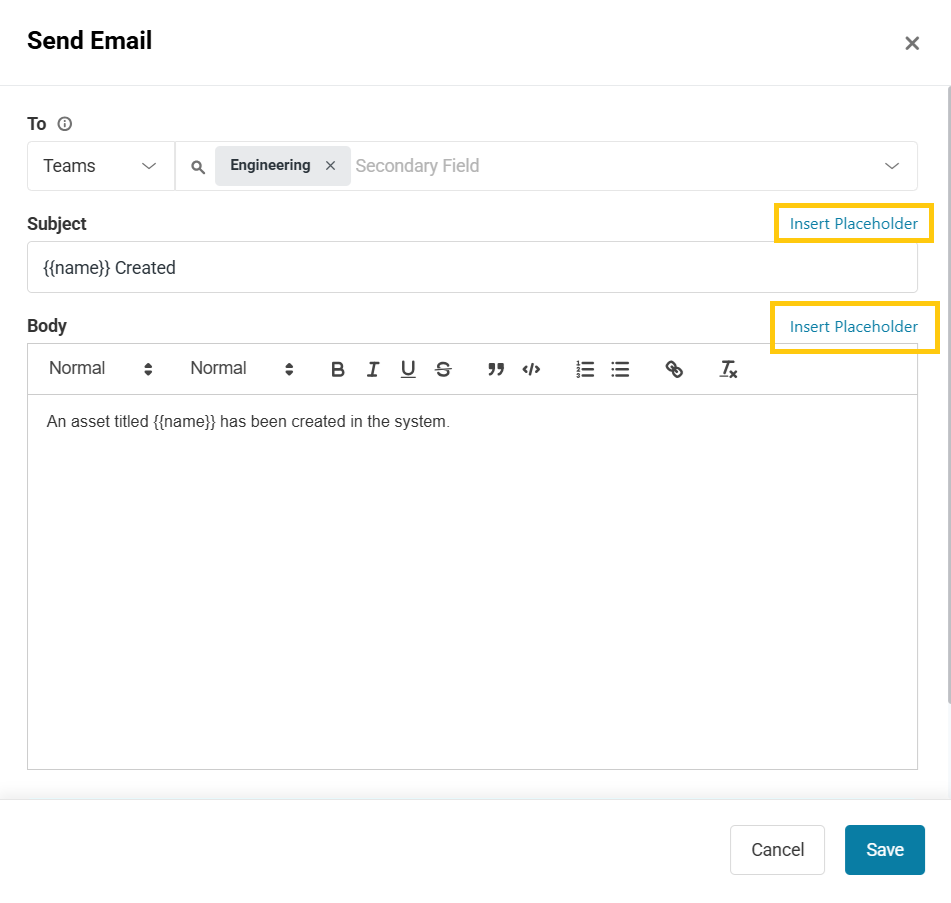
When you click on Insert Placeholder, you will be displayed the option to select a specific field to insert as displayed below:
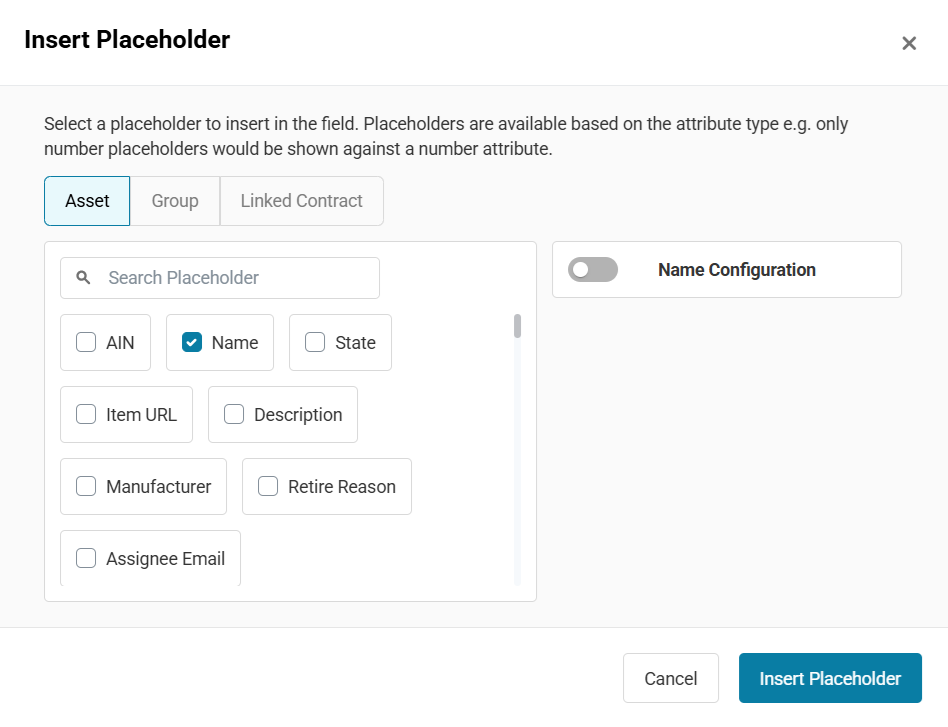
Select the relevant placeholder and then click Insert Placeholder.

Please note that this is a dynamic field, and you’ll be able to view the placeholders relevant to the automation you are creating.
Monitor Workflows Using the Executions Tab
To help you troubleshoot and verify your automations, AssetSonar provides detailed, step-by-step logs for every workflow run.
From the Automations overview page, click on the Executions tab to view a complete history of your workflow activity.
Understanding the Executions Listing
The listing provides a high-level overview of all runs. You can filter these logs by specific triggers, states, or modules.
- Event-Based Workflows: The Object column will display the specific item that triggered the workflow (e.g., a specific Asset or Purchase Order).
- Time-Based Workflows: The Object column will either display the total count of objects that were executed during that scheduled run, or remain blank if no objects were processed.
Viewing Detailed Logs
To see exactly what happened during a specific run, click on the Title of the execution or click View Logs. This opens a detailed modal with four key columns: Node (including its icon), Status, Details, and Executed At (timestamp).
The modal breaks down the success or failure of the workflow step-by-step:
1. Triggers
- Event-Based Triggers: A successful log will display the exact object and trigger event (e.g., Asset #123 MacBook Pro synced at 10:00 AM).
- Time-Based Triggers: A successful log will display your exact schedule configuration (e.g., Run Weekly on Tuesday at 12:00 PM).
- (Note: If a trigger fails to meet its initial criteria, the automation does not start, so no log is created).
2. Conditions (Expandable)
If your workflow includes a Condition Node, you can expand its row to see exactly which filters passed or failed.
- Success: Shows the actual field that met the criteria (e.g., Asset Name contains Mac).
- Failed: Shows that the object did not meet the required criteria, halting the workflow.
3. Actions (Expandable)
If your workflow reaches an Action Node, expanding its row will show the result of every individual action step you configured.
- Success: Details exactly what the system did (e.g., Location updated to New York).
- Failed: Provides the specific error message explaining why that individual action could not be completed.
By expanding the Condition and Action rows, you can pinpoint exactly where a complex, multi-step workflow succeeded or failed, making it incredibly easy to debug and refine your automated processes.
4. Web Requests (and App Connectors)
When your workflow includes a Web Request or an App Connector, the execution logs record the exact payloads sent to and received from the external system. If a Web Request processes multiple objects (e.g., iterating through an array), each object will have its own individual row in the logs.
- Success: When the node successfully executes the request (e.g., a 200 OK response), the Details column will show “Item processed successfully” alongside a clickable view details link.
- Failed: If the API call fails, the Details column will display the relevant error message returned by the external system (e.g., 401 Unauthorized. You are not authorized to access this.).
The “View Details” Read-Only Modal Clicking view details on a successful Web Request log opens a read-only view of that specific node execution. This is an invaluable debugging tool that displays:
- The input received from the previous node.
- The actual form values and headers sent in the request.
- The exact JSON output/response returned by the API.
Important Note: To optimize system performance, the rich “view details” history for Web Requests is only available for 7 days after the execution. After 7 days, the detailed payload view expires and will no longer be accessible, though the high-level success/fail status will remain in the log.
Ready to Automate Your IT Workflows?
With the Workflow Automation, you can visually design and manage automations that streamline onboarding, ensure compliance, and eliminate manual effort.
Need help setting up your first workflow? Contact us at support@ezo.io — we’re happy to assist.

![[How-to] Enable Autocheckout in AssetSonar](https://cdn.ezo.io/wp-content/uploads/2023/07/27122305/How-to-Enable-Autocheckout-in-AssetSonar-scaled-1.webp)
![[How-To] Build Web Request Automations Using the Workflow Automation Engine in EZO AssetSonar](https://cdn.ezo.io/wp-content/uploads/2026/03/09093304/Web-Request-Automations-EZO-Assetsonar.jpg)
![[How-To] Clean and Process Data Using the Data Transformation Node in AssetSonar Automation Engine](https://cdn.ezo.io/wp-content/uploads/2026/03/09100046/Data-Transformation-Node-EZO-Assetsonar.jpg)


