
Contract management including complete visibility into upcoming renewals, expirations, warranties, etc. is a critical part of efficient ITAM. The Contracts module in AssetSonar is a central location to store your contracts related to Items, Purchase Orders, Work Orders, Projects, and more.
With this information consolidated in a single place, you can avoid costly delays in contract renewals, inconvenience and time-wasting during manual tracking, and reactive behavior when it comes to renewals for audits & legal compliance. Get alerted in advance if a warranty or a license is expiring, get timely management approvals, and easily run reports to track the expense/costs associated with contracts.
1. Setting up Contracts
Go to Settings → Add Ons → Contracts and enable the feature.
Note: This action can be taken by Account Owners, Admins, and Custom Roles with permissions for Contracts.

Once enabled, you will be able to see the Contract types already available in the system. You will also have the option to edit these options.

An overlay will appear asking you to enter the edited Contract name and check whether you would like to activate an approval requirement.

You also have the option to add custom Contracts other than the default ones present in the app. Go to the ‘Add New Contract Type’ button from the Settings:

An overlay will appear as shown below:

Fill out the relevant fields such as the Contract type name and click on ‘Create’. A new Contract type will be created.
2. Creating a Contract
2.1. Creating a new Contract manually
Now that you have added the types of Contracts, you can start creating Contracts. You will only be able to create a Contract if you are an Admin, Account Owner, or a Custom Role with permission.
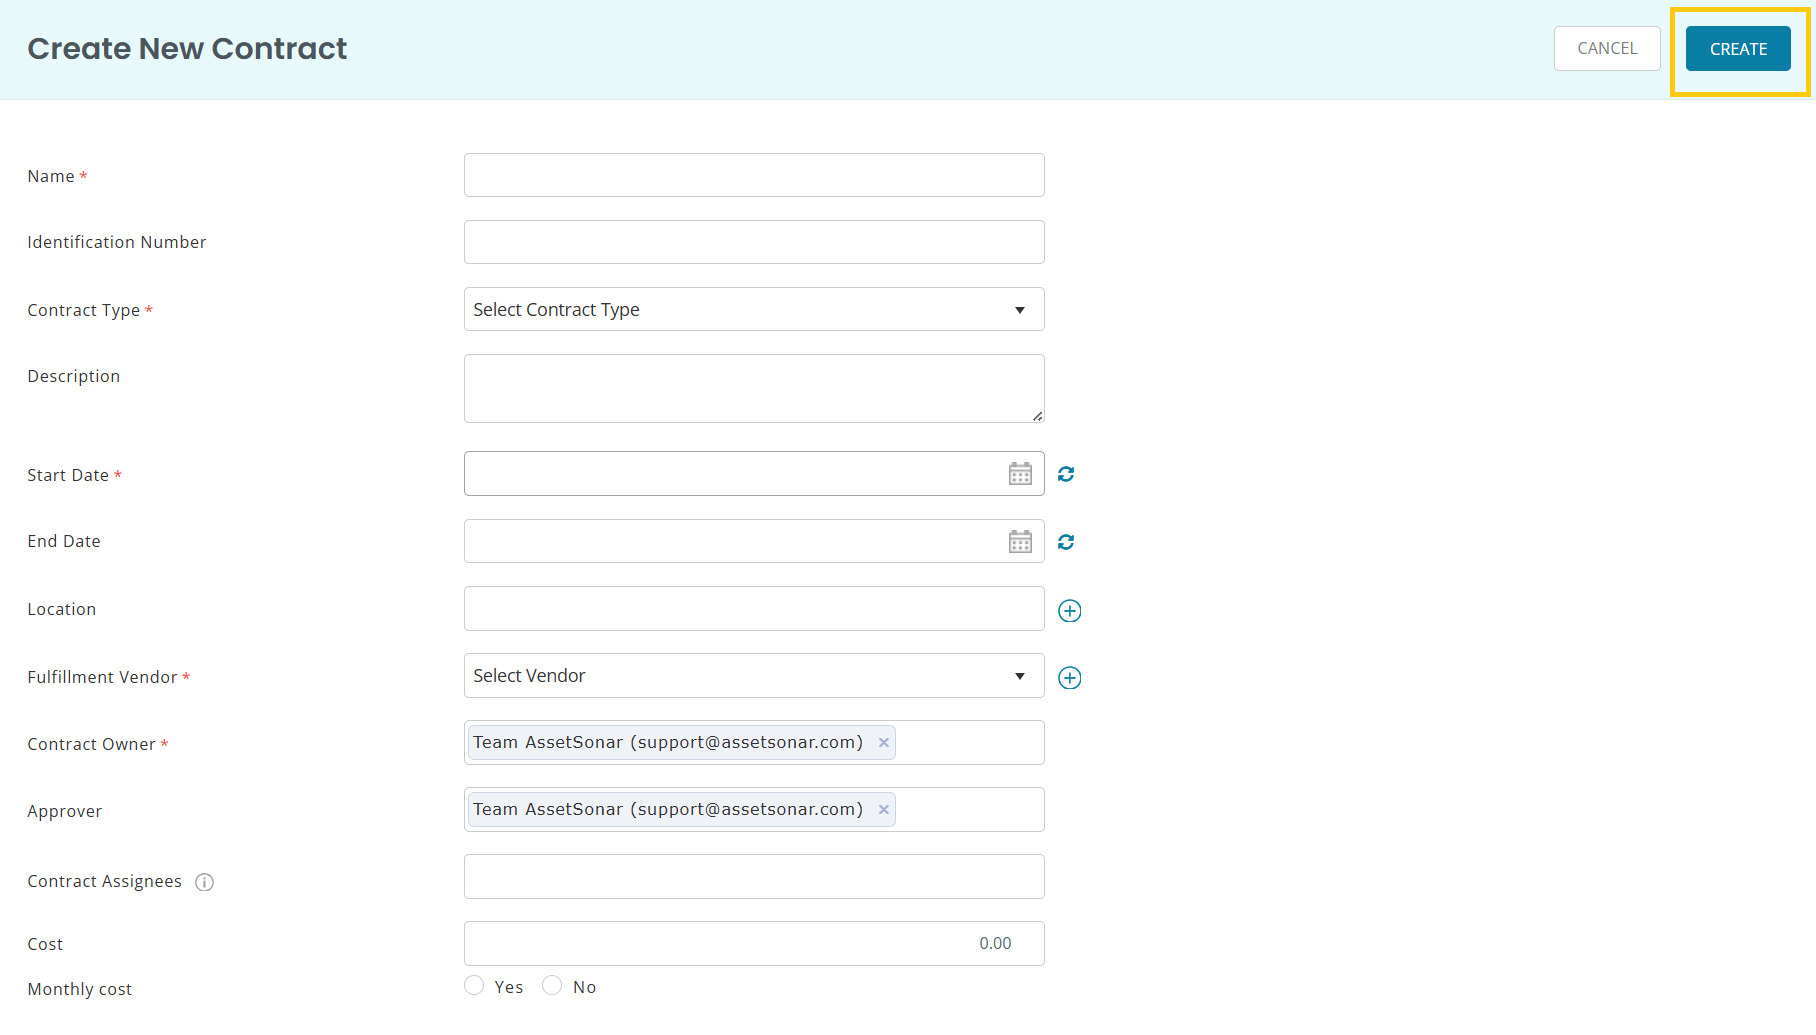
Go to More → Contracts and click on the ‘Add Contract’ button on the top right.

A new page will open up. Add all the relevant information and hit ‘Create’.
The Contract will be drafted and you will be able to edit, clone, or delete it. A Contract in the draft state shows that it has been successfully created and is ready for approval. Click on ‘Request Approval’ to complete the Contract creation process.
Once you have sent in the request, you will no longer be able to make changes to the Contract.

2.2. Importing Contracts
From the Contract Listings page, click on ‘Import Contracts’ and then select ‘Add New Contracts’ from the dropdown menu.

A new page will open up. Choose an Excel file to import and click on ‘Proceed’.

Once you have attached the Excel file, you can then map the columns. If you have missed out on a mandatory field in the chosen Excel file, the system will show an error message.

Click on ‘Preview and Import’ to complete the Contract creation process.
Note: To import Active Contracts, the Start Date must be less than the present date. If the Contract requires approval, the Approved On Date should be less than the present date. Similarly to create an Expired Contract, the End Date must be less than the present date. While importing to update existing Contracts, Contract IDs will be used to match details.
3. Taking Actions on Contracts
3.1. Contract approval
The Admin or the Account Owner in AssetSonar can act as a Contract Approver and can take the following actions on a drafted contract:
- Approve Contract: If the Contract is accepted
- Deny Contract: If the Contract is rejected
- Drafted Contract: If the Contract requires changes
If you have a contract request pending, it will show up on the Contract Listings page as follows:

Click on the Contract that requires approval. Only an Approver can either approve or deny the contract request.

Once an authorized Approver has approved the Contract request, it will then move to Active State.

If the Approver denies the Approval Request, its status is updated on the Contract Details page as shown below:

If there are any changes to be made in the Contract, the Approver will send it to the Drafted state. From the Contract Details page, the Approver can click on ‘More’ and then click on ‘Request Review’ as shown below:

An overlay will appear to add comments and specify the changes required.

Click on ‘Send for Revision’ and the Contract will go into a Drafted state. You will be able to view the Approver’s comments on the Contract Details page.

4. Staff User actions on Contracts
4.1. Contract cloning
Staff Users can take limited actions in the Contracts module. Once an Account Owner or an Admin has created a Contract, a Staff User can clone it to replicate the information. To do so, go on the relevant Contract Details page and click on the ‘Clone’ button.

You will be able to replicate the information or change the fields in the existing Contract as illustrated below:

Once you have made the necessary changes, click on ‘Clone’ to save the changes.
4.2. Applying filters
For enterprises handling a lot of contracts, sorting through them can be a tedious task. You can apply filters to easily find the relevant Contract. From the Contracts page, click on ‘All’ and a dropdown will appear with filters you can classify the Contracts through.

5. Updating Contracts
5.1. Update request
If you have forgotten to add detail while creating the Contract or if you want to update any existing information, open the Contract Details page and click on ‘Edit’.

Once you have made the changes and updated the Contract, the changes can be viewed under the ‘Change Request’ tab on the Contract Details page.

Click on ‘View’ to see the changes in detail.

5.2. Contract renewal
If a Contract is expired or is about to expire, you can renew it from the Contract Details page. You will also be able to see an alert if the Contract is expiring soon.

Click on ‘Renew Contract’ and the following overlay will appear:

Update the dates for renewal and hit ‘Submit’. The expired Contract will move to the Active state from the date of renewal. This change will also be shown under the ‘Change Request’ tab.
5.3. Contract extension
To extend the date on an Active Contract, go to the Contract Details page and click on the ‘Extend Contract’ button on the top right of the screen.

A new layover will appear where you can enter the new date for an extension.

Hit ‘Submit’ to extend the Contract to the desired date.
5.4. Contract termination
Once the Contract is moved to the Active State, the Admin still has the option to terminate it. To end a Contract, go to the Details page of an Active Contract. Click on ‘Terminate Contract’ to cancel the Active Contract.

The following overlay will appear. Click on ‘Terminate’ to end the Contract.

Note: When an Approver makes a change request to a Contract, it is approved automatically. For change requests made by other account users, Admins/Supervisors can view them on the Contract Listing page.
5.5. Contract deletion
Once a contract has been drafted, the Admin still has the option to delete it. You can delete a contract that is in drafted, denied, cancelled, or expired state. To delete a contract, go to the Details page of that contract. Click on ‘Delete’ to cancel the Active Contract.

The following overlay will appear. Click on ‘Ok’ to end the Contract.

Note: You cannot delete an Active contract.
6. Creating linkages to Contracts
6.1. Linking items to Contracts
In AssetSonar, you can also link items to the relevant Contracts so you can have an accurate understanding of the items these Contracts are associated with. To create a link, go to the Contract Details page and click on the ‘Items’ tab.

Now click on the ‘Link Items’ button and a new overlay will appear. Add the items you want the Contract to link to and then click on the ‘Link’ button.

The items will be linked to the Contract and will appear in the ‘Items’ tab. You will also get an option to unlink these items from the Contract.

6.2. Linking Work Orders to Contracts
To link a work order with a Contract, go to the Work Orders tab and click on the ‘Link Work Orders’ button.

An overlay will appear where you can add the name of the Work Order you want to link with the Contract. Hit ‘Link’.

6.3. Linking Purchase Orders
From the Contract Details page, go to the Purchase Orders tab and click on ‘Link Purchase Orders’. An overlay will appear where you can add the relevant purchase order number and hit ‘Link’. The linked purchase order will be shown as follows:

You can also click on ‘Actions’ and choose to unlink a purchase order from the Contract.
7. Contract Alerts
You can set Contract Alerts from the Left Navigation Menu → Alerts → Contracts. You can choose the actions for which you want to set an alert.

Once you have set the desired Alerts for Contracts actions, you will get an email and will also be able to see it under the notifications dropdown as follows:

8. Contract Reports
You can also create and view Contracts Reports to get a better view of the state of your Contracts. From the main navigation menu, go to Reports→ Contract Reports. You can run a report for all Contracts as shown below:

You can also create separate reports for Procurement Contracts as illustrated below:

9. Contracts KPIs
To keep close tabs on your Contracts, you can add them to your main AssetSonar dashboard. Click on ‘Edit’ and then click on ‘Add/Edit Widgets’.

Check ‘Contracts Expiring in 30 Days’ and the KPI Metric would be added to your dashboard as shown below.

Learn more: Configure SPF Records with AssetSonar


