

![[How-to] Use Company URL with EZRentOut and Webstore](https://cdn.ezo.io/wp-content/uploads/2015/07/25105959/How-to-Use-Company-URL-with-EZRentOut-and-Webstore-1024x512.webp)
Access your EZRentOut account and Webstore using your company URL.
Configure your company URL to forward traffic to a different address. Do this by setting up a CNAME.
To add a CNAME to your domain, log into your Domain Registrar’s DNS manager. If you have forgotten who you bought your domain from, search for your domain at https://www.internic.net/whois.html.
Below, we outline the steps for adding a CNAME in GoDaddy for the following scenarios.
-
- Accessing your EZR Account using your company URL
Skip to Section 1 to learn more. - Accessing your Webstore using your company URL
Skip to Section 2 to learn more.
- Accessing your EZR Account using your company URL
The following steps may differ if you have a different registrar.
1. Accessing your EZRentOut account using your company URL
This process can be used to point, say, items.HappyRentals.com (my corporate website’s subdomain) to HappyRentals.ezrentout.com (my EZRentOut account). The CNAME in this example is ‘items’.
1. Log in to your GoDaddy DNS account.
2. Click on the user icon in the top right, then go to My Products > your chosen domain > DNS.
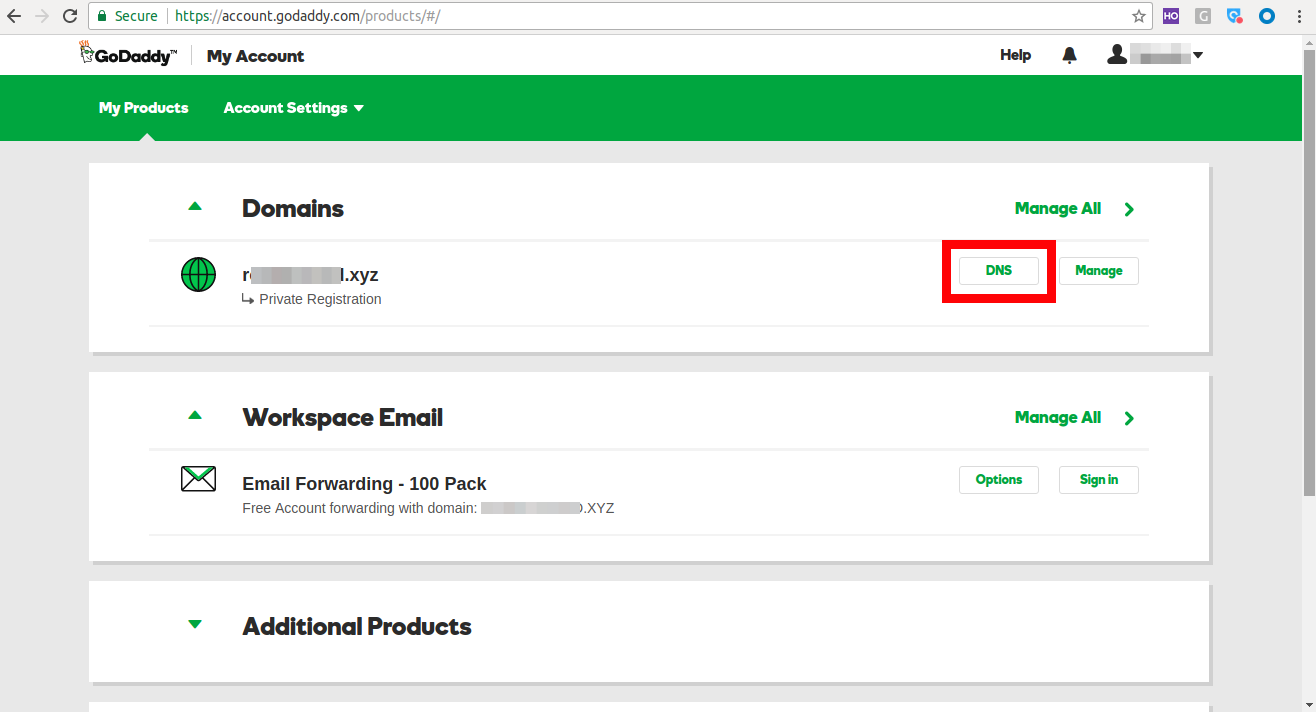
3. On the Records page, click the ‘Add’ button on the bottom right:

4. Choose ‘CNAME’ from the dropdown:

5. In the ‘Host’ field, enter the CNAME you want to use with your current URL (for example ‘items’ for items.mycompany.com)
6. In the ‘Points To’ field, add your Admin login URL for EZRentOut (for example, mycompanyname.ezrentout.com).


7. Click ‘Save’.
8. Once a CNAME has been set up, go to your EZRentOut account to save the CNAME record from Settings → Add Ons → Company URL. Click ‘Validate Company URL’ to confirm if it has been set up correctly.
Note: It can take up to 72 hours for the changes to be made.
2. Accessing your EZRentOut webstore using your company URL
This process can be used to point, say, rentals.HappyRentals.com (my corporate website’s subdomain) to HappyRentals.ezrentalstore.com (my EZRentOut Webstore). The CNAME in this example is ‘rentals’.
1. Log in to your GoDaddy DNS account.
2. Click on the user icon in the top right, then go to My Products > your chosen domain > DNS.
3. On the Records page, click the ‘Add’ button on the bottom right:
4. Choose ‘CNAME’ from the dropdown:
5. In the ‘Host’ field, enter the CNAME you want to use with your current URL (for example ‘rentals’ for rentals.mycompany.com)
6. In the ‘Points To’ field, add your Webstore URL (for example, mycompanyname.ezrentalstore.com).
7. Click ‘Save’.
8. Once a CNAME has been set up, go to your EZRentOut account to save the URL settings from Settings → Store Settings → Webstore URL. Click ‘Validate Webstore URL’ to confirm if it has been set up correctly.

Note: It can take up to 72 hours for the changes to be made.
3. Accessing your EZRentOut webstore using Cloudflare
1. Choose type “CNAME”.
2. Enter the subdomain in the Name field.
Let’s take the example of a store that has a customized store URL as abc.store.com. The Cloudflare name field will contain the subdomain abc.
3. Enter the Webstore original URL in the target (required) field.
The store set up its webstore in EZRentOut and with the URL store.ezrentalstore.com. This needs to go into the target field in Cloudflare.
4. Disable proxy status and set DNS only.
5. Choose Auto in the TTL dropdown.
If you have any questions, feel free to get in touch at support@ezo.io.


