


Rental operations often involve handling dozens of identical assets, especially for high-turnover equipment. Managing each item individually when processing orders can be slow and error-prone. To address this, EZRentOut now lets you group assets by name, enabling you to draft and confirm rental orders based on asset quantity, without specifying exact units upfront.
This blog guides you through enabling the feature and explains how it alters the order and rental experience.
1. Enable “Group Assets by Name”
To get started, go to Settings → Company Settings → Items, set the Group Assets by Name option to Enabled, and click Update to save your changes.

Once enabled, this will:
- Show assets grouped by name on the Asset Listing page.
- Change the way you draft carts and confirm rentals (more on this below).
2. View Assets by Group
You can now switch the asset list to Group by Name. For that, go to Items (Navigation Menu) → Assets. You will see the default view of the asset listing. To switch to Group by Name, expand the Default View dropdown menu as displayed below and select Group by Name.
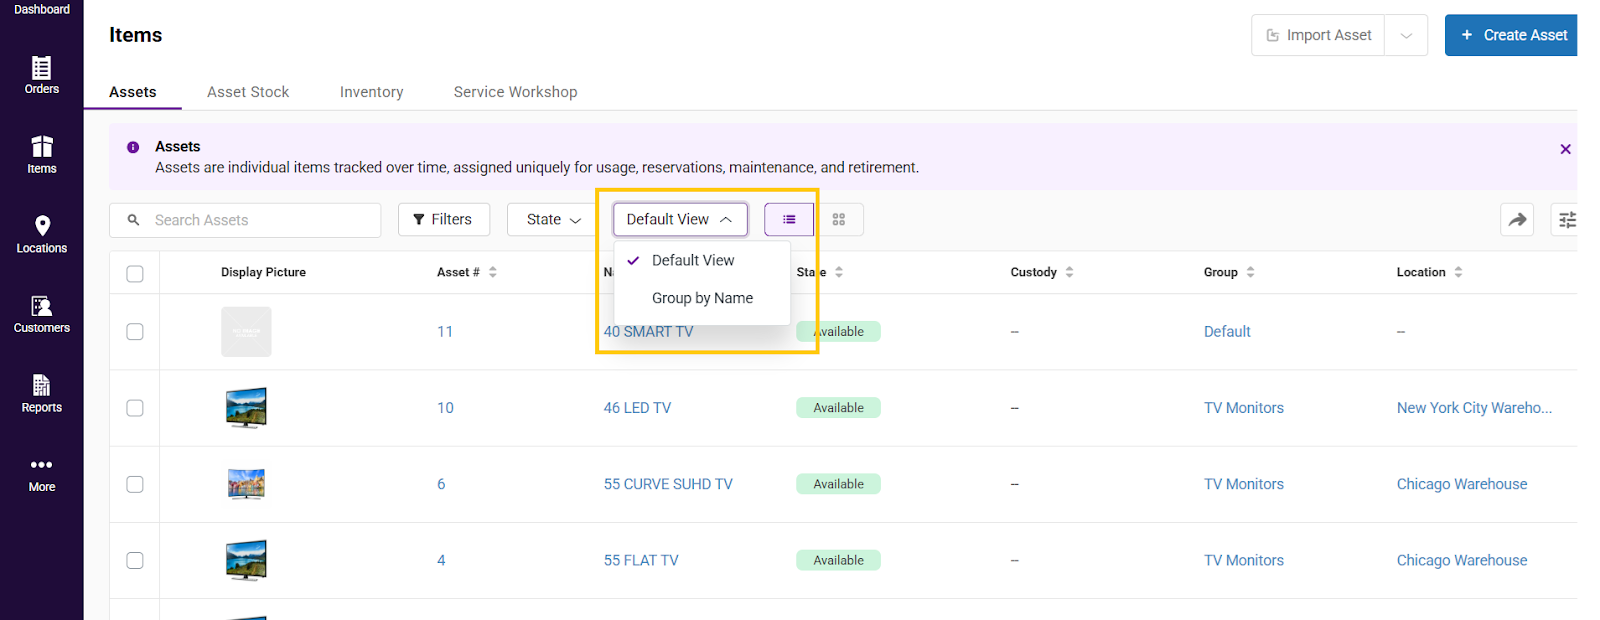
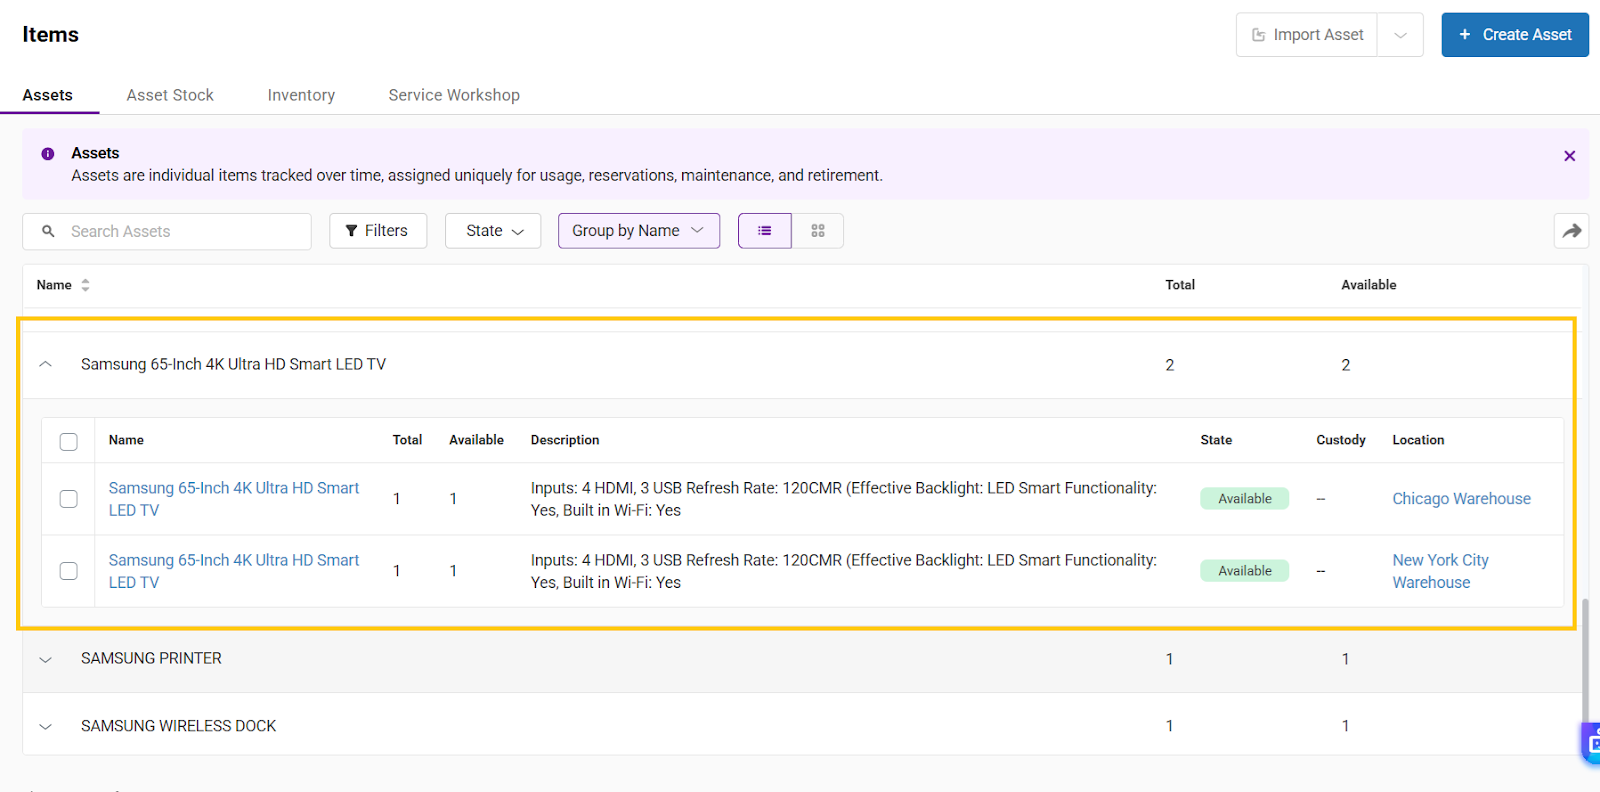
Once you select Group by Name, you’ll notice:
- Assets are grouped by Name.
- A single row represents all available units for that product.
- You’ll see the Available Quantity column indicating how many items are in stock.
- You may click on a row of grouped assets to expand it and view its individual items and details.
3. Create Orders Without Picking Specific Assets
With Group Assets by Name enabled, you can book and then rent an order by entering the Asset Name and Quantity. This speeds up the ordering process and allows for faster workflows, especially when the dispatch details are not yet finalized.
Note: Need a full tour of EZRentOut Orders? See how to manage them here.
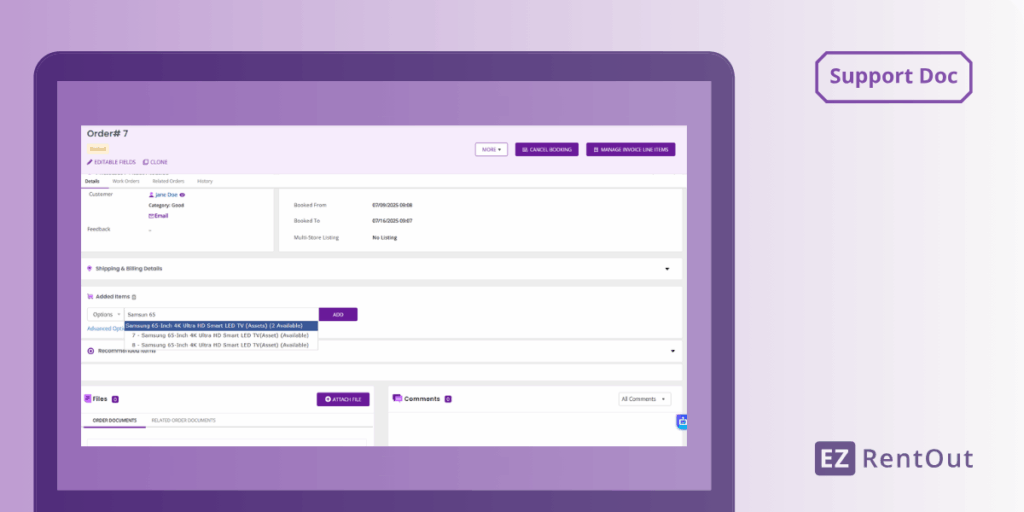
3.1 Add Grouped Assets to an Order
1. Go to Orders (Navigation Menu) and open any order to which you want to add the assets.
2. On the Order Details page, in the Added Items section, search for the asset. You’ll see:
- A grouped entry (e.g., 4K UHD Smart TV)
- Individual serialized assets, if you prefer asset-level rental.
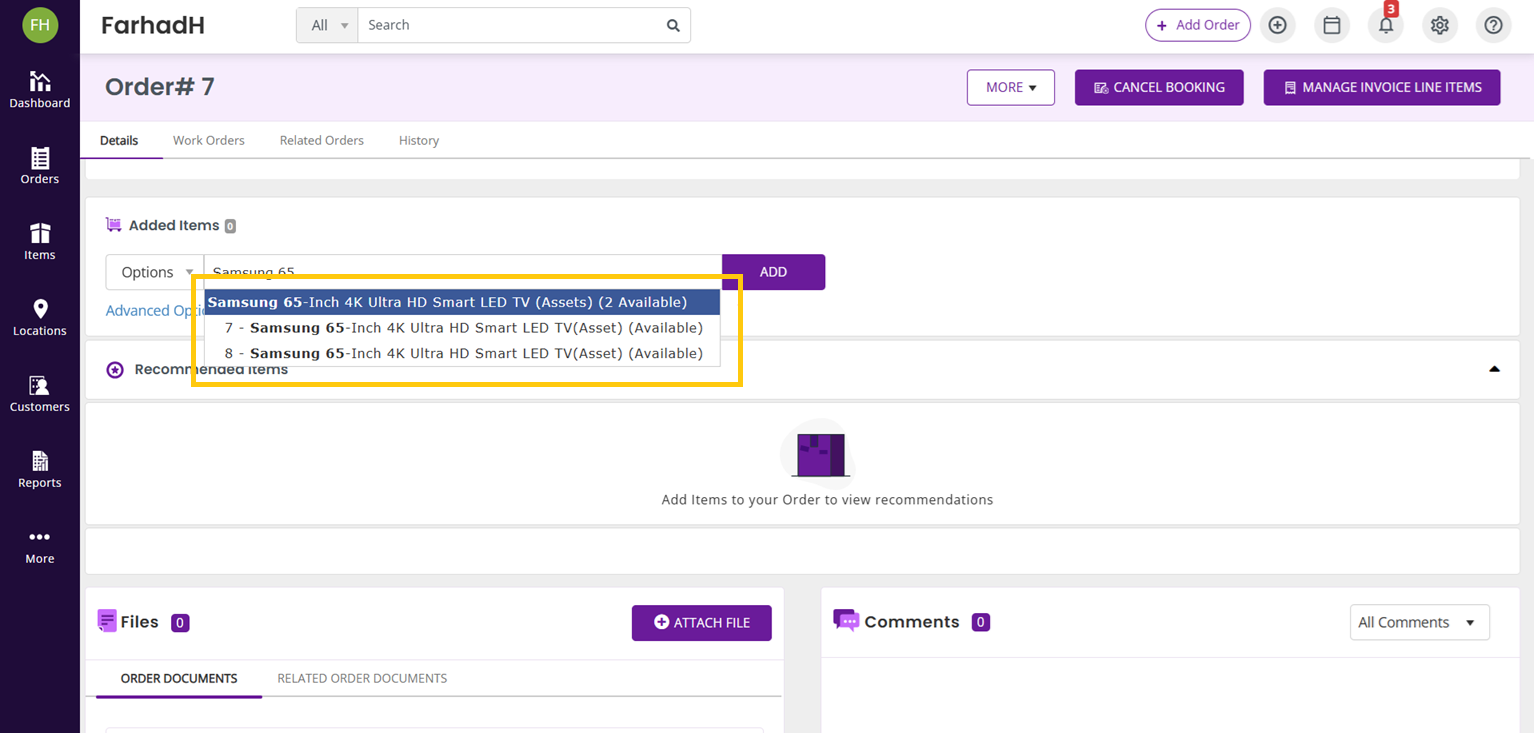
3. Select the grouped asset entry and click Add.
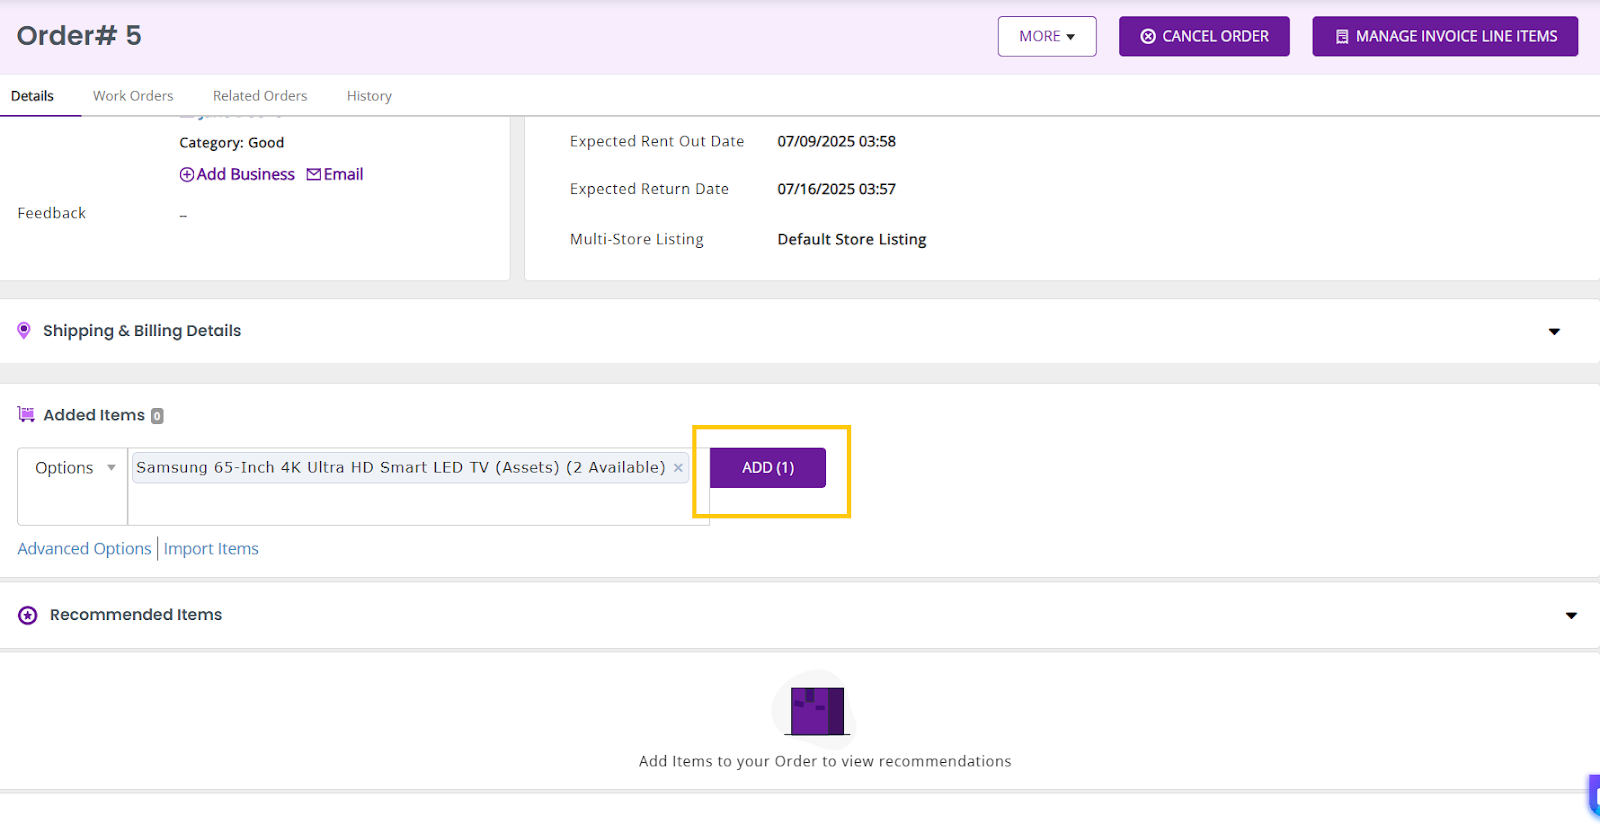
Note: EZRentOut records the item, but you can adjust the quantity later. The system leaves the actual units unassigned for now.
3.2 Confirm Booking
Since you want the system to assign units automatically at dispatch, you will need to Confirm Booking. This locks the quantity and reserves stock—no need to pick items yet.
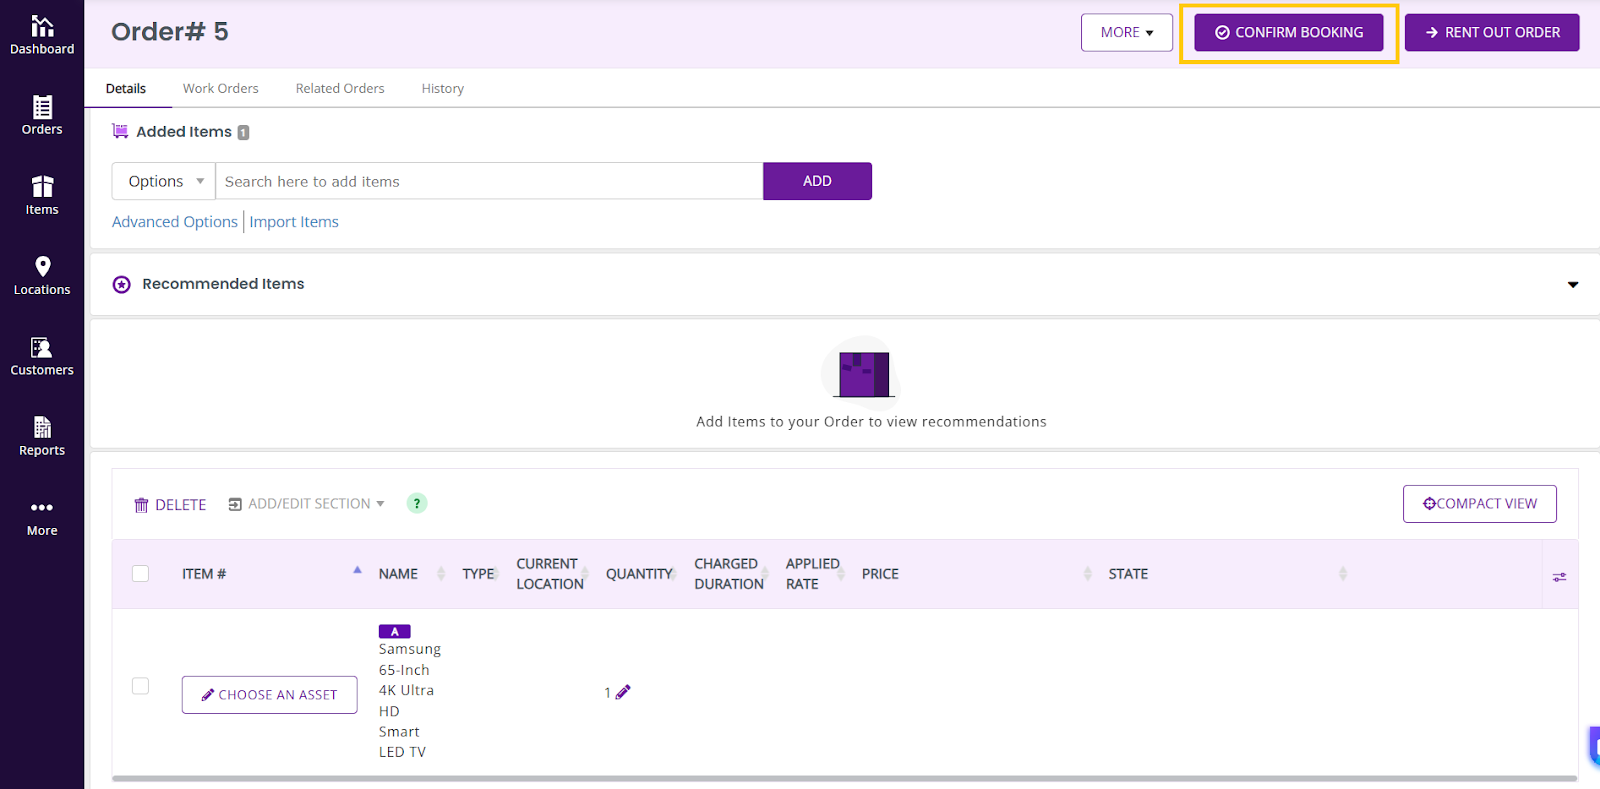
Note: In case you are looking to rent out right away, you may do so by following the regular order workflow. However, in such a case, you will need to select an asset yourself, and the system will redirect you to the relevant section for selecting it.
3.3 Rent Out and Pick Assets
- When you’re ready to dispatch, click Rent Out Order.
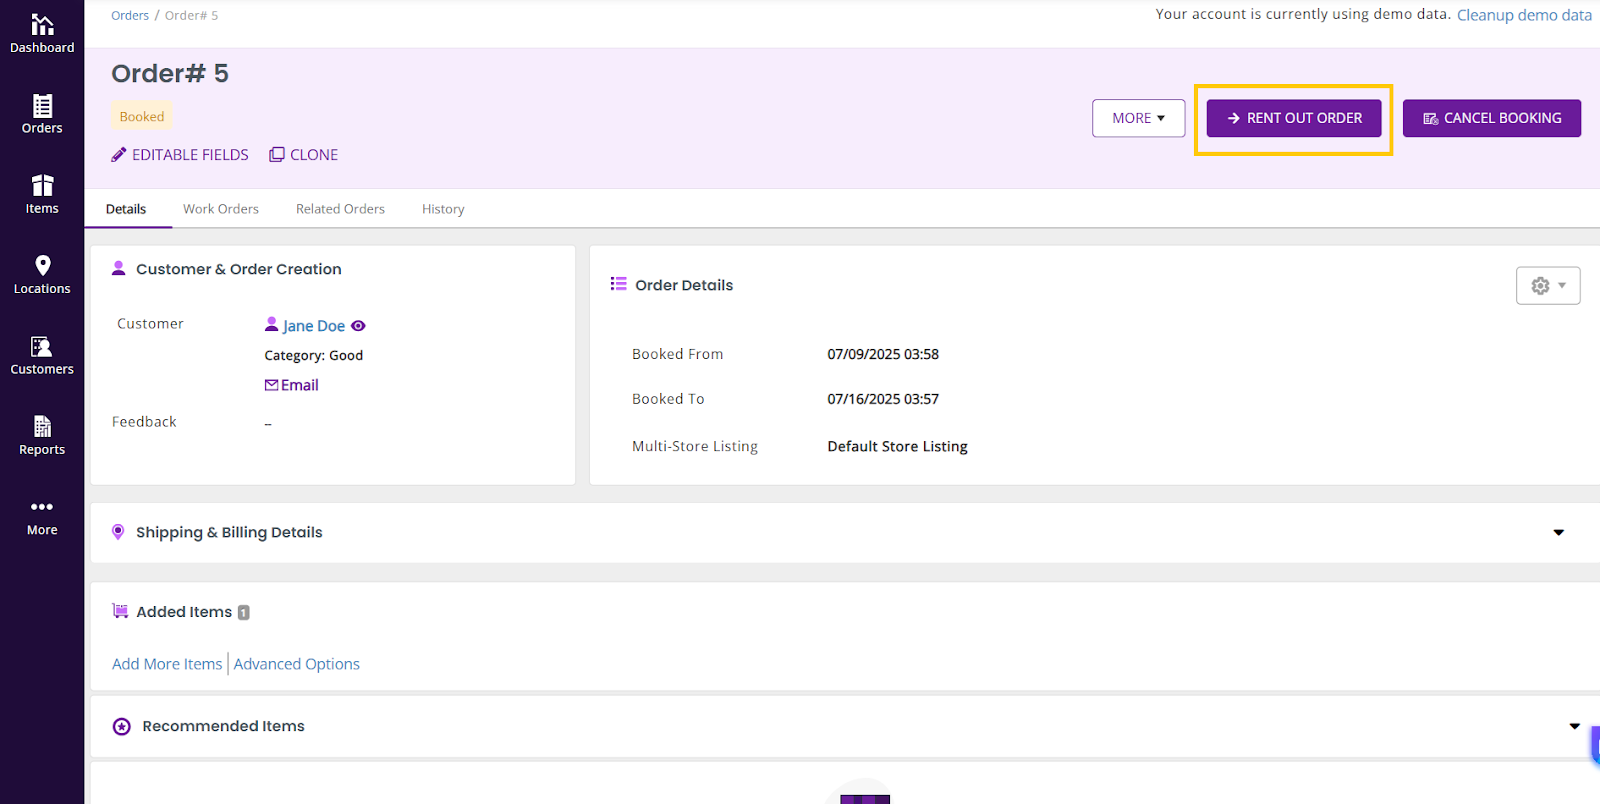
- On the Rent Out Assets screen, you can:
- Manually select specific units.
OR - Click Pick for me to let EZRentOut auto-assign available assets.
- Manually select specific units.
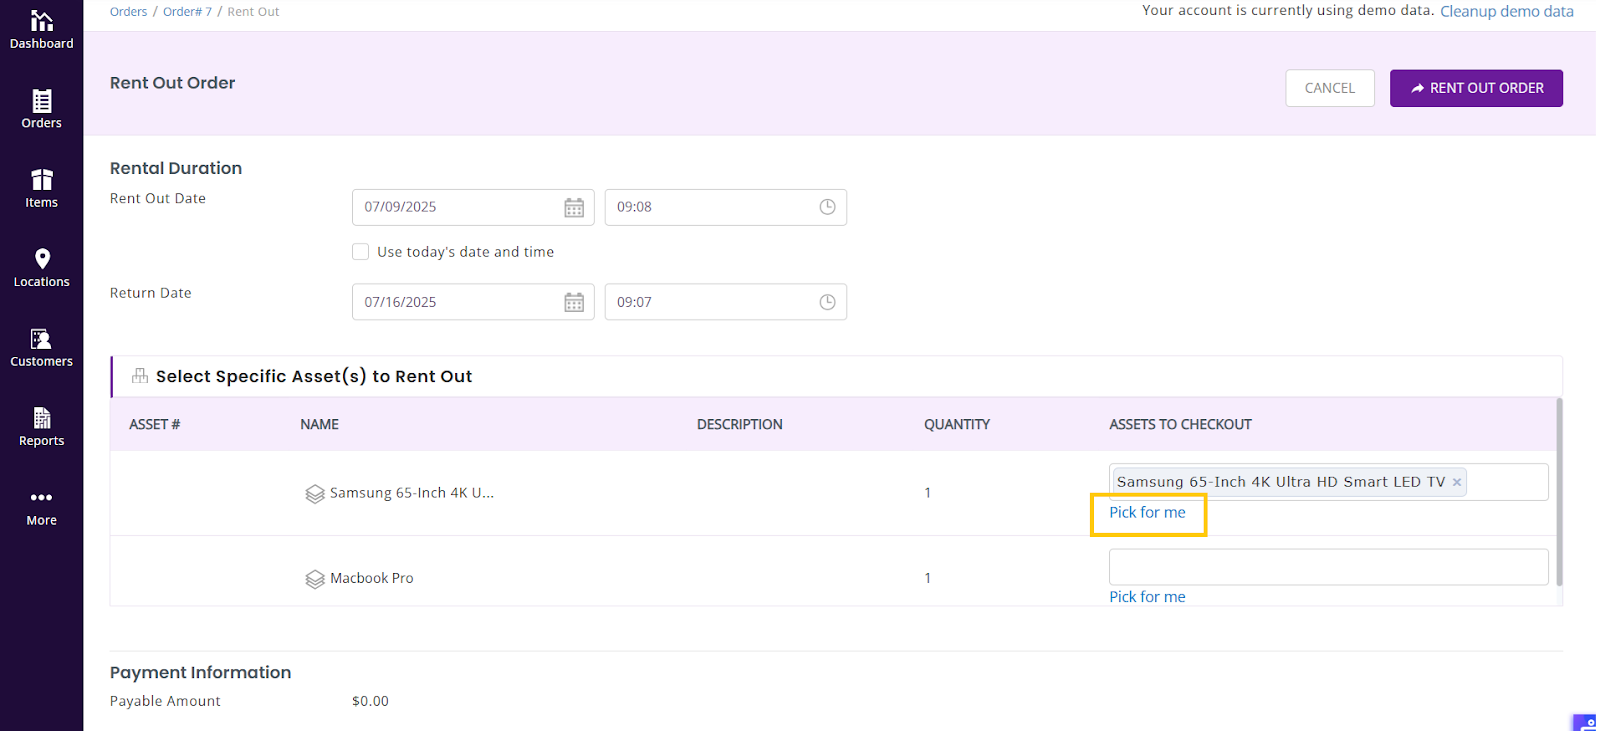
- Review the selection and complete the rental order as usual.
This flexible workflow lets you postpone unit selection until the exact dispatch moment, ideal for fast-moving rental operations. Pricing appears only after a specific unit is chosen (or auto-assigned).
4. Syncing with Accounting Integrations
EZRentOut only syncs finalized orders with your accounting tools. Because exact assets aren’t selected until you rent them out, syncing occurs only after that. This ensures your books reflect actual inventory movement, not tentative reservations.
5. Limitations and UI Notes
- This feature currently applies only to Assets, not inventory or asset stock bundles.
- Grouped view is available on the web, but not yet supported on mobile apps.
6. Ready to Boost Rentals with Product-Based Bookings?
With the new Group Assets by Name feature, you can reserve equipment faster, dispatch more flexibly, and improve operational accuracy — especially for high-volume rentals.
Need help setting it up? Reach out to us at support@ezo.io — we’re happy to help.


