


Managing asset movements with precision is critical in fast-paced rental environments. Manual scanning is often slow and prone to error, especially for high-volume or high-value equipment.
With EZRentOut’s RFID tracking, you can instantly scan and process equipment using a TSL 1128 or Zebra RFD8500 RFID scanner paired with the EZRentOut mobile app. You can install the app on your smartphone or directly on a Zebra Android device, enabling seamless integration and scanning. This guide walks you through setting up your scanner, connecting it to the mobile app, and taking actions on scanned items.
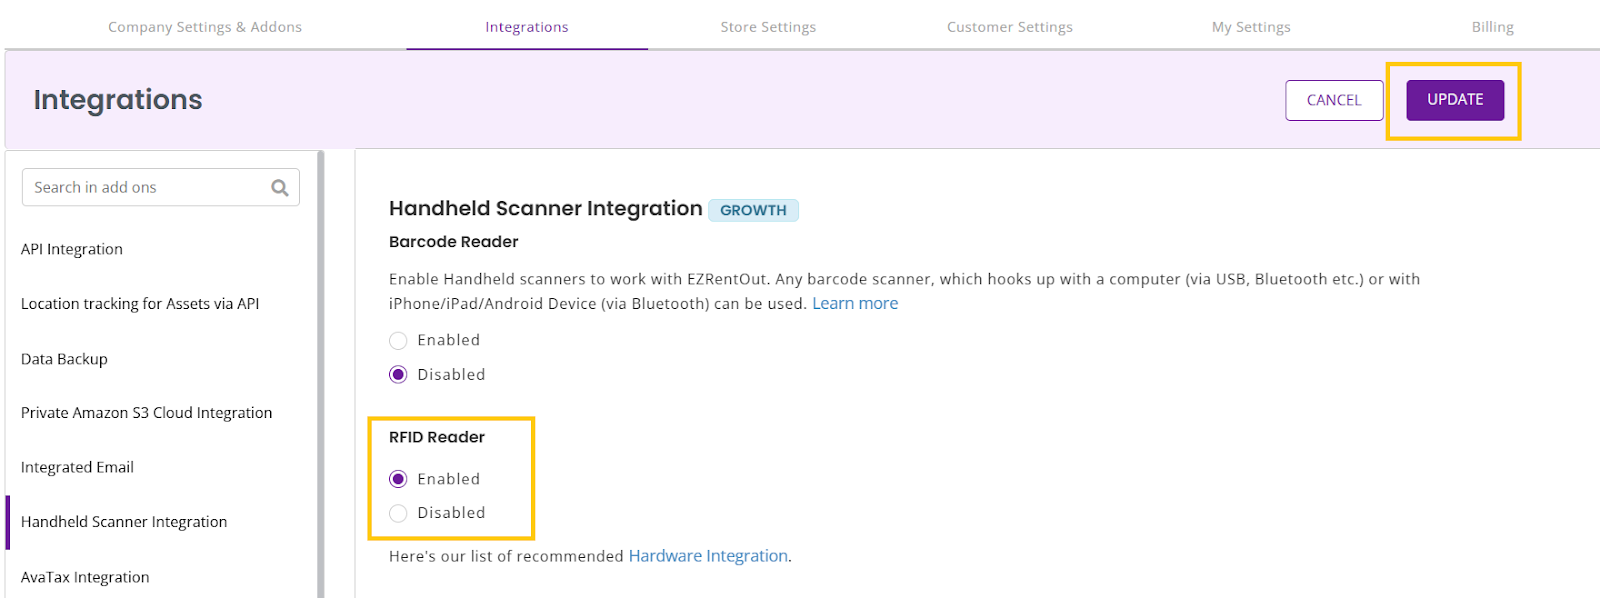
1. Enable RFID Tracking in EZRentOut
To get started, go to Settings → Integrations → Handheld Scanner Integration → RFID Reader, select Enabled, and then click Update.
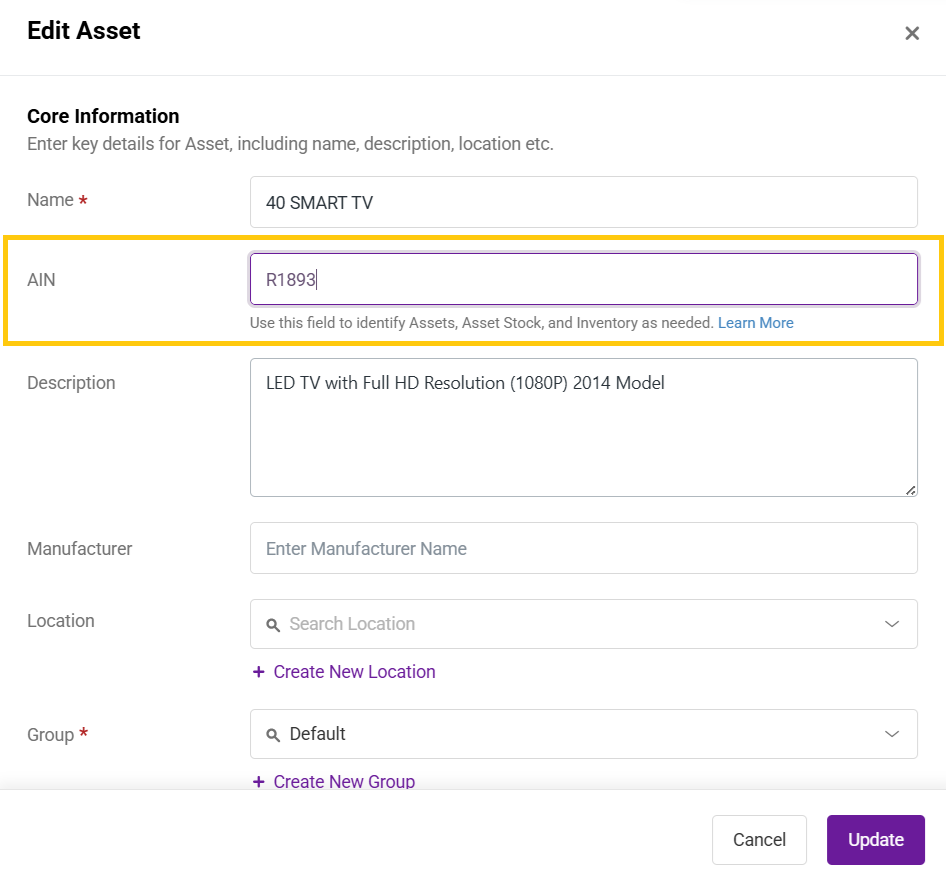
You also need to add RFID tag IDs to your items. You can do this in two ways:
- Go to any item, click Edit, and fill in the Identification Number field.
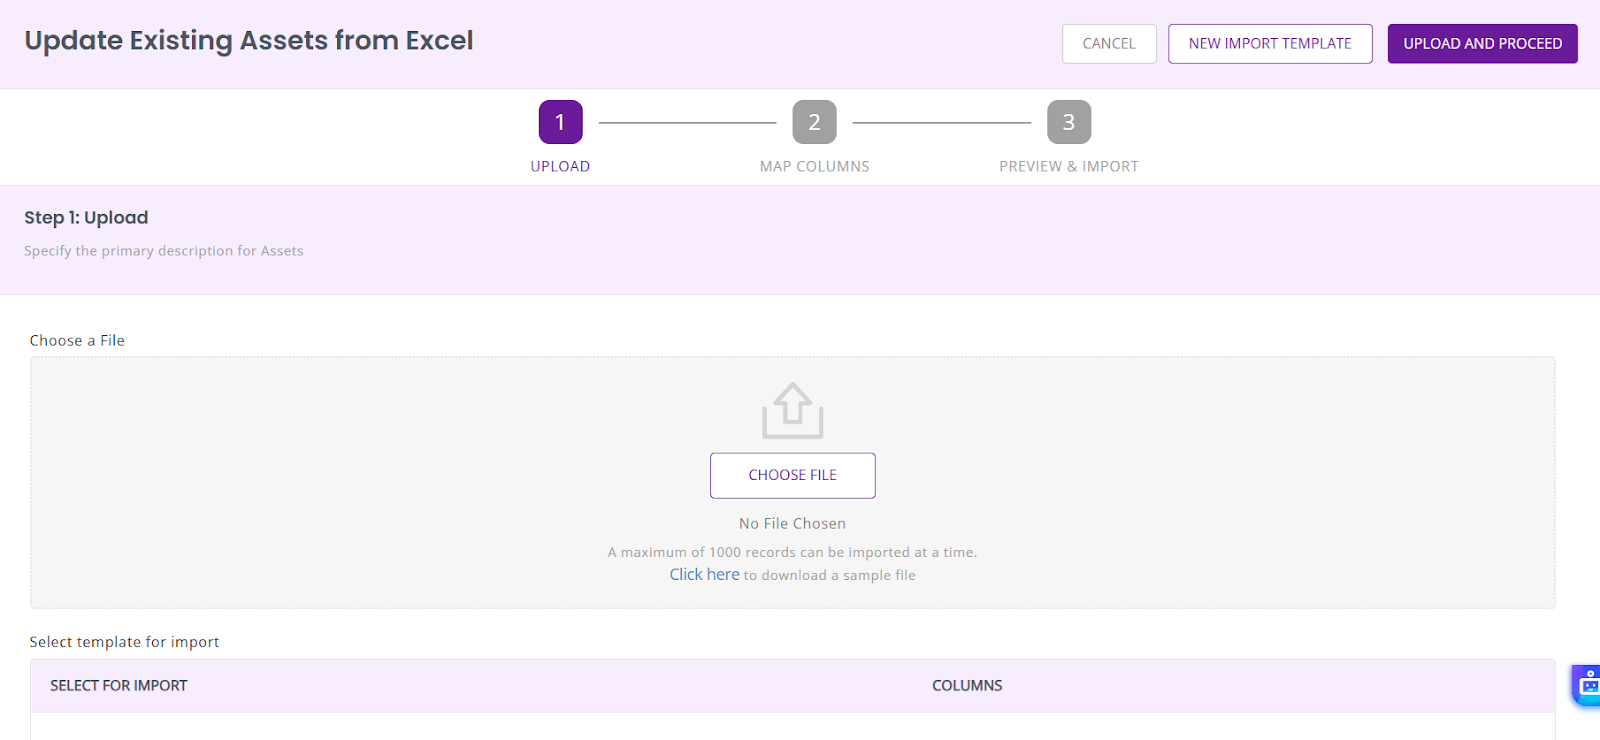
- Alternatively, import RFID tag IDs in bulk using the Excel Import feature. To do this, click on the down arrow icon and then select Update Existing Asset as displayed below. Finally, proceed to upload the relevant file with the IDs.

2. Scan RFID Tags on iOS Devices
- Turn on your TSL 1128 RFID scanner.
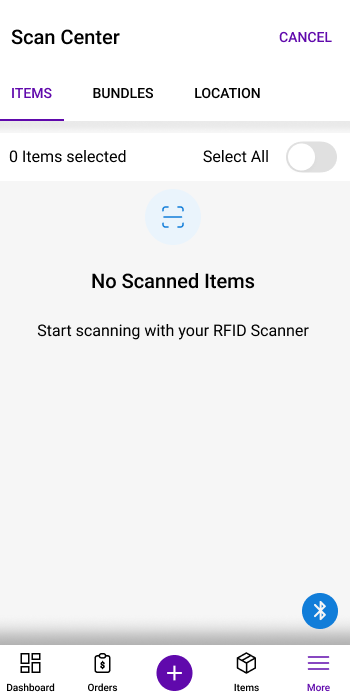
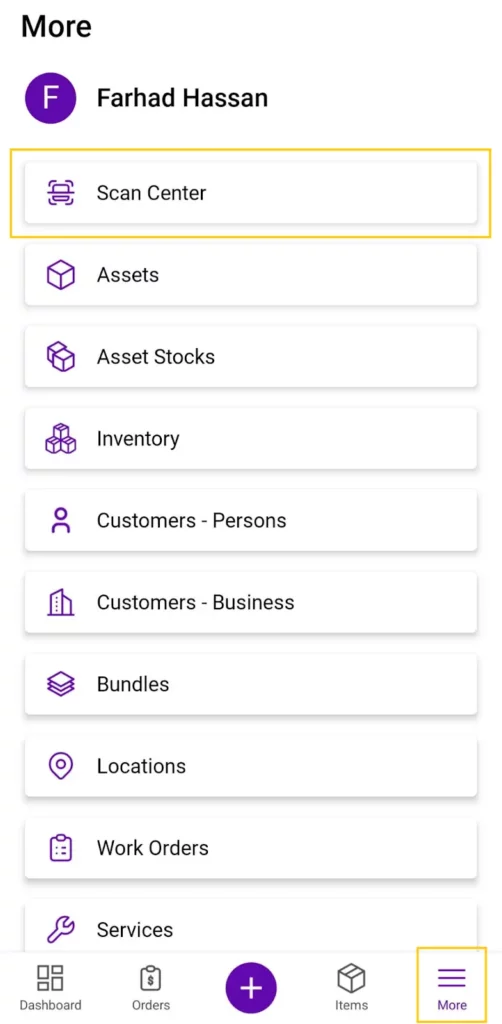
- Open the EZRentOut mobile app (iOS) and go to More → Scan Center from the bottom navigation bar.
- In the overlay, select the relevant scanner.

- If this is your first time pairing, go to iPhone Settings → Bluetooth and tap the scanner name to connect.
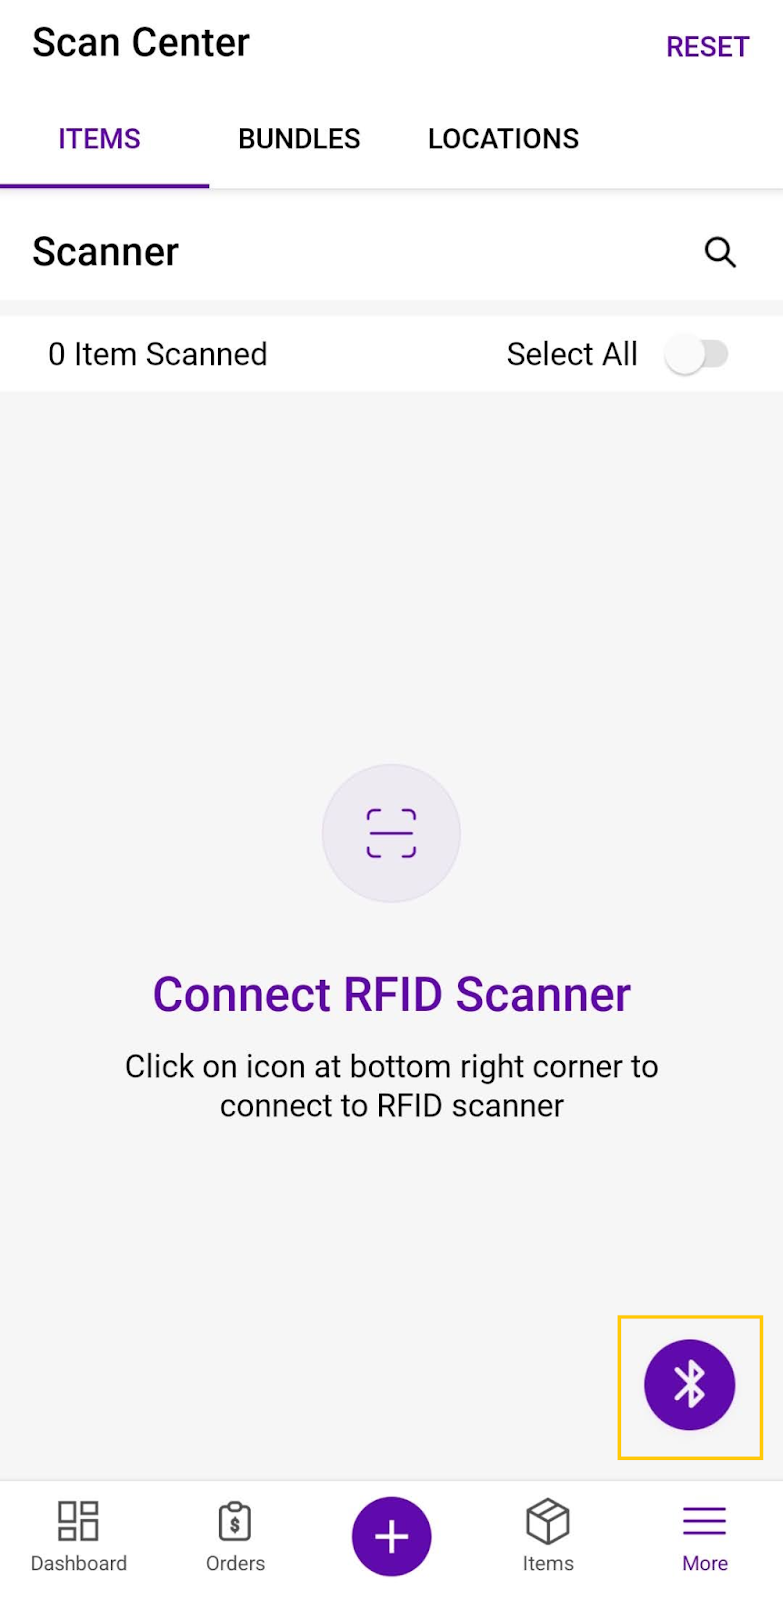
- In the Scan Center screen, tap the Bluetooth icon and select the connected scanner from the list.

- Once paired, return to the app to begin scanning.
3. Scan RFID Tags on Android Devices
- Turn on your RFID scanner.
- Open the EZRentOut mobile app (Android).
- Go to More → Scan Center.
- In the overlay, select TSL RFID Scanner.

- On the Scan Center screen, pair your scanner with the app by clicking on the Bluetooth icon and selecting the relevant scanner.
- You may now start scanning items.
4. Understand TSL 1128 Scanner Behavior
The TSL 1128 is a dual reader with two scan modes:
- Long-press trigger → Scan RFID tags
- Double-press trigger → Scan barcodes
All scanned items appear instantly on-screen.

Note: Tags not available in the system will appear at the bottom of the screen. Users also have the option to create new items against those.
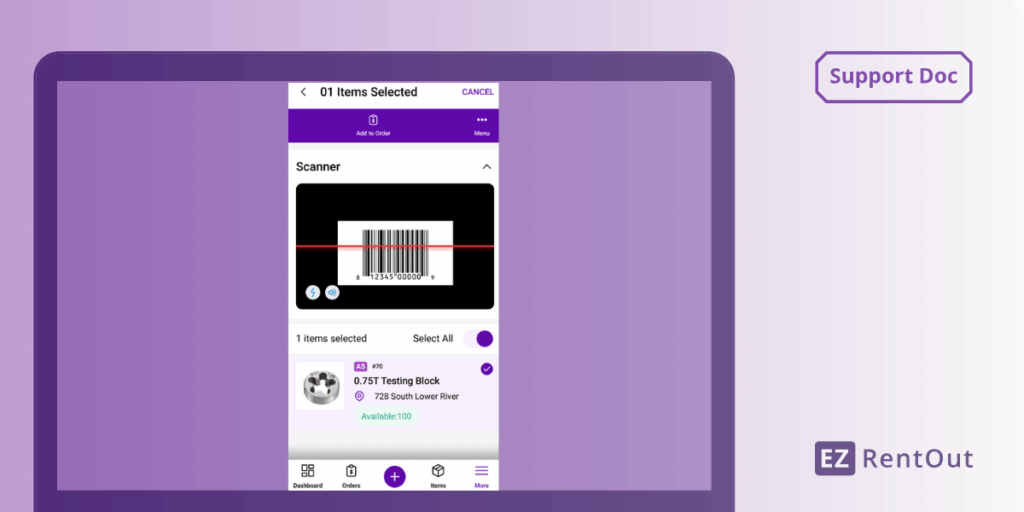
5. Take Action on Scanned Items
After scanning, when the item is selected, you see the option to Add to Order as displayed below:
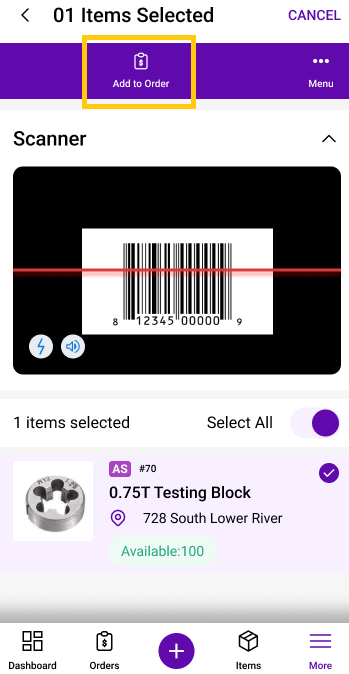
You may also expand a detailed action menu by clicking on the Ellipses (…) Menu button.
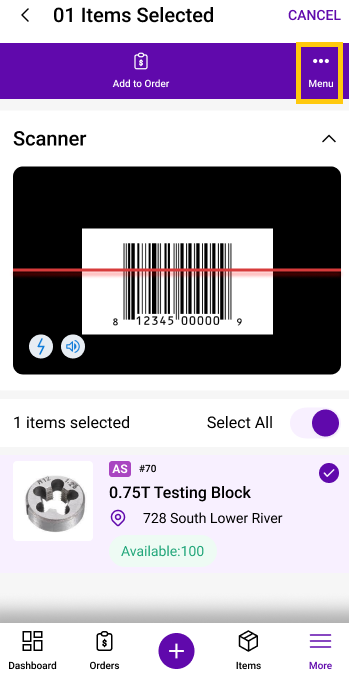
You will see the following additional actions:
Service
- Start Service
- Extend Service
- Schedule Service
- End Service
Update All Items
- Add to Purchase Order
- Add to Work Order
- Edit
- Retire

Ready to Accelerate Equipment Processing?
With EZRentOut’s RFID integration, you can streamline equipment scanning, reduce manual workload, and improve operational accuracy — whether you’re checking gear in and out, validating custody, or prepping for dispatch.
Need help getting started? Contact us at support@ezo.io — we’re here to help.


