

Rental workflows often involve orders, recurring billing, payments, taxes, customers, and invoices that also need to be reflected in your accounting system. If your team uses QuickBooks Online, EZRentOut helps you sync rental transactions so your operational and accounting records stay aligned.
With the QuickBooks Online integration, you can sync EZRentOut orders as invoices, sync payments, import customers, map taxes, and keep order activity updated between both systems.
This guide walks you through connecting QuickBooks Online with EZRentOut, mapping your accounts, syncing orders, payments, taxes, customers, and locations, and reviewing sync status.
EZRentOut also supports QuickBooks Desktop. You may refer to the QuickBooks Desktop Integration blog for that workflow.
1. Connecting to QuickBooks Online with EZRentOut
To start, connect your QuickBooks Online account with EZRentOut.
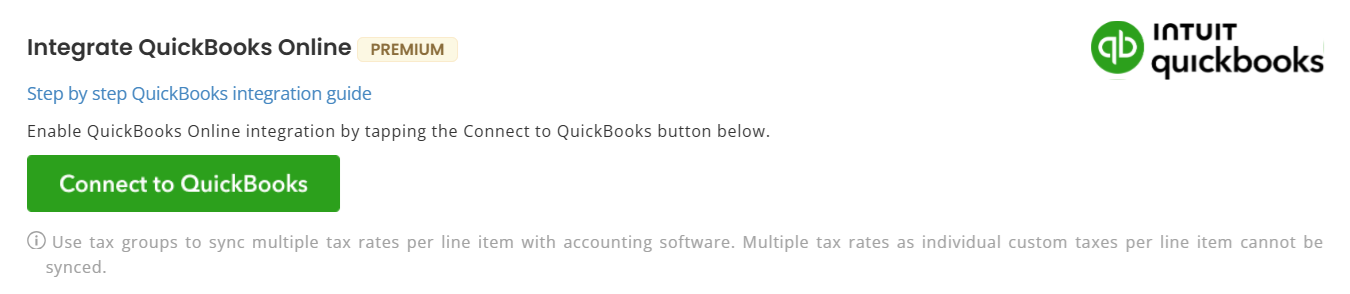
1. From your EZRentOut account, go to Settings → Add Ons → Integrate QuickBooks Online.
2. Click Connect.
3. The Intuit App Center pop-up will appear. Click Connect to allow Intuit to securely share your QuickBooks data with EZRentOut.
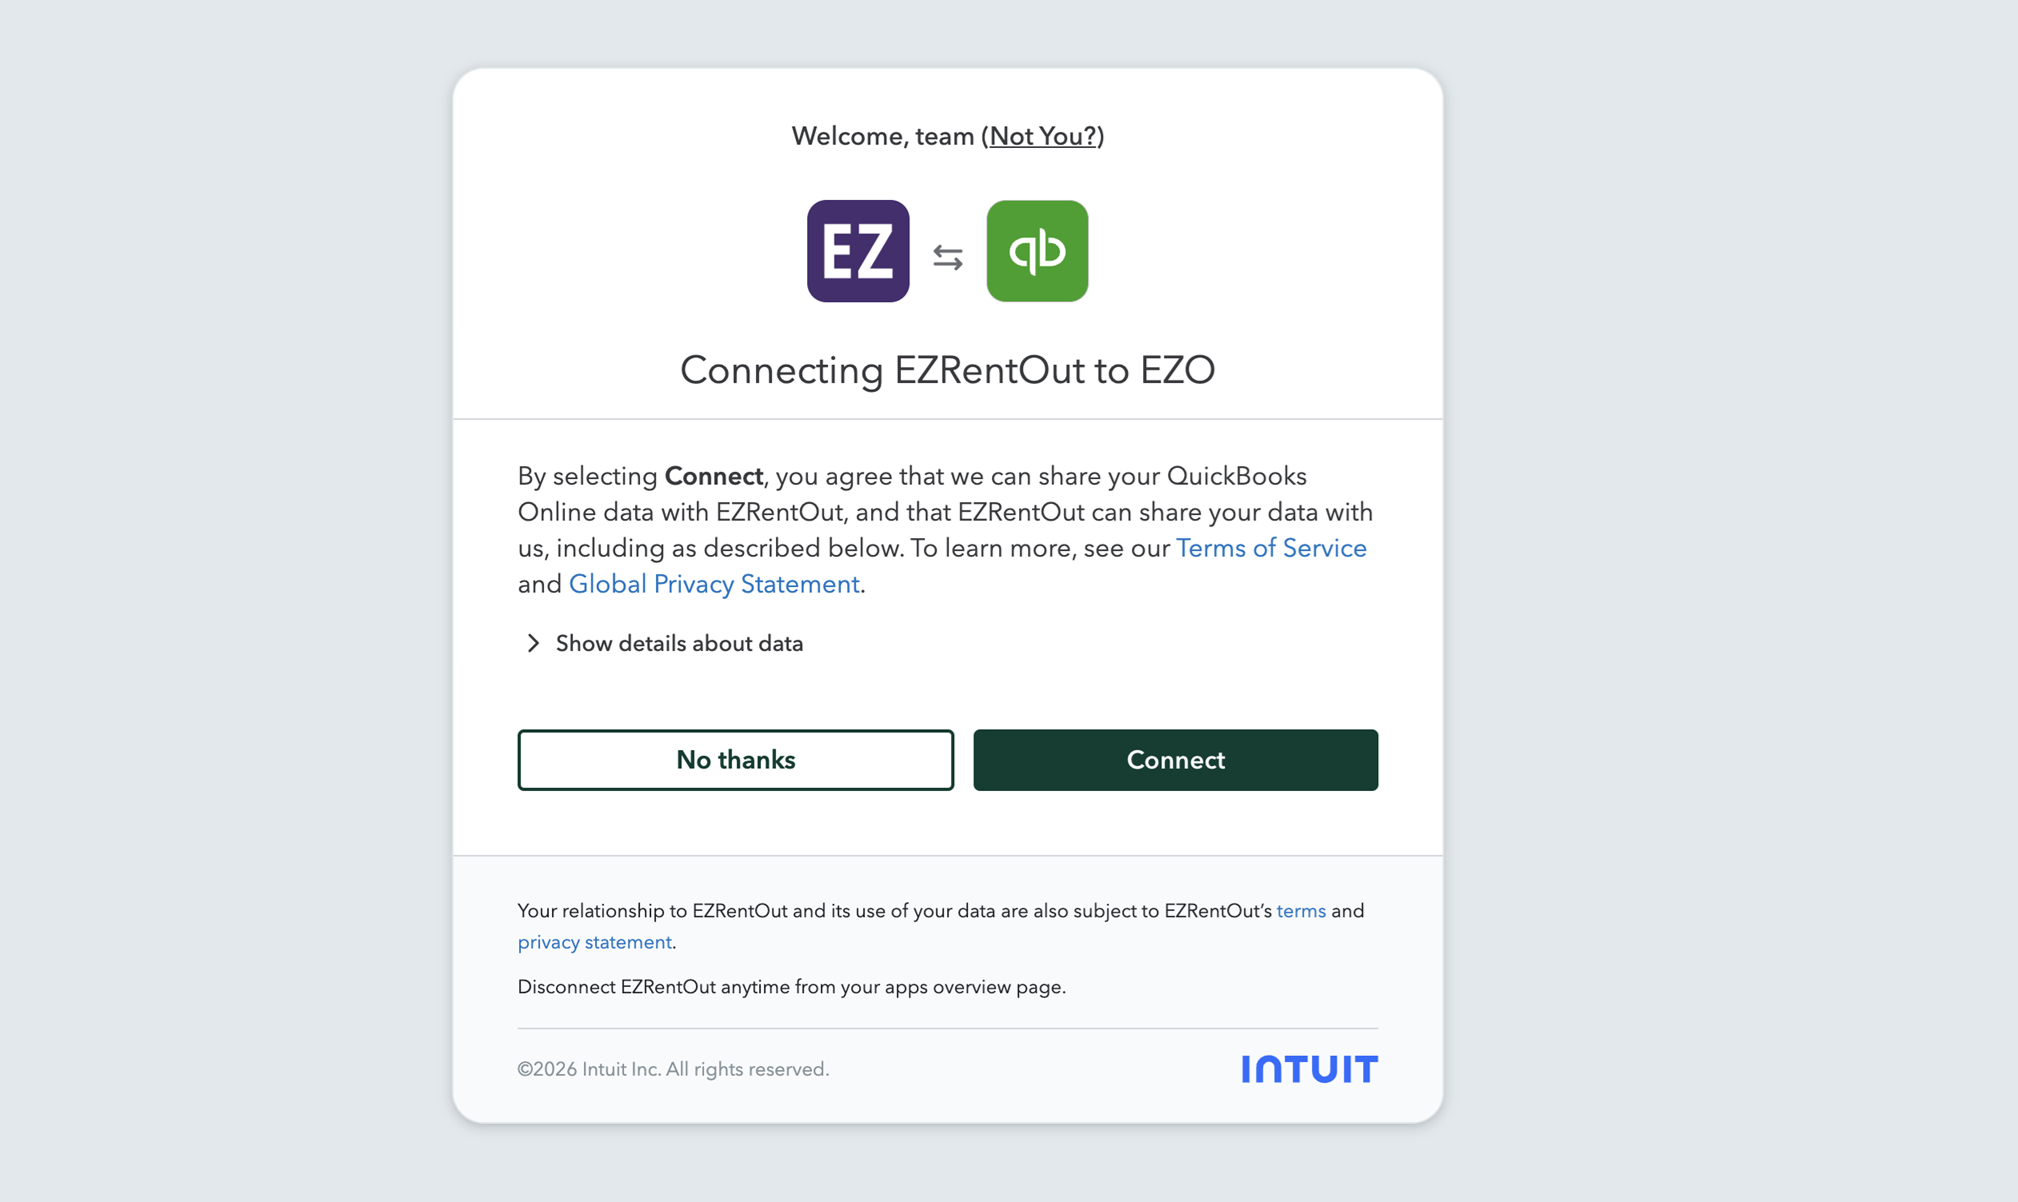
Once authorized, EZRentOut will connect with QuickBooks Online.
Note: This process is quicker if you are already signed in to QuickBooks Online before starting the connection.
4. After signing in, specify the Chart of Accounts for Sales, Payments, and Items.
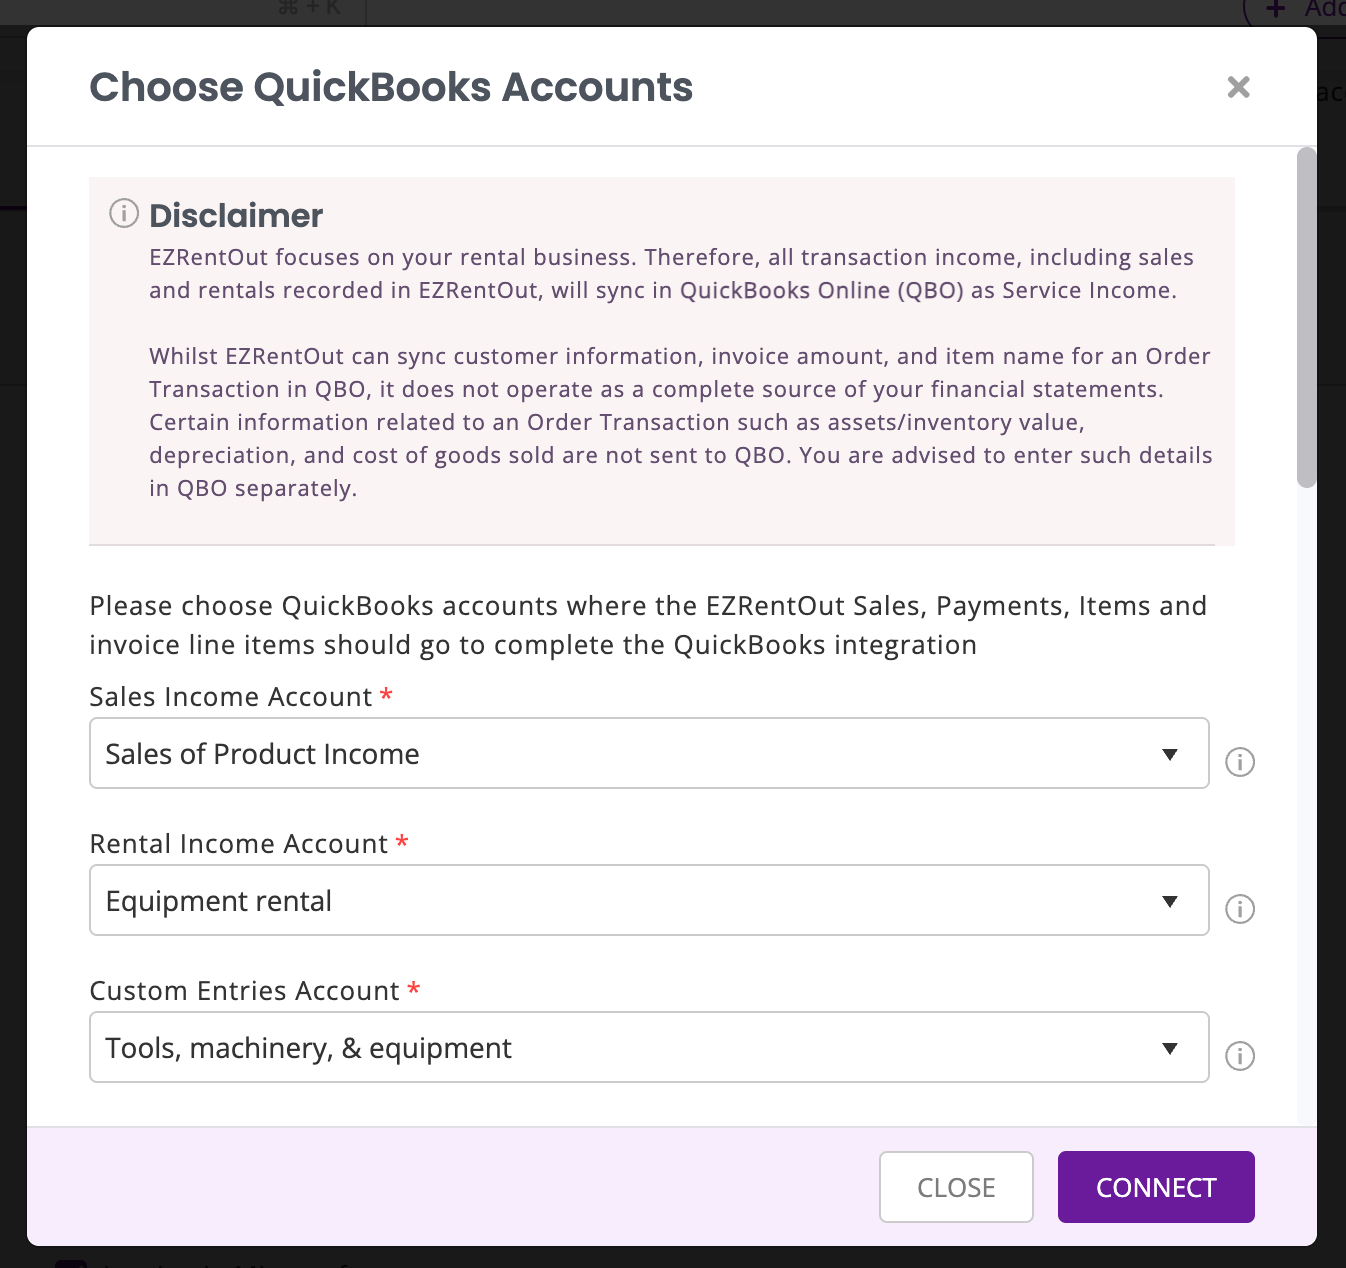
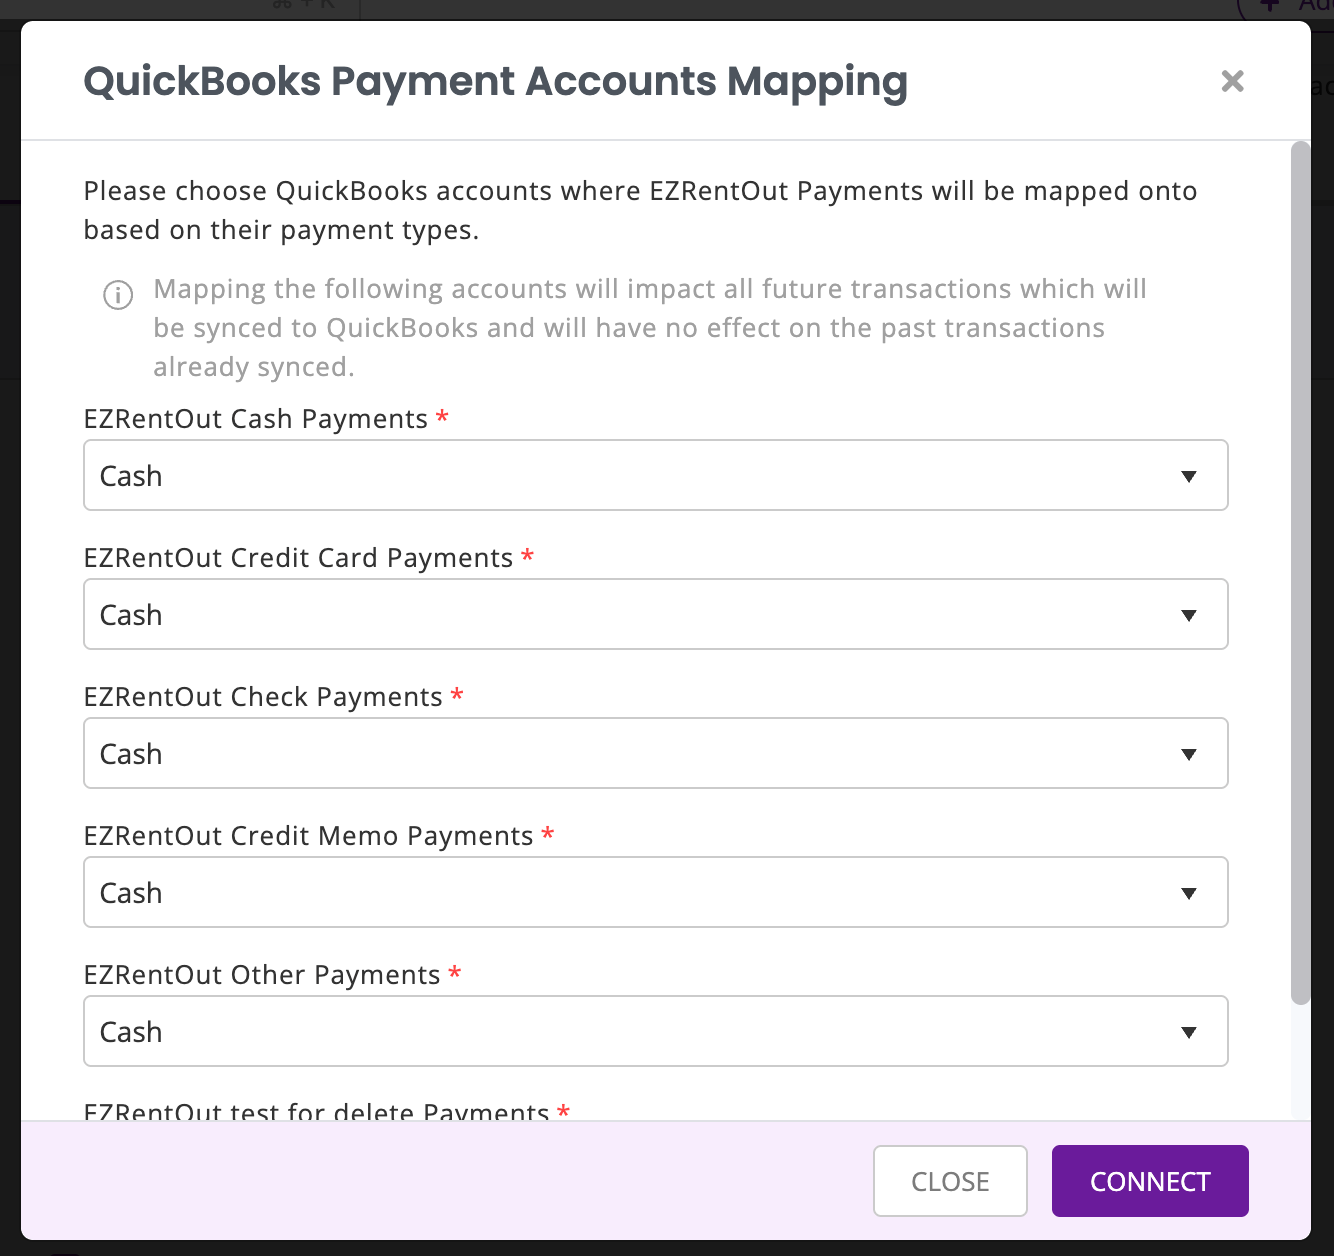
These mappings decide where EZRentOut transactions appear in QuickBooks Online. For example, rental income from EZRentOut can be mapped to the relevant income account in QuickBooks Online. Most businesses configure these mappings once during setup and only update them if their accounting structure changes.
2. Understand How EZRentOut Data Maps to QuickBooks Online
EZRentOut manages rental and sale transactions through Orders. These Orders sync to QuickBooks Online as invoices.
Here is how key records map between the two systems:
| EZRentOut | QuickBooks Online |
| Items | Services |
| Orders | Invoices |
| Customers | Customers |
| Businesses | Customers |
| Payments | Payments |
| Custom entries | Service items |
| Discounts | Service items |
| Damages | Service items |
| Late fees | Service items |
| Taxes | Taxes |
EZRentOut items are created as services in QuickBooks Online. Orders are synced as invoices, and payments can sync between both systems depending on your enabled settings.
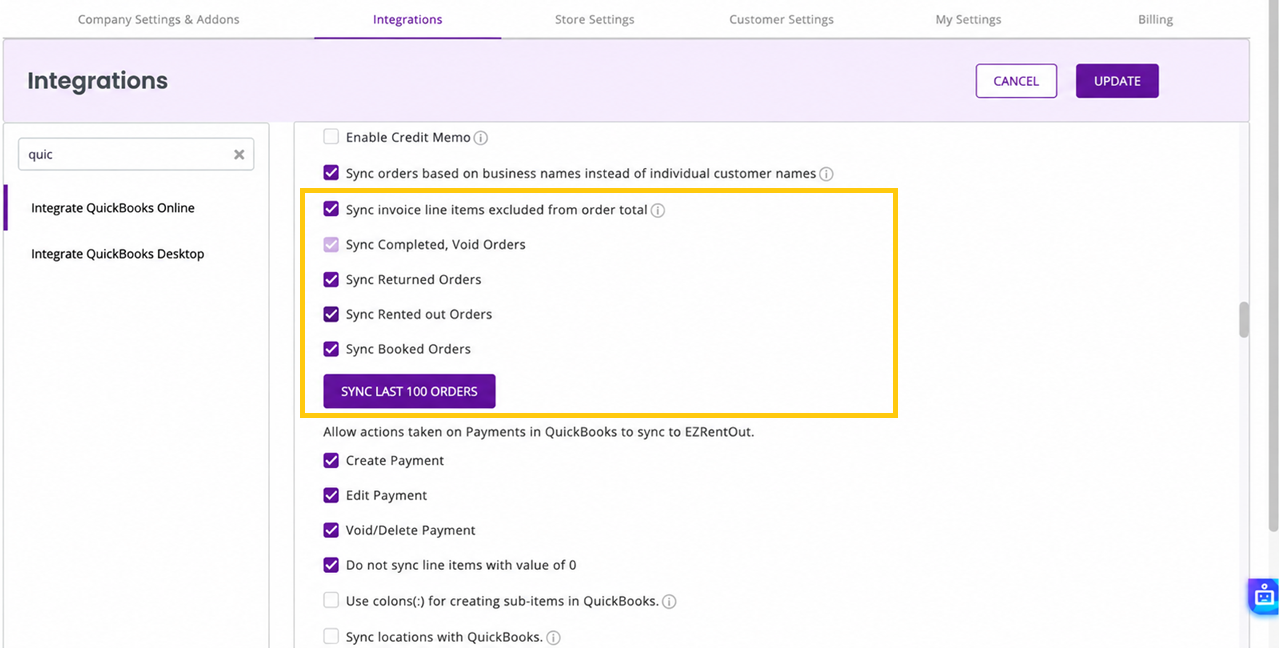
You set automated syncing for completed and void orders, returned orders, rented out orders, and booked orders.
3. Import Customers from QuickBooks Online
You can import customers from QuickBooks Online into EZRentOut.
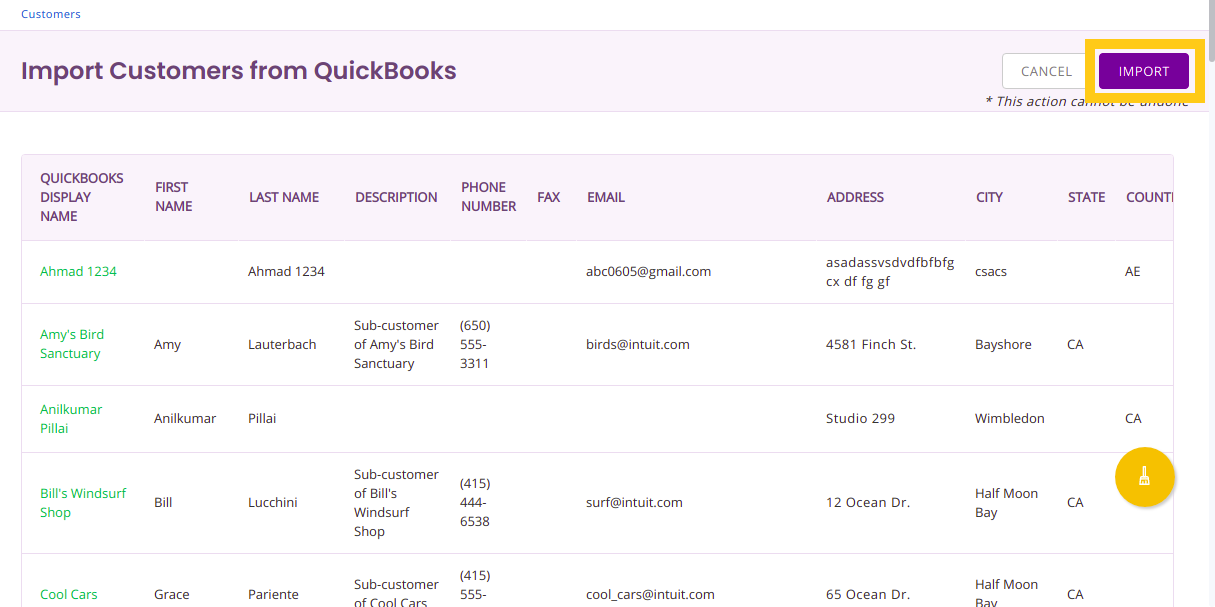
Go to Customers in EZRentOut and click Import Customers, and then select Import From QuickBooks.

EZRentOut will show the customers available for import from QuickBooks Online. Click Import to bring them into EZRentOut.
Once QuickBooks Online is enabled, a QuickBooks Display Name field is available for customers in EZRentOut. This display name is used to match customers between EZRentOut and QuickBooks Online.
If you have not added a display name for a customer in EZRentOut, the field is auto-filled using the customer’s first and last name before sync.
Whenever you rent out an Order in EZRentOut, a new customer can also be created in QuickBooks Online if that customer does not already exist there.
4. Sync EZRentOut Orders as QuickBooks Online Invoices
EZRentOut Orders sync to QuickBooks Online as invoices. You can choose when EZRentOut should sync order information with QuickBooks Online, depending on your workflow. For example, you may choose to sync invoices when an Order is booked or rented out.
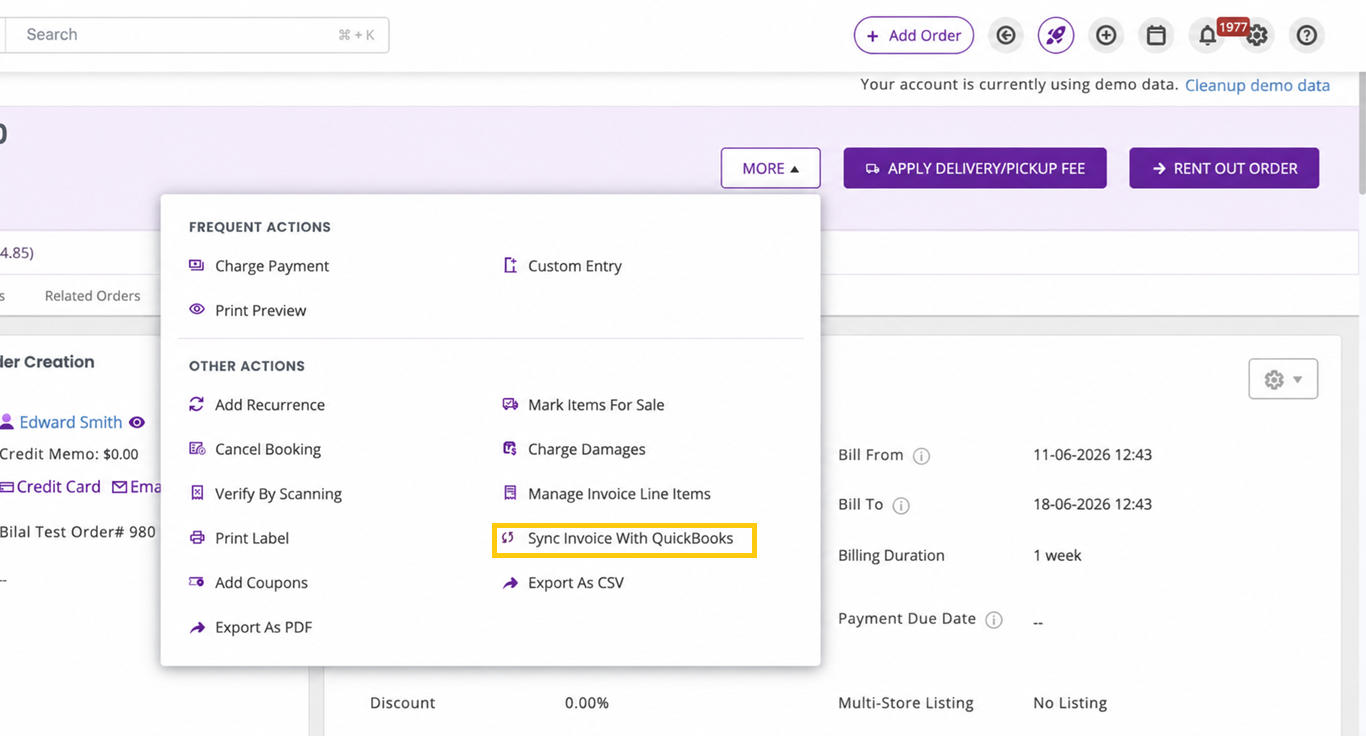
You can also manually sync an Order from the Order details page. Go to Orders → Select Order → More → Sync Invoice with QuickBooks.
Once synced, the Order appears in QuickBooks Online as an invoice. Customer details, billing address, order dates, line items, taxes, discounts, and payments are reflected based on your mapped settings.
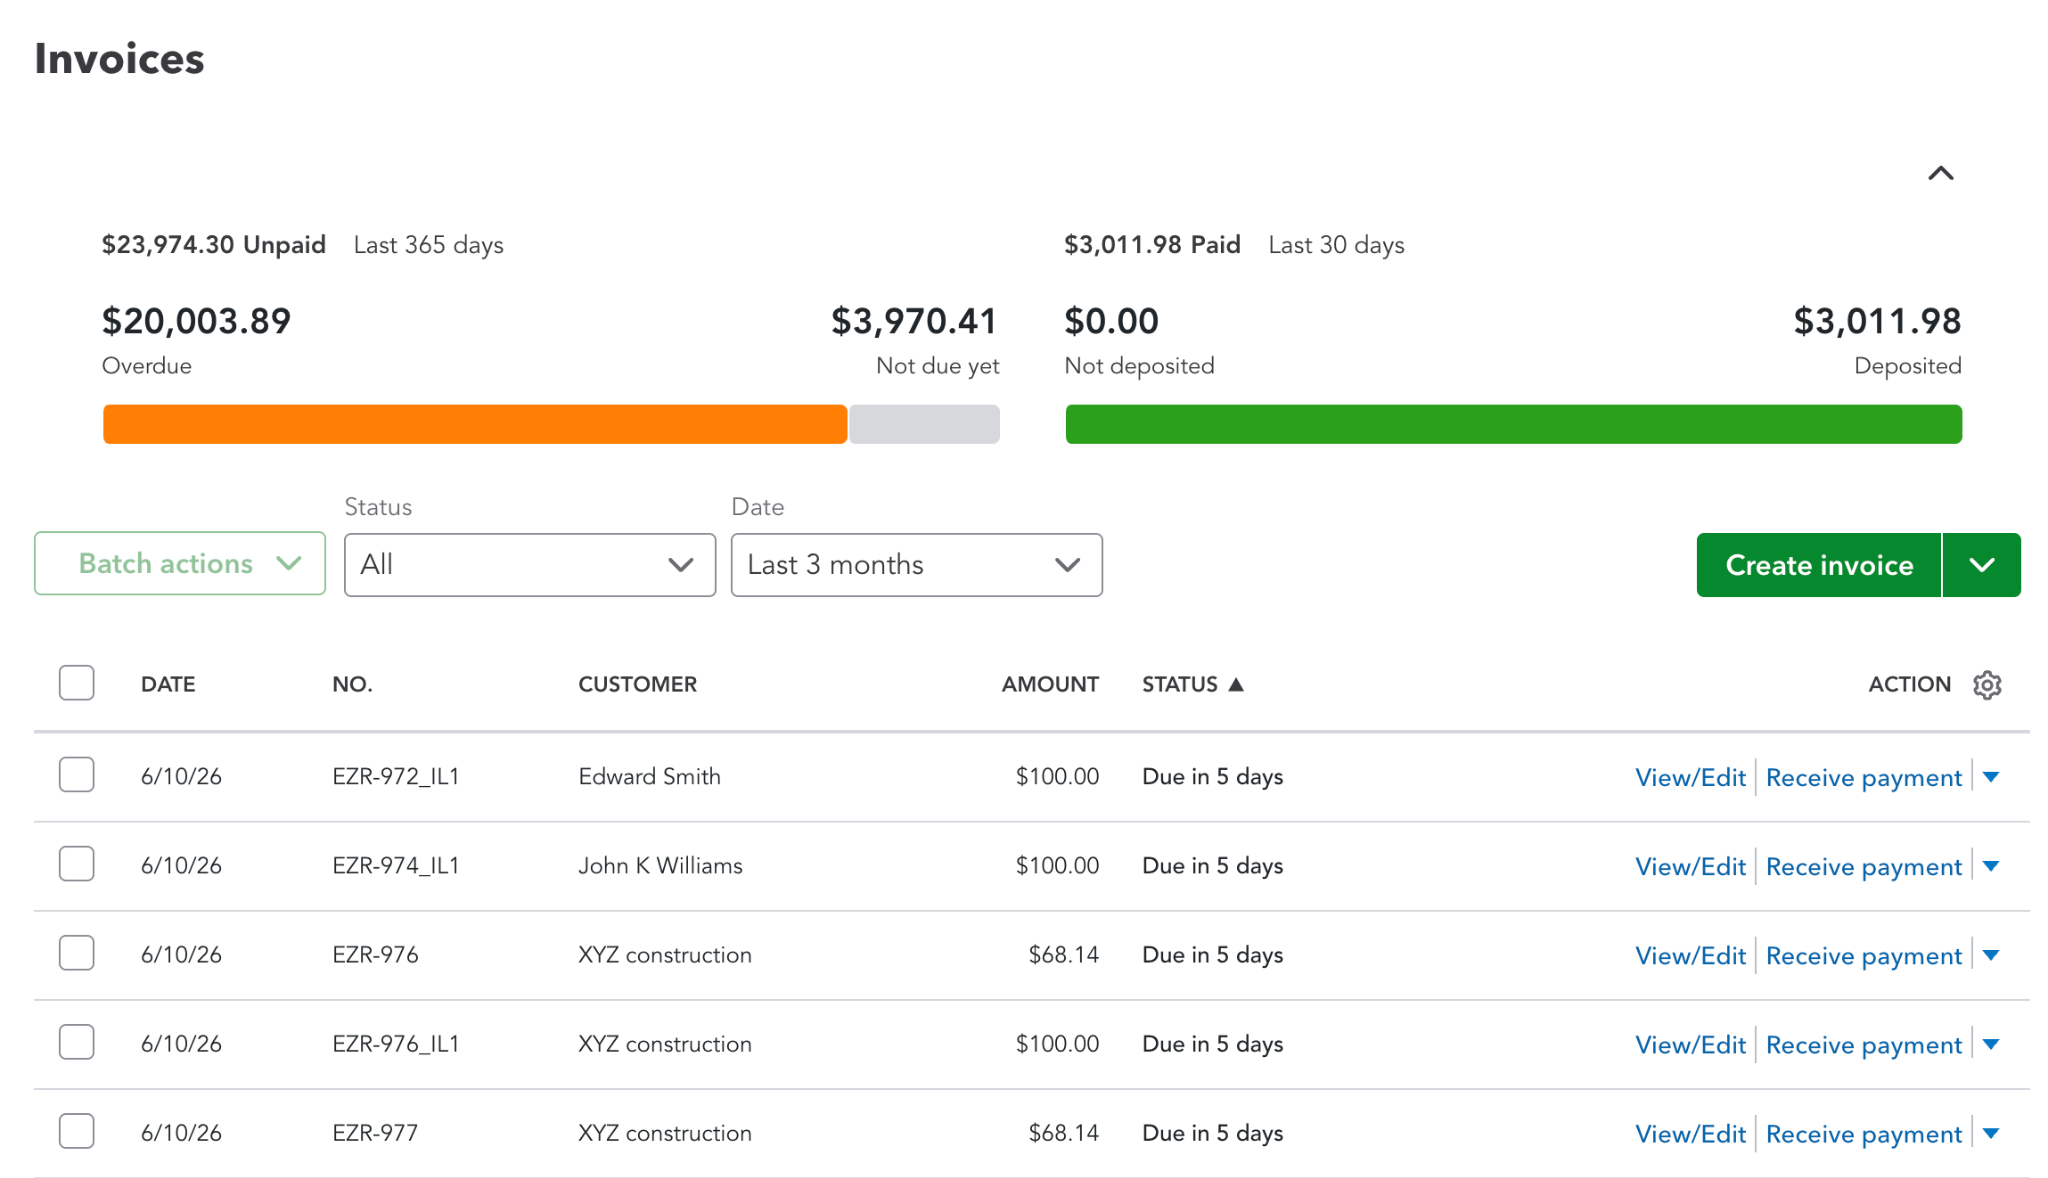
Most order and invoice information syncs from EZRentOut to QuickBooks Online. Payments and taxes can also sync back from QuickBooks Online.
5. Sync Payments Between EZRentOut and QuickBooks Online
Payments can be recorded in either EZRentOut or QuickBooks Online, depending on your workflow.
If you charge a payment in EZRentOut, it can sync to QuickBooks Online against the related invoice.
If you collect a payment in QuickBooks Online, such as through credit card, bank transfer, check, or another payment method, that payment can sync back to EZRentOut. To do that you can enable the following setting from Settings → Add Ons → Integrate QuickBooks Online.
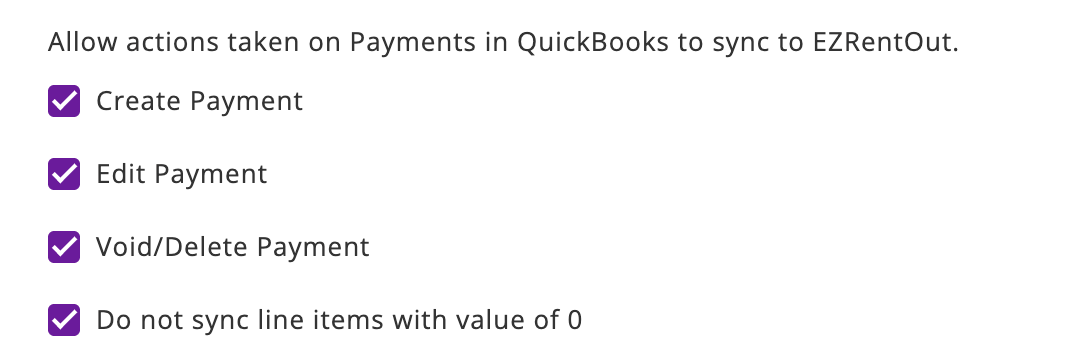
This helps your rental and accounting teams stay aligned without manually updating payment records in both systems.
6. Sync Taxes from QuickBooks Online
You can use QuickBooks Online to calculate and sync taxes for EZRentOut Orders.
Go to Settings → Add Ons → Integrate QuickBooks Online and check Sync Taxes From QuickBooks.
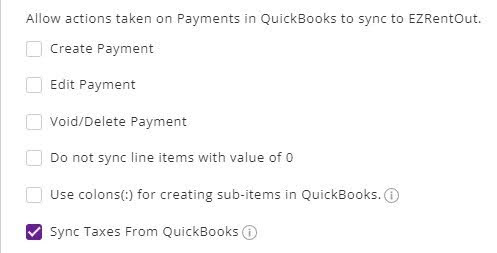
Click Update to save your changes.
When this setting is enabled, EZRentOut can pull tax information from QuickBooks Online for customer invoices.
If changes are made to an Order after taxes have been synced, you can sync the taxes again manually. Go to Orders → Select Order → More → Sync Invoice with QuickBooks.

This removes the taxes currently applied to the Order in EZRentOut and syncs the tax again from QuickBooks Online.
If a tax exists in EZRentOut but not in QuickBooks Online, you may see an error such as Tax not found, please create it on QuickBooks Online or Tax not found, click here to create.
For a successful tax sync, make sure the tax names and rates are consistent across both platforms.
7. Sync Order Locations to QuickBooks Online
You can also sync EZRentOut Order locations to QuickBooks Online locations.
In EZRentOut, go to Settings → Add Ons → Integrate QuickBooks Online and check Sync locations with QuickBooks.
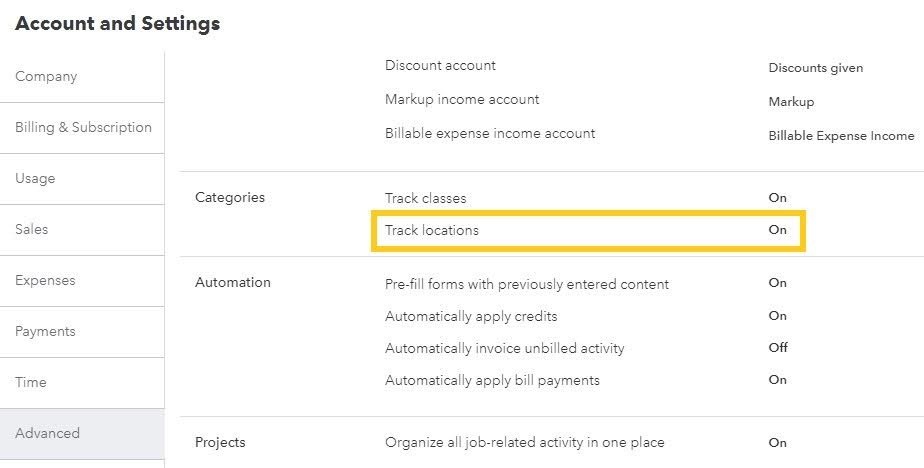
In QuickBooks Online, go to Settings → Account and Settings → Advanced and enable Track Locations.
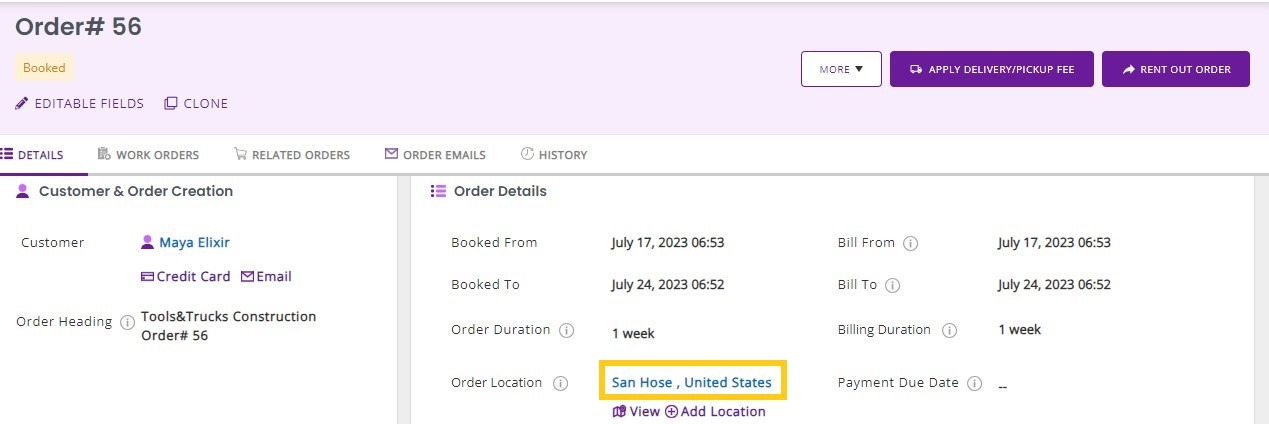
Once enabled, add the relevant location to the EZRentOut Order.
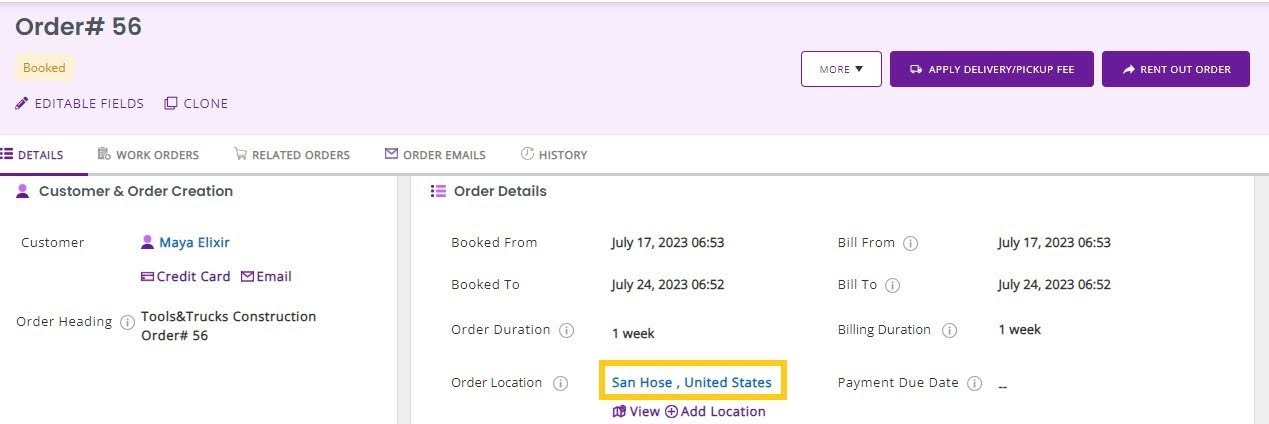
The location can then sync to the location field on the QuickBooks Online invoice.
Note: The same location names should exist in QuickBooks Online for locations to sync correctly from EZRentOut.

8. View Sync Status and History
EZRentOut shows sync status and history for QuickBooks Online transactions.
To view sync history for an Order, go to Orders → Select Order → History.
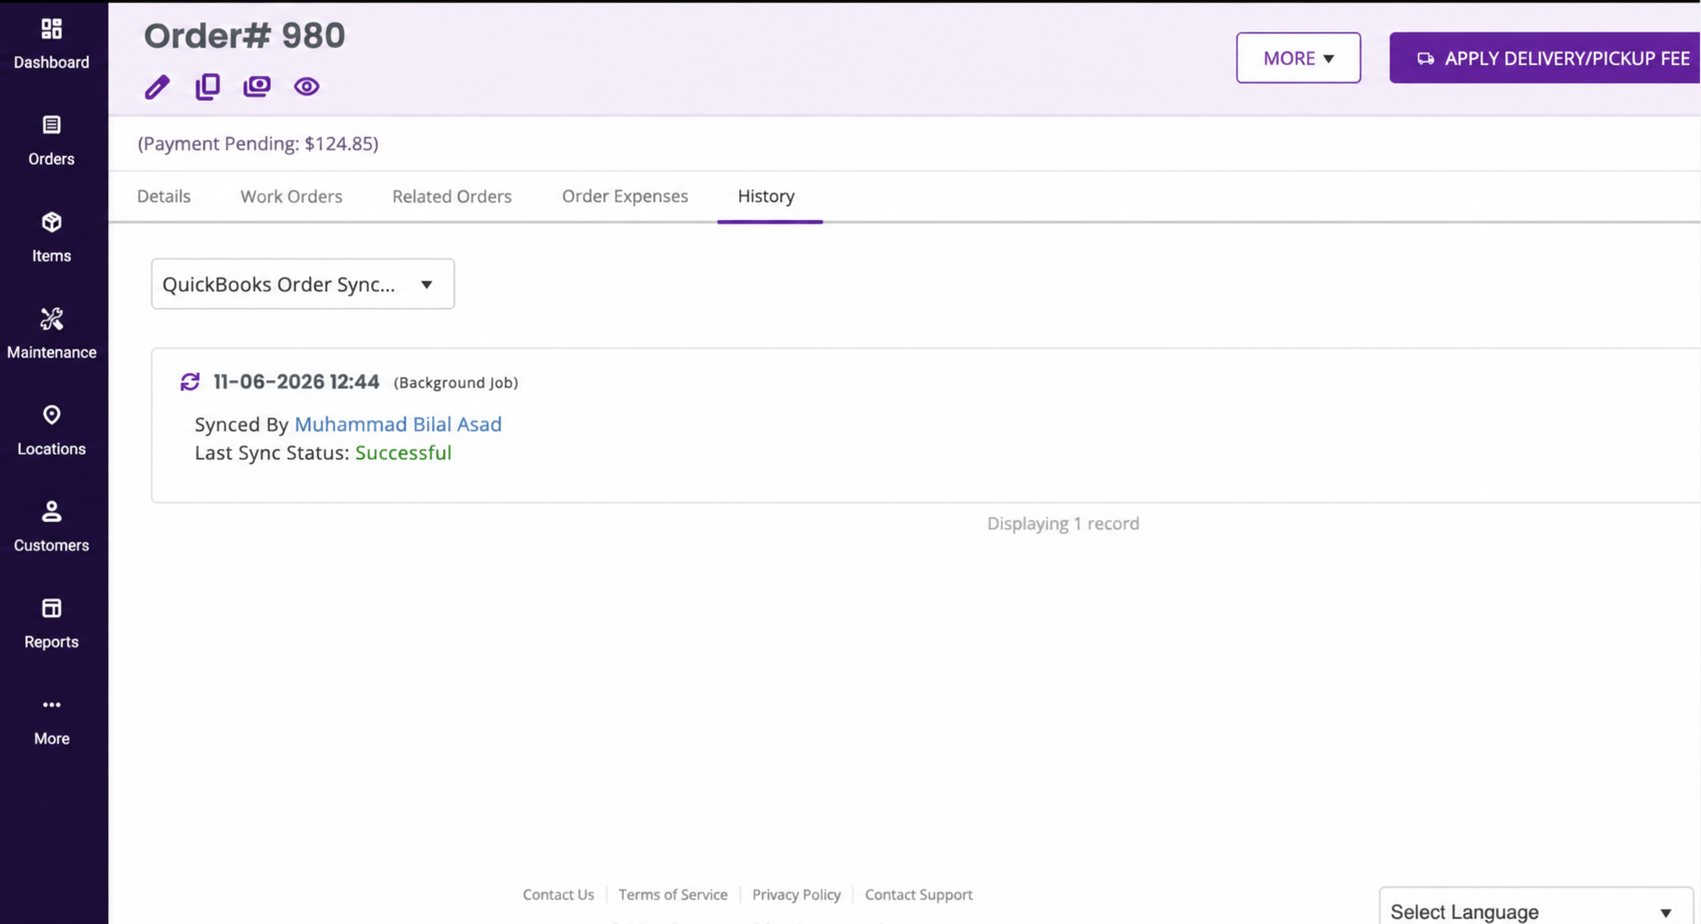
Here, you can review whether the Order synced successfully with QuickBooks Online. If the sync fails, EZRentOut shows the failure reason so you can troubleshoot the issue.
On the Order listings page, you can also add QuickBooks-related columns.
Go to Orders and click the Customization icon on the right side of the table. Add columns such as:
- QuickBooks Online Synced At
- Last Sync Status
- Payment Last Sync Status
You can also apply the Order sync status filter to view Orders that were successfully synced, failed to sync, or were not initiated for syncing with QuickBooks Online.

QuickBooks sync details are also available in Reports → All Orders and can be added manually to custom reports based on your requirements.
Keep Rental and Accounting Records Aligned
The QuickBooks Online integration helps you manage rental operations in EZRentOut while keeping your accounting records updated in QuickBooks Online. By syncing orders, invoices, payments, taxes, customers, and locations, your team can reduce duplicate entry and keep both systems aligned.
Need help setting up QuickBooks Online with EZRentOut? Reach out to support@ezo.io.


