


EZRentOut offers a webstore plugin that integrates your account with Shopify, simplifying your rental management process. You can list your rental items on Shopify and track them in EZRentOut simultaneously. This helps increase the visibility of your items and enhances customer convenience.
If you’re already using Shopify for orders, you can integrate it with EZRentOut to avoid using multiple systems and web stores for order placement and item tracking. Here’s how you can do that:
1. Enabling the Shopify Plugin
Enable the Shopify plugin from the settings to integrate it with EZRentOut seamlessly. Navigate to Settings → Store Settings → Webstore Plugin → Enabled. Hit ‘Update.’

2. Setting up the Plugin
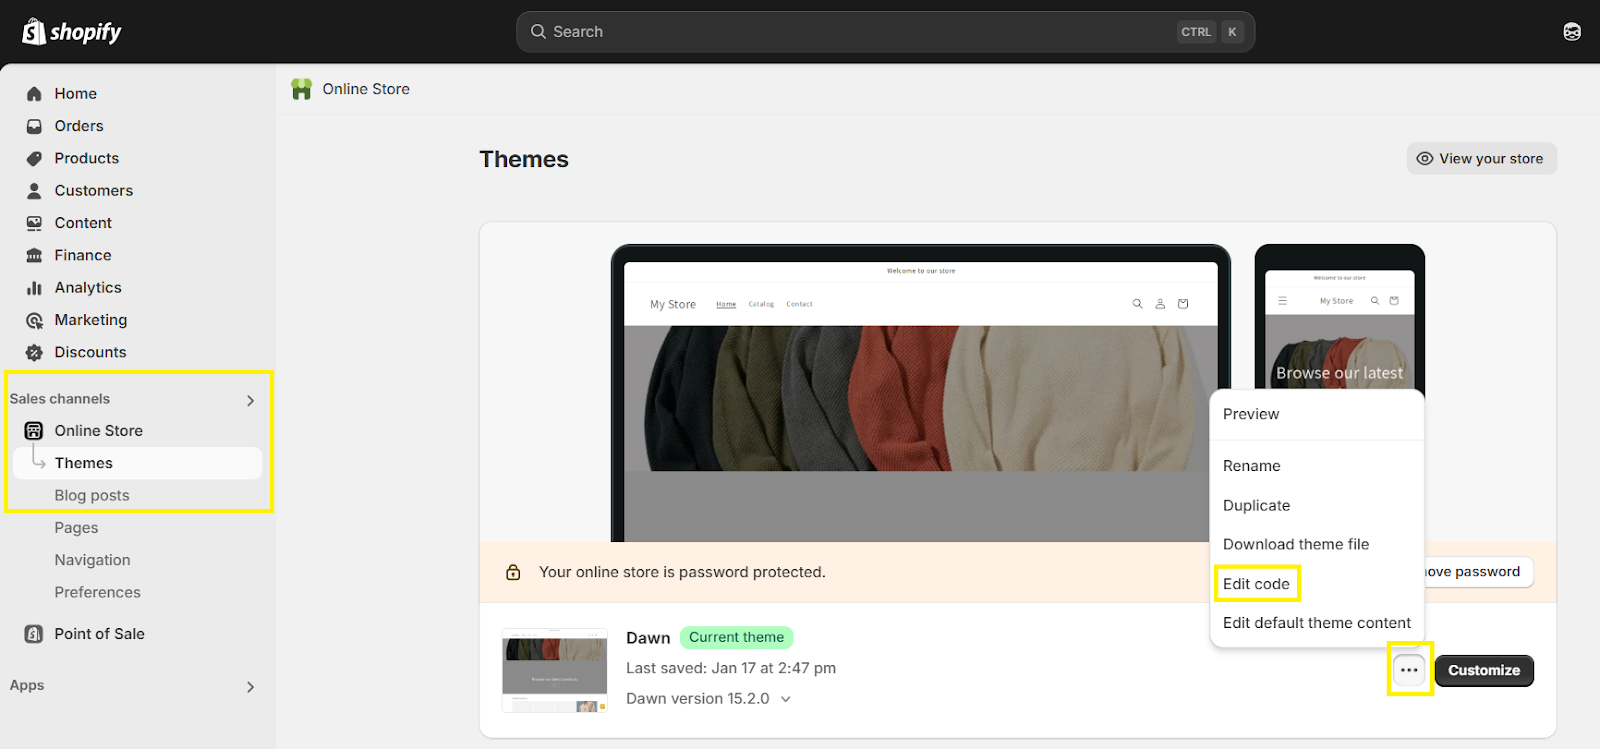
2.1 Once you have enabled the plugin, open your Shopify Admin account and navigate to Sales Channels → Online Store → Click ‘Themes.’ Look for the Actions button (three dots) from here and select ‘Edit Code.’
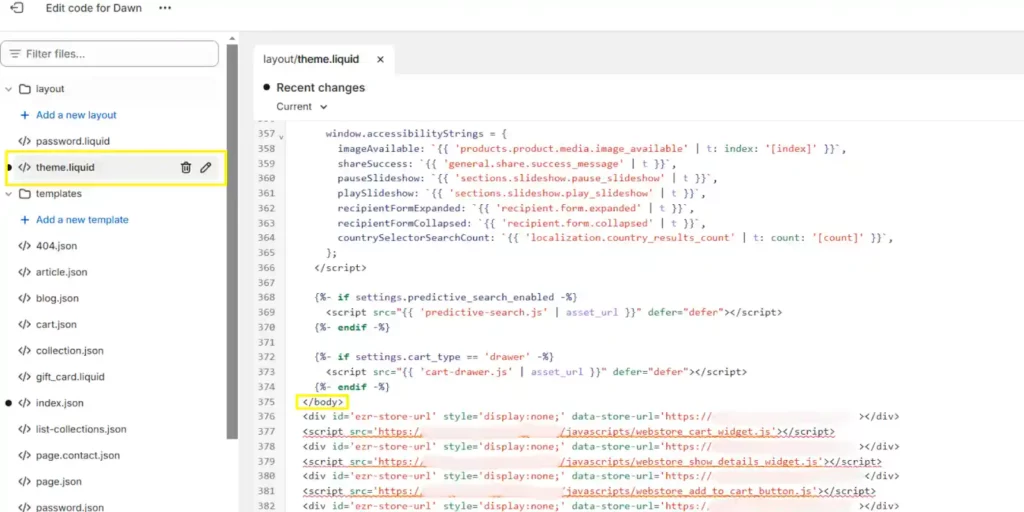
2.2 To add the Webstore Plugin(s) to every page, find and open the theme.liquid file on Shopify. Scroll down the file to find the </body> tag. Copy/paste the relevant action codes from your EZRentOut account after the </body> tag. You can find these codes by going to Settings → Store Settings → Webstore Plugin.
Note: EZRentOut enables you to add the following actions to your Shopify store, and each has a unique code for easy integration:
- Add to Cart
- Add to Cart by Name
- Availability Calendar
- Item Detail
- Item Detail (Grouped by Name)
Hit ‘Save.’
3. Linking Items
3.1 The next step is to link your items in EZRentOut with those in Shopify for a smooth rental experience.
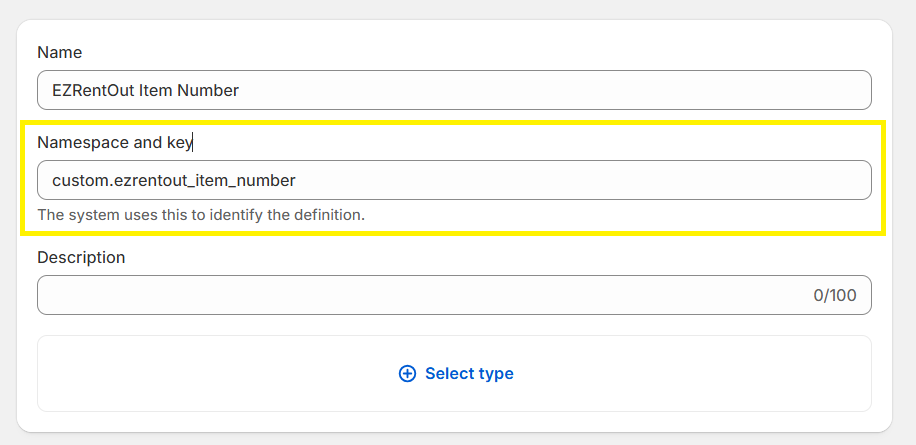
To do so, first create a metafield in Shopify using this guide. A metafield will allow you to map your asset’s identification number in Shopify to track the same asset in EZRentOut.
Make sure you save the ‘Namespace and key’ while creating your metafield.
Once you have created the metafield, it will appear on your product creation page like this:
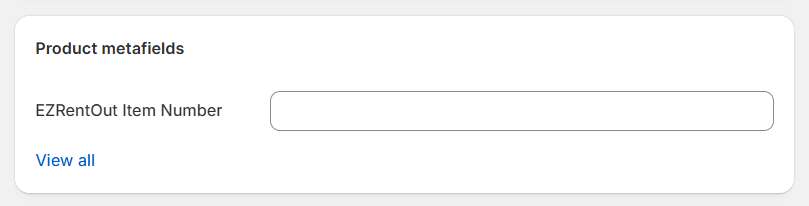
Once you have created the metafield, enter your asset’s identification number from EZRentOut into the field and ensure the item number in Shopify is the same as the asset’s AIN in EZRentOut.
3.2 Hide the preexisting buttons for the actions you enable on Shopify in conjunction with EZRentOut. Go to the relevant page and click the action button to do so. There, you will get the option to disable the button.
Next, copy-paste the code of the actions you want to show on Shopify for individual items from EZRentOut. In the following example, we will enable the Add to Cart button for individual items.
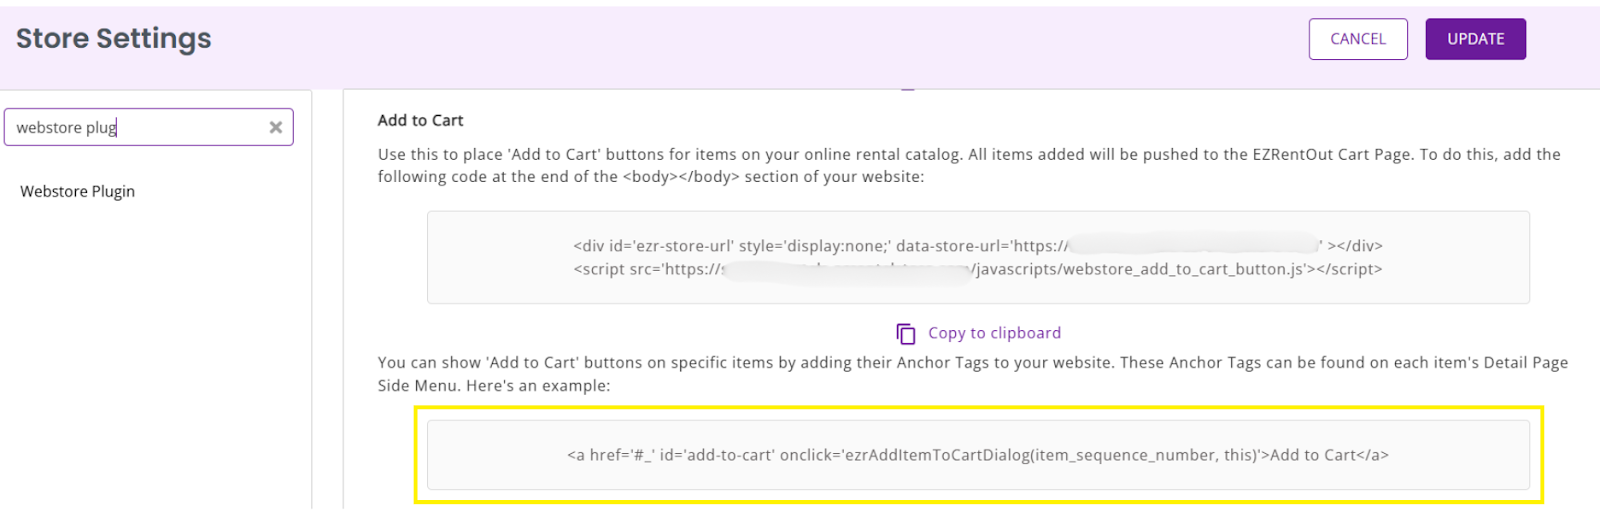
Replace item_sequence_number in the code with the ‘Namespace and key’ of the metafield you created earlier in Shopify. Here’s how you can format the code:
| {{product.metafields.NAMESPACE AND KEY}} |
Add the code you just formatted before ‘onclick’ in the code. Here’s how your complete code will look like:
| <a id=”add-to-cart{{ product.metafields.custom.ezrentout_item_number }}” onclick=”ezrAddItemToCartDialog({{ product.metafields.custom.ezrentout_item_number }}, this)” href=”#_”>Add To Cart</a> |
Go to the page you want to enable the button on → Create Custom liquid.
To create a new Custom Liquid, click on the plus ‘Add Block’ sign as shown below:
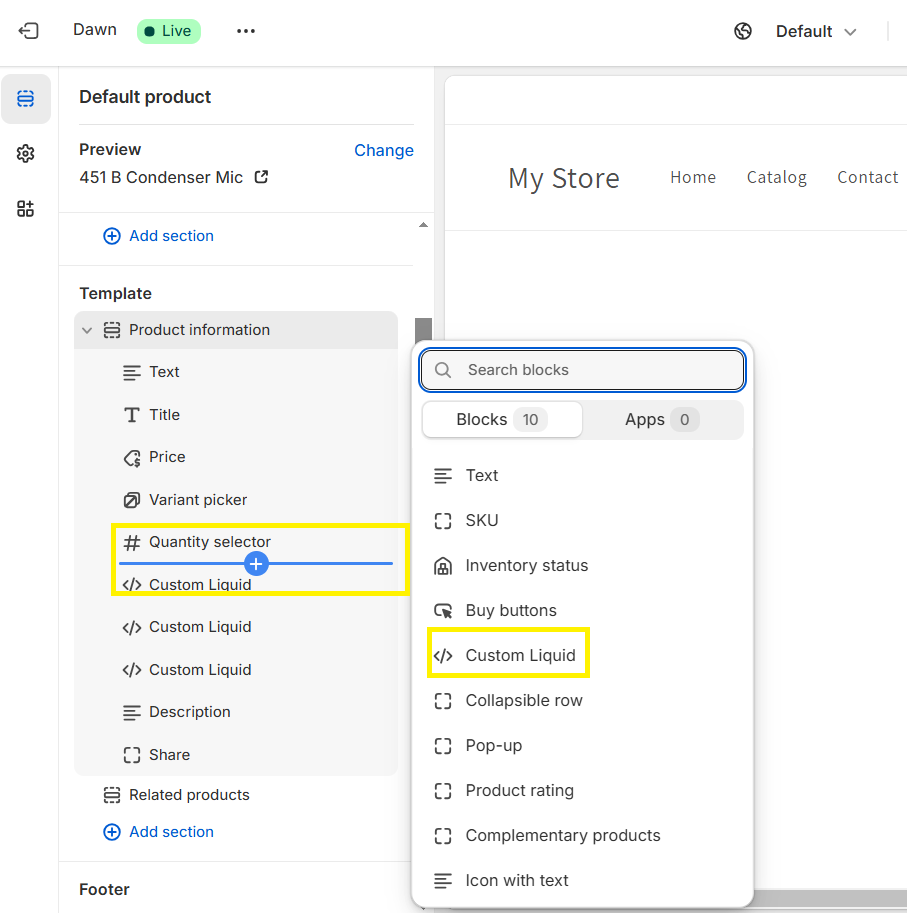
Copy/Paste the above code into the ‘Liquid code’ field.

This is how your product page will look in Shopify after inserting the code(s) from EZRentOut. In the following example, we enabled the Add to Cart, Availability Calendar, and Item Detail buttons on Shopify.
Note: You can format and style these buttons as per your preferences by altering the code as this is beyond the scope of this plugin.
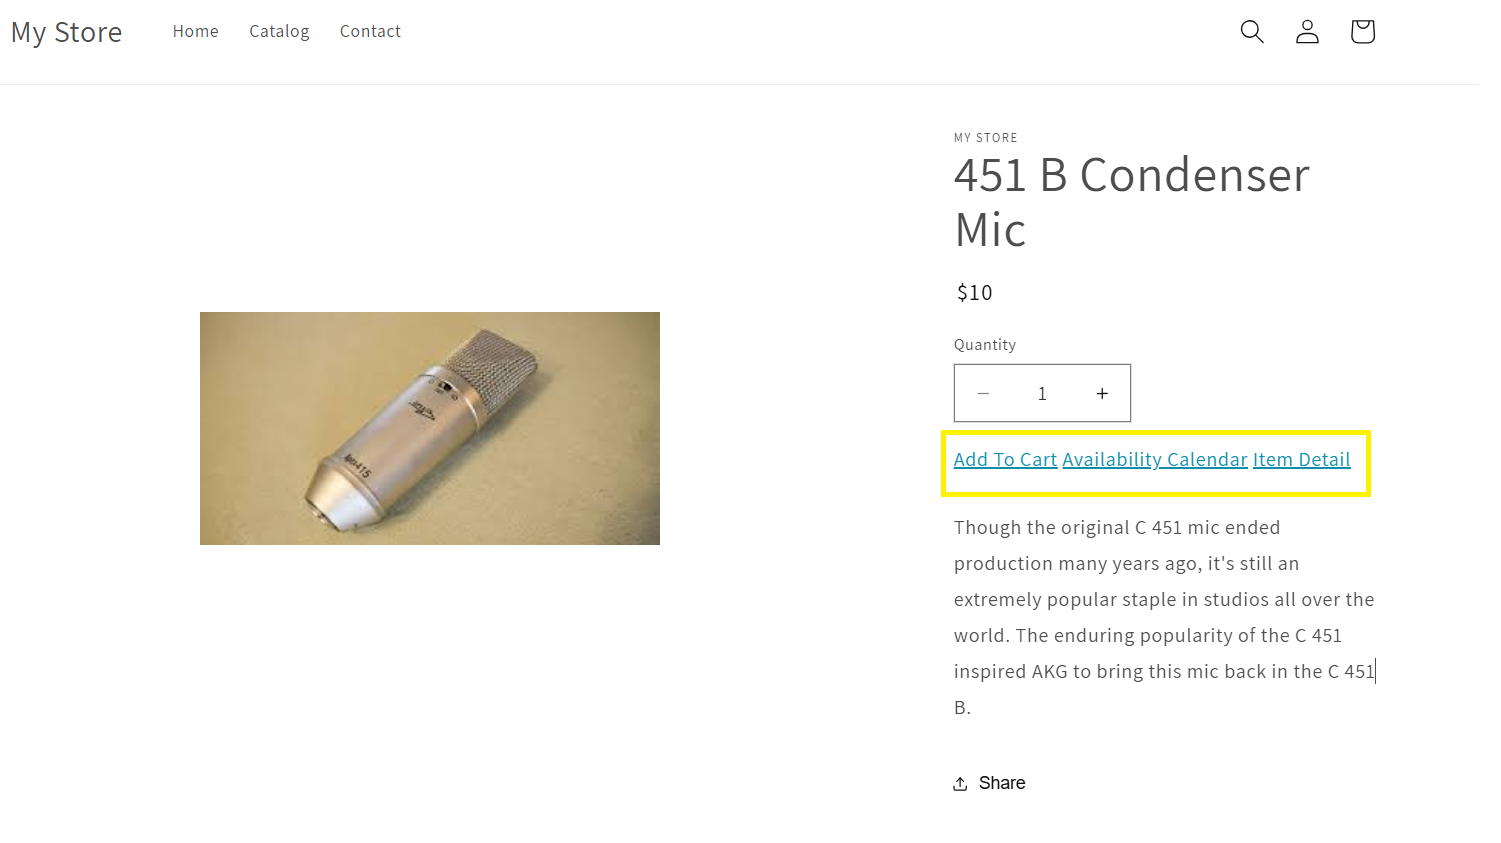
You can now effortlessly add items from EZRentOut to your Shopify cart, while easily checking their availability and details.
You will be taken to the EZRentOut store where you can complete the checkout process.
That’s it! You are set to use the Shopify plugin in EZRentOut — our rental asset management solution.

![[How-to] Integrate Square with EZRentOut](https://cdn.ezo.io/wp-content/uploads/2023/08/Support-Blog-Header-2.png)
![[How-to] Integrate Xero with EZRentOut](https://cdn.ezo.io/wp-content/uploads/2015/05/25094522/How-to-Integrate-Xero-with-EZRentOut.webp)
![[How-to] Integrate Sage Accounting with EZRentOut](https://cdn.ezo.io/wp-content/uploads/2023/10/Support-Blog-Header-Sage-Integration.png)


