

Credit adjustments are common in rental workflows. A customer may be overcharged, return equipment early, receive a refund, or need a billing correction after an invoice has already been shared. Instead of editing the original invoice, accounting teams often issue a credit memo so the customer’s credit can be tracked cleanly.
With EZRentOut’s QuickBooks Online integration, you can create credit memos in EZRentOut and sync them to QuickBooks Online. Once the credit is applied in QuickBooks Online, EZRentOut shows the applied and remaining credit so your rental and accounting teams can stay aligned.
This guide walks you through enabling credit memos, creating a credit memo, adding credit line items, syncing it with QuickBooks Online, and viewing applied and remaining credit in EZRentOut.
1. Enable Credit Memos for QuickBooks Online
Before you can create and sync credit memos, make sure your QuickBooks Online integration is enabled.
Go to Company Settings → Integrations → QuickBooks Online.
Check Enable Credit Memo.
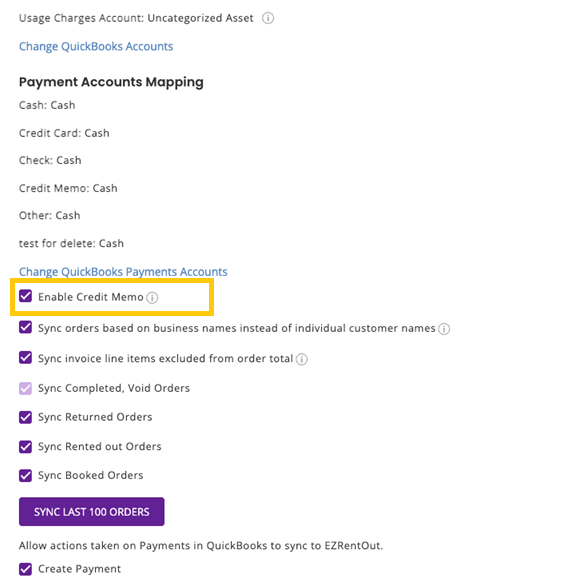
Click Update to save your changes.
Once enabled, the credit memo option will be available in EZRentOut for QuickBooks Online users.
2. Create a Credit Memo from Quick Actions
You can create a credit memo directly from the quick actions menu.
Go to the Quick Actions Menu → Create Credit Memo.
A pop-up will appear where you can search for a customer, contact, or business. Search by name, email, or phone number, then select the relevant record.
Once the business is selected, click Create to continue.
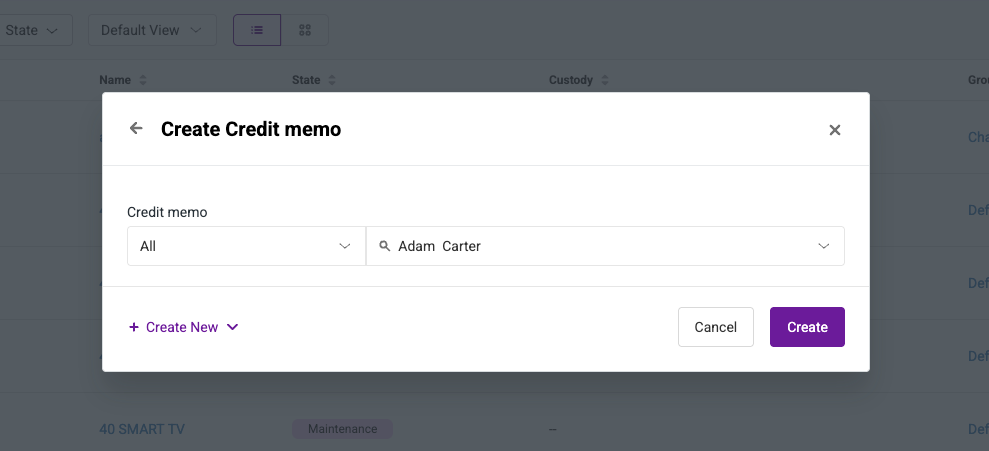
EZRentOut will open a new credit memo page where you can enter credit memo details and add line items.
3. Create a Credit Memo from the Customer Detail Page
You can also create a credit memo from a customer’s detail page.
Go to Customers → Individual/Business → Select Customer → Click Create.
This opens a new credit memo for the selected customer. If you create the memo from the customer detail page, the customer details are already selected.
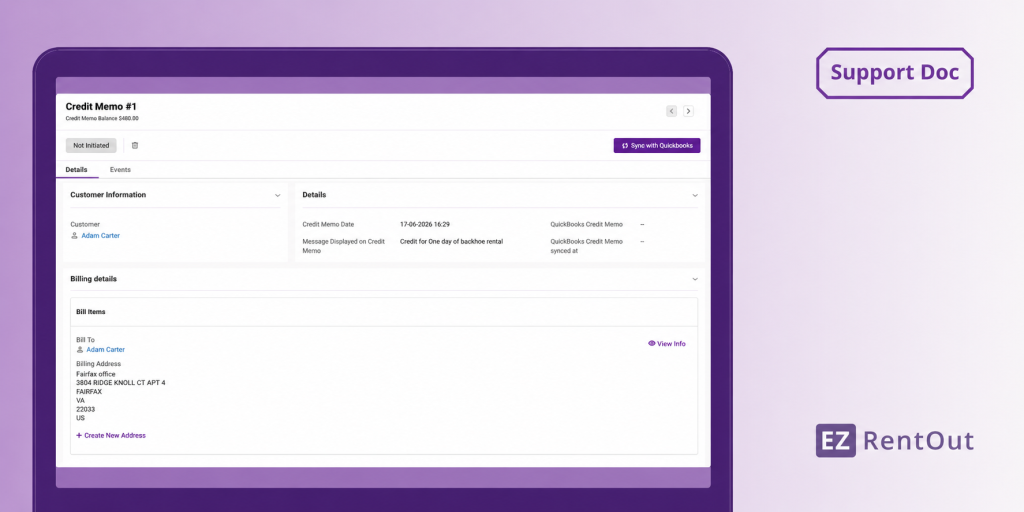
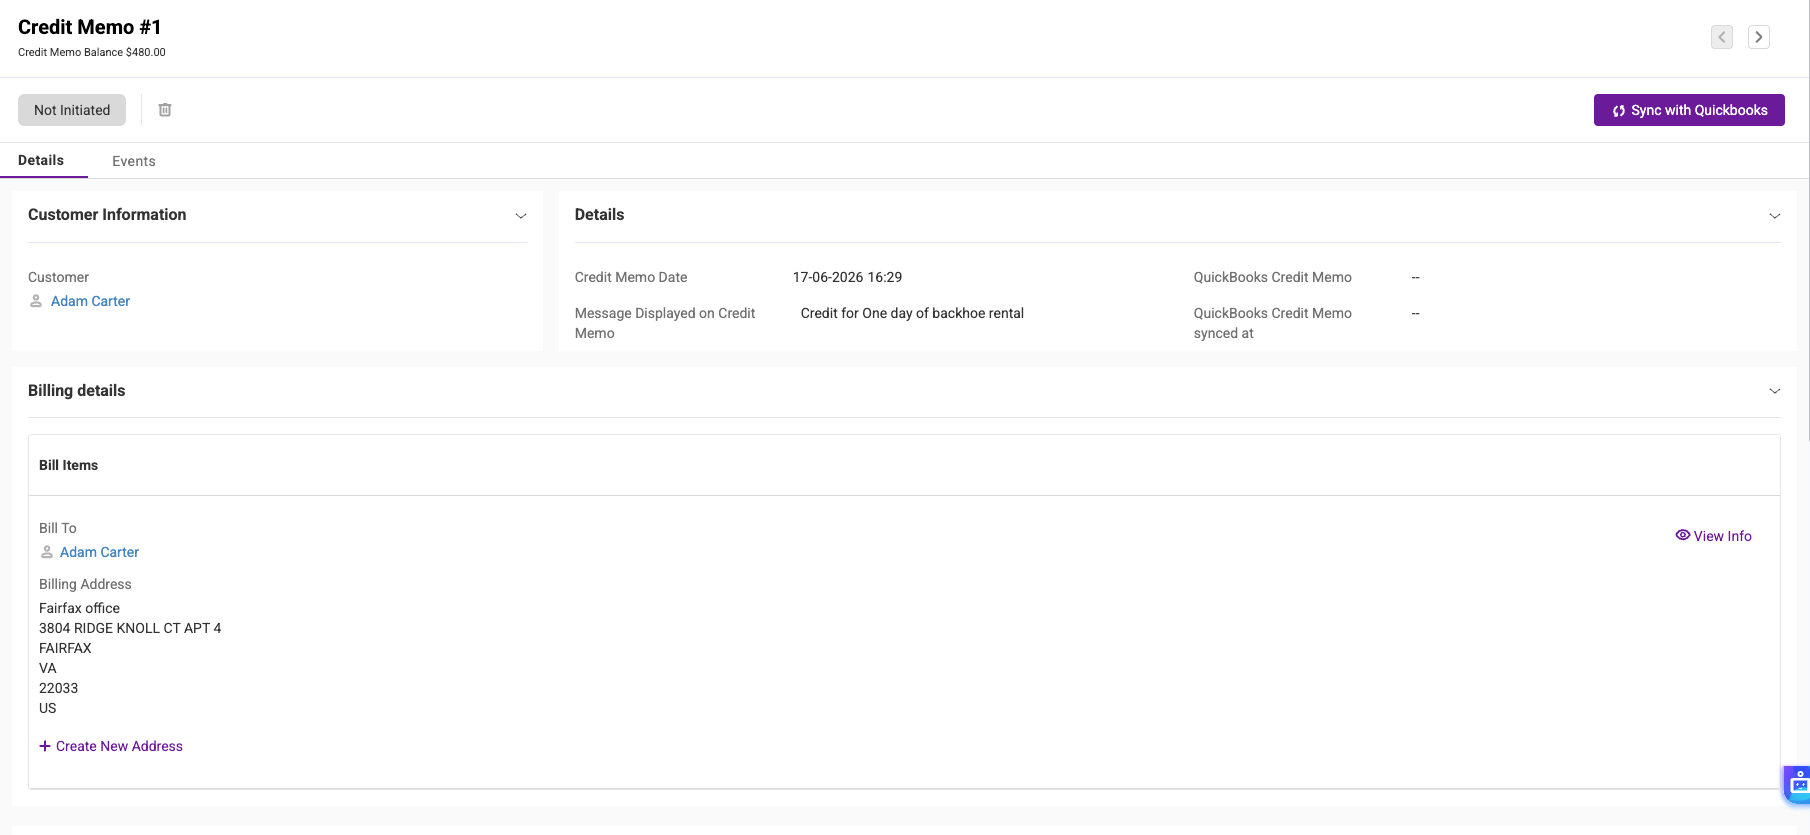
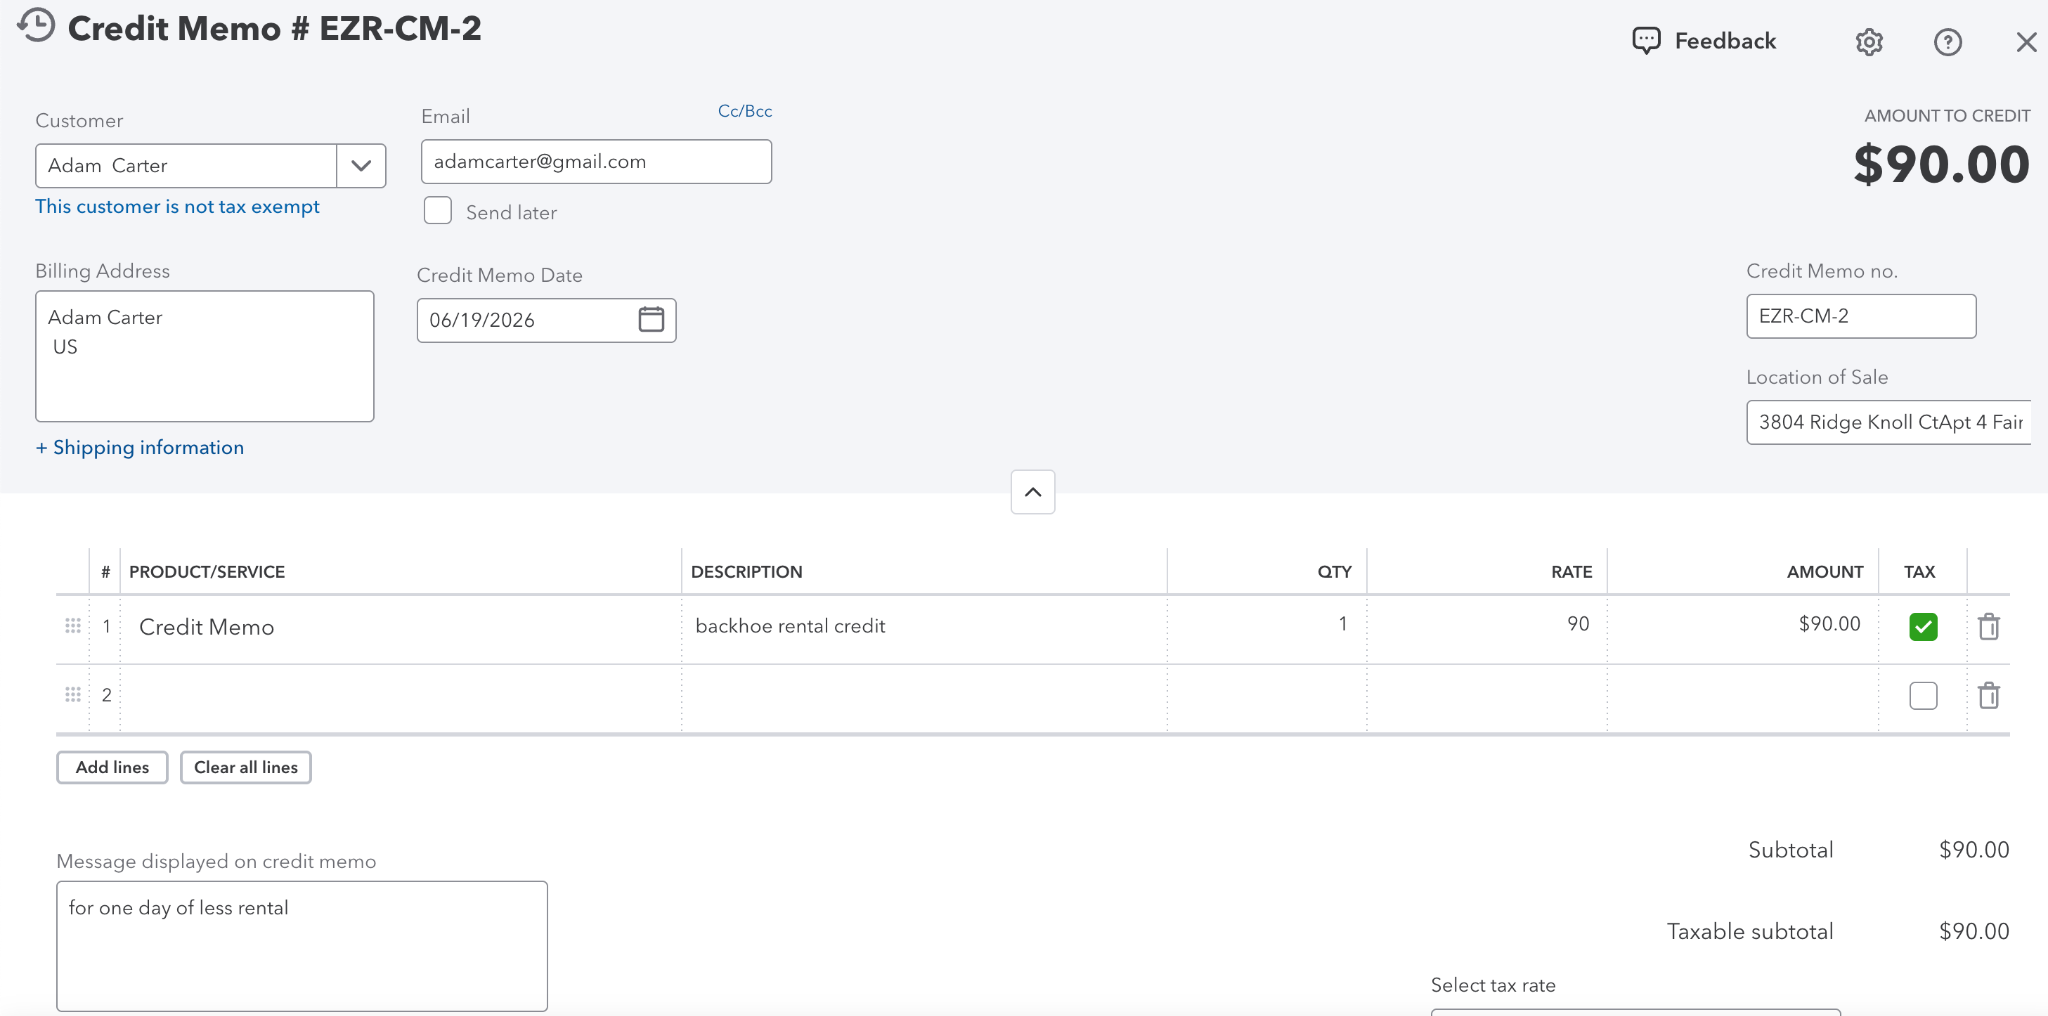
4. Review and Update Credit Memo Details
On the credit memo page, you can review customer and billing information and update the credit memo fields before syncing.
You can update the credit memo date and add a message that will appear on it.
5. Add Credit Memo Line Items
Use the Add Items section to add credit line items to the memo.
For each line item, enter the relevant details such as:
- Item Number
- Name
- Quantity
- Applied Rate
You can also update the tax rate using the same tax flow available for orders.
After adding the required line items, review the calculation table to confirm everything is in order.
6. Sync the Credit Memo with QuickBooks Online
Once the credit memo details are complete, click Sync to QuickBooks.
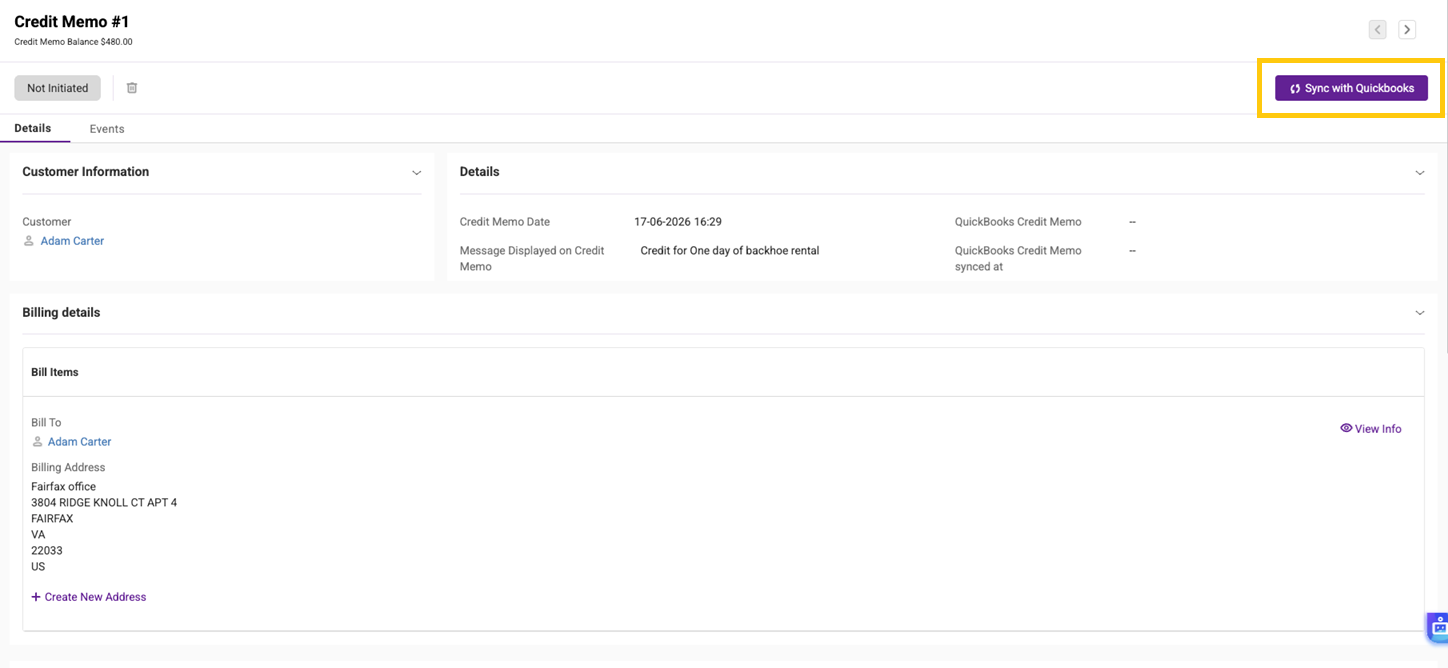
EZRentOut will sync the credit memo to QuickBooks Online. The sync status appears on the credit memo page and can show as:
- Not Initiated
- Failed
- Successful
If the sync is successful, the credit memo will be available in QuickBooks Online under the customer’s credit memos.
If the sync fails, open the credit memo’s History tab to review the QuickBooks credit memo sync logs.
7. Track Applied and Remaining Credit
Credits are applied in QuickBooks Online. Once a credit memo is applied there, EZRentOut updates the credit values on the credit memo page.
You can review:
- Applied Credit
- Remaining Credit
For example, if a $1,000 credit memo is synced to QuickBooks Online and $400 is applied to an invoice, EZRentOut will show Applied Credit as $400 and Remaining Credit as $600.
8. View Credit Memos from the Customer Detail Page
You can view all credit memos created for a customer from the customer detail page.
Go to Customers → Individual/Business → Select Customer → Credit Memo.
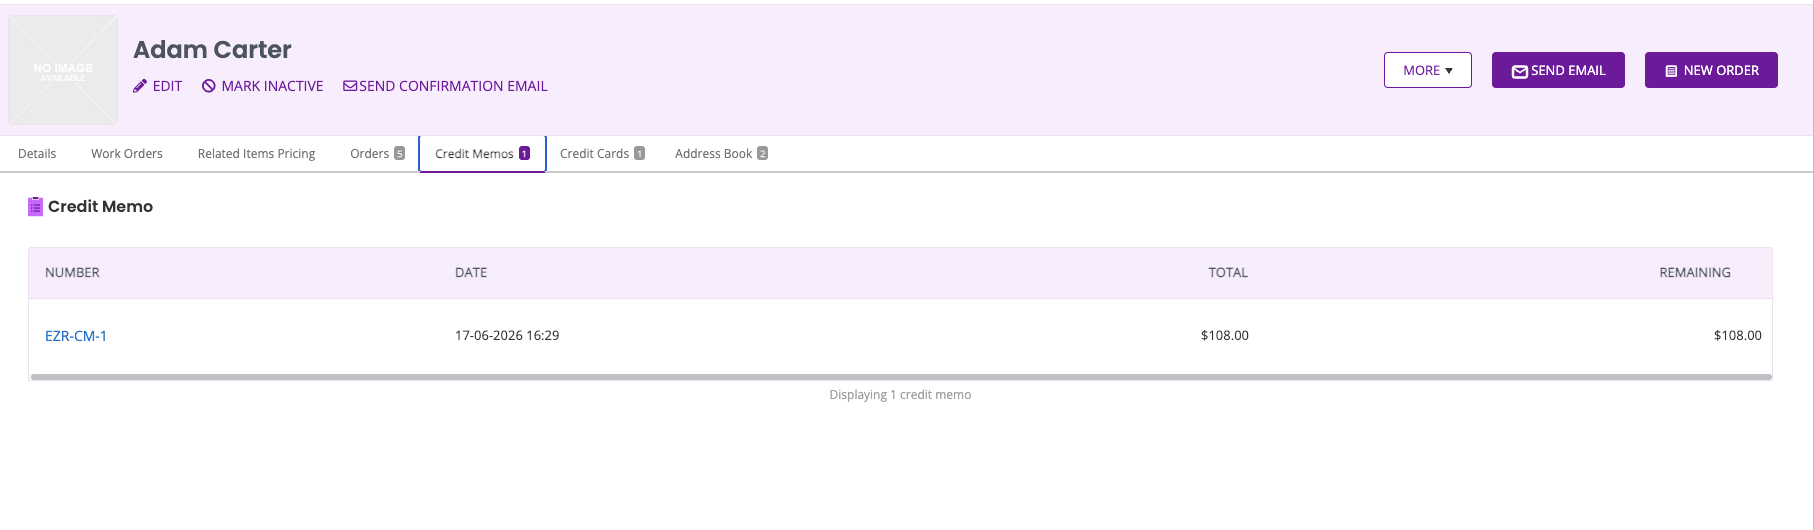
The Credit Memo tab lists all credit memos created for that customer. Use this tab to quickly check whether a customer has available credit before creating or reviewing future orders.
9. Keep Customer Credits Aligned with QuickBooks Online
Credit memos help your team record customer credits in EZRentOut while keeping accounting records synced with QuickBooks Online. You can create the credit memo in EZRentOut, sync it to QuickBooks Online, and track how much credit has been applied or remains available.
Need help setting up credit memos in EZRentOut? Reach out to support@ezo.io.

![[How-to] Integrate QuickBooks Online with EZRentOut](https://cdn.ezo.io/wp-content/uploads/2015/01/12131103/EZRentOut-Quickbooks-Online-Integration.webp)
![[How-to] Integrate QuickBooks Desktop with EZRentOut](https://cdn.ezo.io/wp-content/uploads/2015/11/25121518/Support-Blog-Header-6.webp)
![[How-to] Use Troubleshoot QuickBooks Online Integration Issues with EZRentOut](https://cdn.ezo.io/wp-content/uploads/2018/12/22091323/QBO-EZR-1.jpg)


