Why It Matters
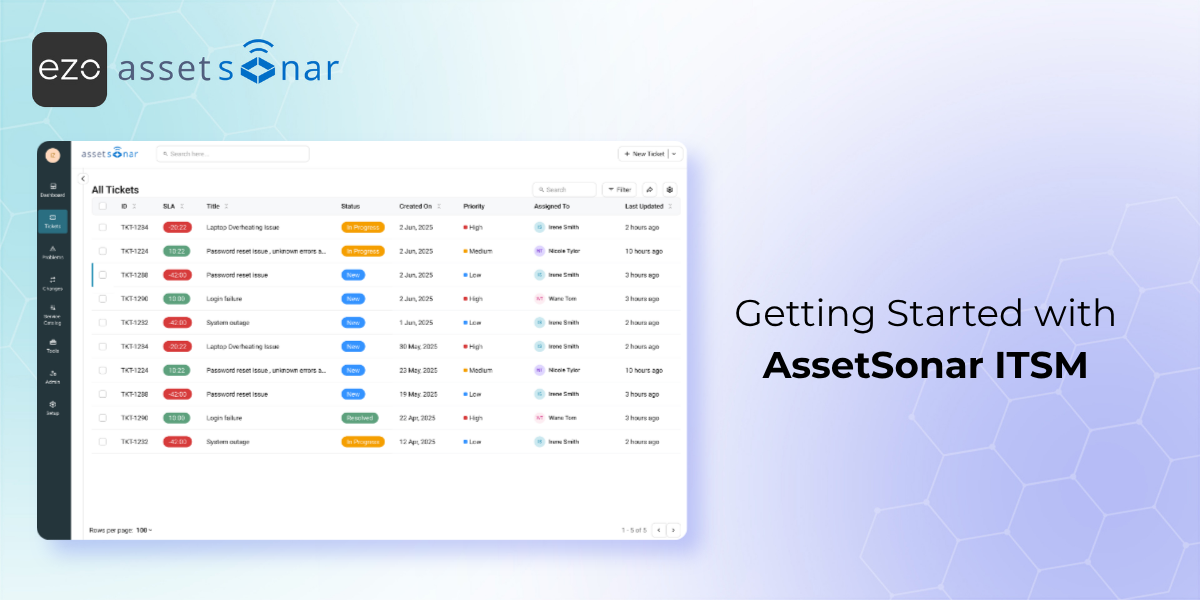
Service Level Agreement (SLA) policies define what must happen and by when, such as the maximum allowed time for a first response or full resolution. By acting as the primary clock for your helpdesk, these policies establish a clear baseline of service for your end-users.
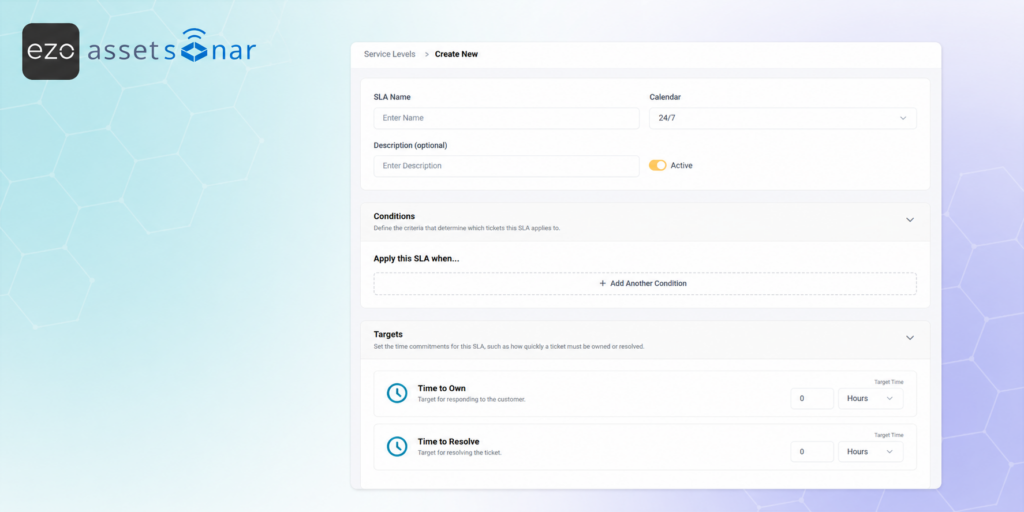
How to Set It Up
- Access the Builder: Navigate to the Service Levels list view, which serves as the primary surface for SLAs, and click the ➕ New Service Level button.
- Step 1: The Basics: Enter a mandatory SLA Name, apply a working Calendar and an optional Description, and ensure the Active toggle is switched on.
- Step 2: Select Conditions: Build the criteria that determine exactly when this SLA applies by adding specific conditions, operators, and fields.
- Step 3: Add Targets: Define your target SLA metrics by setting the “Time to Own” and “Time to Resolve”. You can set both targets simultaneously.
- Step 4: Add Actions & Escalations: You may also set escalation levels and the relevant actions taken in case of escalations.
- Save the Policy: Review your settings and save the policy.
Next Steps
Create a standard SLA policy with a simple 24-hour “Time to Resolve” target, save it, and then submit a test ticket matching your Step 2 scope conditions to verify the timer attaches automatically.
Was this helpful?
Thanks for your feedback!

![[ITSM | How-to] Configuring Technician Notifications in AssetSonar](https://cdn.ezo.io/wp-content/uploads/2026/03/18093708/Configuring-User-Notifications-in-AssetSonar-1.png)
![[ITSM | How-to] Automate and Use Smart Ticket Assignments in AssetSonar](https://cdn.ezo.io/wp-content/uploads/2026/05/14112835/Automate-and-Use-Smart-Ticket-Assignments-in-AssetSonar.png)


