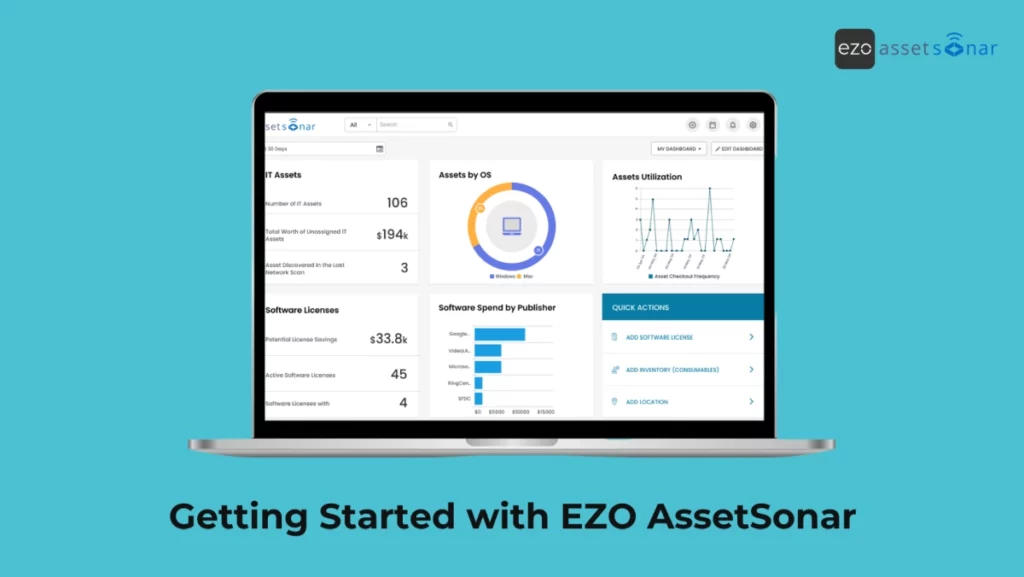
AssetSonar is a cloud-based IT asset management platform that helps organizations discover, organize, assign, secure, and report on hardware, software, SaaS licenses, users, and lifecycle records. It brings endpoint, identity, procurement, service, and usage data into one connected workspace so IT teams can see what they own, who is using it, where it is, and what needs attention.
You do not need to configure every AssetSonar module on day one. For a reliable first launch, start with one discovery source, one user source, a simple location and group structure, a basic custody workflow, and a small pilot. Add software optimization, patch management, IT Graph, automations, service desk connections, and advanced reporting after the underlying data is accurate.
By the end of this guide, you will have the foundation for:
- Audit-ready reports, histories, and verification processes
- A current hardware and software inventory
- Clear user, custodian, group, and location records
- Software license and usage visibility
- Patch and vulnerability tracking
- Repeatable lifecycle and service workflows
Enhance Visibility of Your IT Assets
Step 0: Choose Your ITAM Starting Point
AssetSonar supports hardware asset management, software asset management, SaaS and license management, patch management, workflow automation, and asset-aware service management. Choose the first outcome you need, then expand from a stable data foundation.
| Your immediate priority | Start with |
|---|---|
| See every device and its custodian | Steps 1 to 5: account setup, discovery, users, structure, and custody |
| Control software and SaaS spend | Steps 1 to 4, then Step 6: discovery, normalization, usage, licenses, and optimization |
| Improve security and audit evidence | Steps 1 to 7, then Step 11: inventory, software, patching, histories, reports, and audits |
| Build end-to-end IT asset lifecycle management | Complete all steps in order, then automate the highest-volume lifecycle handoffs |
Before you begin, confirm that you have:
- Account Owner or Administrator access to the required AssetSonar modules
- Administrative access to the device, identity, SaaS, procurement, or service systems you plan to connect
- Consistent identifiers across systems, especially user email addresses, serial numbers, and device names
- A small pilot group that represents your main operating systems, departments, and locations
- A named owner for integration errors, duplicate records, and failed automations
Step 1: Log In and Configure Your AssetSonar Account
Log in using the company subdomain created when your account was registered. For example, a company named ABC Digital Services may use:
abcdigitalservices.assetsonar.com
You can also use the AssetSonar sign-in page and enter your email address.
After signing in:
- Go to Dashboard → Settings → Company Settings & Add Ons → Company Profile.
- Review your company name, subdomain, time zone, date and currency settings, and other account-level information.
- Confirm which AssetSonar modules and integrations are available in your plan.
- Decide which connected system will be the trusted source for each major record type. For example, your directory may own employment status, your endpoint platform may own device configuration, and AssetSonar may own custody and lifecycle status.
Defining trusted sources early helps prevent conflicting user, device, and ownership data after integrations begin syncing.
Step 2: Discover Hardware and Build Your Asset Inventory
AssetSonar can build an inventory through its ITAM Agent, MDM and endpoint integrations, network discovery, procurement sources, and CSV imports. Most organizations use more than one method because no single source covers every laptop, server, peripheral, network device, and manually purchased item.
| Discovery method | Best used for |
|---|---|
| AssetSonar ITAM Agent | Detailed hardware and installed-software data from supported Windows, macOS, and Linux devices |
| MDM or endpoint integration | Devices already managed in platforms such as Microsoft Intune, Jamf Pro, Kandji, Mosyle, or Google Endpoint Management |
| Network discovery | Routers, switches, printers, firewalls, and other IP-based infrastructure that may not run an agent |
| CSV import | Legacy records, peripherals, stock, inventory, and other items that are not discovered automatically |
2.1. Install the AssetSonar ITAM agent (recommended)
For most ITAM deployments, the ITAM Agent is the best first discovery source. Install it on a small set of representative devices before attempting a mass deployment.
The agent supports Windows, macOS, and Linux. Once installed, it sends supported hardware, operating system, and software inventory data to AssetSonar. You can deploy it individually or through your existing software deployment process.
Use this rollout sequence:
- Install the agent on one test device for each operating system in scope.
- Confirm that the devices appear in Items → Assets.
- Compare the discovered serial number, model, operating system, storage, memory, software, and assigned user with the source device.
- Resolve any duplicate or incorrectly matched records.
- Mass-deploy the agent only after the pilot records are accurate.
For deployment requirements and mass-installation options, see Install the AssetSonar ITAM Agent.
Watch: How to Install ITAM Agent on Your Windows in AssetSonar
Watch: How to Install ITAM Agent on Your macOS in AssetSonar
Watch: How to Install ITAM Agent on Your Linux in AssetSonar
Once installed, devices begin syncing automatically. You can also trigger a manual sync under:
Items → Assets → Sync Assets
2.2 Connect your MDM / endpoint manager
If your devices already exist in an MDM or endpoint platform, connect that system to AssetSonar instead of rebuilding the inventory manually. Depending on the integration, AssetSonar can synchronize device identity, configuration, assigned-user, compliance, and lifecycle data. Always review the integration guide for the exact synchronized fields, matching rules, and deleted-device behavior.
AssetSonar supports the following platforms (each link opens a detailed integration guide):
- Microsoft Intune
- Jamf
- Mosyle Business
- Mosyle Manager
- Kandji
- Google Endpoint Management
- Cisco Meraki
- JumpCloud
- SCCM
- Apple Business Manager (ABM)
Start with one endpoint source, complete its first synchronization, and review the resulting records before connecting another source. This makes duplicate and field-precedence issues easier to diagnose.
2.3 Run network discovery
Use Network Discovery for routers, switches, printers, firewalls, servers, and other IP-based devices that may not be visible through the ITAM Agent or an MDM.
AssetSonar supports network discovery through Open-AudIT. At a high level:
- Set up Open-AudIT in your environment.
- Scan the required IP ranges.
- Connect Open-AudIT with AssetSonar.
- Review the discovered records.
- Provision the devices you want to manage in your AssetSonar inventory.
After provisioning, you can assign these devices to groups and locations and include them in reports and audits. See Network Discovery with Open-AudIT for prerequisites and complete setup instructions.
2.4 Import Assets That Are Not Discovered Automatically
Use a CSV import for legacy inventories, peripherals, stock, and other records that are not available through an agent or integration.
- Go to Items → Assets, Asset Stock, or Inventory.
- Select the relevant add or import option.
- Download the sample CSV for that item type.
- Map fields such as asset name, asset identification number, serial number, group, location, purchase date, cost, and custodian.
- Run the import and review the results before importing the next batch.
For detailed mapping guidance, see Adding and Importing Items. For connected keyboards, monitors, docks, and similar equipment, see Peripheral Discovery.
2.5 Validate the Inventory Before You Automate It
Discovery is not complete when records merely appear. Validate a representative sample from every source and location.
Check that each record has the correct:
- Serial number or other unique identifier
- Device name, manufacturer, and model
- Operating system and last synchronization information
- Assigned user or custodian
- Group and location
- Availability or lifecycle status
- Discovery source
Resolve duplicates, missing custodians, stale records, and conflicts between sources before enabling Auto Checkout, lifecycle automations, or compliance reporting.
Outcome: You now have a verified hardware inventory that can serve as the foundation for custody, software, security, service, and reporting workflows.
Step 3: Add Users and Configure Access
Accurate user records connect people with devices, licenses, tickets, approvals, and offboarding actions.
3.1 Add users or connect a directory
You can add users manually or import them in bulk from Members & Access → Add Members or Add Multiple Members.
For ongoing synchronization, connect the directory or identity provider your organization already uses. AssetSonar supports member synchronization through Google Workspace, LDAP, and SCIM-based integrations such as Microsoft Entra ID, Okta, and OneLogin.
Use these guides where relevant:
- Manage member sync through Google Workspace, SCIM, and LDAP
- Provision users through Microsoft Entra ID
- Provision users through Okta
- Provision users through OneLogin
Make sure each user’s primary email address matches across the directory, MDM, SaaS applications, and AssetSonar. Consistent identity data improves user matching, Auto Checkout, license assignment, and offboarding workflows.
Watch: How to Implement User Provisioning via SCIM with Azure AD in AssetSonar
3.2 Configure roles and permissions
Go to Members & Access to manage members, roles, teams, user scope, activity, and synchronization logs.
Apply least-privilege access:
- Give administrators access only to the modules and settings they manage.
- Use custom roles for asset managers, software managers, auditors, technicians, and other specialized users.
- Use teams and user scope to limit which users, items, locations, or workflows a role can access.
- Test each new role with a non-administrator account before assigning it broadly.
For detailed configuration, see Custom Roles and Advanced Access Control.
Step 4: Organize Assets Across Groups, Locations, and Fields
AssetSonar can track assets across offices, campuses, data centers, storage rooms, departments, and remote teams. The quality of this visibility depends on a consistent structure.
4.1 Create Locations and Groups
Use nested locations to represent the physical structure of your organization, from country and city to building, room, or storage shelf. Use groups to organize items that share operational rules, reporting needs, depreciation methods, service processes, or ownership.
For example:
- Locations: US → New York -> Head Office -> IT Store
- Groups: Laptops, Network Equipment, Mobile Devices, Lab Equipment
Avoid creating a different group for every department if a department or cost-center field already captures that information. A simple, durable structure is easier to report on than hundreds of overlapping groups.
See Default and Stock Locations and Organize Assets with Groups for detailed setup guidance.
These guides cover Groups in depth:
- Organize IT Assets By Groups Using IT Asset Tracking Software – Part 1
- Organize Items by Groups using IT Asset Tracking Software – Part 2
- Simplify ITAM Workflows: Set Rules That Auto-Assign Devices To Groups
Watch: How to Organize IT Assets By Groups
4.2 Add the Fields Required for Lifecycle and Reporting
Use standard and custom fields to capture the information your team will actually maintain and report on. Useful fields may include:
- Ownership type, such as company-owned, leased, or BYOD
- Cost center or department
- Business owner and technical owner
- Encryption or security status
- Warranty expiry and planned refresh date
- Lifecycle stage, such as deployed, in repair, decommissioning, or retiring
- Disposal method or retirement reason
Do not create a custom field until you know who owns it, when it changes, and how it will be used. See Custom Fields in AssetSonar.
4.3 Use Packages and Bundles Where They Simplify Operations
A Package contains items that are checked in, checked out, reserved, or serviced together. A Bundle groups items that remain individually actionable.
Use Packages for fixed kits, such as a laptop, charger, and assigned accessories that always move together. Use Bundles for recommended sets whose components may be issued separately.
See Packages and Bundles for detailed examples.
Step 5: Establish Custody and Lifecycle Controls
Once assets and users are in place, begin tracking who has each asset, where it is, and what happens as it moves from acquisition to retirement.
5.1 Check Assets Out to Users or Locations
- Go to Items → Assets.
- Open a test asset.
- Select Checkout.
- Assign the asset to a user or location.
- Add a due date when the asset must be returned or reviewed.
- Confirm that the custodian and location now appear correctly on the asset record.
Repeat the process for a small batch, then review the checkout and custody history. See Quick Checkouts and Checkout Assets to Locations for complete workflows.
5.2 Automate Assignment Carefully
Auto Checkout can use data from supported integrations to assign devices to the matching users in AssetSonar. This reduces manual assignment work for growing and distributed teams.
Before enabling it broadly:
- Confirm that user emails and device assignments match across the connected systems.
- Test Auto Checkout with a limited group.
- Review failures and unmatched records.
- Keep custody verification as a human checkpoint for sensitive or high-value assets.
See Enable Auto Checkout for setup details.
5.3 Configure Reservations and Availability
Use reservations when employees or teams need equipment for a future period. Use the Availability Calendar to see whether an item is available, checked out, reserved, or in service.
See Recurring Reservations and the Item Availability Calendar.
5.4 Build the Rest of the Lifecycle in Stages
After custody is working, connect the next lifecycle stages that matter to your organization:
- Procurement: Import purchase data through a supported integration, such as CDW, or use managed Purchase Orders.
- Warranty and refresh: Synchronize supported warranty data and create alerts for expiry or refresh dates.
- Financial tracking: Configure the depreciation methods and cost fields used by your organization.
- Service and maintenance: Record service dates, costs, providers, and outcomes against the asset.
- Decommissioning and retirement: Standardize approvals, status changes, custody recovery, license removal, and disposal evidence.
AssetSonar can record and coordinate these stages, but security-sensitive actions still need the appropriate control. For example, record proof that data was wiped before disposal rather than assuming that a status change alone performed the wipe.
For the complete acquisition-to-retirement workflow, see Automate the IT Asset Lifecycle in AssetSonar.
Step 6: Discover Software, Measure Usage, and Manage Licenses
AssetSonar combines installed-software discovery, browser and SaaS usage, normalized software records, license entitlements, and optimization insights. This allows hardware and software teams to work from the same user and device context instead of maintaining separate spreadsheets.
6.1 Normalize software
Normalization groups software components, versions, and naming variations under consistent product records. Clean normalization improves license matching, usage analysis, installed-versus-licensed comparisons, and reporting.
To review normalization:
- Go to Software → Software → Normalization.
- Search for a product.
- Review the components mapped to the normalized title.
- Merge, reassign, or correct records where required.
See Software Normalization for detailed guidance.
6.2 Enable Software Usage Metering and Browser Visibility
Installed software tells you what is present; usage data tells you whether it is actually being used.
AssetSonar can use the ITAM Agent and Activity Tracker for supported on-premises software usage. Browser Tracking uses extensions for supported browsers to identify browser-based SaaS activity. Domain Blocking can restrict configured domains on supported managed browsers.
Coverage depends on the operating system, agent version, browser, extension deployment, and settings enabled in your account. Test the components on a pilot device and confirm that activity appears before relying on the data for renewals or investigations.
Use the resulting insights to identify:
- Unused or rarely used installations
- Users with licenses but little or no activity
- Software used without an assigned entitlement
- Browser-accessed SaaS that may be outside the approved catalog
- Duplicate tools used for the same purpose
See Track Software Usage and Uncover Shadow IT and Browser Tracking and Domain Blocking for setup instructions.
6.3 Connect SaaS and Identity Sources
Connect the SaaS applications and identity providers that own your cloud-software, user, and license-assignment data. We recommend integrating AssetSonar with all your key SaaS applications. Supported integrations include:
- Adobe
- Asana
- Calendly
- Google Workspace Cloud Software
- GitHub
- Hubspot
- Microsoft 365
- Notion
- Slack
- Workspace One
- Zoom
Start with the applications that have the highest spend, audit risk, or number of assigned seats. After the first synchronization, compare subscription counts, assigned users, inactive users, and renewal information with the source application.
6.4 Add License Entitlements and Review Utilization
After software is discovered and normalized, add or import the license records that define what your organization owns.
- Go to Software → Software Licenses.
- Create a license manually or import and synchronize it through a supported integration.
- Add the relevant entitlement, seat, purchase, cost, and renewal information.
- Match users or installations with their licenses.
- Review license utilization and exception views.
AssetSonar’s Software Utilization insights can classify supported user-based licensing scenarios as under-licensed, over-licensed, or right-sized. Machine-based and user-machine-based licenses are not included in that utilization classification, so review their entitlement and installation data separately.
See Software License Management and Software Utilization and Shadow IT for detailed workflows.
6.5 Take Action on Waste and Unauthorized Software
Depending on the record and enabled features, you can:
- Reassign or remove unused entitlements and seats
- Request a license audit
- Add, import, or synchronize missing license information
- Blacklist or ignore a software record
- Block configured domains on supported browsers
- Remotely uninstall supported on-premises software
Do not treat one automated signal as the final decision. Confirm business ownership, contractual terms, and user need before removing access or software. For removal steps and supported conditions, see Remotely Uninstall Unauthorized On-Premises Software.
Can AssetSonar help detect shadow IT? Yes. It can combine installed-software discovery, usage metering, browser activity, SaaS and identity integrations, license records, blacklisting, domain blocking, and supported remote uninstall actions. The coverage is only as complete as the agents, extensions, integrations, and device scope you deploy.
For a deeper understanding of license tracking and compliance, refer to:
- Manage Software Licenses And Ensure Compliance With AssetSonar
- Manage Software License Entitlements For Your Users And IT Assets
- Allot License Keys in AssetSonar
- Manage Software License Renewals in AssetSonar
- Track, Verify, and Reclaim Software Usage with License Audits in EZO AssetSonar
6.6 Identify unused or underutilized licenses
Once your software discovery, SaaS integrations, and license records are in place, use License Optimization to identify seats and subscriptions that require review.
To review your optimization data:
- Go to Software → License Optimization.
- Review the available indicators, including:
- Non-Entitled Seats
- Inactive Member Seats
- Unused Seats
- Cost Per Seat
- Total Cost
- Potential Savings
- Open a license record to review its users, activity, entitlements, costs, and renewal information.
- Confirm the business owner and contractual terms before reclaiming a seat, changing a subscription, or removing access.
- Record the action taken and review the license again before its next renewal.
Treat optimization data as a decision aid, not an automatic removal instruction. A user may have a valid business need even when recent activity is low, and some contracts may limit when or how seats can be reassigned.
For the complete workflow, see Optimize Software Licenses in AssetSonar.
6.7 Uninstall unauthorized or unwanted software remotely
When supported, AssetSonar lets you initiate the remote removal of on-premises software from managed Windows devices. This can help your team respond to unauthorized software, remove unused installations, and standardize approved software across endpoints.
Before you begin, confirm that:
- The target is a supported Windows device.
- The AssetSonar ITAM Agent is installed and checking in.
- The device is online when the agent processes the request.
- The agent has sufficient local administrator permissions.
- The removal has been approved under your organization’s software and change policies.
To enable and initiate a remote uninstall:
- Go to Settings → General Settings → On-prem Software Uninstallation and enable the feature if it is not already enabled. Depending on your account, the setting may be labeled On-prem Software Uninstallation (Beta).
- Go to Software → Software → All.
- Locate the software title, select the … menu, and choose Uninstall Software.
- Select the eligible devices and submit the request.
- Monitor the request status. The action is queued until the next agent check-in and will show a status such as Queue, Success, or Failure.
You can also initiate the action from an eligible asset’s detail page. Investigate failed requests before retrying; common causes include an offline device, insufficient permissions, or an installer that does not support silent removal.
For supported conditions and detailed steps, see Remotely Uninstall Unauthorized On-Prem Software in AssetSonar.
6.8 Complete your software management setup
Before moving on, confirm that your software asset management foundation includes:
- Software discovery through the AssetSonar ITAM Agent, an MDM integration, or another supported source
- A normalized software catalog with duplicate or inconsistent titles resolved
- Software usage metering enabled where required
- The AssetSonar Browser Extension deployed if you need supported browser and SaaS usage visibility
- Relevant SaaS, identity, and license integrations connected
- License records added for business-critical applications
- License Optimization reviewed and its data validated
- Owners and review processes defined for unauthorized software and shadow IT
- At least one cleanup action tested, such as reclaiming a seat, removing an assignment, or uninstalling supported software
At this stage, you should have a reliable view of installed software, SaaS access, usage, license ownership, and potential waste. The next step is to add vulnerability and patch visibility for supported endpoints
Step 7: Add Vulnerability and Patch Visibility
AssetSonar Patch Management connects supported agent scans with vulnerability and patch data. It helps your team identify affected devices and software, review patch status, and deploy or schedule supported patches from a centralized workflow.
To get started:
- Open Patch Management from the navigation menu.
- Review the Overview page for patch-status indicators and detected vulnerabilities.
- Open Vulnerabilities to see the affected devices and available remediation details.
- Select a vulnerability to review it and add, schedule, or deploy a supported patch.
- Monitor the deployment results and investigate failed or incomplete actions.
Start with a pilot group, define maintenance windows and exception procedures, and expand only after the deployment behaves as expected. Patch visibility supports your security and compliance processes, but it does not replace risk assessment, change management, or validation by your security team.
For the full setup and deployment workflow, see Automate Vulnerability Monitoring and Patching in AssetSonar.
Step 8: Map Configuration Items and Relationships with IT Graph
IT Graph is AssetSonar’s connected workspace for configuration items and their relationships. It helps teams understand how assets, users, locations, software, licenses, groups, packages, bundles, vendors, domains, and other supported records relate to one another.
Use IT Graph when you need to understand ownership, dependencies, service context, or the possible impact of changing a connected record.
To get started:
- Go to Settings → Company Settings & Add Ons.
- Locate IT Graph and review the enablement option.
- Open IT Graph from the navigation menu.
- Use Configuration Items to browse records by CI type.
- Use Diagram View to select a central CI and explore its connected records.
- Use Relationships to review and manage the relationship types available in your account.
If your account previously used the legacy Relationships module, review the migration carefully before confirming it. Enabling IT Graph and completing the migration replaces the legacy module; disabling IT Graph later does not restore the previous Relationships module.
See Migrate Existing Relationships to IT Graph for supported record types and migration checks.
IT Graph visualizes the relationships available in your AssetSonar data; it does not make incomplete or outdated records accurate automatically. Assign an owner for relationship governance and verify high-impact connections before using them for incident, change, or audit decisions.
Step 9: Configure Alerts and Workflow Automations
After your core records are reliable, use alerts and automations to reduce repetitive work and keep lifecycle actions consistent.
9.1 Configure essential alerts
Subscribe the relevant users to events that require attention, such as overdue checkouts, approaching warranty or renewal dates, custody actions, workflow exceptions, and other enabled events. Use a daily digest where immediate individual emails would create unnecessary noise.
See Email Alerts in AssetSonar for configuration guidance.
9.2 Build and test a workflow automation
Workflow Automations let you define a trigger, apply conditions, and perform supported actions consistently.
To enable and create a workflow:
- Go to Settings → Company Settings & Add Ons → Automations and enable the module.
- Open Workflows & Automations → Automations.
- Create a workflow with an event-based or time-based trigger.
- Add conditions that identify the correct records.
- Add the required supported actions, branches, notifications, or Web Requests.
- Save and activate the workflow.
- Run it against a pilot record and review the execution details before expanding its scope.
Useful first workflows include:
- A new asset becomes ready for deployment → notify the deployment team.
- An asset changes lifecycle status → update supported fields or notify the responsible owner.
- A user is deactivated → alert the teams responsible for asset recovery and license reassignment.
- A license approaches its renewal date → notify the software owner or procurement team.
- An external Web Request fails → alert the workflow owner for follow-up.
Available triggers, conditions, and actions vary by module and account configuration. Use only the options shown in your account, test every branch, and define an owner for failed executions.
For the visual editor, branching, placeholders, Web Requests, and execution logs, see Automate IT Workflows in AssetSonar.
Step 10: Connect Asset Data with Your Service Desk
Asset-aware service management gives technicians the device, user, software, custody, and service context they need while working on a request. It also creates a service history that can be reviewed alongside the related asset records.
Choose the service desk approach that matches your existing support process, then test ticket creation, asset association, permissions, updates, and reporting with a small group before rolling it out.
10.1 AssetSonar ITSM
Use AssetSonar’s native ITSM capabilities when you want request intake, ticket routing, service catalog, SLAs, notifications, knowledge management, and asset-aware ticket workflows within the same platform.
See Getting Started with AssetSonar ITSM for the initial configuration process.
10.2 Zendesk
Connect AssetSonar records with Zendesk to give support teams asset context while they work on tickets. Start with the Zendesk Help Center integration. If you also want employees to request approved IT products and services through Zendesk, configure the AssetSonar Service Catalog and then use Service Catalog Workflows to route and fulfill those requests consistently.
10.3 Jira
Connect AssetSonar items with Jira issues when your support, engineering, or operations teams manage work in Jira. See Set Up AssetSonar’s Integration with Jira for setup guidance.
The exact ticket fields, available actions, and synchronization behavior depend on the service desk and integration configuration you select.
Step 11: Build Dashboards, Reports, and Audit Evidence
Once AssetSonar contains reliable hardware, software, license, custody, service, and lifecycle data, use dashboards to monitor program health, reports to investigate exceptions, and audits to verify that records match reality.
11.1 Configure practical dashboards
Start with a small set of indicators tied to decisions, such as:
- Assets by status, location, group, or custodian
- Assets without an assigned custodian, group, or location
- Upcoming warranty, lease, refresh, or renewal dates
- Software utilization and potential license savings
- Patch status and vulnerability exposure
- Overdue checkouts, services, or work orders
To customize a dashboard:
- Open Dashboard from the navigation menu and select Edit Dashboard.
- Use New Header to organize related metrics and Manage Widgets to add or remove widgets.
- To create a separate dashboard, open the dashboard selector and choose Create New Dashboard.
For configuration guidance, see Use the AssetSonar Dashboard. You can also add graphs and tables to a dashboard and create role-based dashboards when different users need different metrics or data access.
11.2 Create and schedule reports
Open Reports from the navigation menu and begin with reports that reveal missing data, upcoming events, and operational exceptions. Useful examples include:
- Assets without custodians or locations
- Duplicate or incomplete records
- Checkout and custody history
- Assets approaching warranty, lease, or refresh dates
- Software installations without matching entitlements
- Inactive or unused licensed users
- License audit results and renewal exposure
- Patch status by device
- Failed Auto Checkout or workflow executions
- Assets awaiting decommissioning or retirement evidence
Use Item Reports for standard asset and inventory reporting. When a standard report does not answer the operational question, build a Custom Report. You can use tags to organize report data and add graphs to Custom Reports when a visual summary will help stakeholders act on the results.
Schedule only the reports that have a clear recipient, review cadence, and expected action.
11.3 Verify physical and digital records with audits
Use the audit workflow that matches the question you need to answer:
- Item Custody Verification: Confirm that users still possess the assets assigned to them. See Custody Verification in AssetSonar.
- Location Audits: Verify that assets expected at an office, data room, lab, or storage location are physically present. See Location Audits in AssetSonar.
- Software License Audits: Verify software assignment and usage before renewals or vendor reviews, then reclaim seats that are no longer required. See Track, Verify, and Reclaim Software Usage with License Audits.
- Item Trail and lifecycle history: Review changes made by users and integrations where Item Trail is available in your account.
Use audit results to correct records and improve the underlying process. An audit is not complete if an exception has no assigned owner, next action, and due date.
Step 12: Use the Mobile App for Field and Inventory Work
The AssetSonar mobile app helps field teams, storeroom staff, and distributed offices update records without returning to a workstation.
Depending on user permissions and the features enabled in your account, teams can:
- Scan supported item labels with a device camera or connected scanner
- Search assets, stock, software, packages, and bundles
- Check items in or out and extend supported checkouts
- Reserve items and review availability
- Verify custody and location-audit results
- Create supported item records while in the field
- Review services, work orders, vendors, and locations
- Respond to assigned actions and updates while away from a desk
Download AssetSonar for Android or iOS. For a broader walkthrough, see the AssetSonar Mobile App Getting Started Guide.
Initial Rollout Checklist
Before expanding beyond the pilot, confirm that:
- At least one discovery source is synchronizing successfully.
- A representative sample of device records has been validated.
- Duplicate and outdated records have been resolved.
- Users and primary email addresses match across connected systems.
- Roles and user scope have been tested with non-administrator accounts.
- Groups, locations, and required fields follow a consistent standard.
- Sample assets have the correct custodian and lifecycle status.
- Software is normalized before license and usage decisions are made.
- License, usage, and patch data have been validated against their source systems.
- Essential alerts reach the correct owners without creating excessive noise.
- Every automation has been tested, including its failure path.
- Service desk connections have been tested with sample tickets.
- Reports identify the exceptions your team is expected to resolve.
- Custody, location, or license audits have a defined owner and follow-up process.
Frequently Asked Questions
Can AssetSonar manage hardware and software in one system?
Yes. AssetSonar combines hardware inventory and lifecycle records with installed software, SaaS applications, software licenses, usage, patching, users, custody, service context, and reporting. The modules and integrations available depend on your plan and configuration.
Can AssetSonar track assets across multiple offices and remote teams?
Yes. Use nested locations, groups, user assignments, check-in and checkout history, Auto Checkout, MDM integrations, and the mobile app to maintain custody and location visibility. Consistent user and location data are essential for reliable reporting.
Which discovery sources should I connect first?
Start with the system that covers the largest share of your managed endpoints, such as the AssetSonar ITAM Agent, Microsoft Intune, or Jamf Pro. Add network discovery and CSV imports for assets that remain outside that source, then reconcile duplicates before connecting more systems.
How does AssetSonar help reduce software license waste?
AssetSonar combines discovered software, SaaS and identity integrations, usage activity, license entitlements, utilization indicators, audits, costs, and renewal information. These records help teams identify inactive users, unused seats, unlicensed use, and potential savings before making renewal or reclamation decisions.
Can AssetSonar detect unauthorized software and shadow IT?
AssetSonar can discover installed software, measure supported on-premises usage, track browser-based SaaS activity on supported browsers, connect SaaS and identity data, blacklist software, block configured domains, and remotely uninstall supported applications. Coverage depends on the agents, browser extensions, integrations, device scope, and settings you deploy.
Does AssetSonar support patch and vulnerability reporting?
Yes. Patch Management provides vulnerability and patch visibility for supported managed devices, including affected records and patch workflows. Organizations should still validate coverage, manage exceptions, and combine AssetSonar evidence with the rest of their security and compliance controls.
Can AssetSonar make an organization compliant with SOC 2, ISO 27001, HIPAA, GDPR, or another standard?
No ITAM tool creates compliance on its own. AssetSonar can support your controls with inventory, custody history, license data, patch status, workflow logs, Item Trail, reports, and audit results. Your policies, control design, access governance, evidence review, and remediation processes remain essential.
Can AssetSonar integrate with an existing MDM, identity provider, or helpdesk?
Yes. AssetSonar supports integrations across endpoint management, identity, SaaS, procurement, warranty, and service desk systems. For workflows without a native connector, supported APIs, webhooks, or Workflow Automation Web Requests may provide an extension path. Confirm the exact capability for your account and target system.
Build Accuracy First, Then Automate
AssetSonar can connect hardware, software, users, licenses, vulnerabilities, tickets, and lifecycle activity in one ITAM workspace. The fastest route to useful visibility is not enabling every feature at once. It is creating a trusted data foundation, testing it with a limited group, and expanding one workflow at a time.
Once your inventory, identity, structure, and custody records are reliable, add the software, patching, IT Graph, automation, service, and reporting layers that solve your highest-priority operational problems.
For help with your setup, browse the AssetSonar guides and blogs or contact support@ezo.io.