Why It Matters
Ticket routing helps your team send incoming tickets to the right support group and assign them to the right technician for resolution.
In AssetSonar ITSM, routing works in two stages. First, the ITSM Rule Engine routes tickets to the correct technician group based on ticket details such as category, urgency, impact, requester, or location. Then, Ticket Routing can assign the ticket to a technician within that group using load balancing or round robin logic.
This helps reduce manual assignment work, prevent misrouted tickets, and keep SLA-sensitive tickets moving.
How to Set It Up
Before you configure routing, make sure your technician groups are set up in AssetSonar. These groups should reflect how your IT team handles work, such as Network Support, Device Support, Software Support, or Security.
Create a Rule
Go to Administration → Rules and create a new rule.
Add the rule details, including the Name, Description, active status, and when the rule should apply, such as when a ticket is added, updated, or both.
Next, define the rule criteria. Criteria decide when the rule should run. For example, you can create criteria based on ticket fields such as:
- Category
- Impact
- Priority
- Request source
- Requester
- Requester group
- Requester location
- Status
- Title
- Type
- Urgency
After adding criteria, define the rule actions. Actions decide what AssetSonar should update when the criteria are met.
For routing, the key action is assigning the ticket to a Technician Group. You can also configure actions for fields such as Priority, Urgency, Status, Request source, templates, approvals, or SLA targets where needed.
If multiple rules can apply to the same ticket, review the rule order before going live. Rule order can affect which rule runs first when conditions overlap.
You can also review the rule history to check which routing actions were applied. Use history filters or export options when you need to audit changes or troubleshoot routing behavior.
Save the rule once the criteria and actions are set.
Note: Keep routing rules specific enough to avoid conflicts. Test each rule with sample tickets before applying it to live workflows.
Configure Ticket Routing
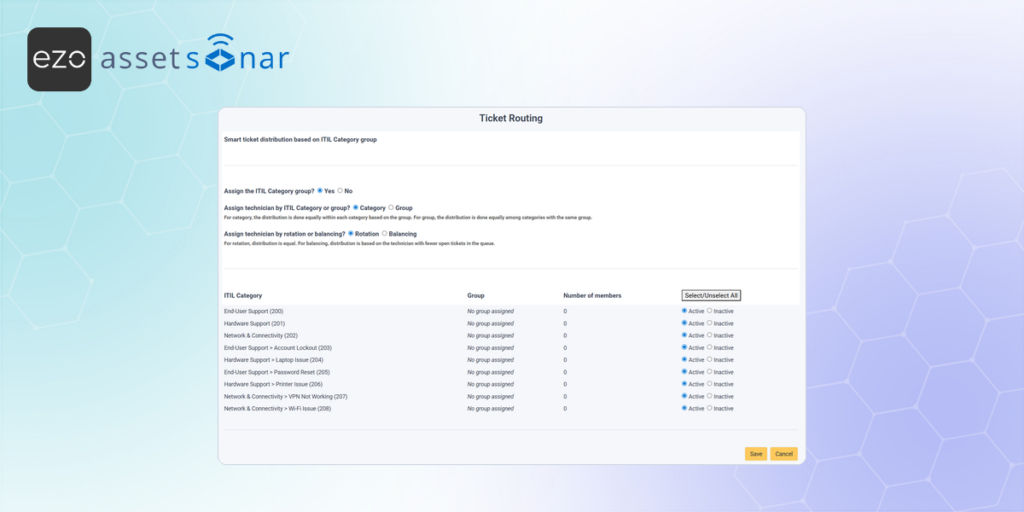
Go to Setup → Ticket Routing.
Use Ticket Routing to assign tickets to technicians inside the group selected by your routing rule.
Choose one of the following assignment methods:
- Load balancing: Assigns the ticket to the technician with the fewest open tickets.
- Round robin: Assigns tickets in sequence across available technicians.
For example, if a rule sends all network-related tickets to the Network Support group, Ticket Routing can then assign each ticket to a technician in that group based on your selected method.
Review Assignment Precedence
Ticket Routing assigns a technician only when the ticket does not already have an assignee after rules, templates, or manual input are applied.
This means Ticket Routing does not override a technician who was already selected manually or assigned through another workflow.
Next Steps
Create a test ticket that matches your routing rule. Confirm that the ticket is assigned to the correct technician group, then check whether Ticket Routing assigns the technician using your selected load balancing or round robin method.

![[ITSM | How-to] Automating Ticket Assignment in AssetSonar](https://cdn.ezo.io/wp-content/uploads/2026/03/30130127/Automating-Ticket-Assignment-in-AssetSonar.jpg)
![[ITSM | How-to] Configuring Outgoing Email Notifications in AssetSonar](https://cdn.ezo.io/wp-content/uploads/2026/03/18093921/Configuring-User-Notifications-in-AssetSonar-2.png)


