Cloud infrastructure changes quickly. Instances start and stop, storage volumes move, databases scale, and network resources are updated across regions. Without a central view, IT teams can lose track of what exists, where it runs, and how it connects to the rest of their infrastructure.
With AWS Cloud Integration in AssetSonar, you can connect your AWS account, import supported AWS resources, and view them from the AWS Resources tab under Items.
This guide walks you through enabling the integration, authorizing AWS access using the recommended IAM Role method, selecting regions and resources, reviewing imported AWS resources, enabling optional live tracking, and checking sync status.
1. Enable AWS Cloud Integration
To turn on the AWS integration:
- Go to Settings → Integrations → Mobile Device Management & Network Discovery, then locate AWS Cloud settings.
- Select Enabled.
- Click Update.

Once enabled, AssetSonar displays the AWS authorization setup.
Note: You can configure multiple AWS regions within the account you connect.
2. Create an External ID
AssetSonar uses an External ID to securely assume the AWS IAM Role created for the integration. The External ID must match the value added to the role’s AWS IAM trust policy.
To create an External ID:
- Generate a secure, unique string. You can use a UUID or another random string approved by your AWS administrator.
- Keep this value ready. You will add it to the AWS IAM Role trust policy and then enter the same value in AssetSonar.
Example External ID: 1a1z2tt2bcxcbk75af94e17284s605dsdq
Note: The External ID is not a password or access key. It is a security control used by AWS to make sure the role can only be assumed when the correct External ID is supplied.
3. Create an IAM Policy in AWS
AssetSonar uses an AWS IAM Role with read-only permissions to access supported AWS resource data securely. This setup uses AWS Security Token Service (STS), an External ID, and a dedicated IAM role so AssetSonar can sync supported AWS resources without requiring long-term access keys.
The IAM policy you create should include permissions for the AWS resources you want to import into AssetSonar. If you plan to track only selected resource types, you can remove permissions that are not relevant to those resources. For example, if you do not want to import RDS resources, your AWS administrator can remove the RDS permissions from the policy.
If you are unsure which permissions are required for your selected resources, contact AssetSonar support at support@ezo.io before making changes.
To create the IAM policy:
- Log in to your AWS Management Console.
- Go to IAM → Policies.
- Click Create policy.
- Open the JSON tab.
- Paste the following policy, or adjust it based on the AWS resource types you want AssetSonar to import:
{
"Version": "2012-10-17",
"Statement": [
  {
    "Sid": "AssetSonarAWSCloudResourceReadOnly",
    "Effect": "Allow",
    "Action": [
      "ec2:DescribeInstances",
      "ec2:DescribeInstanceStatus",
      "ec2:DescribeRegions",
      "ec2:DescribeTags",
      "ec2:DescribeVolumes",
      "ec2:DescribeNetworkInterfaces",
      "ec2:DescribeVpcs",
      "ec2:DescribeSubnets",
      "ec2:DescribeSecurityGroups",
      "elasticloadbalancing:DescribeLoadBalancers",
      "elasticloadbalancing:DescribeTargetGroups",
      "elasticloadbalancing:DescribeTargetHealth",
      "rds:DescribeDBInstances",
      "rds:DescribeDBClusters",
      "autoscaling:DescribeAutoScalingGroups",
      "tag:GetResources"
    ],
    "Resource": "*"
  }
]
}- Click Next.
- Enter a policy name, such as AssetSonarAWSCloudResourceReadOnlyPolicy.
- Review the policy and click Create policy.
Note: This policy provides read-only access to supported AWS resources for discovery and sync. It can be configured based on the AWS resource types you want to import. Your AWS administrator may remove irrelevant permissions for modules you do not want to track, but the final policy must still allow AssetSonar to read the AWS resources selected for sync.
4. Create an IAM Role and Add the External ID
After creating the policy, create an IAM Role that AssetSonar can use to access supported AWS resource data.
To create the role:
- Go to IAM → Roles.
- Click Create role.
- Select the relevant trusted entity option for a custom trust policy.
- Add the trust policy provided below.
- Replace Add Your Secure String with the External ID you created earlier.
{
"Version": "2012-10-17",
"Statement": [
  {
    "Sid": "AllowAssumeRoleWithExternalId",
    "Effect": "Allow",
    "Principal": {
      "AWS": "*"
    },
    "Action": "sts:AssumeRole",
    "Condition": {
      "StringEquals": {
        "sts:ExternalId": "Add Your Secure String"
      }
    }
  }
]
}- Click Next.
- Attach the policy you created earlier, such as AssetSonarAWSCloudResourceReadOnlyPolicy.
- Enter the following role name: iap_assetsonar_role
- Review the role and click Create role.
5. Retrieve the IAM Role ARN and Add Details in AssetSonar
After creating the IAM Role:
- Go to IAM → Roles.
- Open the role you created for AssetSonar.
- Copy the Role ARN.
The Role ARN will look similar to this:
arn:aws:iam::<ACCOUNT_ID>:role/iap_assetsonar_roleNow return to AssetSonar:
- Go to Settings → Integrations → Mobile Device Management & Network Discovery → AWS Cloud.
- Click Connect.
- Enter the same External ID you added to the AWS IAM Role trust policy.
- Paste the Role ARN copied from AWS.
- Click Add.
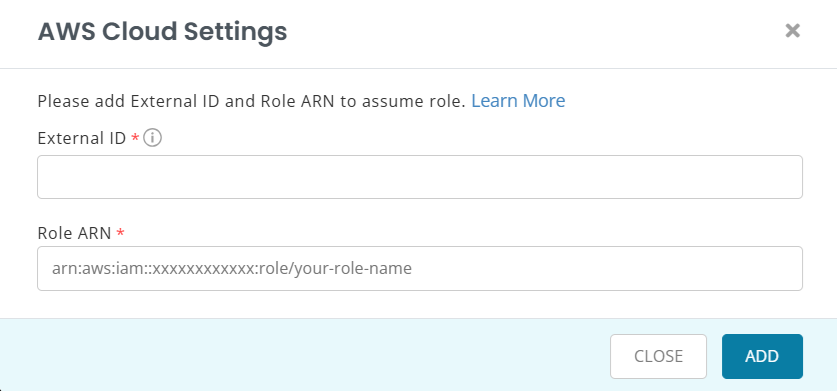
AssetSonar can then use the Role ARN and External ID to assume the AWS IAM Role and begin syncing supported AWS resources.
Warning: The External ID in AssetSonar must exactly match the sts:ExternalId value in your AWS IAM Role trust policy. If the values do not match, AWS will block the role assumption and the sync will fail.
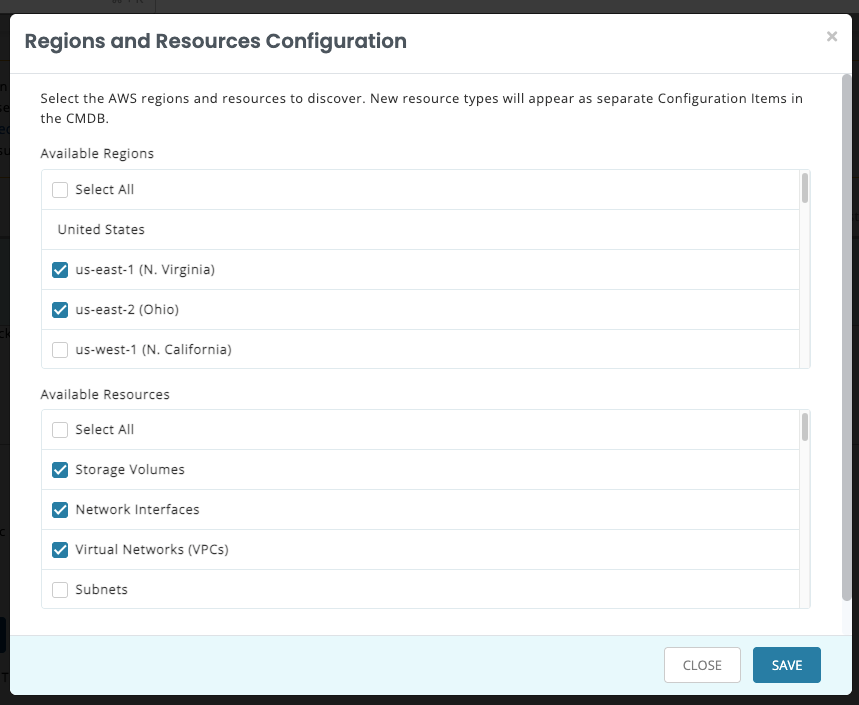
6. Select AWS Regions and Resources
After the Role ARN is saved, configure the AWS regions and resources AssetSonar should sync.
To select regions and resources:
- Return to AWS Cloud settings.
- In the Regions field, select the AWS regions you want to monitor.
- In the Resources field, select the AWS resource types you want AssetSonar to import.
- Click Update.
By default, AssetSonar starts with us-east-1 and Cloud Servers / Virtual Machines.
Supported AWS resources include:
- EC2 Instances
- Storage Volumes
- Network Interfaces
- Virtual Networks (VPCs)
- Subnets
- Security Groups
- Load Balancers
- Target Groups
- Auto Scaling Groups
- DB Subnet Groups
- Database Clusters
- Managed Databases
Note: Select only the regions and resources you actively want to monitor. This keeps the AWS Resources view focused and makes sync status easier to review.
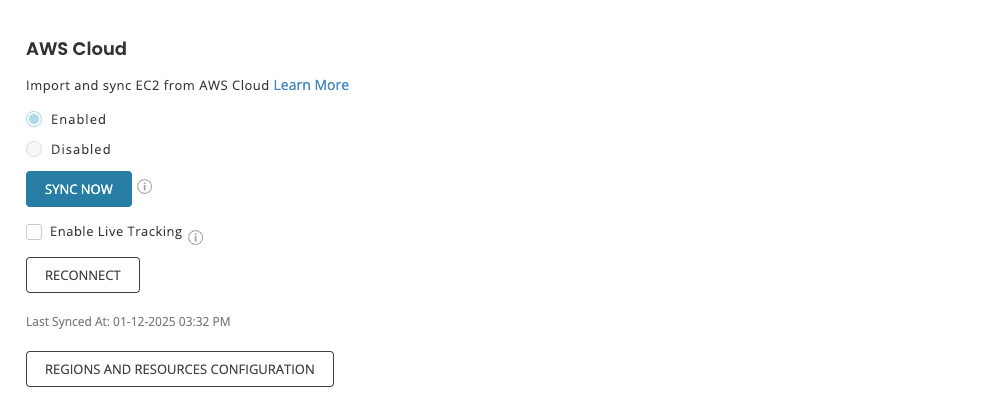
7. Configure Live Tracking
By default, AssetSonar updates AWS resource status through scheduled syncs. For EC2 instance status, AssetSonar uses AWS status APIs to update lifecycle and health-related information.
You can also enable live tracking for near real-time updates.
To enable live tracking:
- Return to AWS Cloud settings.
- Select Enable live tracking.
- Click Update.
When live tracking is enabled, AssetSonar uses AWS event-driven updates, such as EventBridge-based infrastructure events, to keep AWS resource status more current.
Warning: Live tracking may incur additional AWS charges based on event volume and AWS service usage. Review AWS EventBridge pricing before enabling this option.
Use live tracking when your team needs more current AWS status data for operational workflows such as incident response, change tracking, or infrastructure monitoring.
8. Run or Review AWS Sync
After setup, you need to click on Sync Now to start importing the selected resources from the selected regions.
To review sync timing:
- Return to AWS Cloud settings.
- Check Last Synced At to see when the latest sync was completed.
AssetSonar also sends sync emails to keep you informed when:
- AWS sync is in progress
- AWS sync is completed
- AWS sync has failed
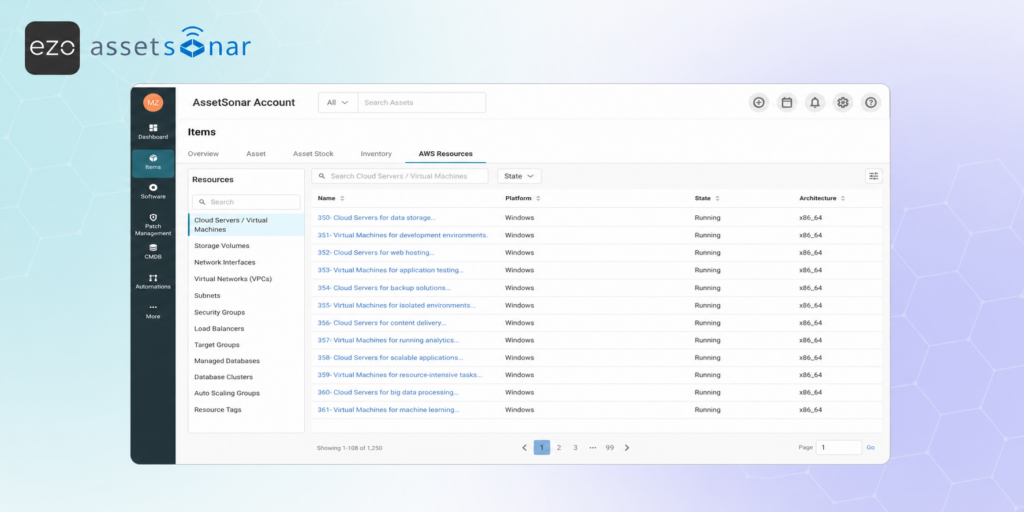
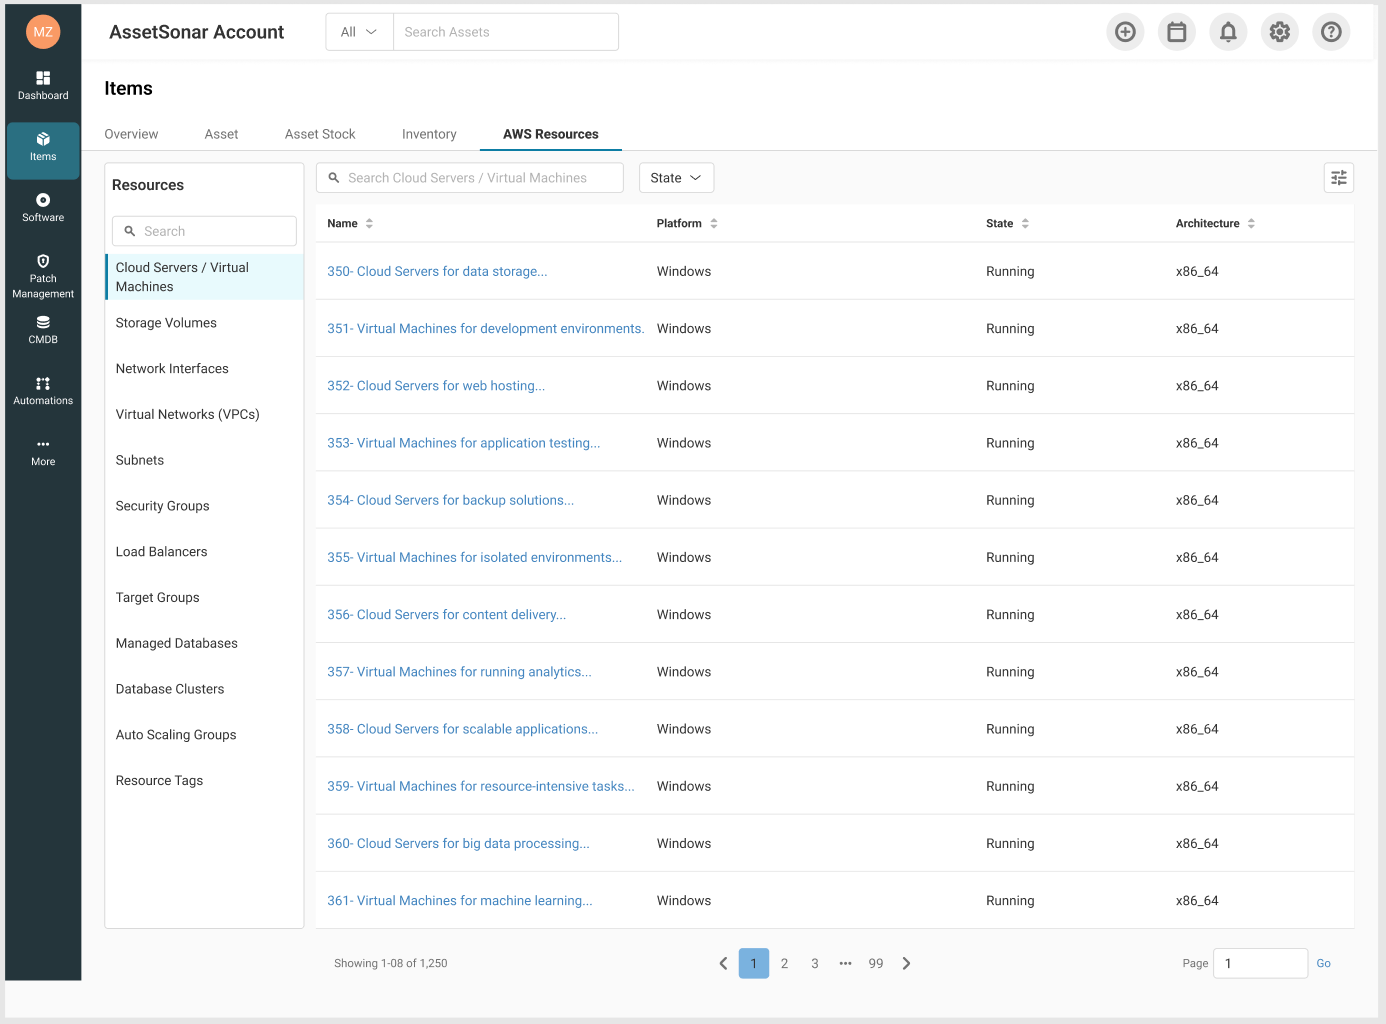
9. View Imported AWS Resources
Once the sync completes, you can view imported AWS resources from the Items module.
To view AWS resources:
- Go to Items → AWS Resources.
- Use the resource list to review imported AWS infrastructure.
- Use filters such as State, Sync Source, Region, and Availability Zone to narrow down the list. Click any AWS resource to open its detail page.
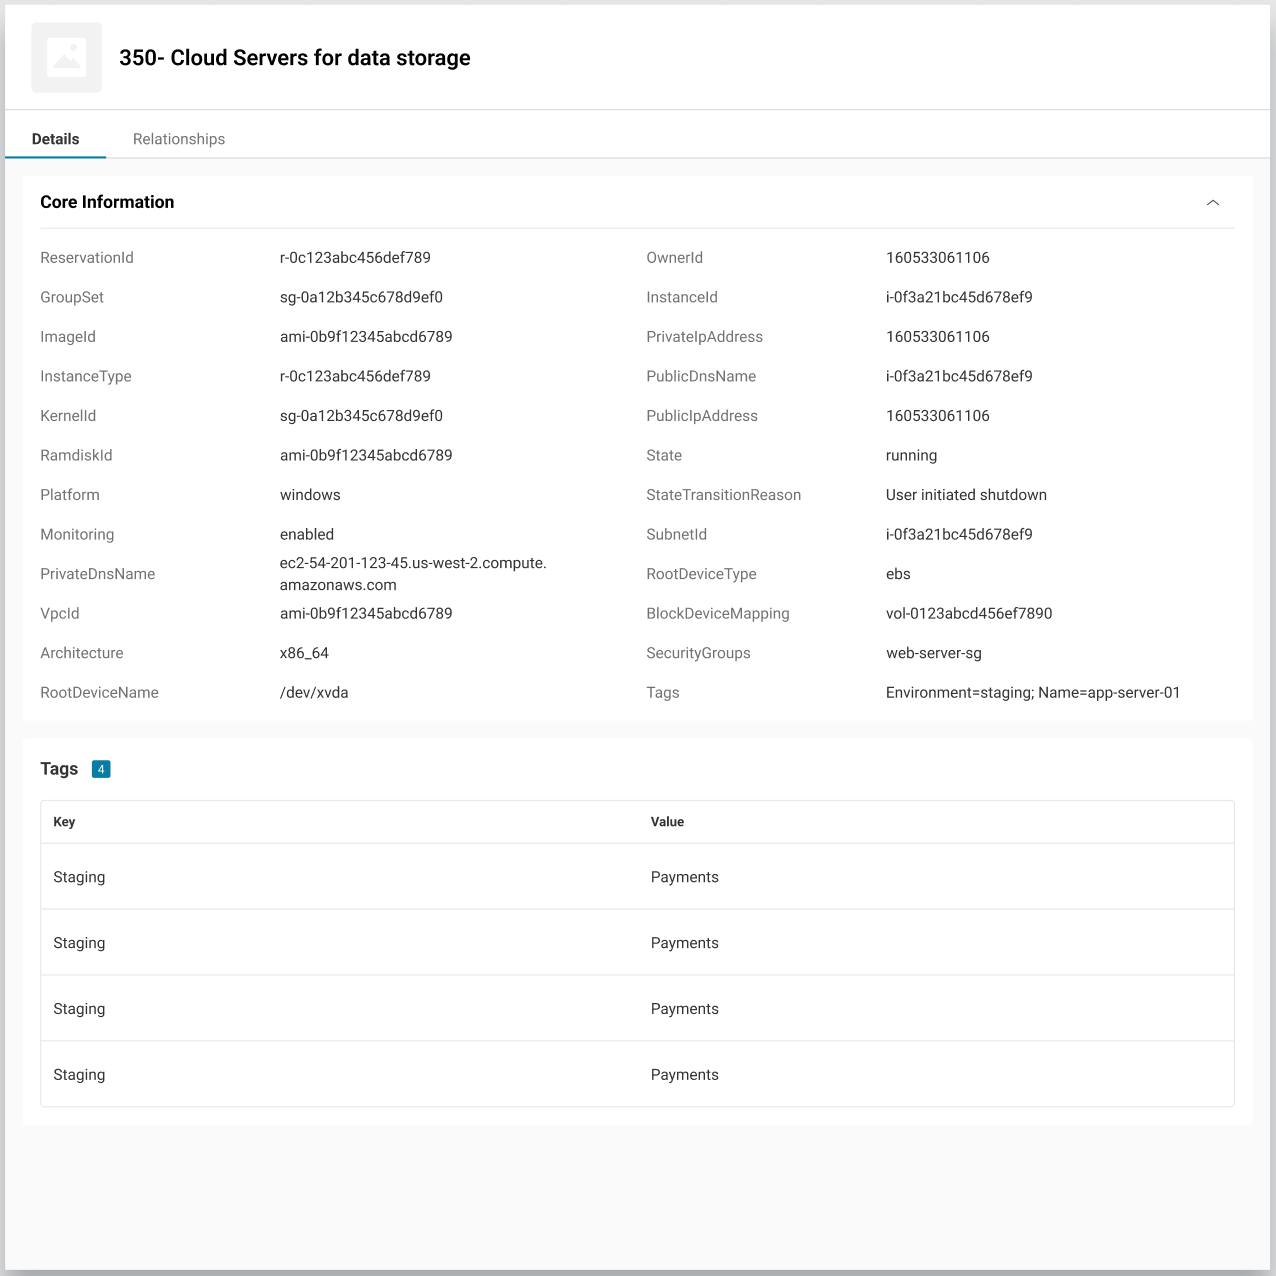
10. Review AWS Resource Relationships
AssetSonar also maps supported relationships between synced AWS resources. These relationships help you understand how your cloud infrastructure is connected.
For example:
- A Virtual Network (VPC) contains Subnets
- A Subnet hosts Cloud Servers / Virtual Machines
- A Cloud Server / Virtual Machine is attached to Storage Volumes
- A Cloud Server / Virtual Machine uses Network Interfaces
- A Security Group protects servers, interfaces, databases, or load balancers
- A Load Balancer routes traffic to Target Groups
- An Auto Scaling Group manages cloud servers
- A Database Cluster contains Managed Databases
To view relationships:
- Go to Items → AWS Resources.
- Open the relevant AWS resource.
- Click the Relationships tab.
Use this view to understand infrastructure dependencies and troubleshoot cloud resource impact from a single place.

Ready to Bring AWS Infrastructure into AssetSonar?
With AWS Cloud Integration, AssetSonar helps you bring cloud servers, storage, networking, databases, load balancers, scaling groups, and resource tags into one operational view. You can monitor AWS resources across selected regions, review sync health, and understand how cloud infrastructure components relate to one another.Need help setting up the AWS role or reviewing sync failures? Reach out to us at support@ezo.io — we’re happy to assist.

![[How-To] Automate Apple Device Onboarding with AssetSonar’s Apple Business Manager (ABM) Integration](https://cdn.ezo.io/wp-content/uploads/2025/10/29182422/How-To-Automate-Apple-Device-Onboarding-with-AssetSonars-Apple-Business-Manager-ABM-Integration.webp)
![[How-to] Automate Software Tracking with Slack Integration in AssetSonar](https://cdn.ezo.io/wp-content/uploads/2025/01/20124914/Zoom-integration-scaled-1.webp)
![[How-to] Configure Azure AD Single Sign-on (SSO) Integration With AssetSonar](https://cdn.ezo.io/wp-content/uploads/2020/10/Configure-Azure-AD-Single-Sign-on-SSO-Integration-With-AssetSonar.png)


