Why It Matters
When transitioning from an existing ticketing system to AssetSonar ITSM, manually re-entering open and historical tickets is impractical. Bulk importing via CSV helps preserve ticket history, maintain audit trails, and move active workloads into your new service desk without disrupting support operations.
How to Do It
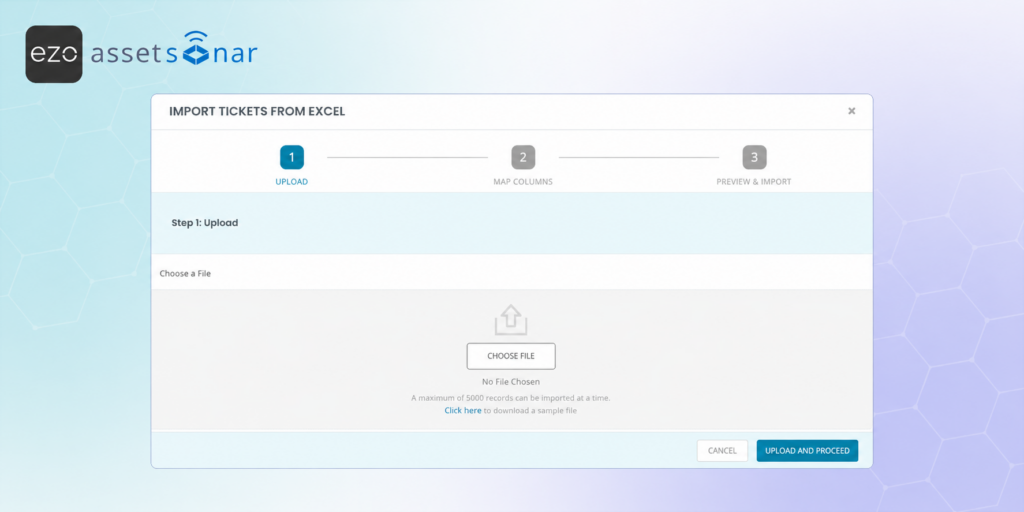
- Access the Tool: From your AssetSonar account, go to Settings → ITSM and then scroll down to locate the Bulk Import section.
- Get the Template: Click the Upload button to open the import modal, then click the link to download the sample CSV file. This provides the exact schema required, including mandatory headers like TicketID, subject, status, priority, and assignee.
- Upload Your Data: Once your data is added to the template, upload your CSV file.
- Review Field Mapping: The system shows a field mapping modal where you can confirm how your CSV columns map to AssetSonar ITSM ticket fields. Review the mapped fields and update any mappings if needed before continuing.
- Run Validation and Import: Once the mapping is confirmed, the system runs upfront validation to check for missing columns, data type mismatches, duplicate IDs, invalid dropdown values, or other issues before processing begins.
- Review the Results: The engine supports partial imports, meaning valid rows import successfully while invalid ones are skipped. Upon completion, you receive an automated email summary containing a downloadable error report so you can quickly fix and re-upload any failed rows.
Next Steps
Download the sample CSV from the Bulk Import settings, populate it with a small batch of your existing helpdesk data, upload it, review the field mapping, and run a small test upload to verify the results before uploading your full ticket history.
More Ways to Migrate Your Data
AssetSonar makes it easy to bring your historical helpdesk data into our ITSM module. Depending on your current setup, check out our other migration guides to find the path that works best for your team:
[ITSM | How-to] Migrating Jira Issues into AssetSonar
[ITSM | How-to] Migrating Zendesk Tickets into AssetSonar

![[ITSM | How-to] Migrating Jira Issues into AssetSonar](https://cdn.ezo.io/wp-content/uploads/2026/06/05114622/assetsonar_jira_itsm_import_fields_banner.webp)
![[ITSM | How-to] Migrating Zendesk Tickets into AssetSonar](https://cdn.ezo.io/wp-content/uploads/2026/06/29082746/zendesk-itsm-migration-6a422b93d9daf.jpg)


