

Construction teams often rent a large share of their equipment. But without proper tracking, rental durations, costs, and workflows get tangled up with owned assets. EZO’s Rented Assets feature lets you clearly mark rented items, log rental timelines and costs, and manage rental actions like Off Rent, Resume Rent, and Returned.
This guide walks you through enabling the feature, adding rented assets, working with rental actions, and reporting on rental activity.
1. Enable Rented Assets
Go to Settings → Company Settings → Items. Enable Rented Assets and click Update to save.
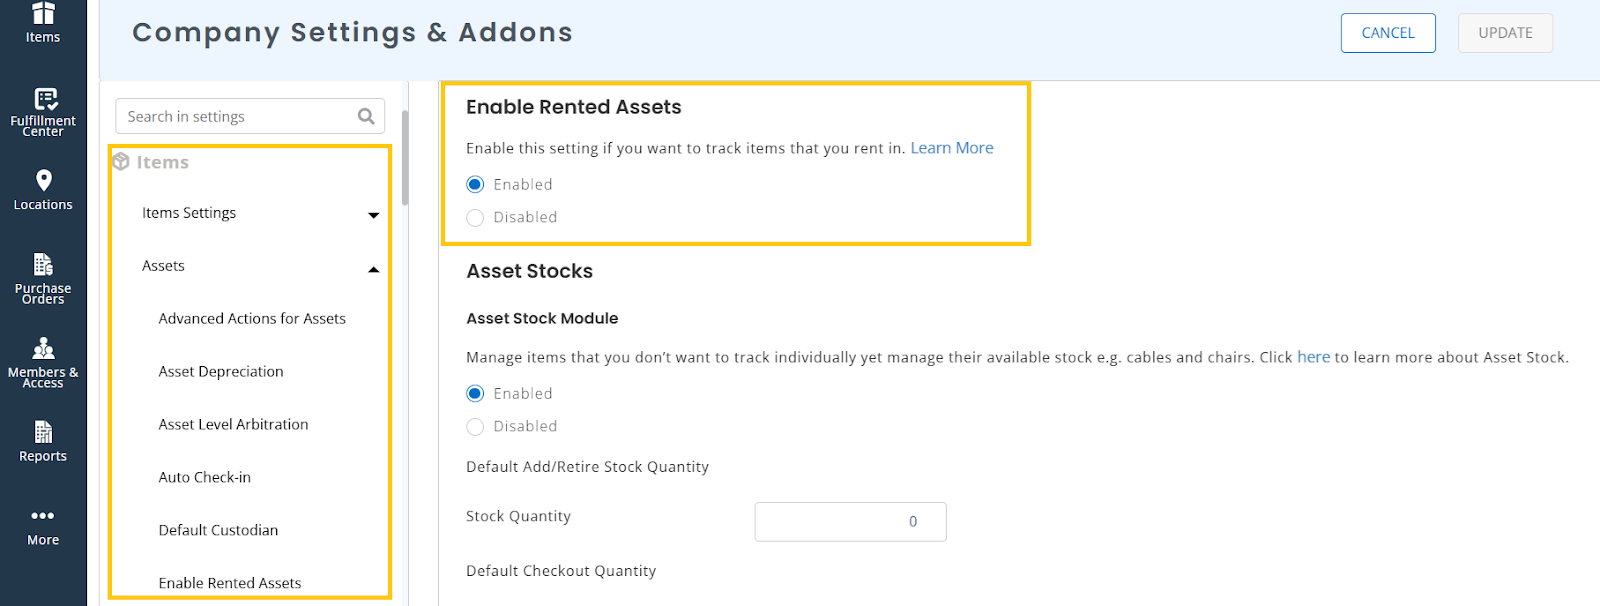
Note: For trial accounts that select Construction Contractors, Rented Assets are enabled by default.
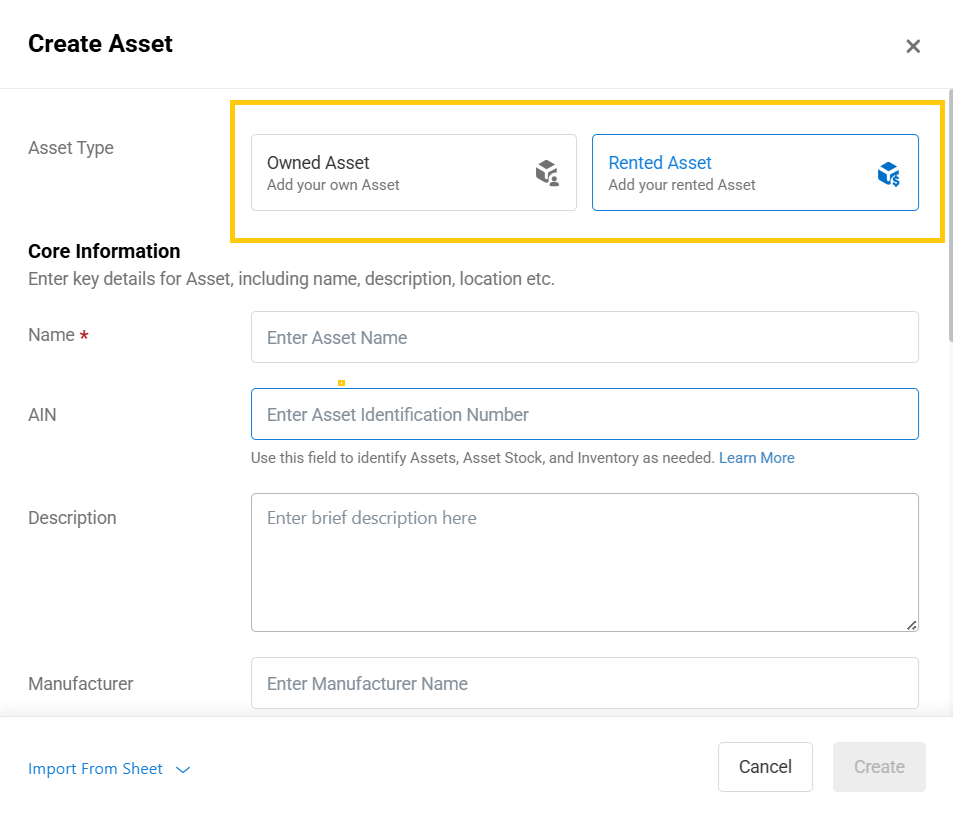
2. Add a Rented Asset and View It in Listings
Go to Item (Navigation Menu) → Assets → Create Asset. Here, you may choose Owned Asset or Rented Asset and then fill in the rest.
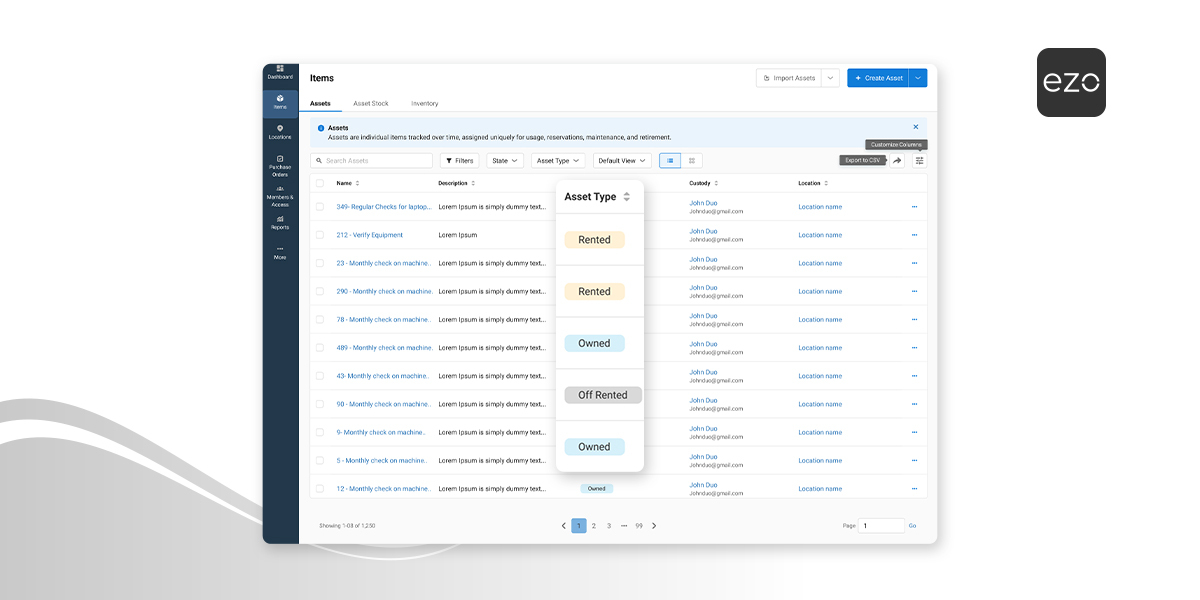
To view rented items:
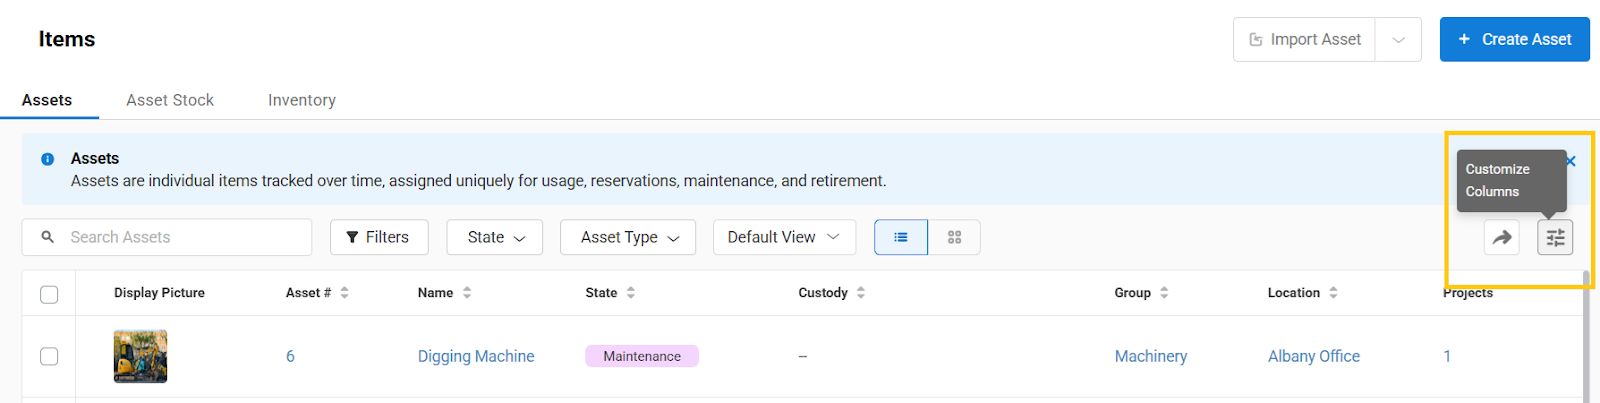
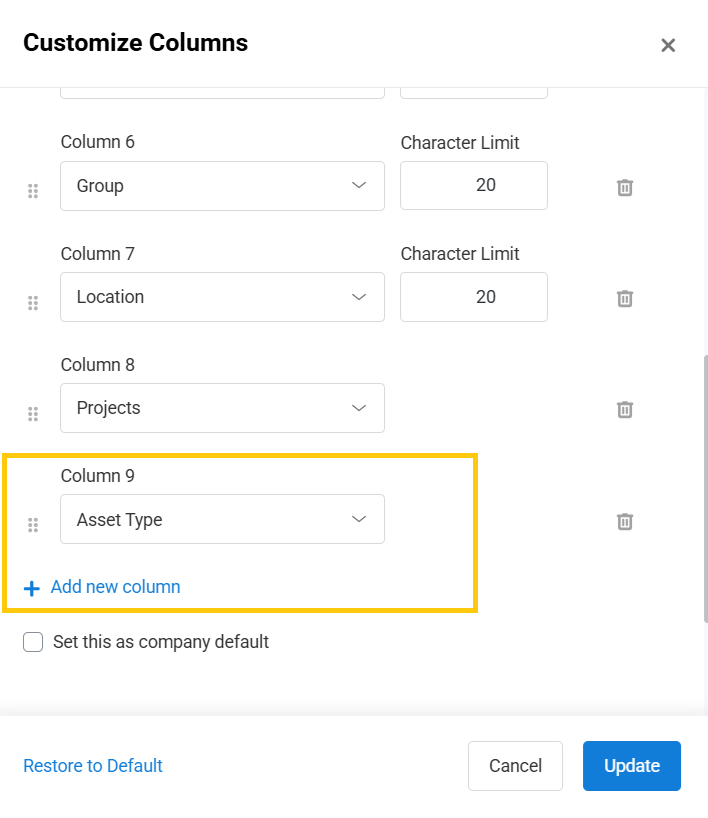
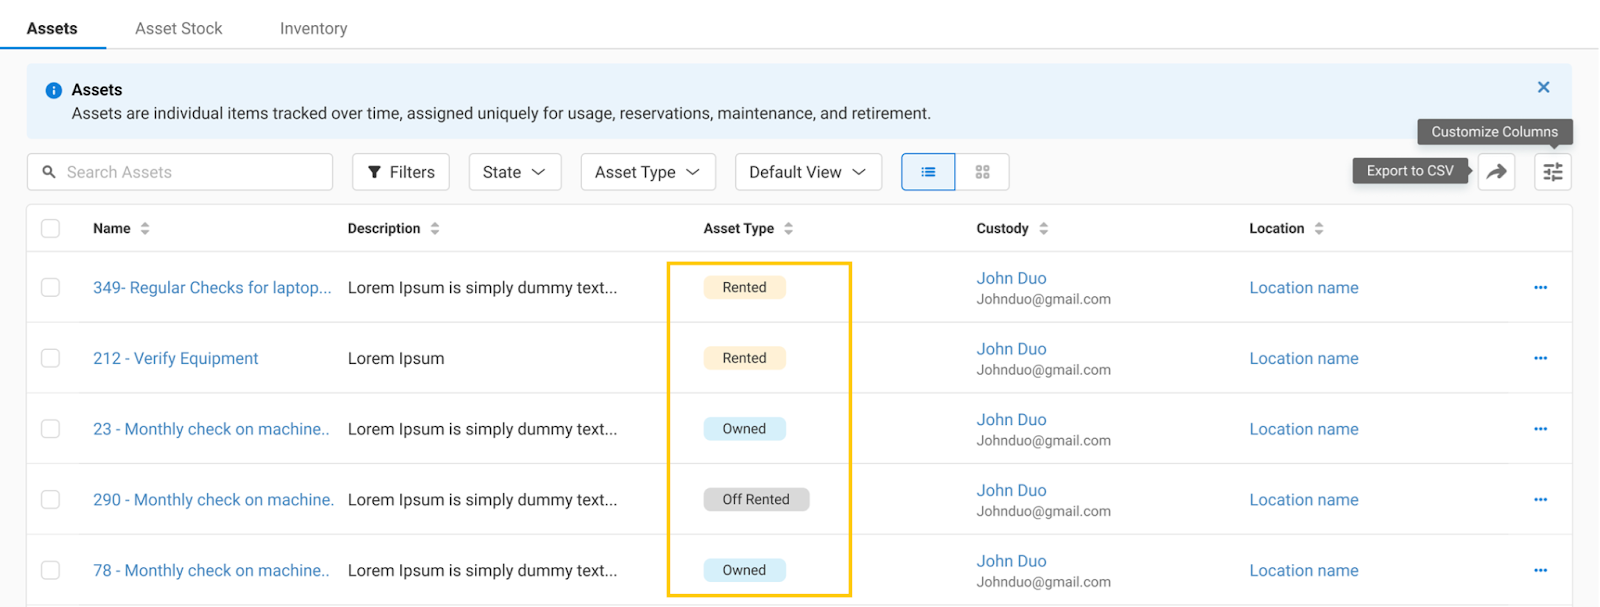
- Head to Asset Listings
- Click Customize Columns and add the Asset Type column.
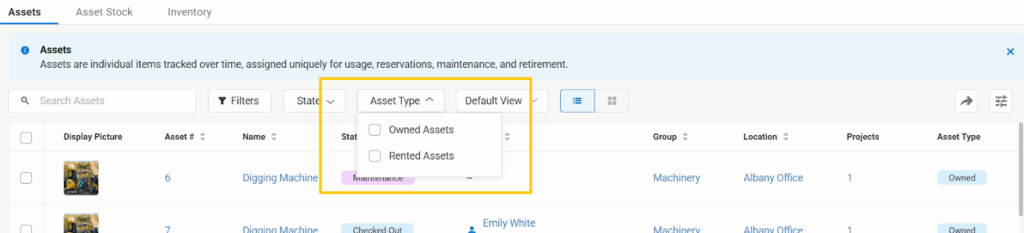
- Filter by Owned or Rented to narrow down the list
.
Note: Once an asset is created as Owned, you cannot later change it to a Rented.
3. Understand Rented Asset Fields and Behavior
When adding a rented asset, the system displays various fields to help you track rental-specific data. Here’s a breakdown of what to expect:
- Asset Type: Every asset is now categorized as either Owned or Rented. You’ll select this during asset creation and can later filter by this field in listings.
- Rental Duration: Tracks the total number of rental days. This is auto-calculated based on when the asset was added and whether it was Off Rented at any point. Rental Duration pauses when an asset is marked as Off Rented and resumes only when rent is resumed.
- Rental Cost: Lets you enter the cost of renting the item. This is an optional field, but useful for reporting.
- Off Rented On: Automatically records the date when an item is marked as Off Rented.
- Current Status: Rented items will have statuses like Rented, Off Rented, or Returned. These reflect the current state of the rental lifecycle.
Limitations and Exceptions
Note these behaviors to avoid confusion during data entry or usage:
- Assets cannot be converted from Owned to Rented (or vice versa) after creation.
- Rented Assets cannot be linked to Purchase Orders — the system assumes they are not owned.
- Rented assets are excluded from depreciation and maintenance workflows.
- Only one of each rented asset record exists in the system — each rented unit is tracked independently; you can’t have a quantity of 3 rented units under a single asset.
- Custom actions (like Return, Off Rent, Resume Rent) are only visible for rented assets, not owned ones.
4. Actions for Rent Items
You can perform the following actions specifically on the rented items:
Off Rent
Go to Items (Navigation Menu) → Assets → [Rented Asset Name] → … (Ellipses) and select Mark as Off Rented. You will be displayed a modal, enter the rental cost, and then confirm.
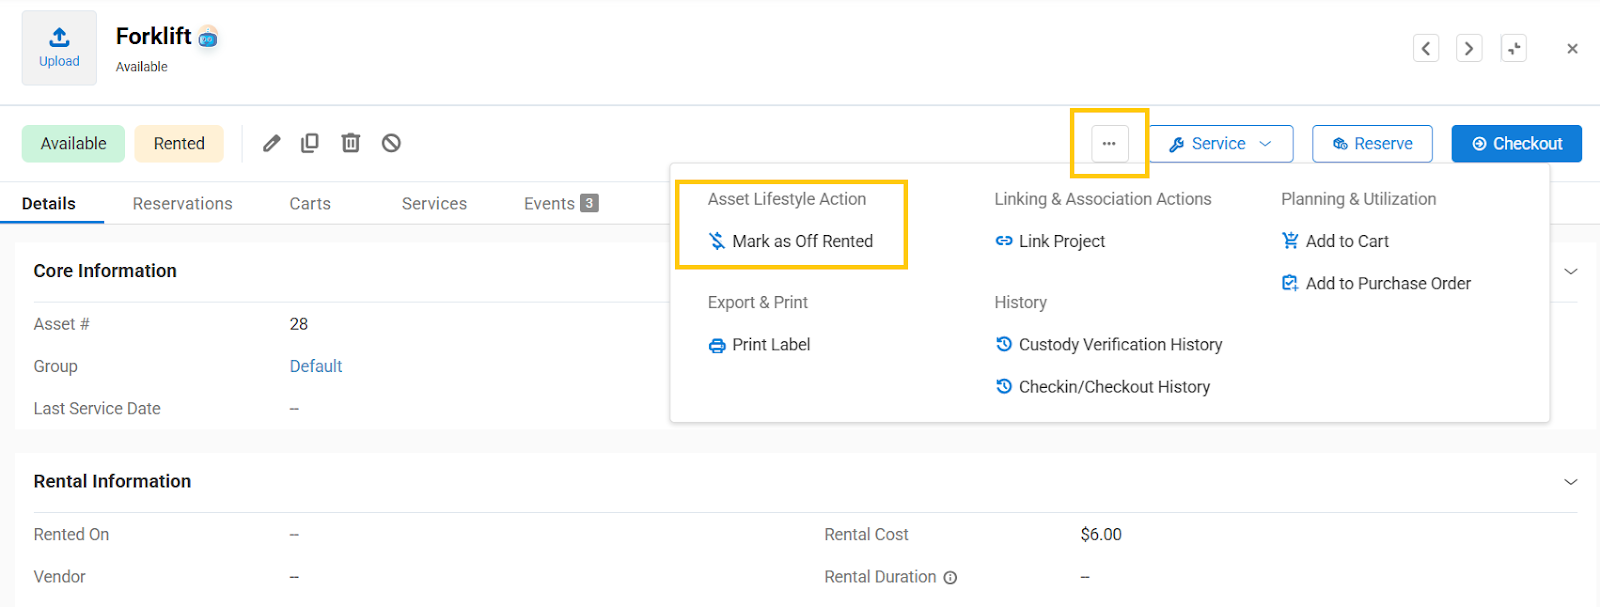
Note: The Rental Rate field pulls from Pricing Tier if defined. You can override it manually.
Resume Rent
If an asset has been off rented, the rent can be resumed by following the same path by clicking the Ellipses on the Assets Details page. Click Resume Rent, confirm the prompt, and the rental duration will begin again.

Note: While an item is Off Rented, you cannot Checkout, Audit, or Cart Checkout. You can still Reserve. Use Resume Rent to re-enable full actions.
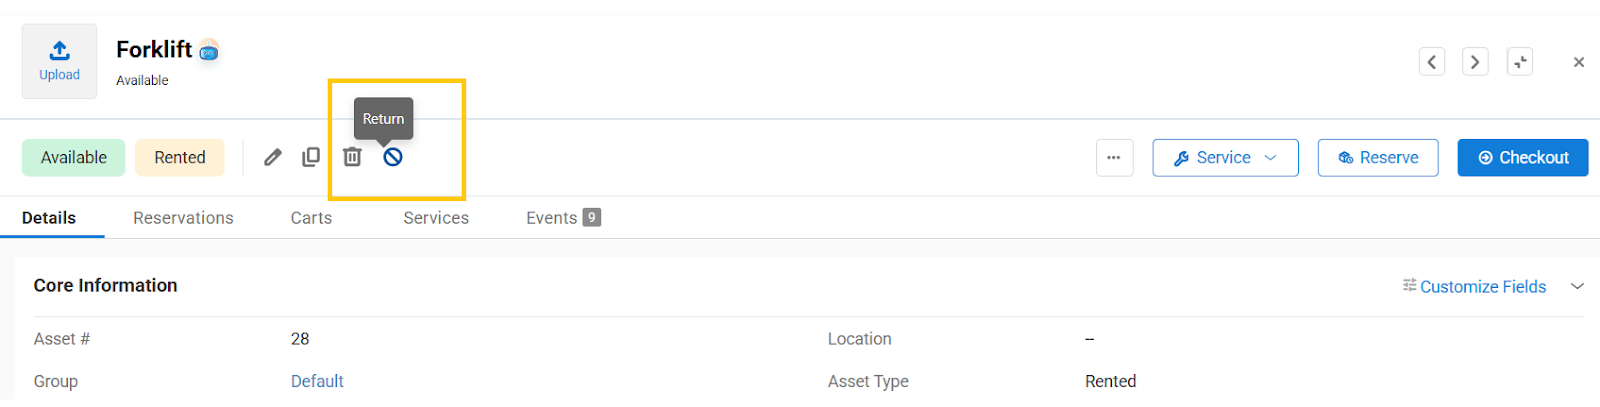
Returned
You may also record return details and end the rental by clicking on the Return icon as displayed below:
5. View and Report on Rented Assets
Custom reports now also have new fields, such as Rental Cost and Asset Type, to allow you to build summaries and reports on your rented assets. Go to Reports (Navigation Menu) → Custom Reports.
You can also build reports to track rental durations, off-rent trends, or total rental spend across assets.
6. Ready to Take Control of Your Rented Assets?
With EZO’s Rented Assets feature, you can track rentals alongside owned items, capture true rental cost and duration, and prevent off-rented equipment from being checked out. Whether you’re adding new gear, closing out returns, or reviewing spend reports, you’ll have complete visibility in one place.
Need help getting started? Reach out to support@ezo.io — we’re happy to assist.