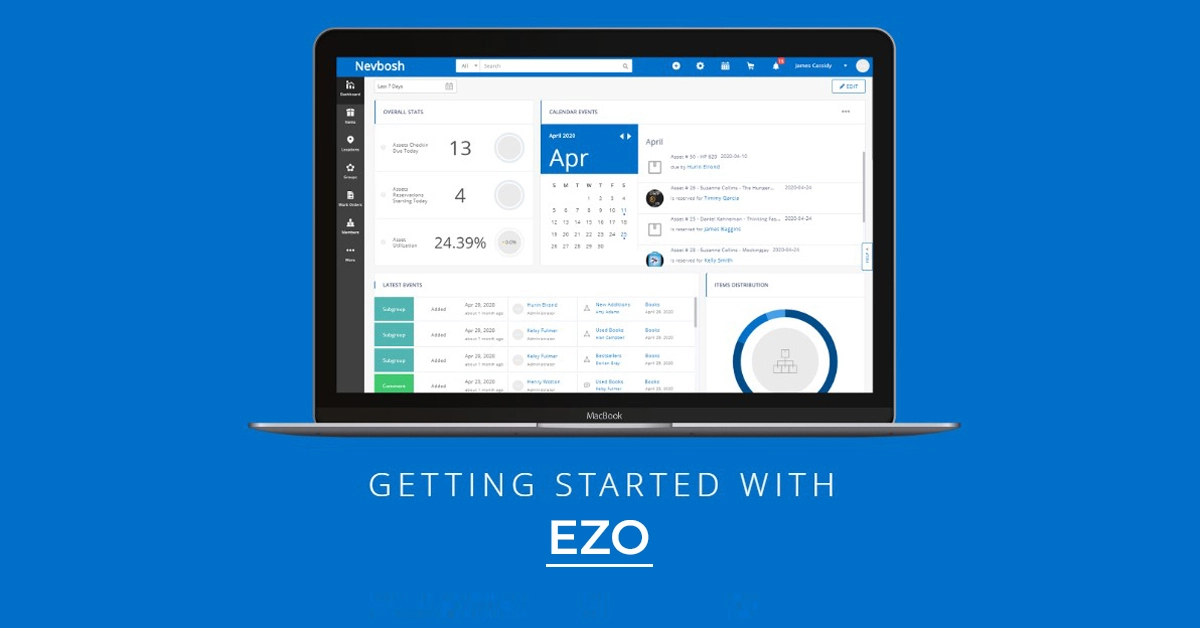
EZO is a cloud-based asset management platform that helps organizations track equipment, tools, supplies, and other operational resources from one centralized system. Teams can maintain accurate item records, monitor equipment locations, assign assets to employees, manage checkouts and reservations, schedule maintenance, and review activity across multiple sites.
Instead of relying on spreadsheets, paper logs, emails, or disconnected systems, EZO gives administrators and employees a shared view of their items and related workflows. Barcode, QR code, RFID, and mobile scanning help teams identify and update items quickly, while access controls determine which records and actions each user can access. EZO is suitable for organizations managing shared equipment across offices, warehouses, job sites, facilities, and other locations.
This guide will help account owners and administrators set up EZO and begin using it. It covers the essential steps for organizing an account, adding Members and items, configuring labels, and completing the first checkout and check-in. Advanced capabilities, including maintenance, employee requests, reporting, and integrations, are introduced briefly and linked to dedicated EZO guides where appropriate.
Core Capabilities in EZO
EZO connects asset tracking, equipment management, maintenance, requests, and reporting through a centralized set of item records.
Asset Tracking
- Centralized item records: Store identification numbers, locations, assigned Members, purchase details, depreciation, status, and activity history in one place.
- Custody tracking: See who is responsible for an asset and review its previous checkouts, returns, and transfers.
- Location tracking: Monitor equipment across offices, warehouses, job sites, facilities, and other locations.
- Lifecycle management: Track assets from acquisition and deployment through maintenance, recovery, and retirement.
Maintenance Management
- Work orders: Create, assign, prioritize, and monitor maintenance tasks from a centralized workspace.
- Preventive maintenance: Schedule recurring service based on dates, usage, or meter readings.
- Maintenance checklists: Standardize inspections and service tasks with configurable checklists.
- Workflow automation: Trigger maintenance actions, alerts, and assignments based on predefined conditions.
- Service history: Maintain records of completed work, costs, technicians, and equipment downtime.
Requests and Reservations
- Self-service requests: Allow employees to search for available items and submit equipment requests.
- Equipment reservations: Reserve assets for specific dates, projects, events, or Members.
- Centralized fulfillment: Review and process requests from the Fulfillment Center instead of managing them through emails, messages, or paper forms.
- Request tracking: Give employees visibility into approval, fulfillment, and request status.
Barcode, QR Code, RFID, and Mobile Tracking
- Barcode and QR code scanning: Identify items and open the correct record without manually searching through item lists.
- RFID tracking: Scan multiple tagged items during audits, transfers, and other high-volume activities.
- Mobile access: Check items in and out, update records, and review item information from a mobile device.
- Scanning workflows: Scan items during checkouts, returns, transfers, audits, and location updates.
Reports and Dashboards
- Standard reports: Review item assignments, availability, locations, maintenance, stock levels, and transaction history.
- Custom reports: Select the fields and filters required for a specific operational or management view.
- Scheduled reporting: Automatically send recurring reports to relevant users.
- Configurable dashboards: Display the metrics, reports, and activity most relevant to each user or role.
AI-Assisted Support and Analysis
- Product guidance: Use ZOE, the EZO AI assistant, to find instructions and answers about using the platform.
- Report analysis: Ask questions about report data without repeatedly rebuilding or rerunning a report.
- Catalog insights: Review usage patterns across Assets, Asset Stock, and Inventory.
- Stock insights: Identify potential shortages based on historical demand and usage trends.
These capabilities rely on the item records stored in EZO. Before configuring requests, maintenance, reports, or other advanced workflows, become familiar with the application’s navigation and the different item types available.
1. Understand the EZO Navigation
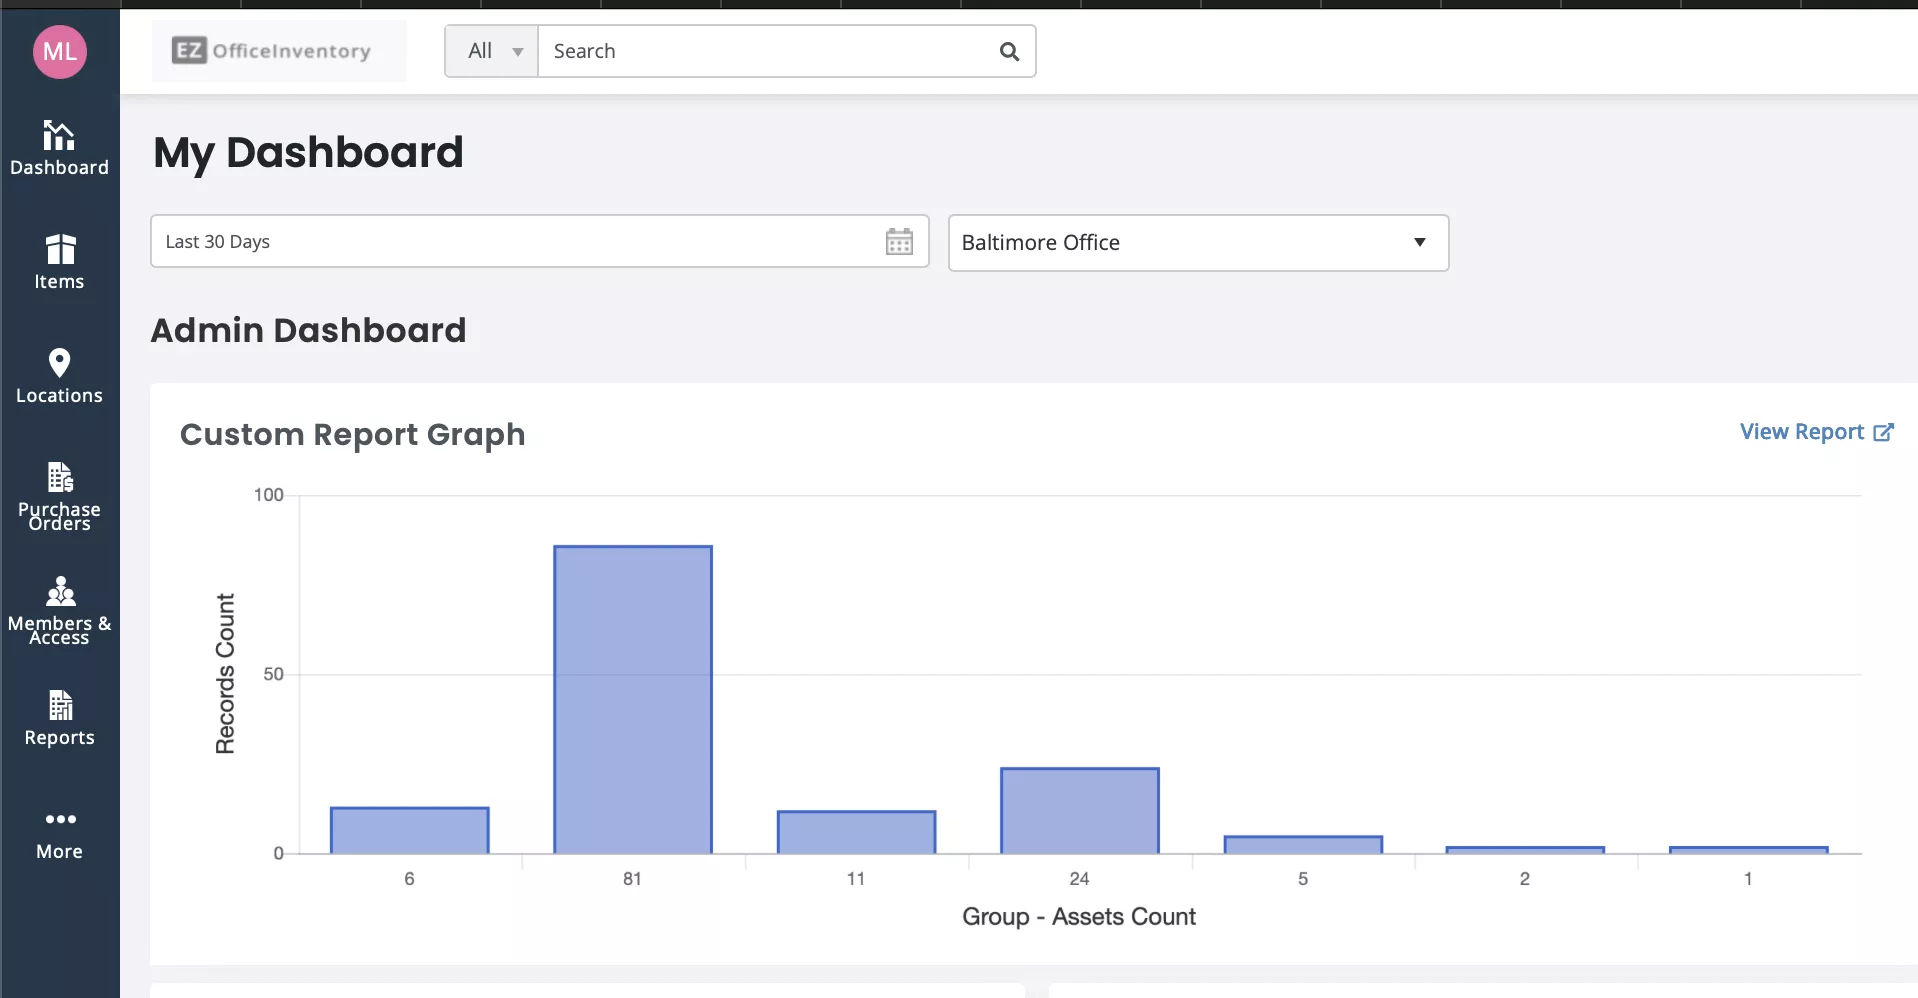
The side and top navigation bars help you move between EZO modules, manage item records, and complete routine asset management tasks. Whether you are adding equipment, tracking its location, processing requests, scheduling maintenance, or reviewing reports, the navigation options keep the relevant tools within easy reach.
Note: The features available in your account may vary based on your role, permissions, account settings, and enabled add-ons.
1.1 Access Core Modules
Use the side navigation bar to access the main modules in EZO. From here, you can:
- Add and manage Assets, Asset Stock, and Inventory through Items.
- Track items across offices, warehouses, job sites, and other facilities through Locations.
- Create purchase orders and record incoming items through Purchase Orders.
- Add users and configure their permissions through Members and Access.
- Review item availability, custody, utilization, and activity through Reports.
- Review and process employee requests through the Fulfillment Center.
- Schedule preventive maintenance and manage work orders through CMMS.
Together, these modules help you manage item records, users, transactions, requests, maintenance activities, and reporting from one system.
1.2 Complete Frequent Actions From the Top Navigation Bar
Use the top navigation bar to complete frequent actions without opening the full module.
- Notifications: Review updates about requests, reservations, approvals, overdue items, and other account activity.
- Quick Item Center: Search for or scan items to check them out, check them in, reserve them, extend a checkout, or move them between locations.
- Add New: Create an item, location, Bundle, Package, or purchase order.
- Carts: Group multiple items for a project, job, event, or shared transaction.
- Availability Calendar: Check whether equipment is available, checked out, or reserved for a particular date.
Here are some additional actions available in the top Navigation Bar:
You will use the side navigation bar to configure and manage your account, while the top navigation bar provides shortcuts for frequent item actions. The next step is to understand how EZO categorizes the different resources your organization manages.
2. Understand Item Types in EZO
Before adding items to EZO, decide how each type of equipment or supply should be tracked. EZO separates items into Assets, Asset Stock, and Inventory based on whether they are tracked individually, managed by quantity, or consumed during use. Choosing the correct item type ensures that availability, custody, stock levels, and transaction histories are recorded accurately.
2.1 Choose the Right Item Type
| Item type | Use it for | Examples | How it is tracked |
| Assets | Reusable equipment that must be tracked individually | Laptops, cameras, vehicles, power tools | Each item has its own record, identification number, location, status, custody, and history. |
| Asset Stock | Reusable items that are interchangeable and do not require individual records | Cables, chairs, safety helmets, drill bits | A quantity is tracked across one or more locations. Units can be checked out and returned without identifying each one separately. |
| Inventory | Supplies or materials that are consumed during use | Fuel, batteries, cleaning supplies, spare parts | Quantities are added when stock is received and removed when items are consumed or issued. |
Use the following rule when deciding between the three:
- Choose Assets when each unit needs its own identity, custody record, maintenance history, or lifecycle.
- Choose Asset Stock when items are reusable but only the available and assigned quantities need to be tracked.
- Choose Inventory when items are consumed and are not expected to be returned.
For example, a construction company could record each excavator as an Asset, track safety helmets as Asset Stock, and manage fuel as Inventory.
For a detailed comparison of available actions, identification methods, and quantity tracking, see How to Differentiate Between Item Types in EZO.
2.2 Organize Items With Bundles and Packages
EZO also lets you combine items when they are regularly issued, reserved, or managed together.
- Bundles: Combine Assets, Asset Stock, and Inventory in flexible quantities. A site crew bundle, for example, could include one power tool, two safety helmets, and several consumable supplies.
- Packages: Combine multiple Assets that should be checked out or reserved together. A camera package could contain a camera body, lens, tripod, and lighting kit.
- Groups: Categorize related records for easier filtering, reporting, and configuration. Groups organize items but do not replace their individual item types.
For detailed setup instructions, see How to Create and Manage Bundles and Packages in EZO.
3. Set Up Locations, Groups, and Custom Fields
Setting up your organizational structure before adding items makes equipment operations easier as your organization grows. Locations, Groups, and Custom Fields determine how equipment is organized, searched, reported on, and managed throughout its lifecycle. Configuring them before importing data also simplifies mapping records from spreadsheets or another asset tracking system.
3.1 Set Up Locations
Locations represent where your organization’s Assets, Asset Stock, and Inventory are stored, assigned, or used. They can represent offices, warehouses, storerooms, job sites, buildings, departments, vehicles, or any other physical space. For organizations operating across multiple facilities, EZO supports parent Locations and Sublocations, allowing you to build a hierarchy that reflects your operations.
A well-defined location structure helps operations teams quickly locate equipment, track transfers, perform audits, and generate more accurate reports. It also provides better visibility into where equipment is stored or in use across multiple sites.
To learn more, see:
3.2 Organize Items with Groups and Subgroups
Groups organize equipment based on your organization’s structure, making it easier to search, filter, report on, and manage equipment records. While Item Types determine how an item is tracked, Groups let you categorize equipment by department, function, project, manufacturer, or any other classification that supports your workflows.
If you need additional organization, you can create nested Subgroups to build a more detailed hierarchy. For example:
- IT Equipment
- Computers
- Laptops
- Monitors
- Computers
- Facilities
- Cleaning Equipment
- Safety Equipment
Creating Groups before importing data helps keep equipment records consistent, improves reporting, and makes it easier for administrators and field teams to find the equipment they need.
To learn more, see:
3.3 Configure Custom Fields
Custom Fields allow you to capture information that is unique to your equipment operations, such as project codes, inspection dates, voltage ratings, condition, funding sources, or warranty types.
If you’re importing existing records, create the required Custom Fields before importing your data. This allows you to map spreadsheet columns correctly during the import process and reduces the need for manual updates afterward.
Standardizing this information makes it easier to filter equipment records, generate reports, and maintain consistent data across your organization.
To learn more, see:
4. Add Members and Configure Access
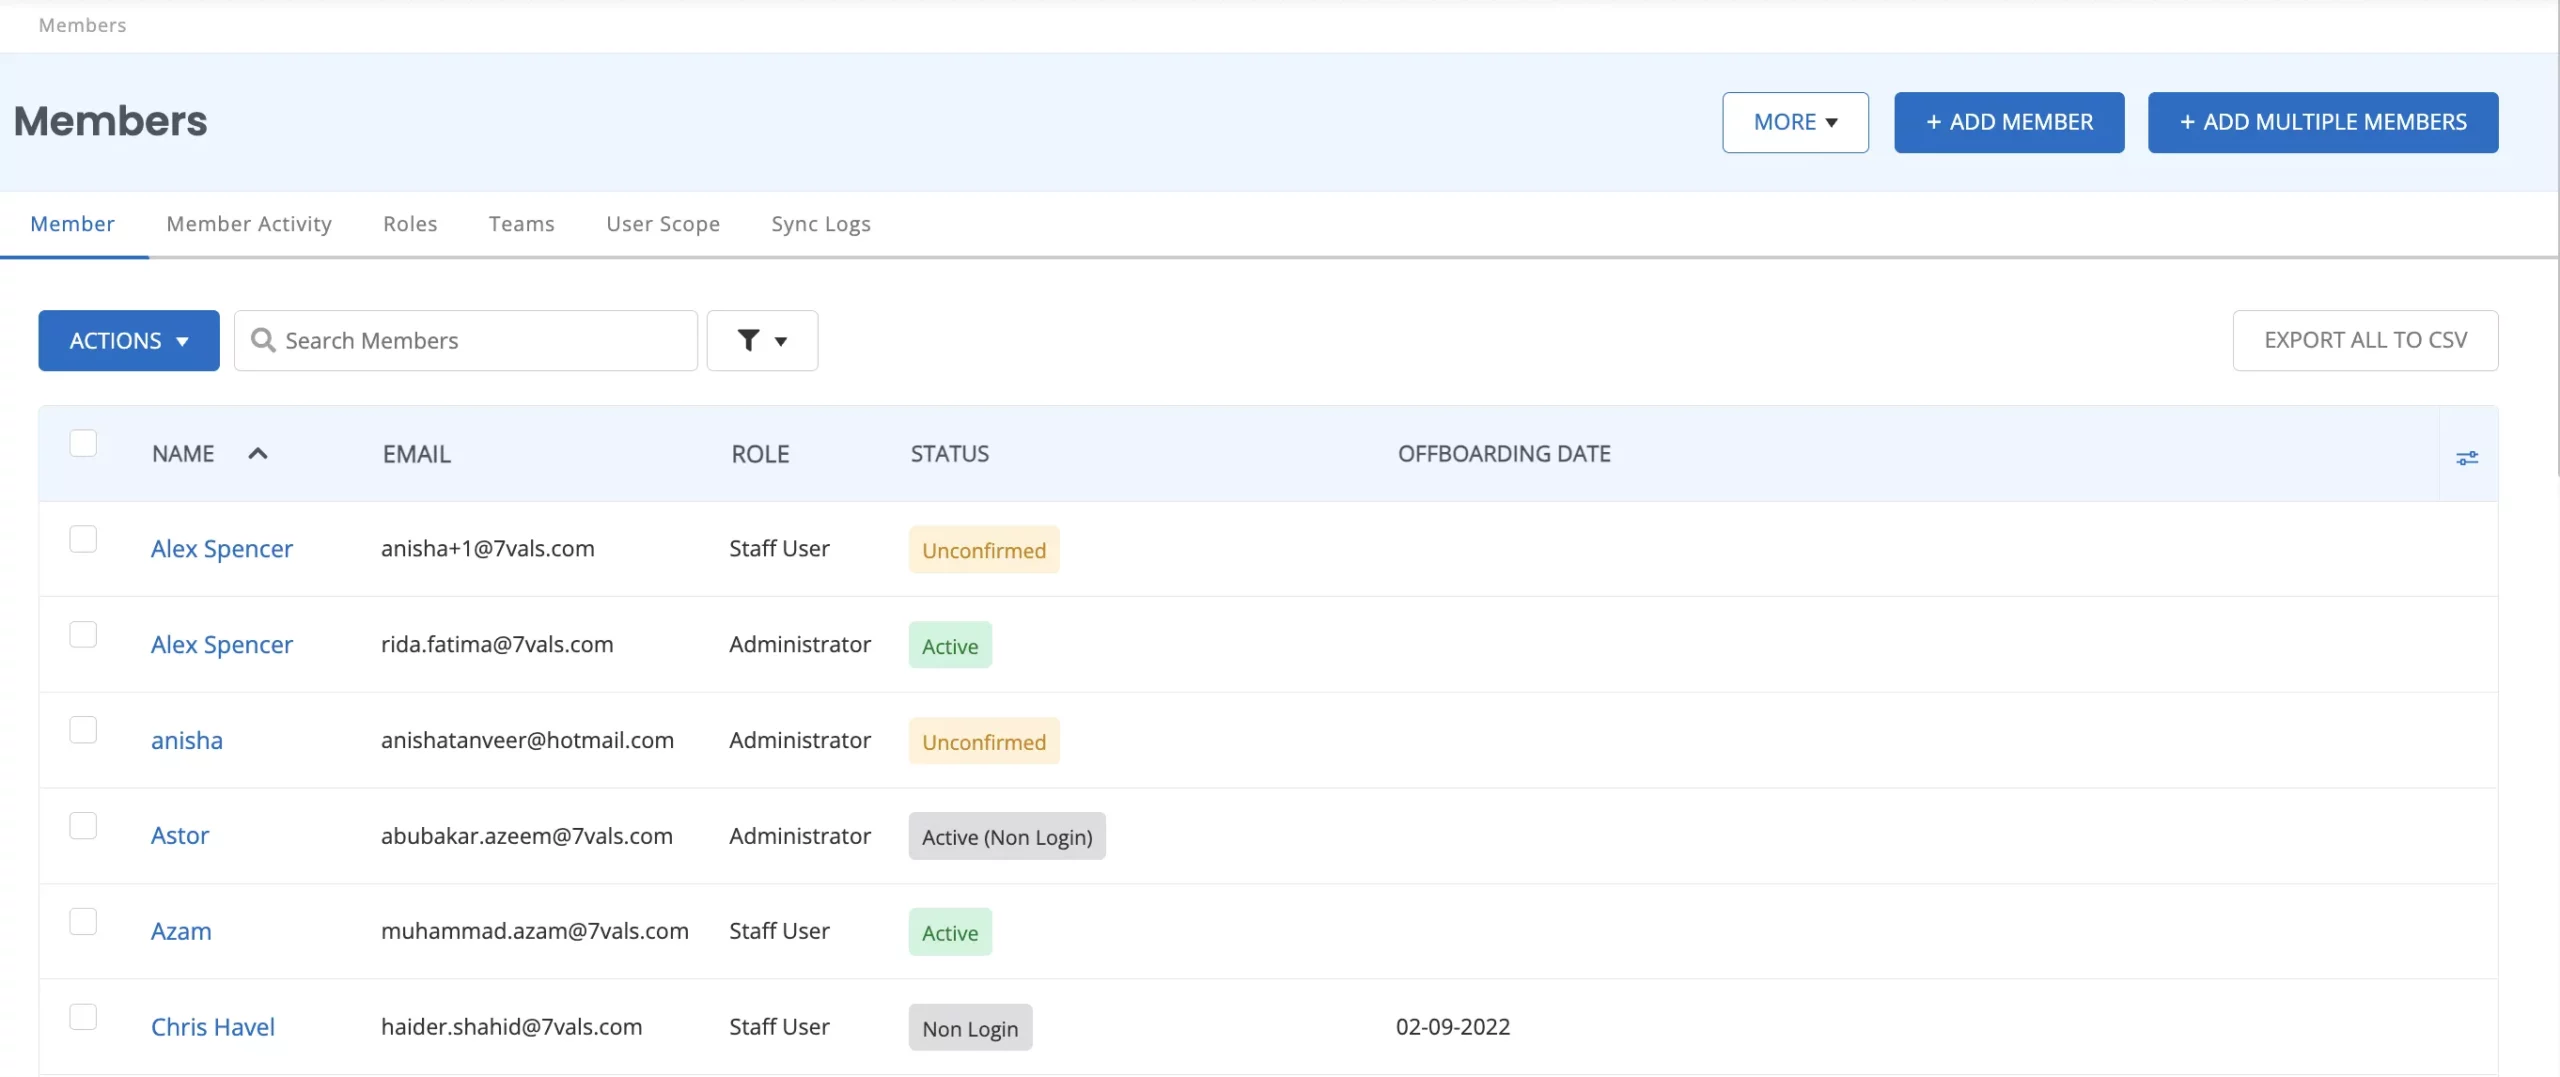
Members are the people who use EZO to manage, request, maintain, or borrow equipment. Adding Members allows organizations to assign equipment, process requests, track user activity, and maintain a complete history of operational actions.
You can add Members individually or import them in bulk when onboarding larger teams. Keeping Member records up to date improves accountability, simplifies equipment assignments, and helps maintain accurate equipment operations across your organization.
To learn more, see:
4.2 Configure Roles and Permissions
Roles determine what each Member can do in EZO, while User Scope determines where they can do it. Assigning the appropriate permissions ensures users have access to the tools they need while protecting sensitive operational data.
EZO includes default roles for common responsibilities. If your organization requires more flexibility, you can create Custom Roles by cloning an existing role or building one from scratch. This allows you to tailor permissions for different job functions without affecting other users.
User Scope further refines access by limiting Members to specific locations, groups, teams, or subsets of equipment. This makes it easy to support multiple departments, projects, or job sites while ensuring users only have access to the equipment relevant to their responsibilities.
Learn more
Watch the complete workflow for Members and Roles:
5. Add or Import Equipment
Equipment records are the foundation of your equipment operations in EZO. Whether you’re tracking individually managed Assets, reusable Asset Stock, consumable Inventory, or organizing equipment into Bundles and Packages, EZO provides flexible ways to build and manage your equipment catalog.
You can add equipment individually or import existing records in bulk. Organizations transitioning from spreadsheets or another equipment management system can migrate existing records while preserving important information such as Locations, Groups, purchase details, and Custom Fields. Starting with complete and well-organized records improves reporting, simplifies day-to-day operations, and helps maintain accurate equipment data as your organization grows.
Learn more
5.1 Manage Equipment Records
After adding your equipment, you can view and manage it from the Items module. Equipment records can be searched, filtered, sorted, and customized to help teams quickly find the information they need.
Each equipment record serves as a central source of information, including its location, assignments, maintenance history, reservations, and other operational activity. Keeping records complete and up to date helps improve reporting, audits, and day-to-day equipment management.
5.2 Perform Equipment Actions
As equipment moves through its lifecycle, EZO allows you to update its status and activity from a single record. Common actions include updating locations, checking equipment in and out, making reservations, transferring custody, recording maintenance activities, and reviewing equipment history.
Asset Stock and Inventory follow similar workflows, allowing teams to add or remove quantities, monitor stock levels, and maintain accurate records as items are issued, consumed, or replenished.
5.3 Optimize Equipment Planning
As your equipment operations grow, understanding how equipment is used becomes just as important as tracking where it is. The Catalog Optimizer analyzes historical usage patterns for Assets, Asset Stock, and Inventory, helping organizations identify utilization trends and make more informed operational decisions.
Use Catalog Optimizer to:
- Monitor equipment utilization trends over time.
- Identify items that are optimally utilized, underutilized, or at risk of stockouts.
- Adjust utilization targets to reflect changing operational demand.
- Support equipment purchasing, allocation, and replenishment decisions with historical usage data.
Learn more
6. Plan, Request, Reserve, and Fulfill Equipment
EZO connects equipment planning, employee requests, reservations, approvals, and fulfillment in one workflow. Teams can use Carts to assemble equipment for a job or event, allow employees to submit requests through the Request Portal, reserve items for future dates, and process approved requests through the Fulfillment Center.
6.1 Create Carts
Carts help teams organize multiple items required for a job, project, or event in one workspace. A Cart can include Assets, Asset Stock, Inventory, Bundles, and Packages, allowing users to reserve or check out the required equipment together instead of processing each item separately.
EZO can also recommend items that have previously been checked out together, helping teams prepare more complete equipment sets. Cart costs can be reviewed for planning purposes, while Cart Tags make it easier to organize Carts by department, project, event, or location.
When only one item is required, users can reserve it directly from the item details page without creating a Cart.
To create a Cart,
- Click on the cart icon in the top navigation bar and select Current Cart.
- Add the items you want to add in the Add Items section and then click the Reserve or Checkout button.
- Assign a user to the cart, set the return date and once again click the Reserve or Checkout button.
For detailed guidance, you can read the following support blogs:
- Using Carts for equipment management
- Tracking the cost of Carts
- Using item recommendations
- Organizing Carts with Tags
6.2 Submit Requests Through the Request Portal
The Request Portal gives employees a self-service space to browse available equipment, submit requests, select the required dates, and track progress without relying on emails, messages, or paper forms.
Depending on the account configuration, requests can move through approval and fulfillment workflows before equipment is issued. Employees can also use General Requests when they know what they need but are not requesting a specific item record.
Learn more:
6.3 Reserve Equipment for Future Use
Reservations help teams hold equipment for a future project, event, job, or employee before the actual checkout takes place. Users can reserve an individual Asset from its details page or use a Cart when several items are needed together.
The Availability Calendar shows current and upcoming bookings, helping users identify whether equipment is available for the required dates. Recurring reservations can also be created for equipment needs that repeat on a regular schedule.
A reservation plans future use, while a checkout records who takes custody of the equipment when it is issued.
Learn more:
- Using the Availability Calendar
- Reviewing availability while reserving equipment
- Creating recurring reservations
6.4 Review and Fulfill Requests
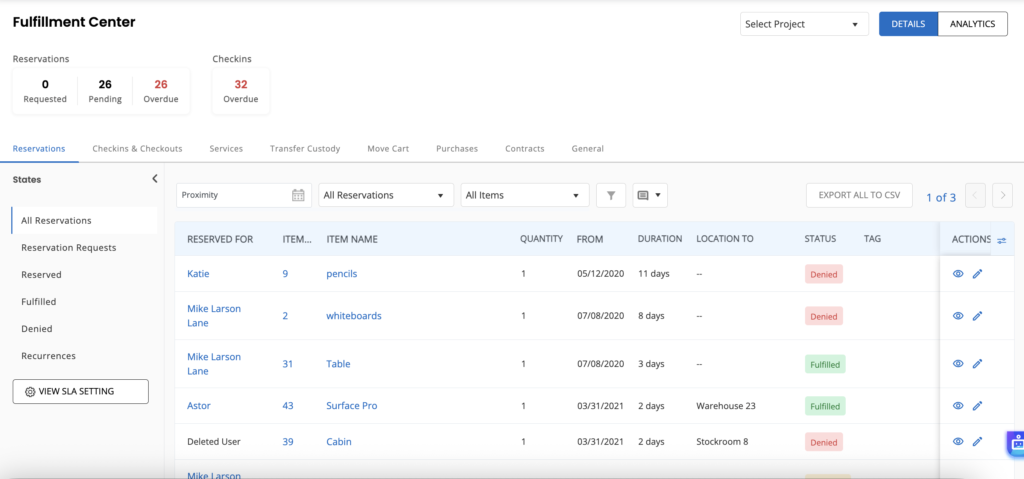
The Fulfillment Center gives equipment managers a centralized workspace for reviewing incoming requests, processing approvals, preparing items, and completing fulfillment.
Managers can review the requested items, quantities, dates, availability, and approval status before preparing equipment for checkout. The Fulfillment Center also records request activity, making it easier to see who approved, rejected, or fulfilled each request and where it is waiting for action.
Learn more:
Carts and reservations help teams plan equipment requirements, while the Request Portal and Fulfillment Center manage how those requirements are submitted, approved, prepared, and fulfilled.
7. Manage Equipment Procurement with Purchase Orders
Purchase Orders help organizations manage the procurement process for new equipment, Asset Stock, and Inventory from a centralized workspace. Instead of tracking purchases through spreadsheets or email, EZO lets you create, manage, and receive purchase orders while keeping equipment records and stock levels up to date.
As purchase orders are fulfilled, received items can be added directly to your equipment catalog, reducing manual data entry and helping maintain accurate operational records.
Learn more
As purchase orders are fulfilled, received items can be added directly to your equipment catalog, reducing manual data entry and helping maintain accurate operational records.
8. Manage Equipment Maintenance with CMMS
EZO CMMS helps organizations manage equipment maintenance from a centralized workspace. Teams can create and assign Work Orders, schedule preventive maintenance, record service and inspection activities, and track maintenance history for individual Assets. This helps maintenance teams keep equipment available, reduce unplanned downtime, and maintain a record of work performed throughout an Asset’s lifecycle.
8.1 Manage Maintenance with Work Orders
Work Orders help maintenance teams organize repairs, inspections, servicing, and other maintenance tasks from start to finish. A Work Order can be linked to the Assets being maintained, with work logs, costs, consumed Inventory, and other details recorded as work progresses. This provides a centralized record of maintenance activity and makes it easier to track technician work and equipment downtime.
To create a maintenance Work Order:
- Go to CMMS → Work Orders and click Create Work Order.
- Enter the task details, assign it to the relevant member, set the priority and due date, and select the Asset(s) that requires maintenance.
- Save the Work Order and update its status as work progresses.
You can record work performed, labor, costs, consumed Inventory, and other details as the task is completed. This creates a maintenance record that can be referenced later when reviewing the Asset’s history.
Here are some of the prominent actions you can take in your CMMS account:
Learn more
8.2 Schedule Preventive Maintenance
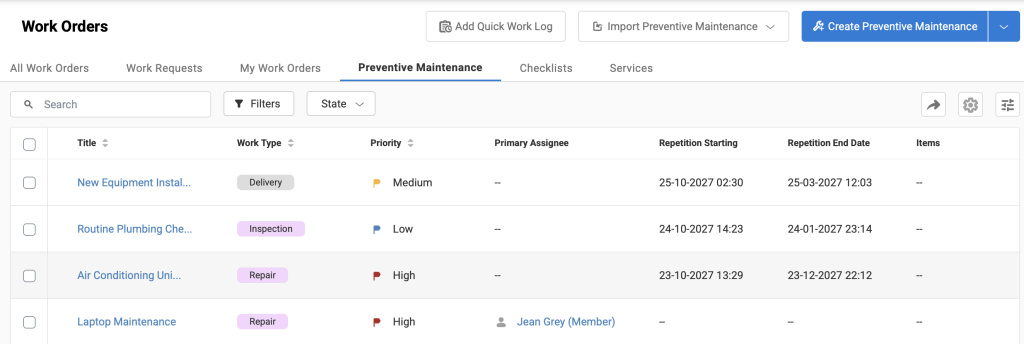
Preventive maintenance allows teams to schedule recurring inspections and service before equipment problems occur. Maintenance can be scheduled based on defined intervals and associated with specific Assets or Groups, helping teams maintain equipment regularly and reduce the risk of unexpected downtime.
Recurring maintenance Work Orders can be generated automatically according to the schedule you define, reducing the need to create routine maintenance tasks manually.
To set up preventive maintenance:
- Go to CMMS → Preventive Maintenance and click Create Preventive Maintenance.
- Select the maintenance type, priority, and add an assignee.
- Define when the maintenance should occur and how often it should repeat and select the Item(s) it applies to.
- Add the required maintenance tasks or checklist save the schedule.
Learn more
9. Monitor Equipment Operations
As your equipment operations grow, monitoring activity and analyzing data becomes essential for making informed decisions. EZO’s reporting and dashboard tools give you visibility into equipment availability, utilization, maintenance, inventory, and other operational metrics, helping you identify trends and keep operations running efficiently.
9.1 Analyze Equipment Data with Reports
EZO includes a library of standard reports that help you monitor equipment assignments, availability, maintenance activity, inventory levels, transaction history, and other operational data. You can also create custom reports by selecting the fields and filters that are most relevant to your organization.
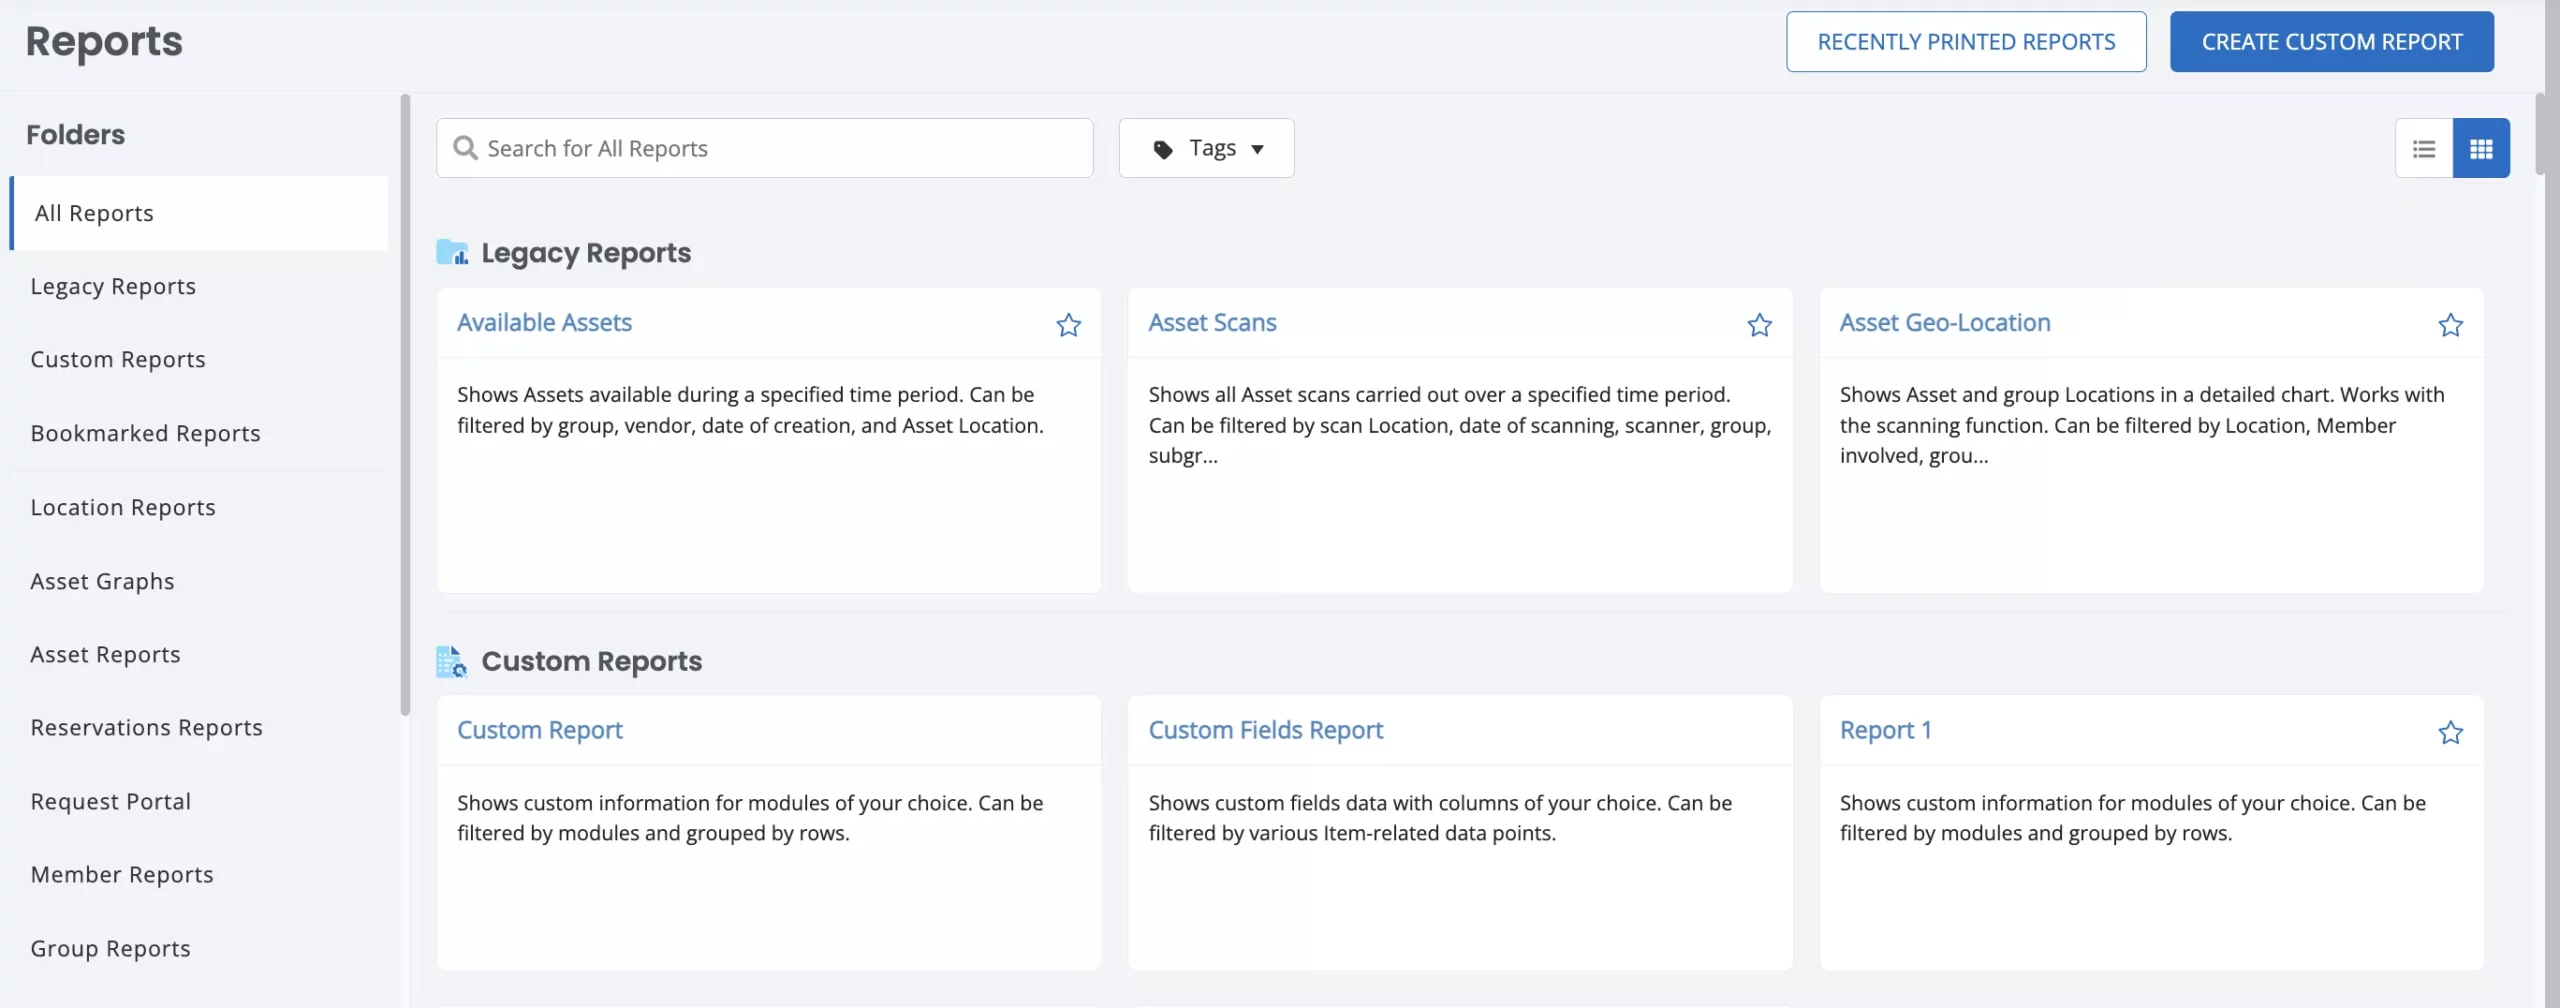
Reviewing reports regularly helps identify operational trends, support audits, and make informed decisions about equipment utilization and resource planning. You can also schedule reports to be generated and shared automatically with the relevant stakeholders.
Learn more
9.2 Monitor Key Metrics with Dashboards
Dashboards provide a centralized view of the information that matters most to your role. Display reports, charts, and activity summaries to monitor equipment operations without switching between multiple modules.
Because dashboards are customizable, different teams can track the metrics most relevant to their responsibilities, whether that’s equipment availability, maintenance performance, inventory levels, or operational activity across locations.
Learn more
9.3 Analyze Operational Data with ZOE
ZOE is EZO’s AI assistant that helps users find product guidance and analyze operational data using natural language. Instead of manually searching through documentation or repeatedly rebuilding reports, you can ask questions to better understand your data and quickly find relevant information.
Whether you’re learning how to use a feature or exploring report data, ZOE helps you work more efficiently by providing answers and insights directly within EZO.
10. Connect EZO with Other Business Systems
EZO integrations connect equipment operations with the other systems your organization uses. Depending on your workflows, you can connect EZO with accounting, service desk, identity management, automation, GPS, and other business applications to reduce duplicate data entry and keep information synchronized.
For example, an accounting integration can connect equipment-related purchasing and maintenance activity with your financial records, while a service desk integration can connect equipment information with support tickets. Identity and access integrations can simplify user provisioning and sign-in, while automation tools can connect EZO with other applications and trigger actions based on changes in your workflows.
10.1 Choose an Integration
Start by identifying the workflow you want to connect rather than choosing an integration based only on the application name. Consider whether you need to:
- Sync purchasing or maintenance information with an accounting system.
- Connect equipment records with service desk tickets.
- Simplify user provisioning or single sign-on.
- Automate actions between EZO and other applications.
- Bring equipment location or telematics data into EZO.
- Connect EZO to an internal application using the API.
Review the available integrations and select the one that matches your workflow. The available integrations and configuration options may vary based on your account and enabled features.
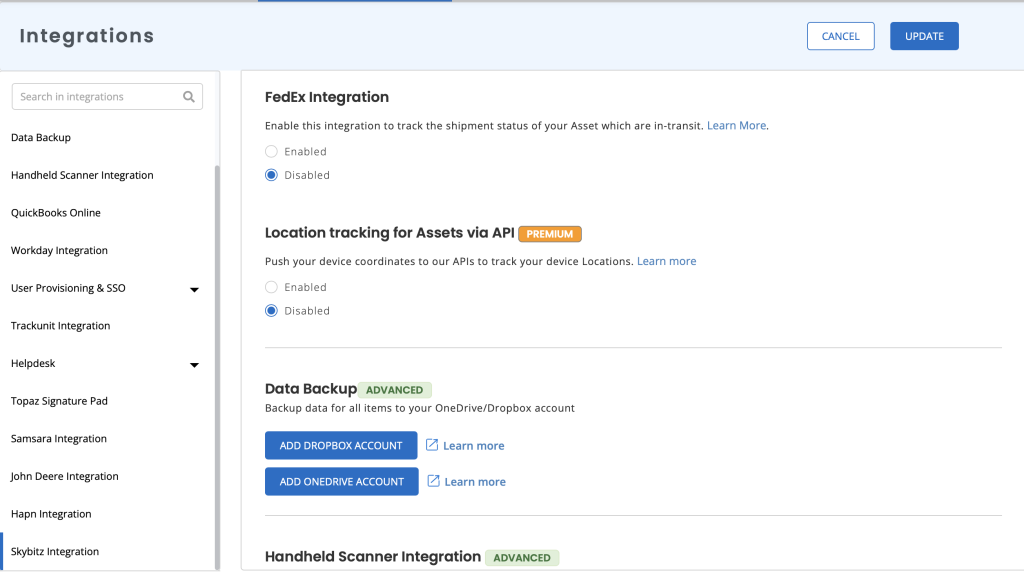
10.2 Configure and Test the Connection
Each integration has its own authentication, permissions, field mappings, and synchronization settings. Follow the setup instructions for the specific integration you are connecting, then test the connection before relying on it in your day-to-day workflow.
Learn more
11. Use the EZO Mobile App for On-the-Go Equipment Operations
The EZO Mobile App helps field teams, warehouse staff, and other users manage equipment away from a desktop. Users can search for equipment, scan items, update records, and complete common equipment operations directly from their mobile devices.
With the EZO Mobile App, you can:
- Scan equipment: Use your mobile device to scan barcodes or QR codes and quickly open the corresponding equipment record.
- Check equipment in and out: Issue and return equipment, extend checkouts, and complete other common item actions from the mobile app.
- Reserve equipment: Reserve available equipment when you need it for a future date.
- Search and view equipment: Find Assets, Asset Stock, Inventory, Bundles, and Packages and review their details while on the go.
- Add and update equipment: Create equipment records and update item information from the field when needed.
- Manage maintenance: View and work on maintenance tasks and Work Orders from a mobile device.
Learn more
Get Started With EZO
You now have the foundation needed to start managing equipment in EZO. You’ve learned how to structure Locations and Groups, add Members, import equipment, configure tracking methods, manage checkouts and requests, procure items, schedule maintenance, review reports, and connect other business systems.
As your workflows become more advanced, use the dedicated guides linked throughout this article for detailed configuration instructions and feature-specific workflows.
Need help setting up EZO? Contact the EZO support team at support@ezo.io.