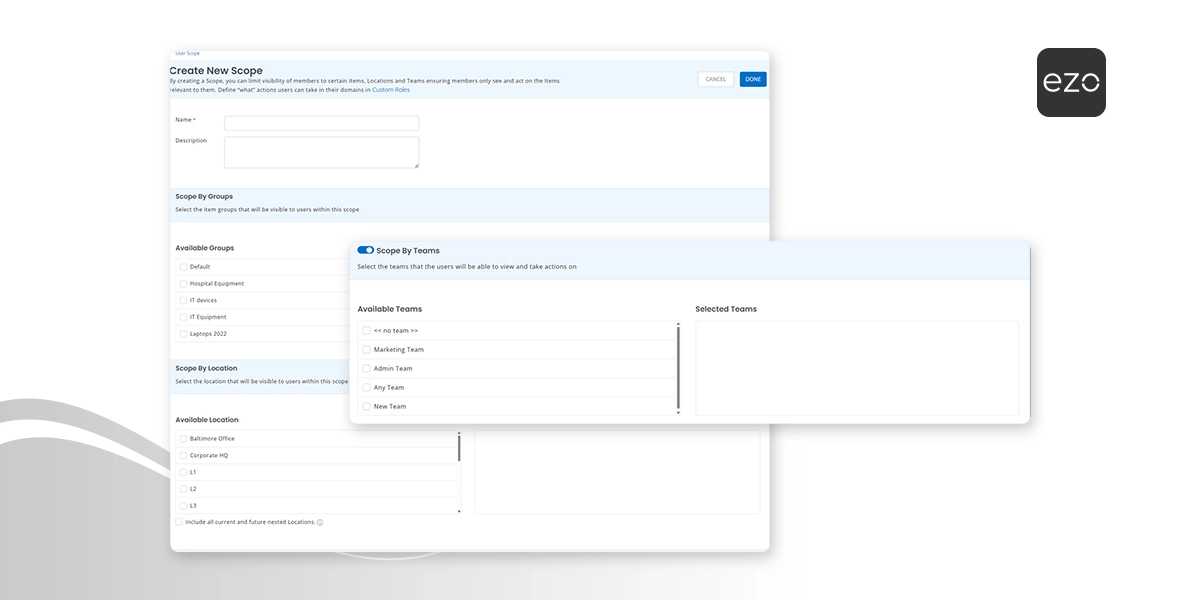
Managing access in a growing organization often turns into a headache — endless role duplication, confusing permissions, and no clear way to control who sees what.
Imagine an IT admin named Sara. Her role defines what she can do: approve requests, edit assets, or generate reports. But her scope defines where she can do it — maybe only for the IT department’s laptops, or just the Dev Team’s assets. Without separating the role and the scope, permissions and visibility overlap, creating confusion and bloated role libraries.
With EZO’s Teams and User Scope feature, you can finally separate permissions (what users can do) from scope (where and on what they can act). This means cleaner role structures, easier team management, and visibility that adapts as your organization changes.
This guide walks you through creating teams (manually, via CSV, or through identity providers), setting up scopes, and applying them so the right people have the right access at the right time.
Note: The User Listings tab will no longer be shown. Scopes are the new unified way to manage visibility.
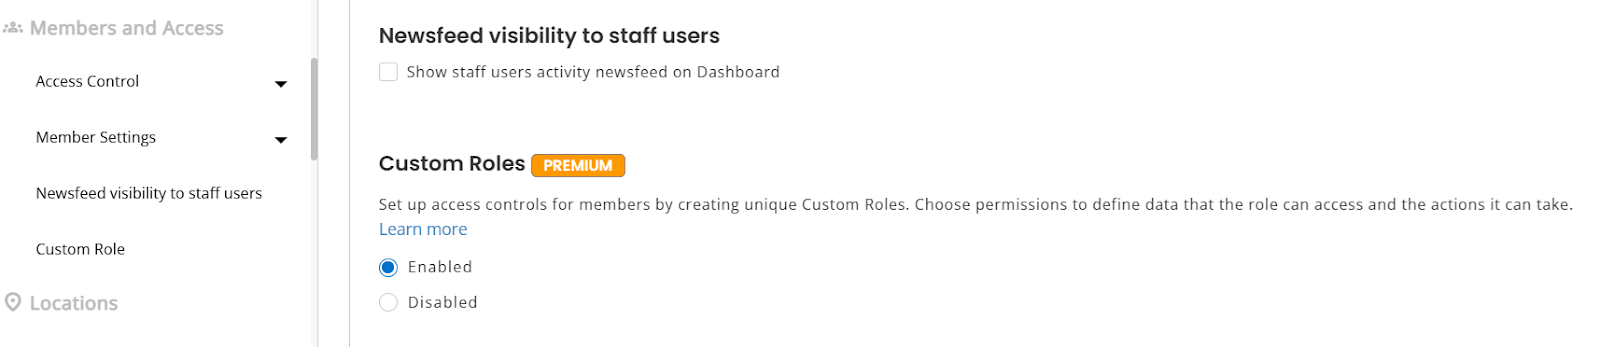
1. Enable Custom Roles
Before you can create teams, you will need to enable Custom Roles.
- Go to Settings → Custom Roles and click Enabled.
- Then click Update to save the settings.
2. Create a Team
Teams can be created in three ways:
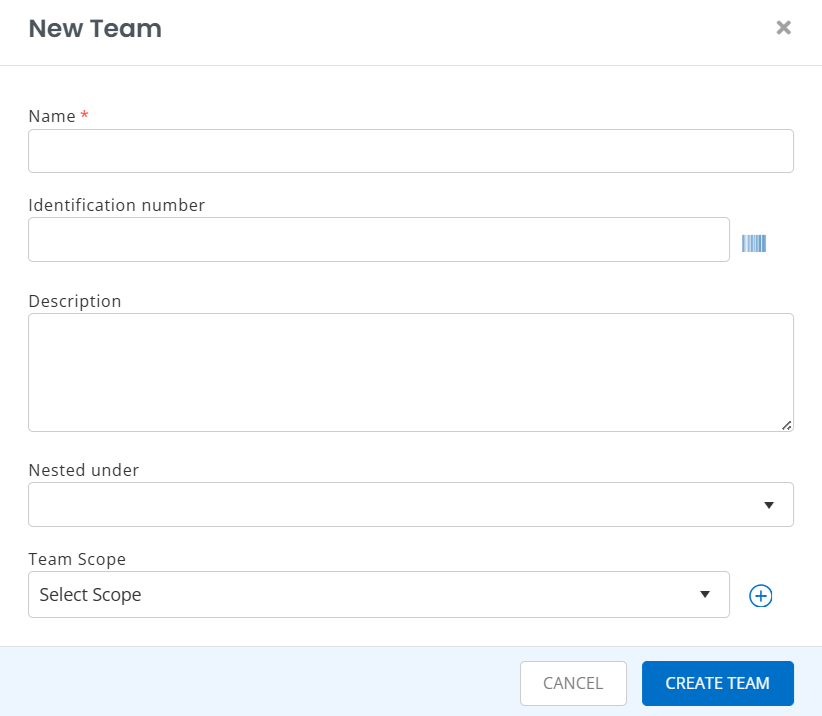
Manually in the Teams module
- Go to Members & Access → Teams → + Add New Team.
- Enter the Team Name among other details and click Create Team.
Example: Sara, the IT admin, creates a “Design Team” manually in EZO so she can quickly manage all requests and assets tied to designers.
Auto-Sync via Active Directory (SCIM / LDAP / Google Workspace)
- Go to Settings → Integrations → User Provisioning & SSO.
- For your chosen integration (SCIM, LDAP, or Google Workspace), enable the checkbox “Create Teams in EZO based on Attribute.”
- Choose an attribute from the dropdown: Department, Manager, or Work Location.
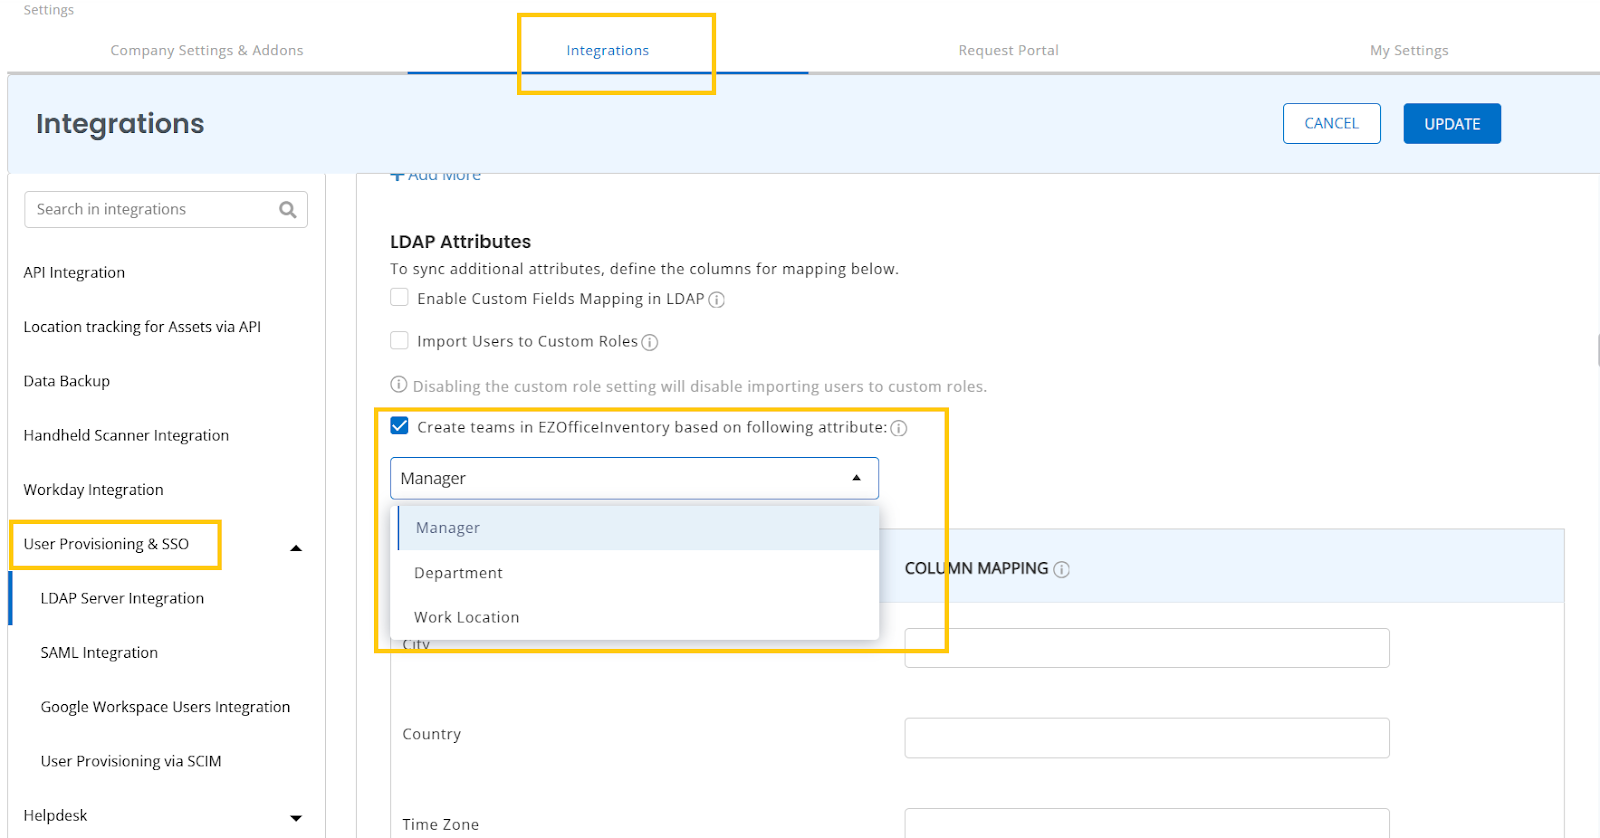
- Members sharing the same attribute are automatically grouped into a team.
- Example: All users with Department = Product Management are grouped into a “Product Management” team.
- Example: All users with Manager = Alex Smith are grouped into “Alex Smith’s Team.”
- Teams update dynamically as AD data changes.
- If you want to create teams using a different criterion, first uncheck the option Create teams in EZO based on the following attribute. Then, add your preferred attribute to the Team field in the Column Mapping fields as shown below.
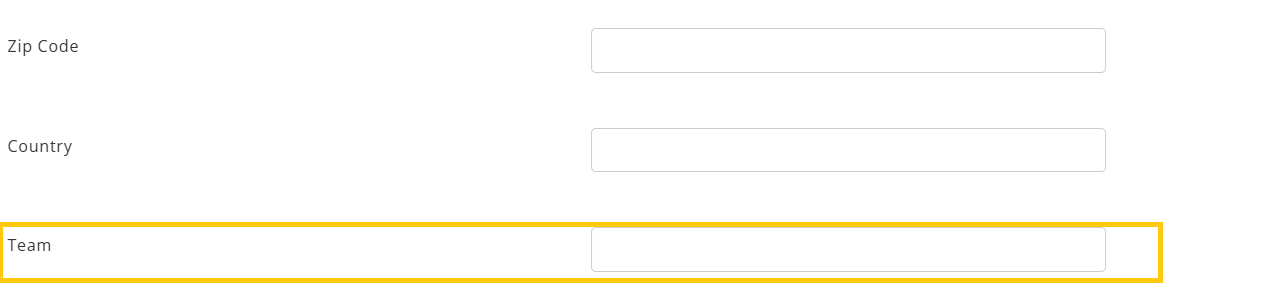
Note: Teams synced from AD will update automatically if mapped.
Example: Instead of manually building a team, Sara enables auto-sync so everyone listed under “Engineering” in her directory is always grouped as the “Engineering Team” in EZO.
Import via CSV
- While importing members, include the Team column in your CSV.
- To import team via CSV/Excel, go to Members & Access → More → Import Members → Add New Members
- Select the relevant file and click Upload and Proceed.
- One Step 2, check Team (create new if not present in system) and then proceed with the regular flow of adding new members.
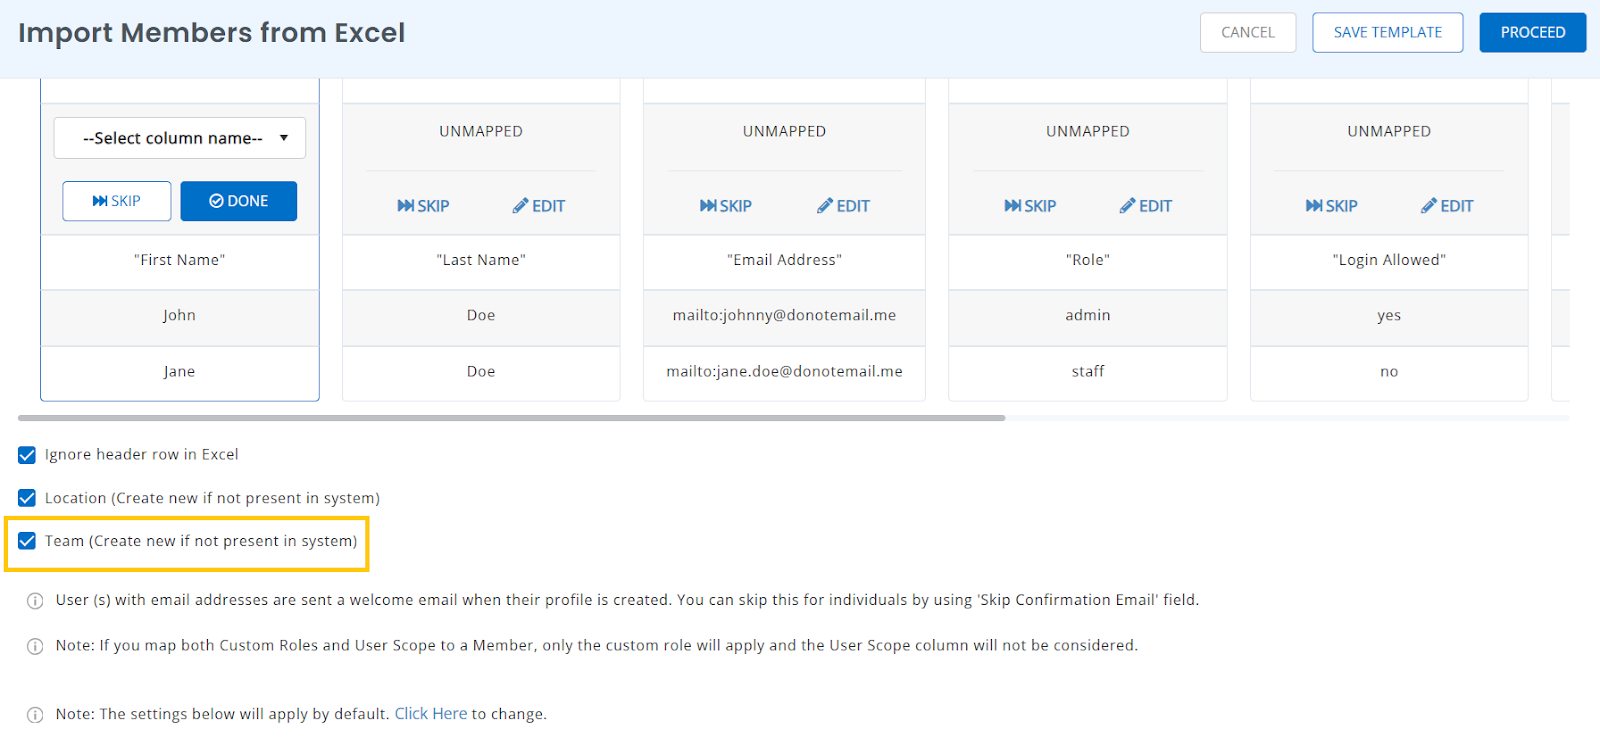
- If the team already exists, members are mapped automatically.
- If the team doesn’t exist, a new one is created.
- Blank team fields are ignored, leaving existing team values unchanged.
Example: Sara uploads a CSV of all new hires. Checking the team option automatically creates a “QA Team” for testers, instead of her having to create it manually later.
3. Create New Scope
Scopes control which Groups, Locations, and Teams a user or team can access. Permissions still come from Custom Roles, but visibility comes from Scopes.
- Go to Members & Access → User Scopes → Add User Scope
- Here you may select all the relevant groups and locations for that particular scope.
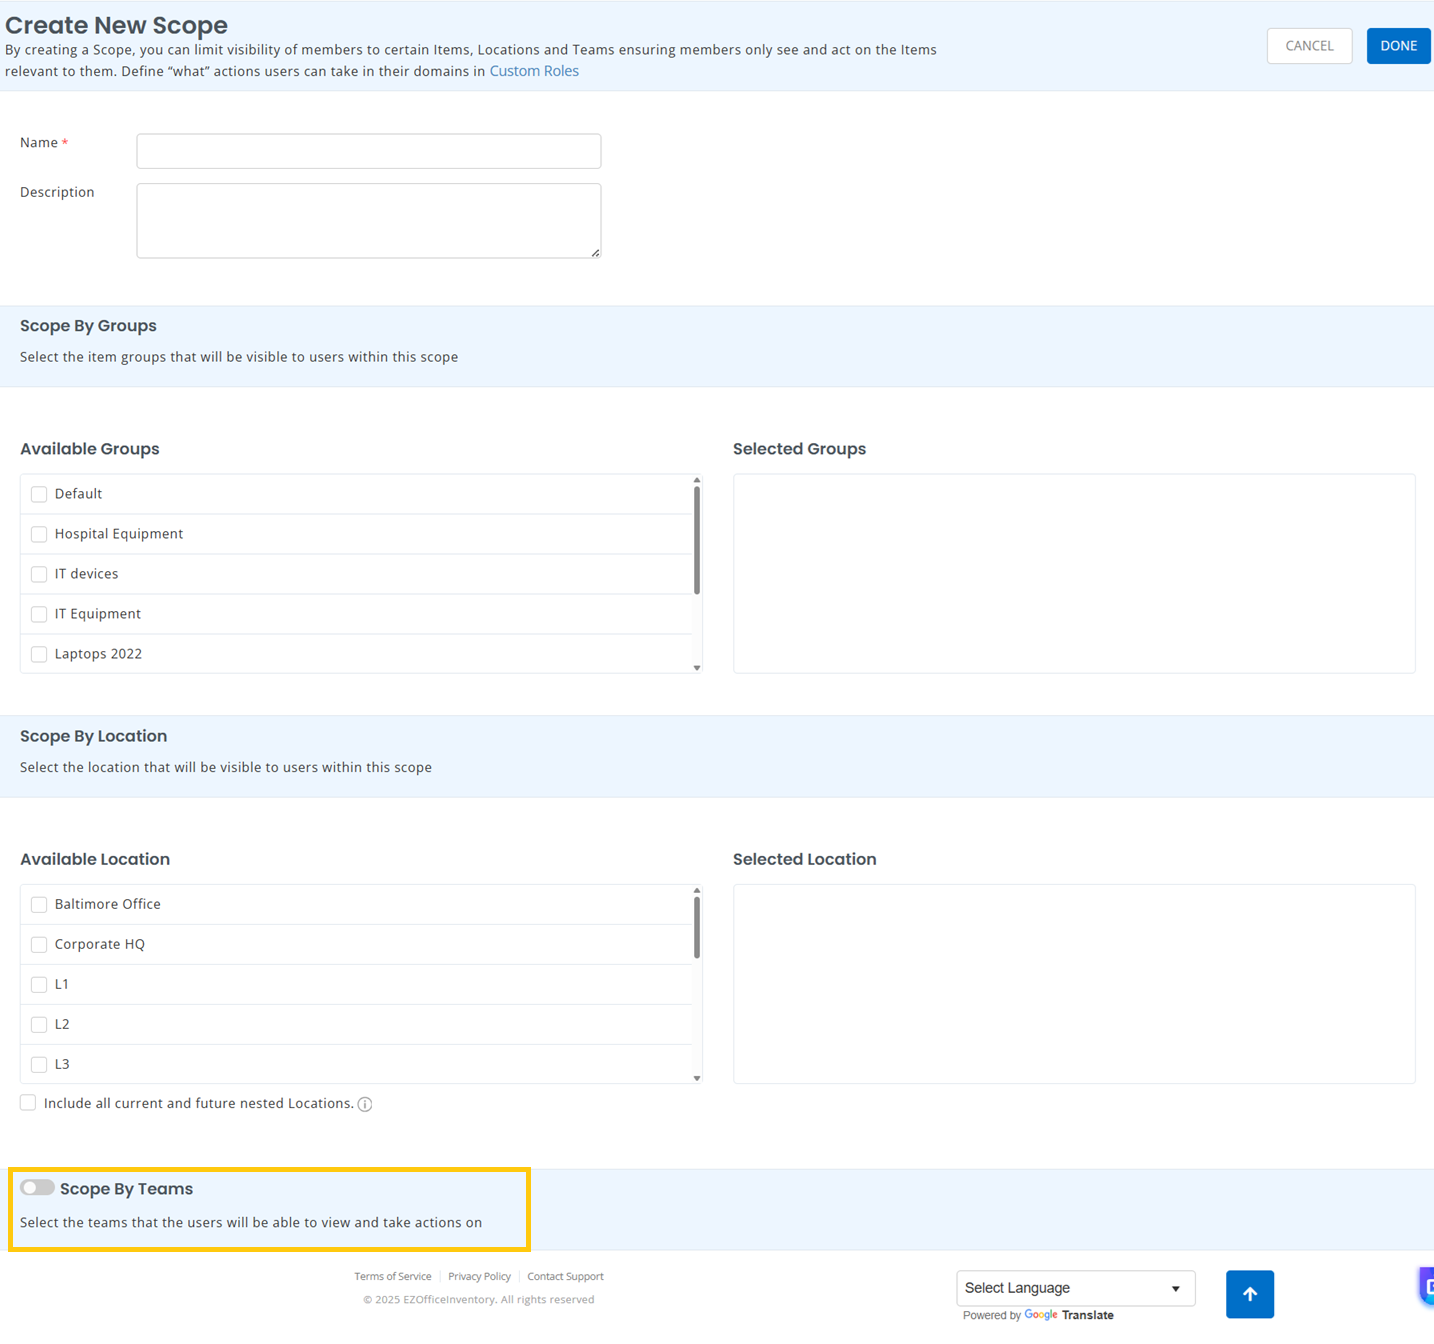
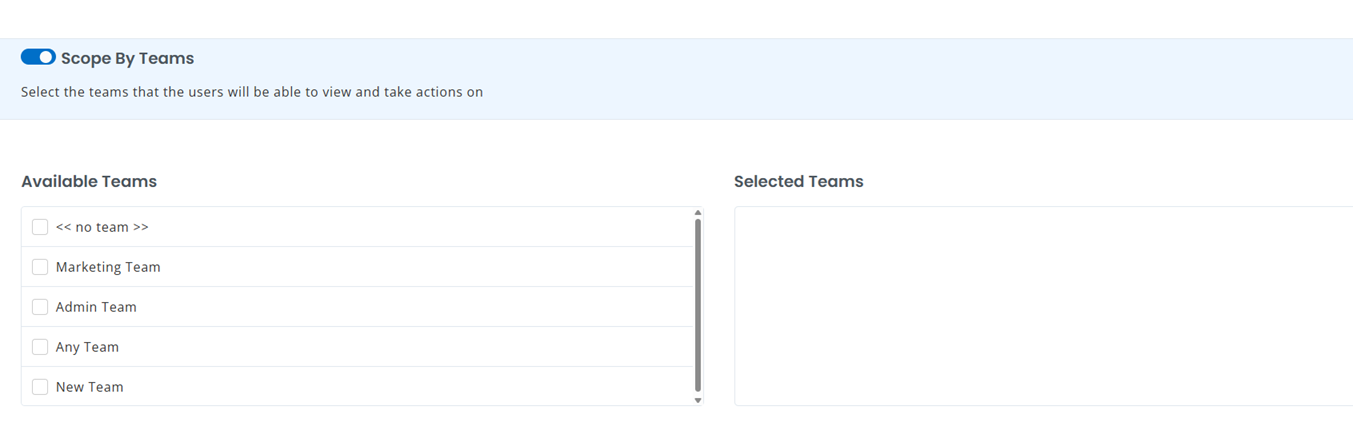
- You may also toggle Scope By Teams option to add specific teams (outlined below).
Example: Sara wants her IT Support Team to manage assets only for the Product and Dev Teams. She creates a new scope, selects Scope by Teams, and adds “Product” + “Dev.”
Now, IT Support members can approve requests, edit assets, or generate reports — but only for Product and Dev assets, not the entire organization.
4. Assign Scope at the Team Level
- Go to Members & Access → Teams
- Open a team’s detail page and then click Add Scope as outlined below.
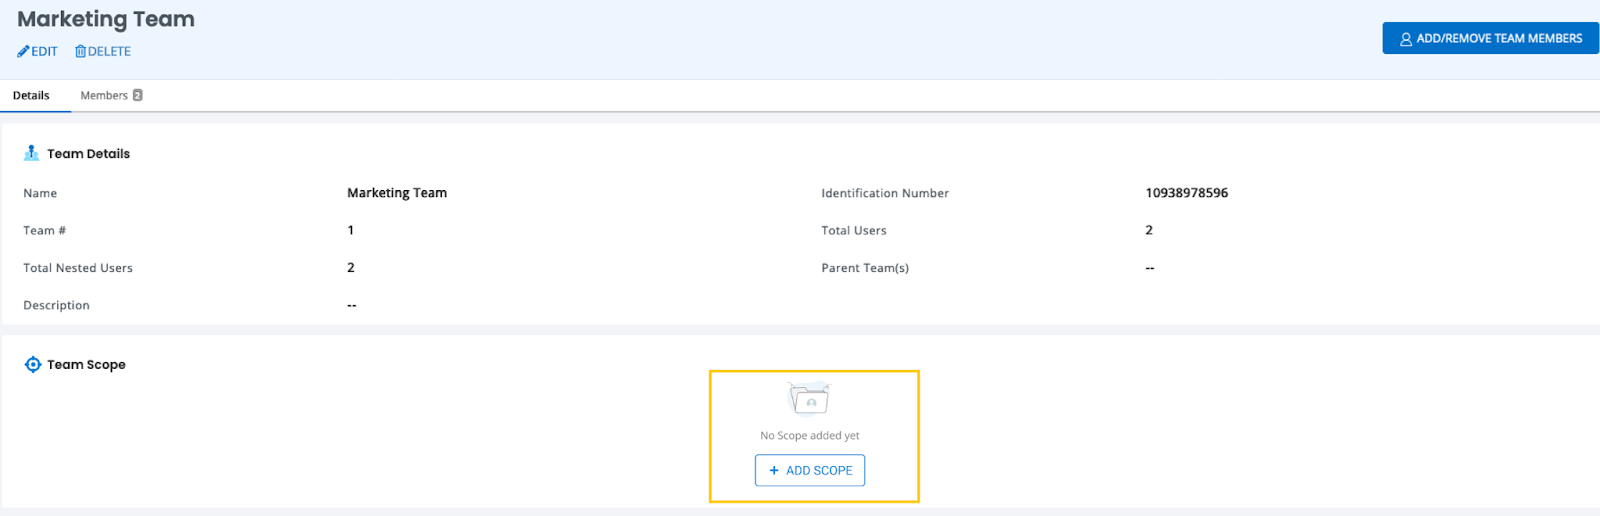
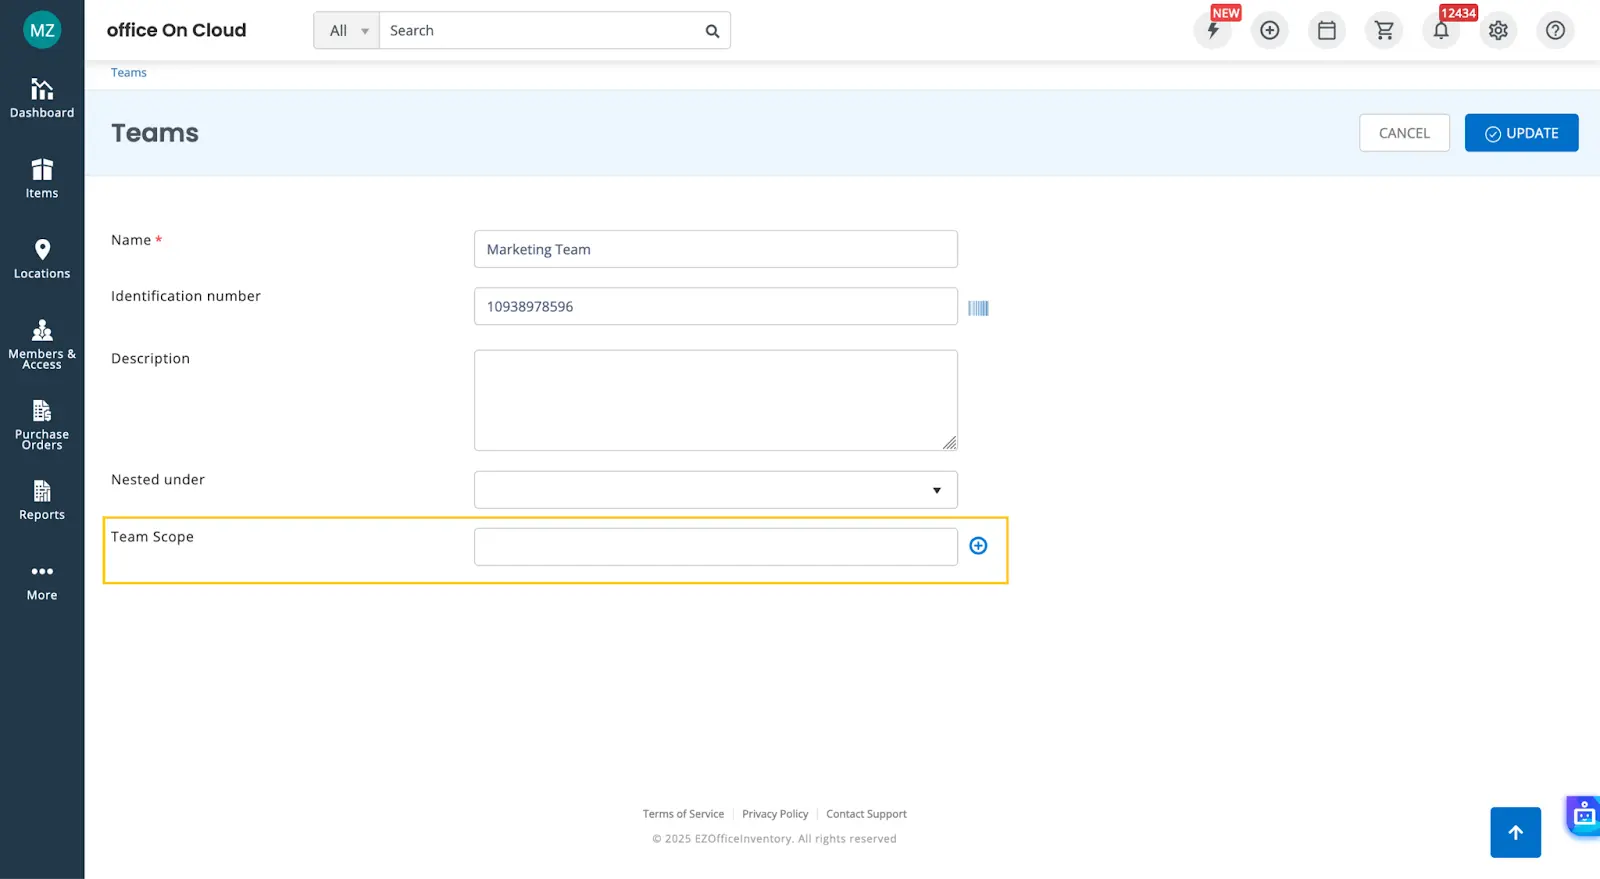
- Define scope for that team and then click Update. You may also add a Team Scope by clicking on the + sign which opens the Create Scope popup (See Section 3 above).
All users in the team inherit the assigned scope. Scope details appear in the Team Scope section in the team details page.
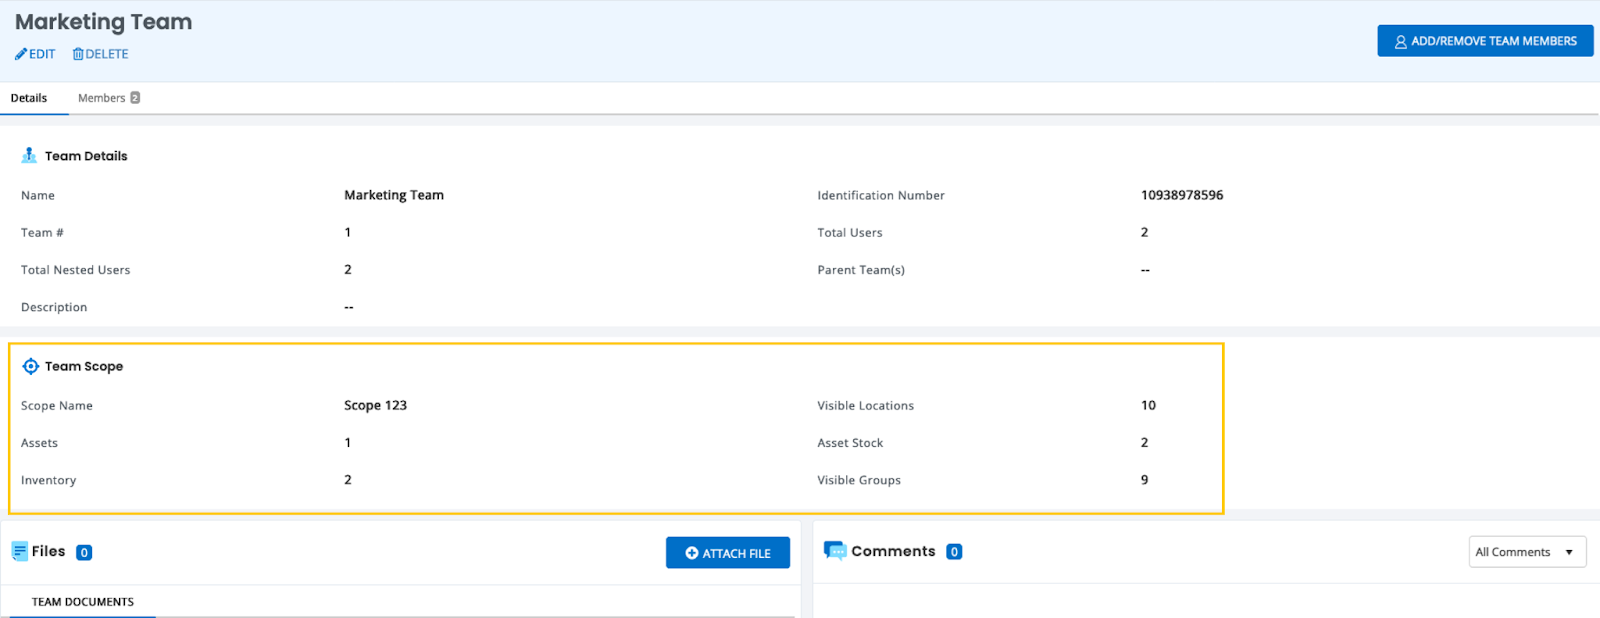
Example: Sara assigns a scope to the “Design Team” so they can only manage assets in the Marketing group. This way, designers don’t see or edit assets from other departments.
5. Assign Scope at the Member Level
- Go to Members & Access → Members
- Open a member’s profile page.
- Under Member Scope, either:
- Select an existing scope from the dropdown, or
- Click + to create a new scope directly which will open the Create Scope popup (See Section 3).
Update: A member can now belong to more than one team at the same time. On the member’s profile, all teams are listed comma-separated. If scope or visibility is applied on teams, a member who is part of multiple teams inherits visibility from all of them.
Example: When Sara adds a new developer who belongs to both the “Engineering” and “QA” teams, the developer automatically inherits visibility from both scopes. Sara doesn’t need to manually merge permissions; AssetSonar does it for her.
6. Automatically Assign Scopes to New Members
With the Automation Engine, you can automatically assign scopes to new members based on conditions you define, such as their role. This removes the need to manually assign scopes every time a new member is added to your account.
The example below walks you through setting up a workflow that assigns a scope to a new member when they are created, based on their role.
To do this, navigate to More → Workflow Automations from the left navigation bar, and click + Create New Workflow. Provide a name and optional description for your workflow and follow the steps given below.

Create a Trigger node
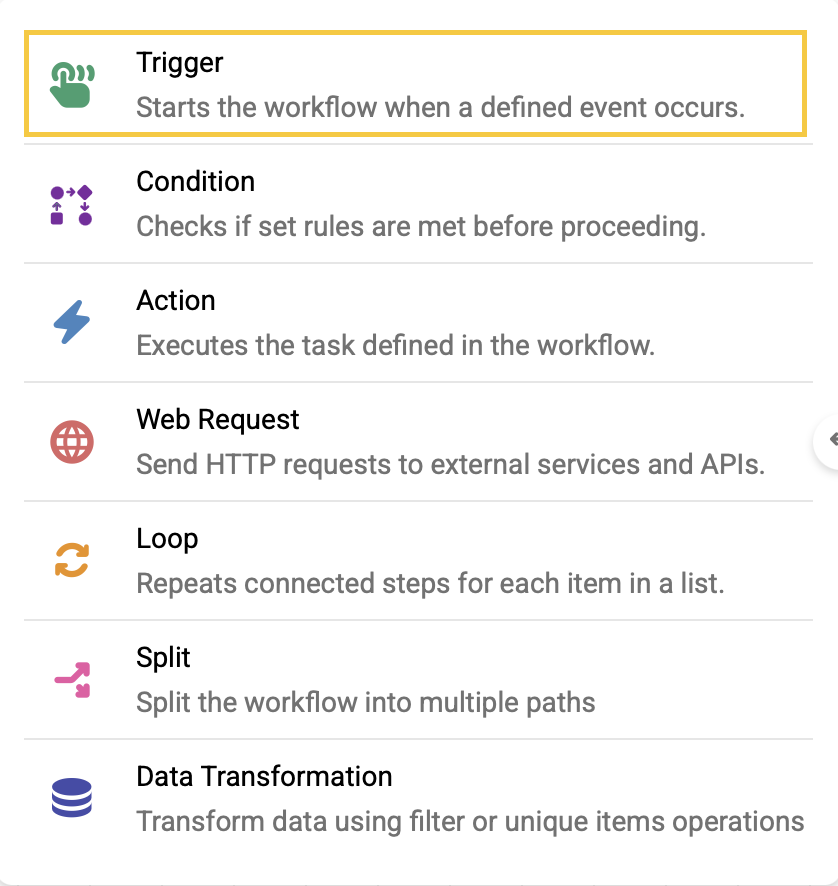
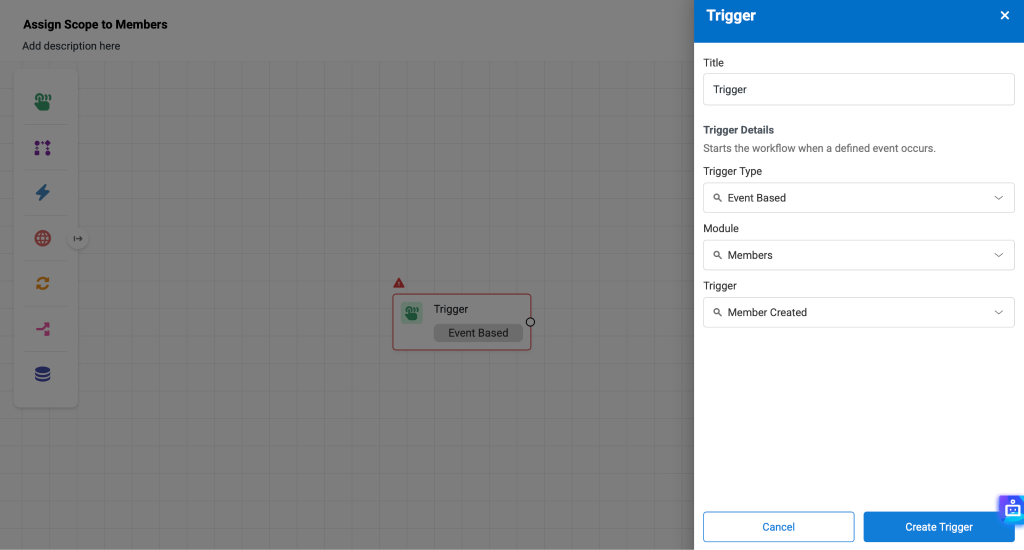
- Click the Trigger icon (shown below) and drag it onto the canvas.
- In the trigger modal,
- Select Event Based as the Trigger Type.
- Select Members as the Module.
- Select Member Created as the Trigger.
- Click the Create Trigger button.
Add a Condition node
Once you have created a trigger, you can add a condition to check that certain criteria are met before any action is taken. In this example, we will add a condition that checks the role associated with the new member.
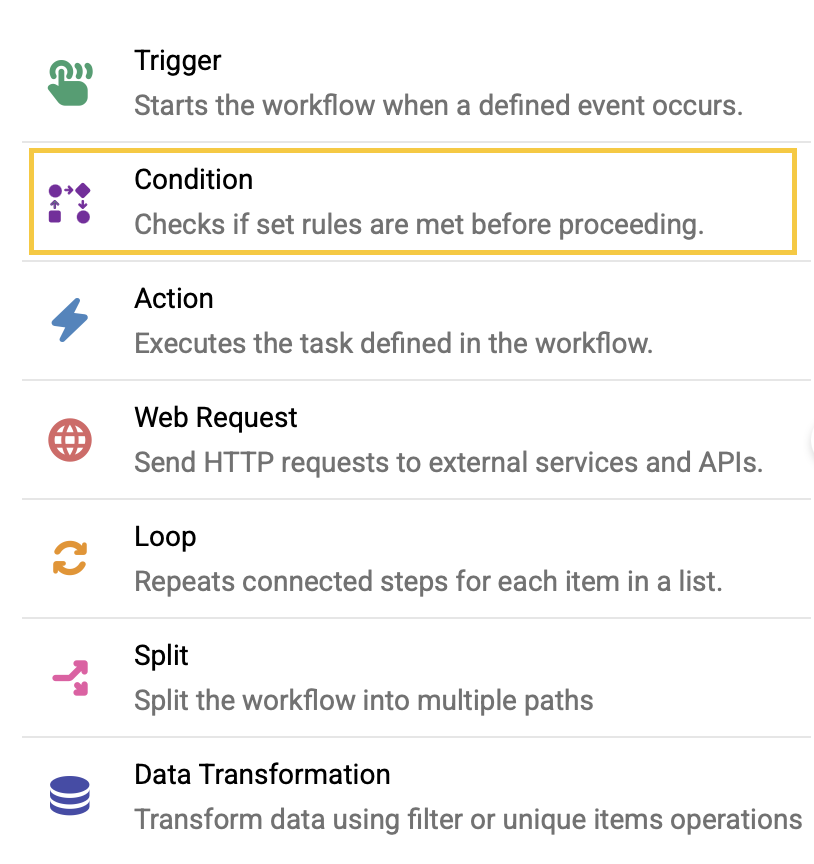
- Click the Condition icon (shown below) and drag it onto the canvas.
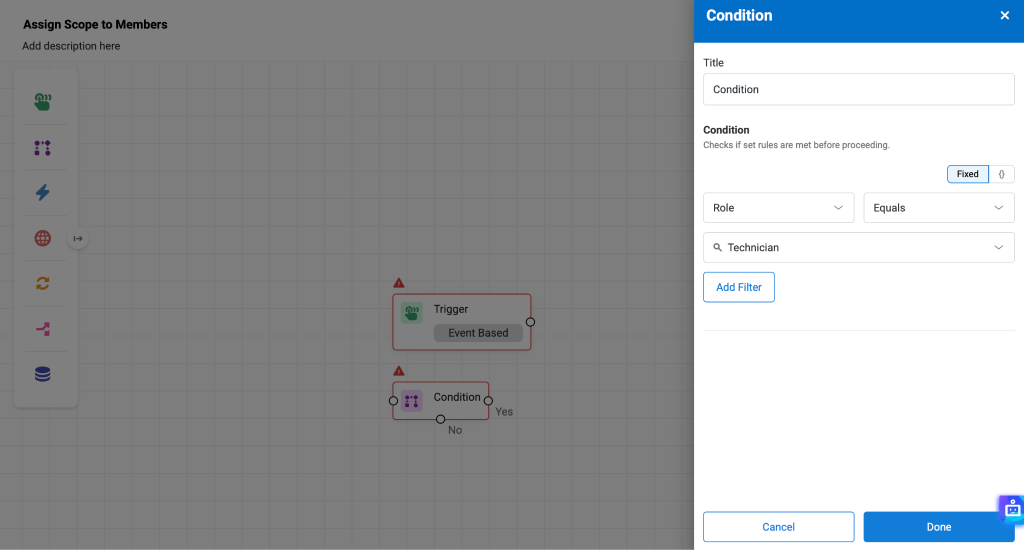
- In the condition modal, select Role from the drop-down under Condition and select the relevant role from the given drop-down.
- Click Done.
Once you’ve configured the Condition node, link it to the Trigger node by dragging the arrow from one node to the other.
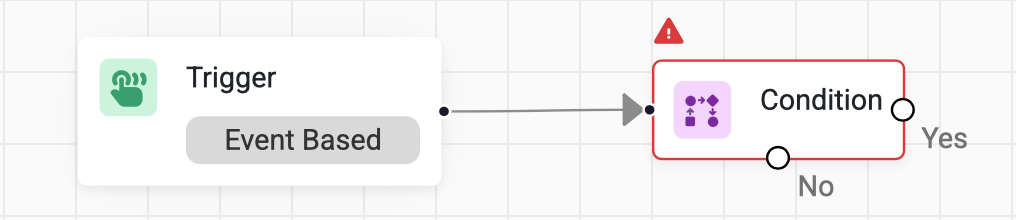
Note: The canvas automatically creates Yes and No branches, which can then be linked to the relevant actions depending on what you want to automate when the condition is true or false.
Add an Action node
Now add an Action node to assign the relevant scope to members that meet the condition defined in the previous step.
- Click the Action icon (shown below) and drag it onto the canvas.
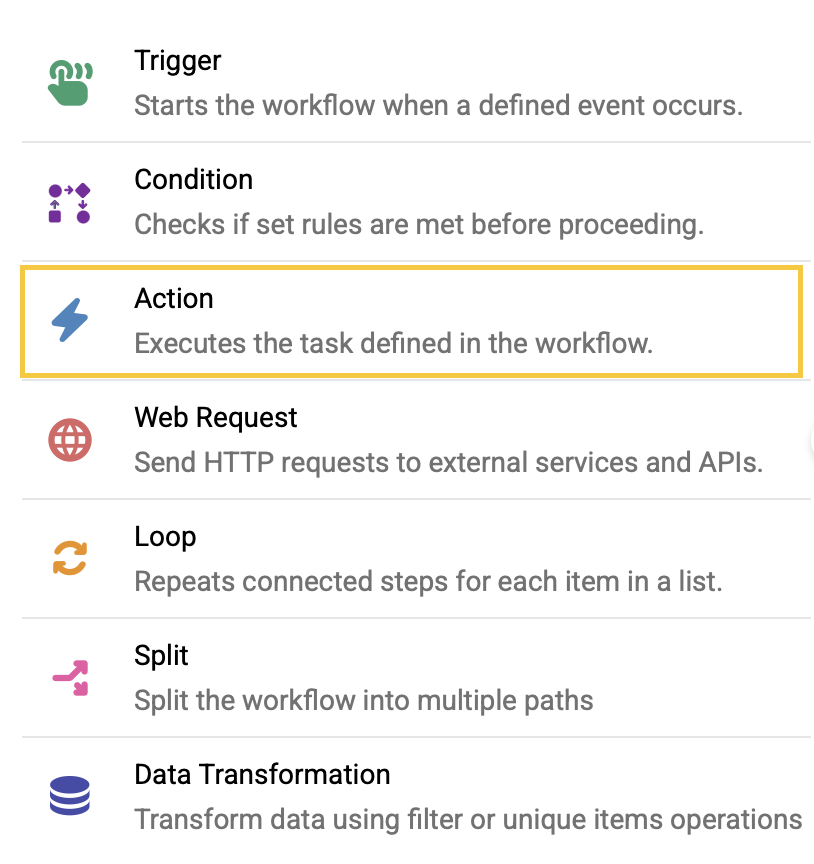
- In the Action modal, select Assign Scope as the action and select the relevant scope from the given drop-down.
- Click Add Action.
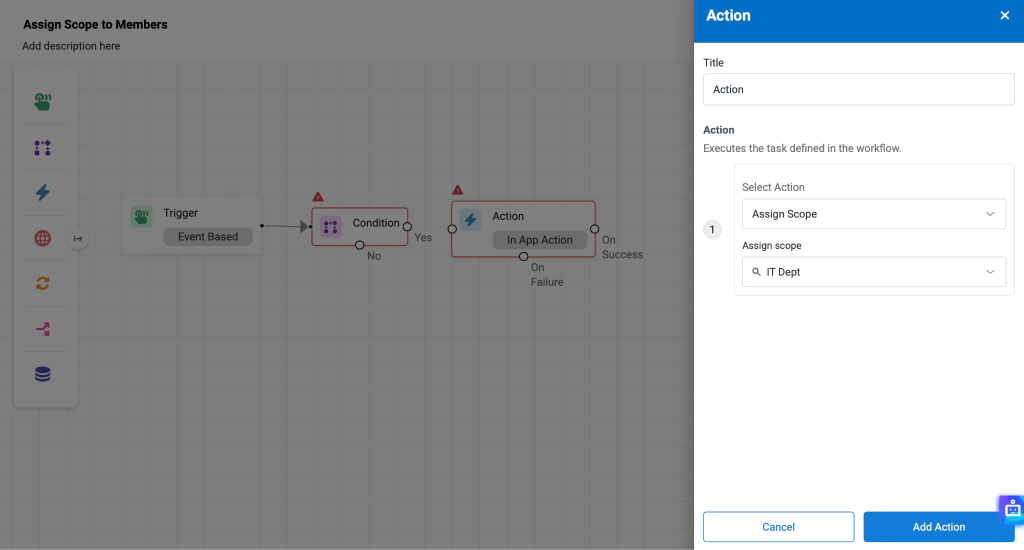
Once configured, link the Action node to the Condition node by dragging the arrow from one node to the other.
Once the workflow is complete, click Save Changes and activate it by toggling the Activate switch. In the confirmation pop-up, click Activate.
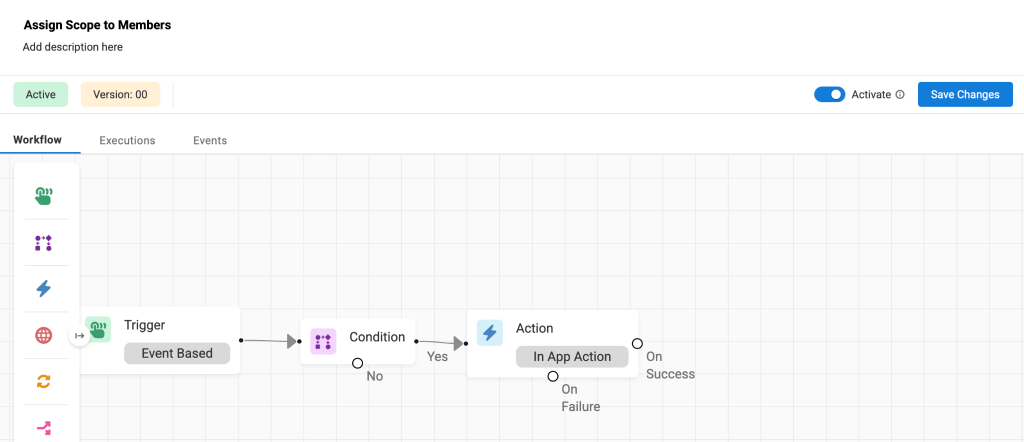
Once activated, the relevant scope will be automatically assigned to any new member that meets the condition defined in this workflow.
7. Scope Application in the Request Portal
Scopes now apply consistently across the Request Portal, just as they do in the main app. This ensures:
- Requesters only see items, groups, and teams allowed under their scope.
- Admins don’t need to create extra custom roles just for portal restrictions.
Example: Sara enables scopes so that when designers log into the Request Portal, they only see laptops tagged for the Design Team, not hardware meant for Engineering or Finance.
8. Limitations & Exceptions
- A user can now belong to multiple teams simultaneously.
- Each scope still defines where users act, while roles define what they can do. Both need to be configured.
- If a member is added to multiple teams, they inherit the scope of all those teams.
9. Keep Access Clean and Scalable
With the changes to the teams and scopes, you don’t need to juggle endless custom roles. Permissions stay simple, scopes keep visibility sharp, and team changes no longer mean role chaos. Whether you’re onboarding new hires, restructuring teams, or tightening compliance, EZO gives you a cleaner way to manage access.
Need help setting it up? Email us at support@ezo.io — we’re happy to assist.