You can schedule custom reports to be sent to users at a later date using EZO. This is a great way to ensure everyone is up-to-date on the latest asset data, eliminating time spent gathering, compiling, and sharing this information with relevant parties.
Below, we’ll outline the simple steps you need to take to set up scheduled custom reports.
1. Scheduling Custom Reports
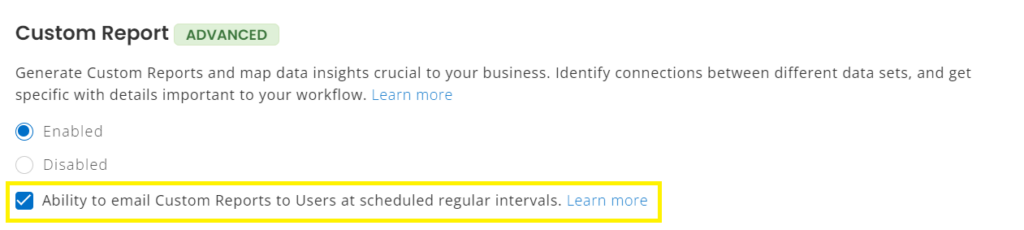
To schedule the report, you first need to go to Compnay Settings & Add Ons → Custom Reports and select the following checkbox:
To get started, click on Reports from the left-hand side navigation bar. From the Reports listing page, click on the ‘Creat Custom Report’ button.

After you’re done creating the custom report, scroll down to the bottom to the generated report. There, click on More → ‘Schedule Report’ button.

You can also click ‘Schedule Report’ even after you’ve successfully run a report.
Clicking ‘Schedule Report’ prompts an overlay. It is split up into different sections discussed below.
1.1. Name and Users
Give your report a name, and choose the Staff Users or Administrators you’d want to share the report with. Note that members who are unsubscribed to email alerts will not receive any scheduled report alerts.
To make sure you are subscribed, go to Name → Edit Profile → ‘Subscribe to Email Alerts’.

1.2. Schedule
Decide how often you’d want the report to be sent to company users. You could set it to be sent daily, yearly, and anything in between. The ‘Activate Scheduling’ checkbox highlighted in yellow can be used to turn the report scheduling on and off. This allows you to quickly disable scheduled reports.

Note: Reports are sent out based on your time zone, and the time you’ve chosen to send out alerts.
- You can change your time zone from Settings → Company Settings & Add-Ons→ Company Profile → Miscellaneous → Time Zone.
- You can change the time that alerts are sent at from Settings → Company Settings & Add-Ons→ Time for Alerts.
1.3. Report Columns
You can customize the columns to be contained within the report, choose which item category to include, and decide whether you’d want to include retired items in the report.

1.4. Report Filters
As with any custom report, you can also add filters to your reports. When you’re done, click ‘Schedule Report’ at the top right corner.

And with that, you’re done! The report will be sent to the chosen company users at the intervals you specified.
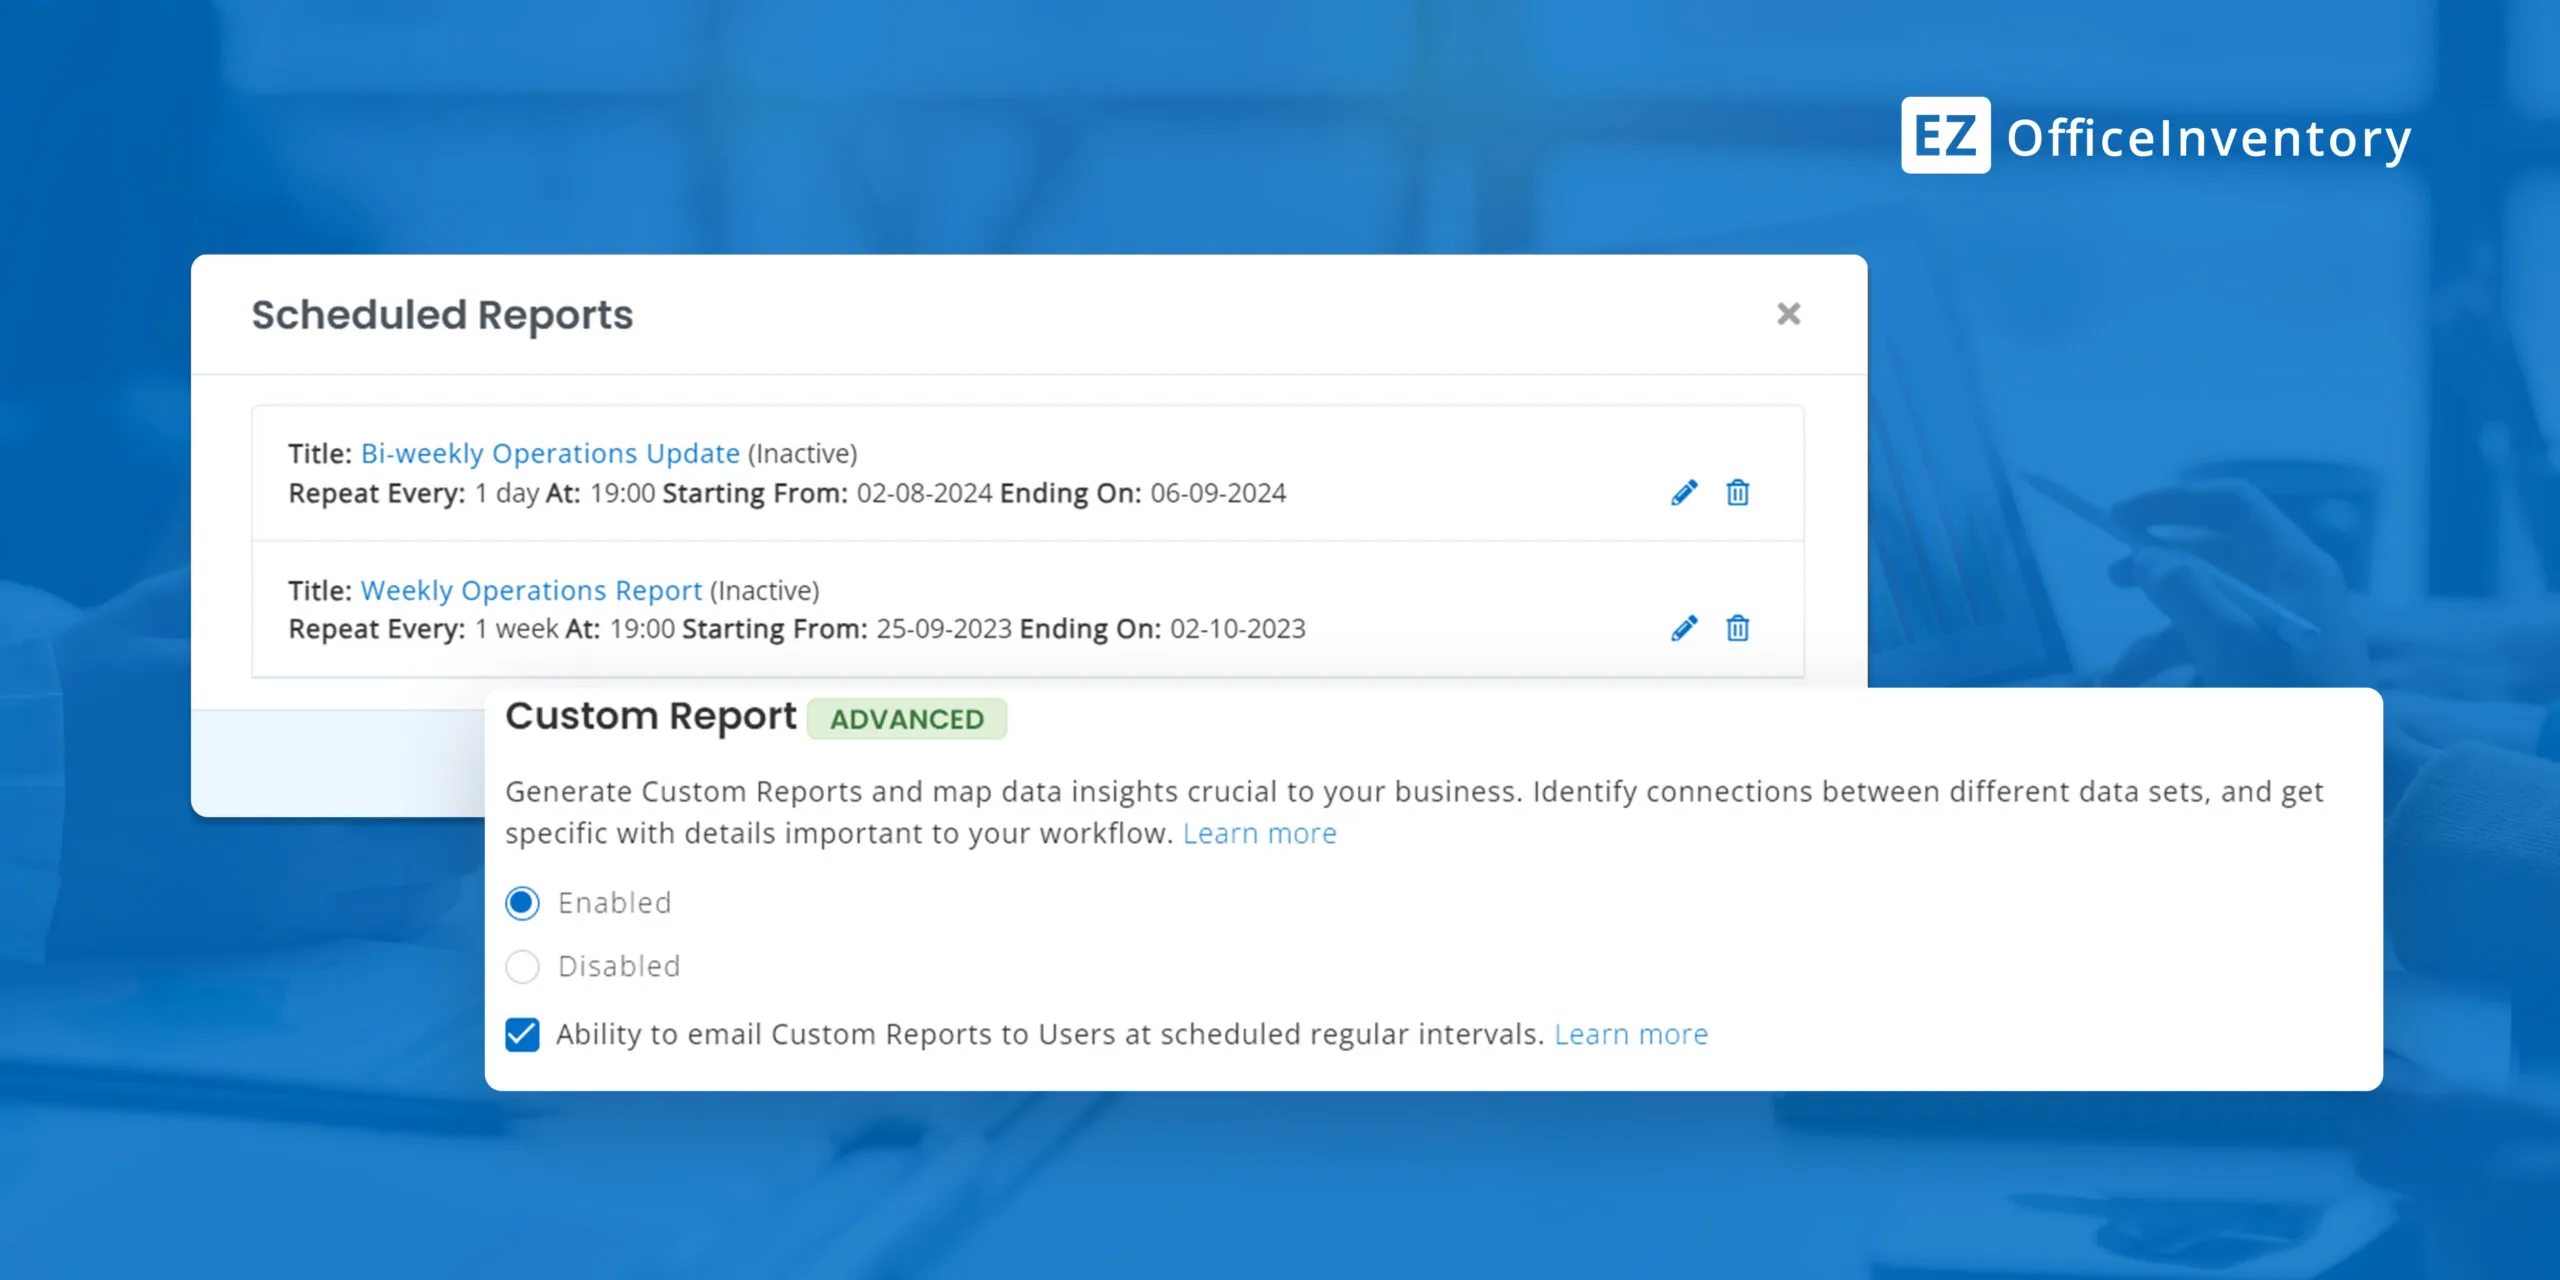
2. Existing Scheduled Reports
You can view, edit, and delete existing scheduled reports by going to Custom Reports and clicking the ‘View Scheduled Reports’ button highlighted below:

This provides a quick snapshot of all the reports that have been scheduled in the system, including details about their schedule, whether they are active, and so forth.

This is also a great place to quickly enable or disable earlier reports by editing a report and addressing the ‘Activate Scheduling’ checkbox.
And with this, you’ll be sharing equipment reports across your organization in no time!


