
In CMMS, automation has become an industry requirement, including directing work to the right teams and triggering preventive and predictive maintenance.
The business use case of automation
The business case for automation is evident; automation is a must-have feature for CMMS systems to be competitive among higher-end mid-market and enterprise customers. This enables organizations to more effectively compete for and win more advanced deals.
Advantages of automation in CMMS
Automation is considered a significant feature for CMMS solutions like EZO CMMS as it offers several key benefits:
- Increases efficiency by customizing workflows to fit the unique needs of each business
- Improves control over maintenance tasks, reducing human errors
- Supports proactive maintenance through automated alerts and scheduling, extending asset lifespan
- Enhances resource optimization, leading to less downtime and lower operational costs
- Streamlines labor management by efficiently delegating tasks to the right teams, enhancing productivity
How automation in EZO CMMS works
When work requests are approved or work orders are created, the system automatically routes or assigns the work to the right team. This includes supervisors, technicians, vendors, approvers, and reviewers, with assigned tasks based on factors like title, work type, total cost of work order, department of the requestor, first item group, etc.
The system automatically sets the default start and due dates accurately, based on factors like priority, work type, department of the requestor, location of the requestor, first item group, etc.
How to set up automation to efficiently manage business workflows
In EZO CMMS, the automation and workflows can be set up for work orders and purchase orders. To learn how to set up automation and workflows for purchase orders, click here.
Let’s walk you through the step-by-step process to set up automation to efficiently manage business workflows for work orders.
Create workflows in EZO CMMS
In EZO CMMS, you can create workflows for purchase orders and work orders. In this support blog, we will discuss workflows for work orders in detail.
Create workflows when WO is created
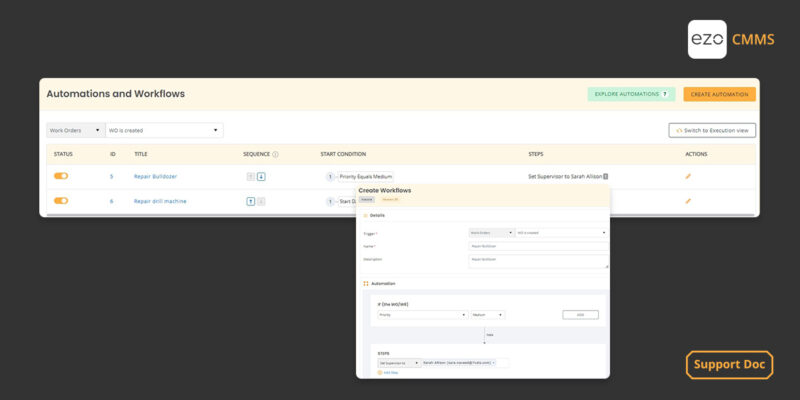
Navigate to the Automation and Workflows listings page, select Work Orders from the drop-down menu, and then opt for the option “WO is created”.
Now, click on “Create Automation”, select Work Orders in the Trigger field, and then select “WO is created” from the drop-down menu. Afterwards, enter relevant information in the given fields.
Within the Automation section, several options are available in the drop-down menu under “IF (the WO/WR) such as priority, work type, start date, due date, location of first service item, group of first service item, etc.

Various options are available for each specified condition. For example, you can choose “Priority” as the condition and set “Medium” as the priority level for it. Within the STEPS field, we can set various conditions against different options like supervisor, primary assignee, expected start date, etc.
In the example below, the trigger for Work Orders is activated upon the creation of a WO. Here, the priority level is medium, and Sarah Allison is designated as the supervisor.

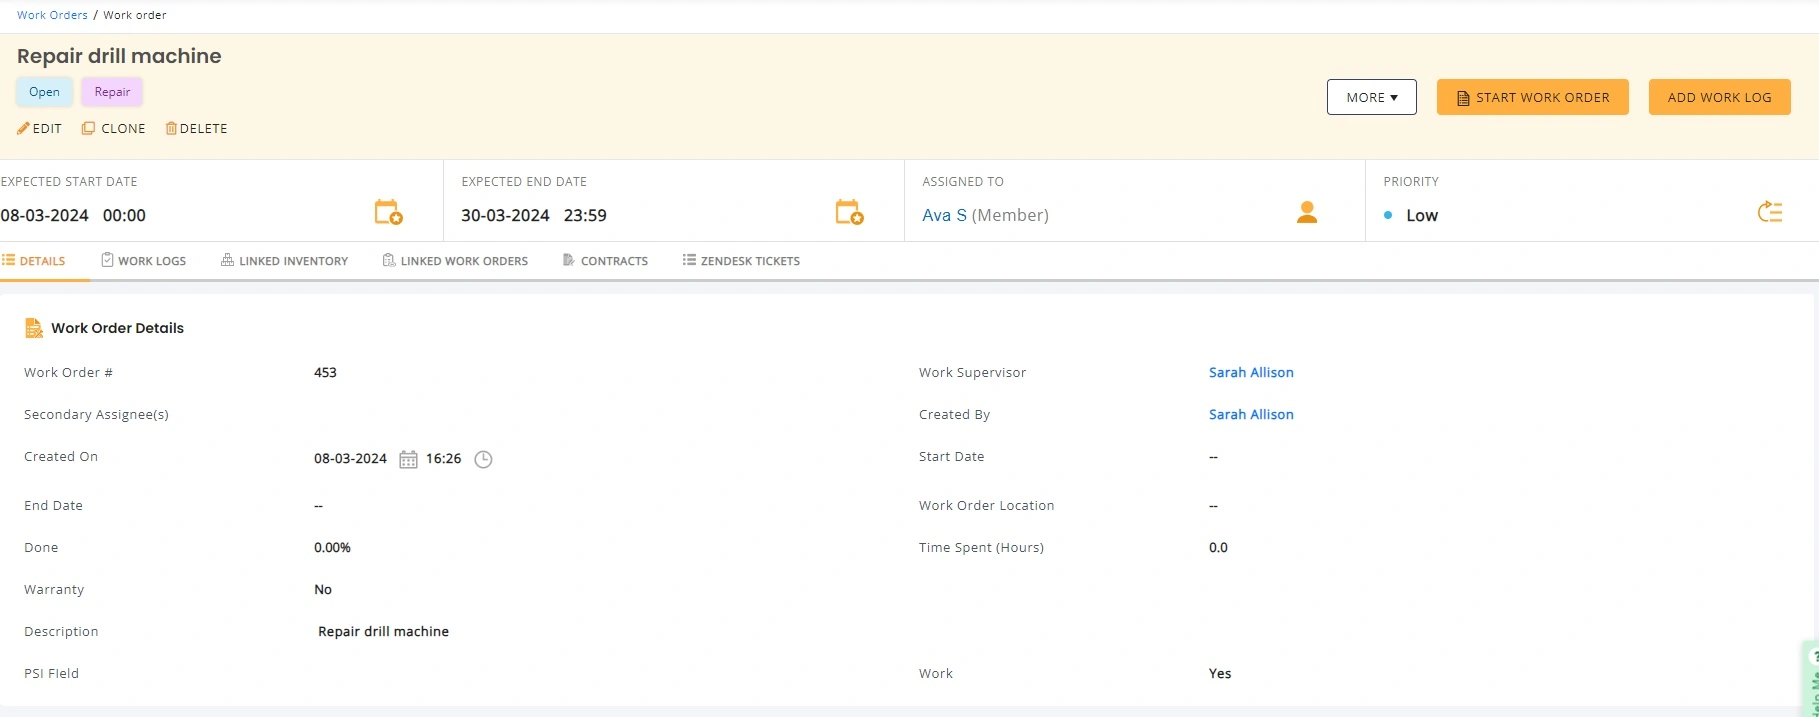
You can also view the details of the work order on the work order page.

So, for this particular work order, the priority level is set to Medium, with Sarah Allison assigned as the supervisor.
Let’s consider a different scenario in which a WO is created as a “Repair drill machine.” In this case, the workflow responds to a condition stating that if the Start Date of the WO falls within the last 7 days, then Sarah Allison will be assigned as the Supervisor.

Click on “Save” and your workflow will be created.
You can also view the details of the work order on the work order page as shown below.
Both WO workflows are visible on the Automation and Workflows listings page. To activate these workflows, simply flip the toggle switch as shown in the image below.

Create workflows when WO is approved
Go to the Automation and Workflows listings page, select Work Orders from the drop-down menu, and then opt for the option “WO is approved”.
Now, click on “Create Automation”, select Work Orders in the Trigger field, and then select “WO is approved” from the drop-down menu. After that, enter relevant information in the respective fields.

Within the Automation section, several options are available in the drop-down menu for “IF (the WO/WR) such as priority, work type, start date, due date, location of first service item, group of first service item, etc.
For example, in the scenario above, we have set a condition that if the Work Type is categorized as Repair, Sarah Allison will be assigned as the supervisor.
Click on “Save” and your workflow will be created.

Additionally, you can view the work order details on the work order page as shown below.

The WO workflows for approved work orders are shown on the Automation and Workflows listings page. To activate the workflows, switch the toggle button as shown in the image below.


