Tracking operational costs across repairs, inventory use, retirement, and depreciation can get complicated when expenses are spread across different teams, departments, jobs, or locations. Cost Centers in EZO help you assign these costs to the right area so you can review financial activity more clearly.
With Cost Centers, you can track costs from Work Orders, Inventory Checkouts, Item Retirement, and Asset Depreciation in one place. This guide walks you through enabling Cost Centers, creating cost centers, assigning them during key workflows, and reviewing cost activity in reports.
1. Enable Cost Centers
Before you can assign costs to specific Cost Centers, you need to enable the setting first.
- Go to Settings → Company Settings & Add Ons → Add Ons → Cost Centers.
- Select Enabled.
- Click Update to save your changes.
Once enabled, EZO displays a table where you can view and manage your Cost Centers.
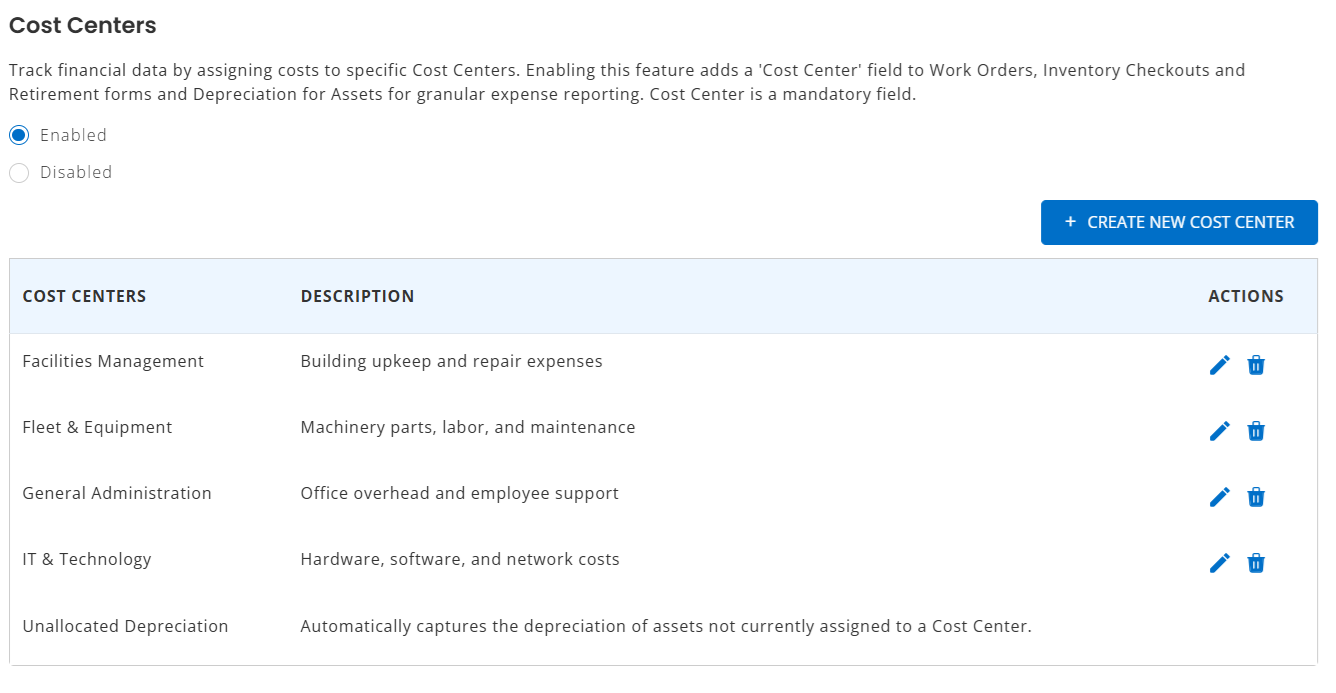
Note: Unallocated Depreciation is created by the system and is used when depreciation is charged for an asset that does not have a Cost Center assigned.
2. Create or Edit Cost Centers
You can create, edit, or delete Cost Centers from the same settings page.
- Go to Settings → Company Settings & Add Ons → Add Ons → Cost Centers.
- Click Create New Cost Center.
- Enter the Cost Center name and description, then save your changes.
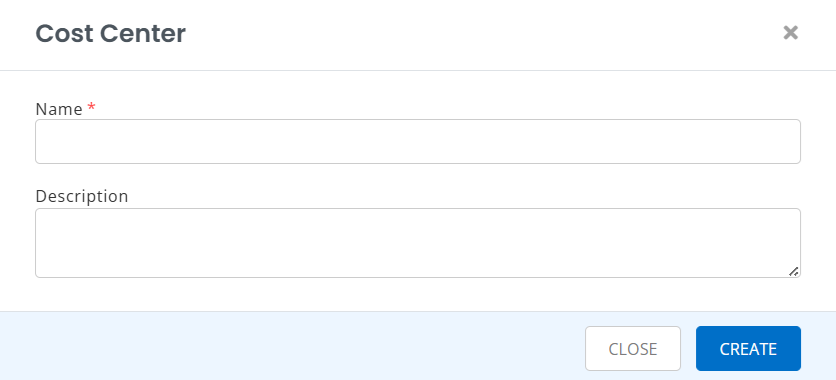
You can also use the edit icon to update an existing Cost Center’s name or description. If a Cost Center has not been used yet, you can delete it from the same table.
Use clear names that match how your team reviews costs. For example, you may create separate Cost Centers for equipment repairs, facilities, IT, fleet maintenance, or project-specific overhead.
3. Assign Cost Centers to Work Orders
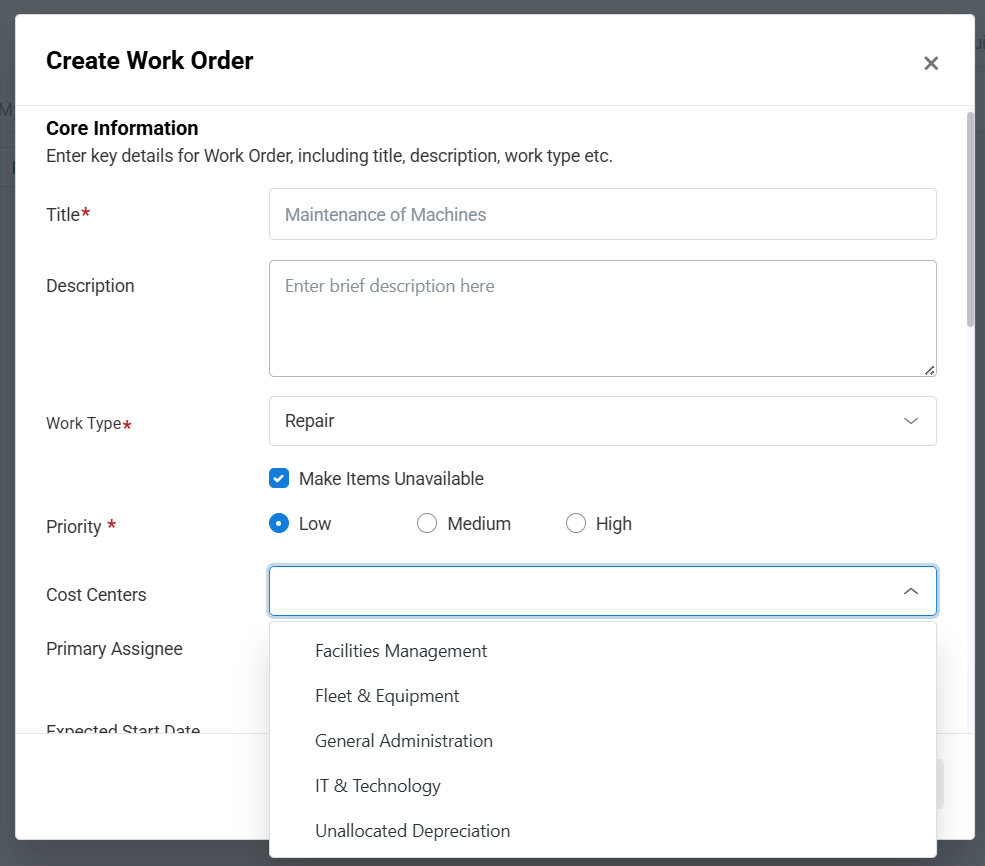
You can assign a Cost Center when creating or editing a Work Order.
- Go to More → CMMS → Work Orders → Create Work Order.
- Fill in the Work Order details and select the relevant Cost Center from the dropdown.
- Click Create Work Order to save the Work Order.
You can also update the Cost Center later by opening the Work Order and editing the field, provided you have the required permissions.
When costs are added to a Work Order, EZO can record them against the selected Cost Center. This includes:
- Work Logs
- Linked Inventory
- Other Service Costs
If a system-generated Work Order does not already have a Cost Center, EZO may prompt users to select one when the Work Order is started.
4. Assign Cost Centers to Inventory Checkouts
You can also assign a Cost Center when inventory is consumed.
- From the Navigation Menu, go to Items → Inventory and open the inventory item you want to update.
- Click More → Remove Stock.
- In the Remove Stock form, select the relevant Cost Center along with the stock quantity, location, and other required details.
- Click Remove Stock to complete the action.
This records the inventory consumption against the selected Cost Center so it can be reviewed later in reports.
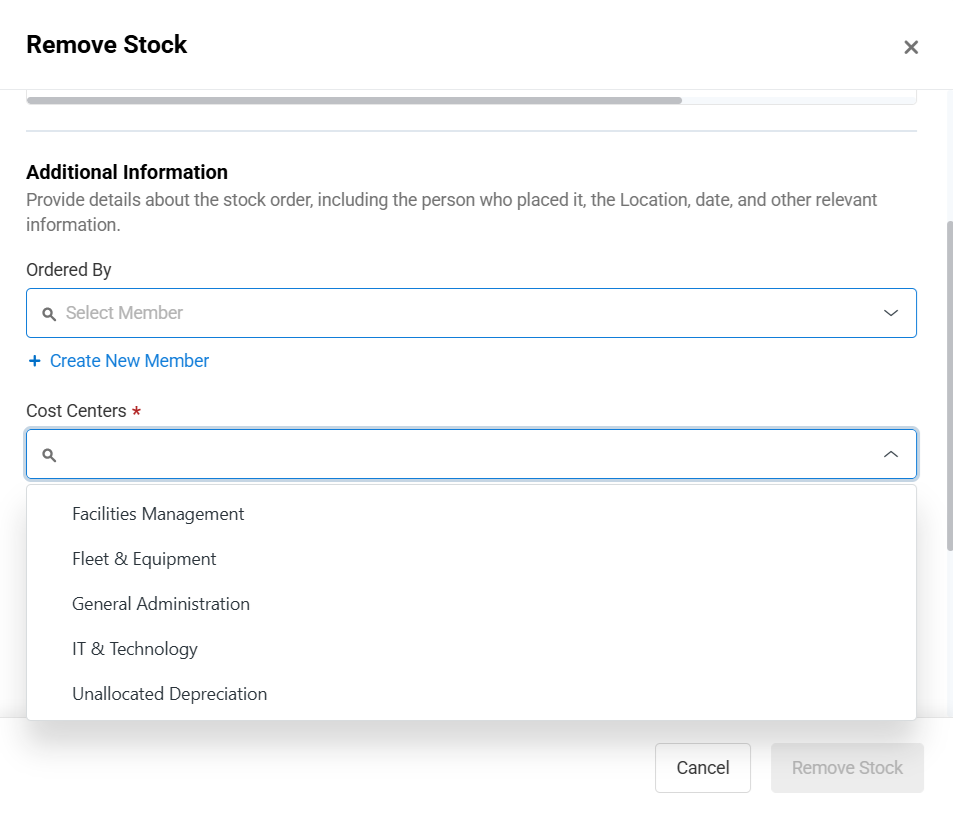
If inventory is linked to a Work Order, it automatically inherits the Work Order’s Cost Center. This helps keep inventory costs tied to the same repair, maintenance, or service activity.
5. Assign Cost Centers to Inventory Reservations
Cost Centers can also be selected when reserving inventory.
- From the Navigation Menu, go to Items → Inventory and open the relevant inventory item.
- Click More → Reserve.
- In the reservation form, select the relevant Cost Center and complete the rest of the reservation details.
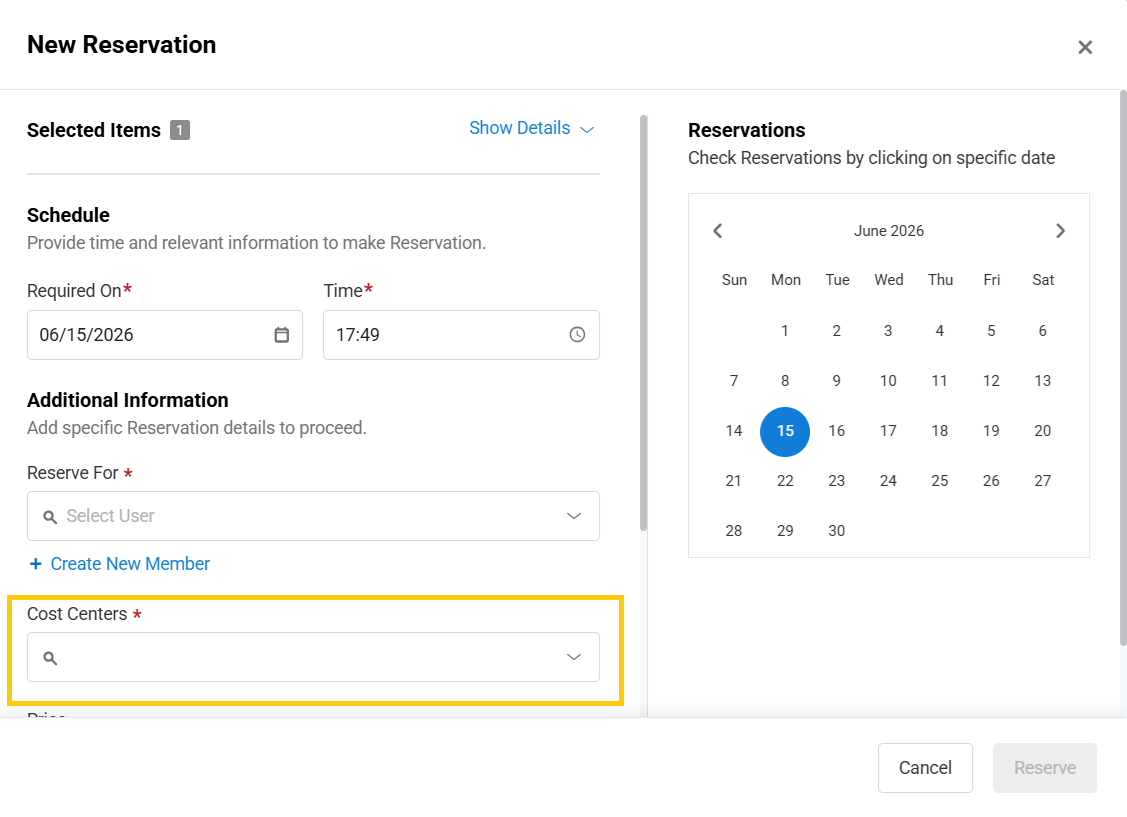
- Click Reserve to save the reservation.
The Cost Center field is also shown when viewing or editing inventory reservations, so users can keep the reservation aligned with the correct cost area.
6. Assign Cost Centers During Cart Checkout
If you are using Carts, Cost Centers can be selected when checking out a Cart.
- Go to Carts → All Carts → Select Cart → Check Out.
- In the checkout form, select the relevant Cost Center along with the required checkout details.
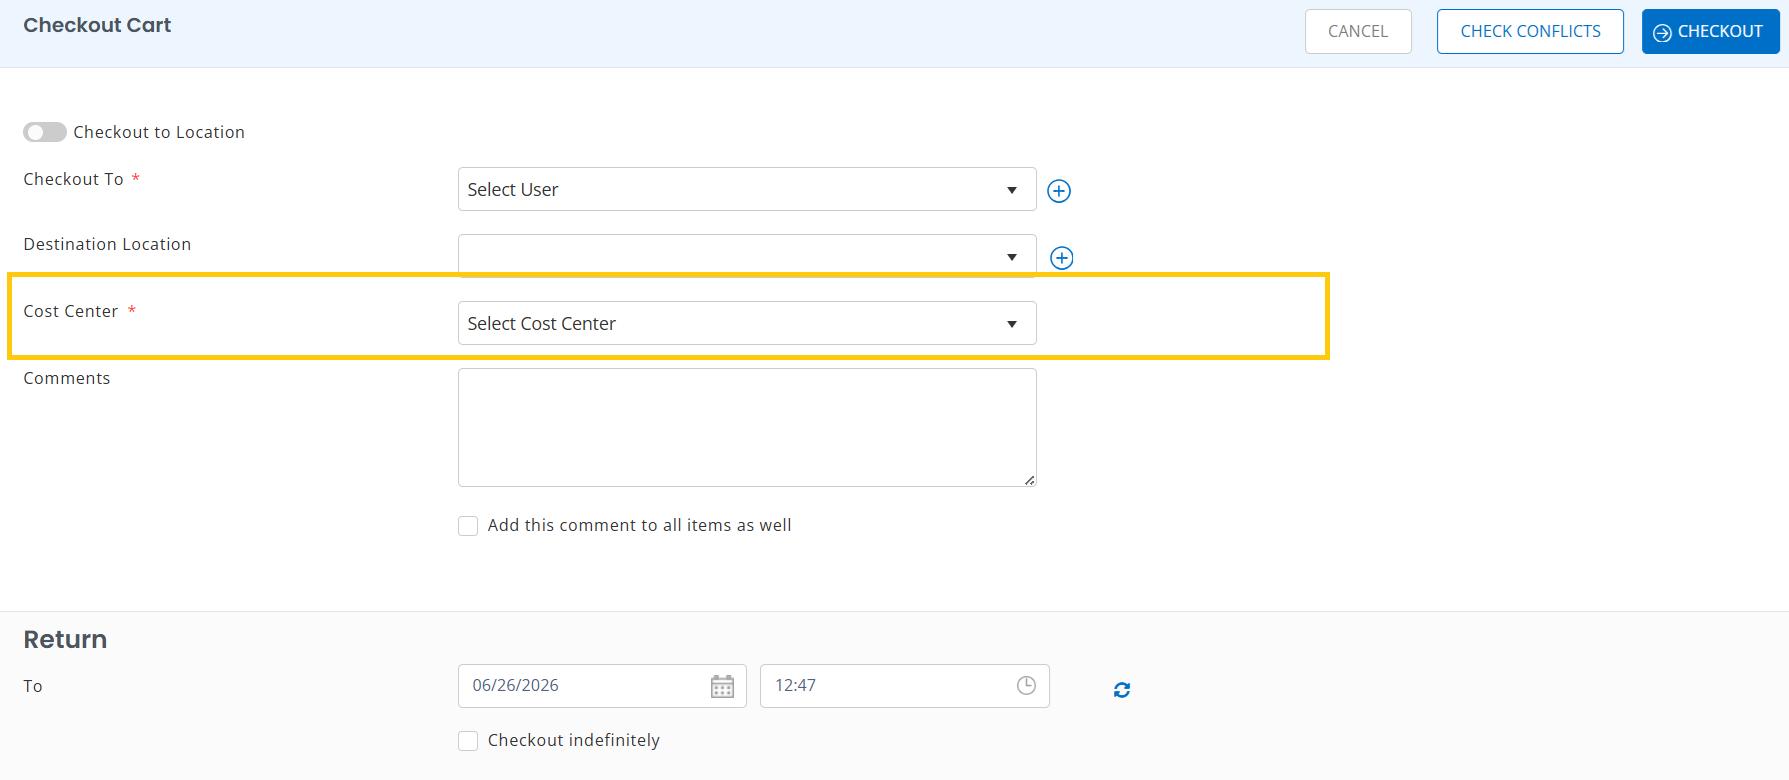
- Complete the checkout.
This helps assign inventory or item consumption in the Cart to the right department, project, or operating area.
Cost Centers can also appear in the Request Portal cart workflow. When users create a cart from the Request Portal, the Cost Center field appears in the cart form so the cost can be assigned before the request is processed.
7. Assign Cost Centers When Retiring Items
When retiring items, you can assign the retirement activity to a Cost Center.
- For Assets, go to Items → Assets → Select Asset → Retire.
- For Asset Stock or Inventory, go to the relevant item detail page and select the retirement action.
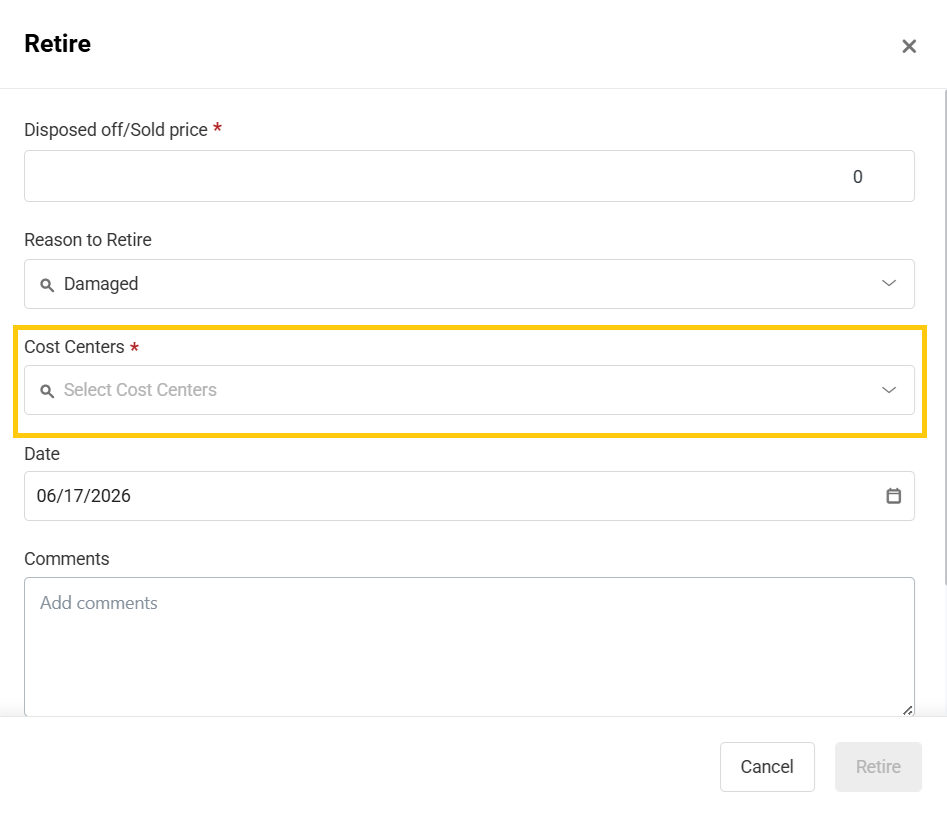
- In the retirement form, select the relevant Cost Center in the retirement details.
- Complete the retirement action.
If the item has a salvage value, EZO credits that value back to the selected Cost Center. This helps the Cost Center report show both expenses and recoveries where applicable.
8. Track Depreciation with Cost Centers
Cost Centers can also be used to track depreciation for assets.
- When creating or editing an asset, go to Items → Assets → Create Asset or Items → Assets → Select Asset → Edit.
- Select the relevant Cost Center in the asset form.
When asset depreciation is enabled, EZO charges the calculated depreciation amount to the asset’s assigned Cost Center. Depreciation is posted to Cost Centers on the last day of every calendar month.
If an asset does not have a Cost Center assigned, its depreciation is routed to Unallocated Depreciation.
If no depreciation method is active in your account, EZO does not charge depreciation to Cost Centers. If more than one depreciation method is active, EZO asks you to select the method to use for Cost Center attribution.
9. View Cost Center Activity in Reports
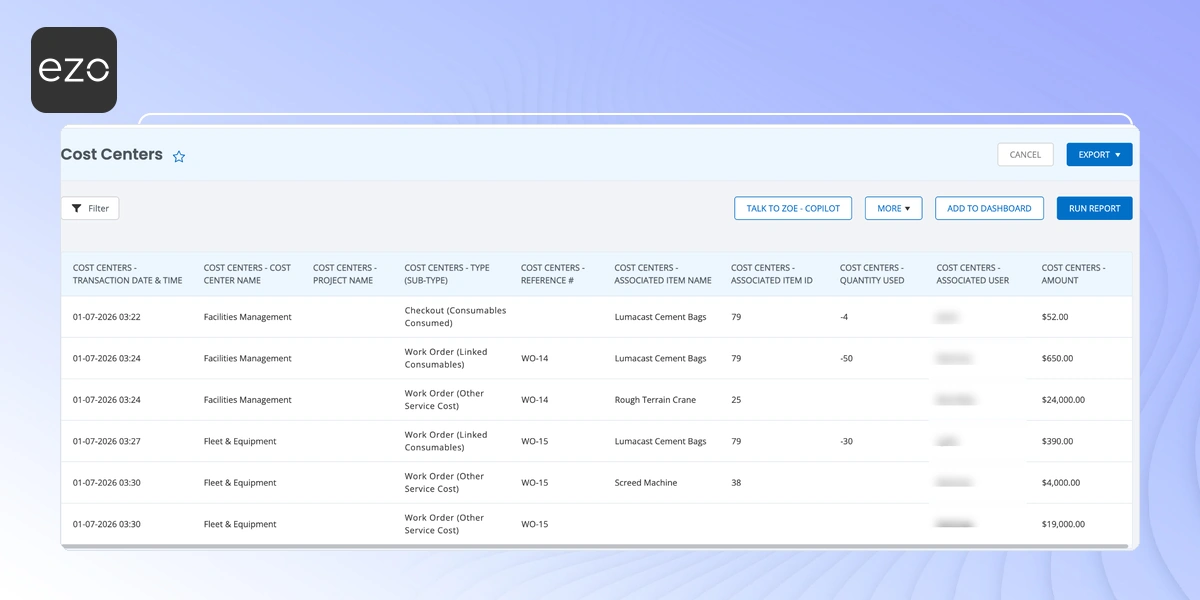
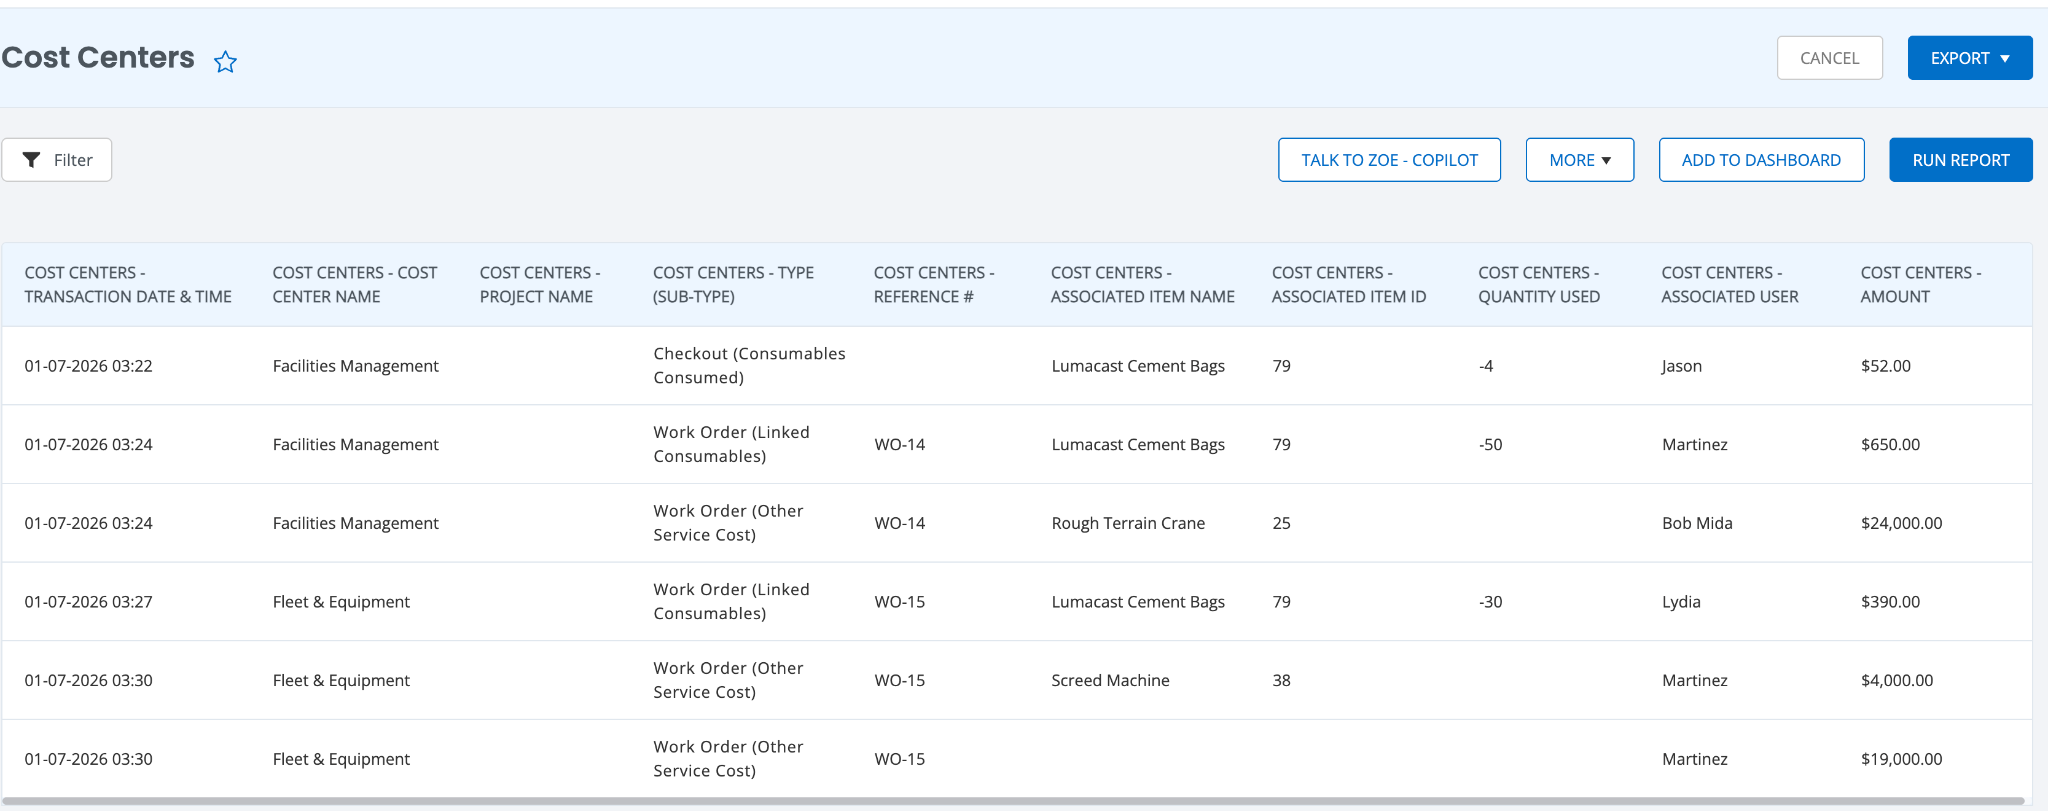
You can review Cost Center activity from the default Cost Centers report.
Go to Reports → Miscellaneous Reports → Cost Centers.
This report gives you a ledger-style view of financial activity across Cost Centers. You can use it to review costs from Work Orders, Inventory Checkouts, Item Retirement, and Depreciation.
The report includes details such as:
- Transaction Date & Time
- Cost Center
- Project
- Type
- Reference #
- Item
- Quantity Used
- Associated User
- Amount
Positive amounts represent expenses charged to the Cost Center, such as parts, labor, other service costs, inventory consumption, or depreciation. Negative amounts represent income or savings, such as salvage value or returned inventory.
You can also use Cost Centers in Custom Reports to build reports around the cost activity most relevant to your team.
Keep Operational Costs Easier to Review
Cost Centers help you connect everyday operational activity with financial tracking. Instead of reviewing Work Orders, inventory use, retirements, and depreciation separately, you can assign each cost to the right department, project, or operating area and review the results in one place.
Need help setting up Cost Centers in EZO? Reach out to support@ezo.io.