
All businesses, whether big or small, often have to reserve items in advance to ensure their daily operations are running smooth. EZO CMMS offers a Reservations feature, enabling you to book items in advance to ensure they’re available when you want to check them out.
The Reservations functionality in EZO CMMS has been significantly enhanced to offer a more comprehensive and effective service. It now includes support for advanced workflows and provides insights to help you make reservations without any scheduling conflicts.
Furthermore, it allows you to reserve a certain quantity of inventory stock items at designated locations and dates, making the reservation process even more efficient.
Benefits
Let’s quickly look at the major benefits of Reservations in EZO CMMS:
- Prevent double bookings: Properly reserving your assets for specific periods can prevent booking conflicts. This ensures that each asset is allocated to one purpose at a time, ensuring smooth flow of operations.
- Increased coordination: Preventing booking conflicts between departments enhances the use of shared assets and encourages cooperation between the teams. With clear reservation schedules, teams can plan their activities accordingly.
- Enhanced accountability: Identifying which user has booked which item and for what purpose enhances visibility and accountability. This makes it easier to trace the person responsible for the asset in case of asset loss or damage.
- Reporting: Generating reports to review asset usage details, including where, how, and when an asset has been used, can provide a comprehensive summary of your reserved assets. This enables you to know the number of reservations, self-serve reservations, and average time to resolve them.
- Quick analysis: On the reservations detail page, users can quickly assess the duration, date, and location of their reservations–cancel or extend–as needed. With the new ‘Proximity’ option, they can even set the period/number of days for which they want to view their reservations for easier analysis.
1. Item Reservation
Reservation via Item’s Detail Page
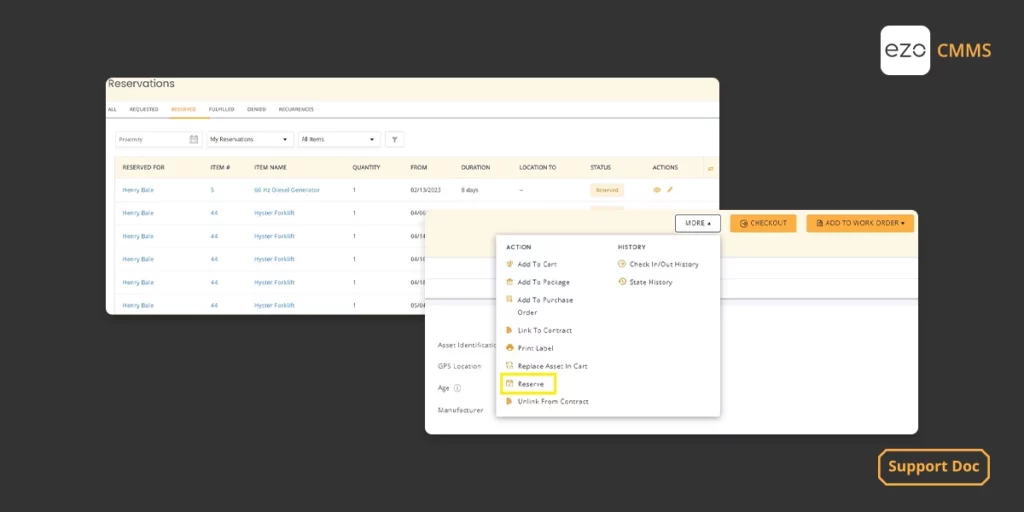
You can reserve an item from its detail page. Click ‘Reserve’ and an overlay will appear.

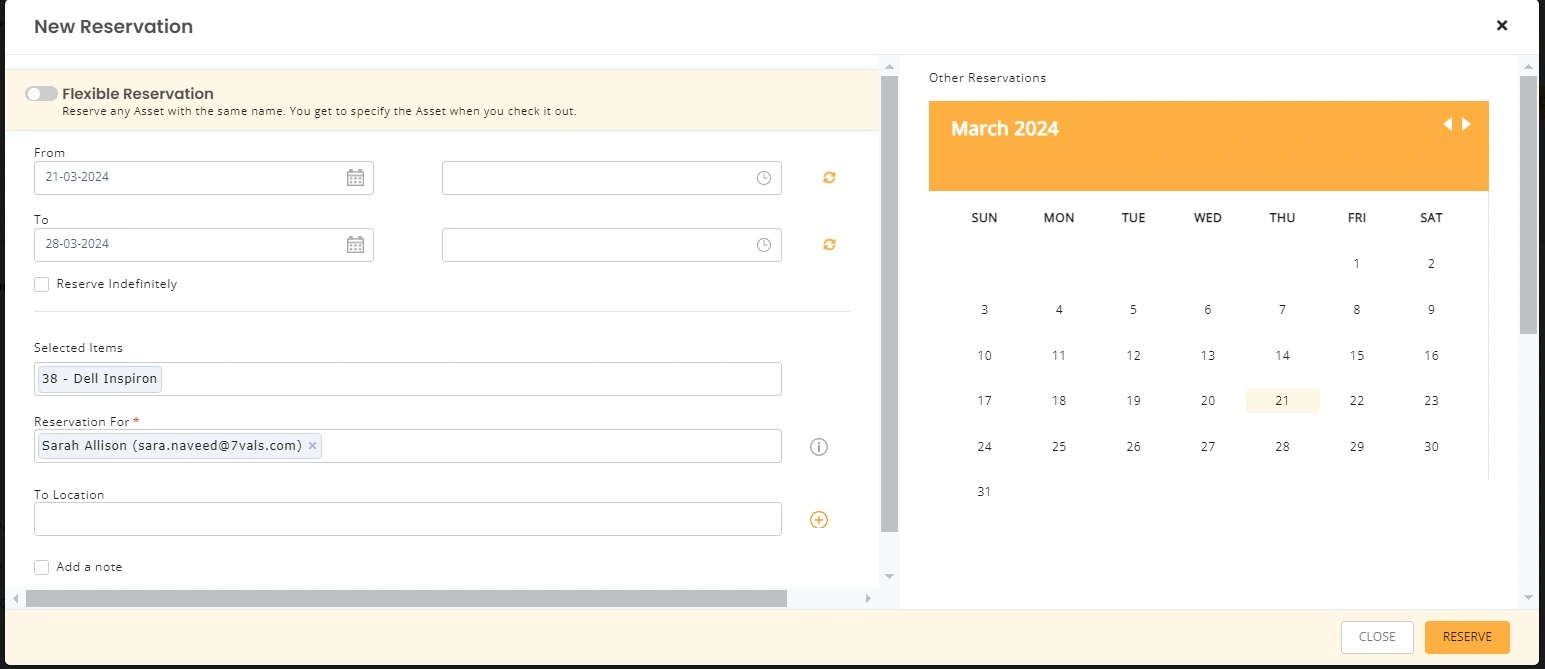
In the overlay, mention the reservation period and for whom the reservation will take place. You can also add a note to a reservation which can be viewed under the reservations tab.
Note: You can view how to reserve an asset with the Catalog view enabled here.
Add New Users and Locations On Reservation
If you move items between new custodians and locations often, adding that information on the fly can take a fair amount of time.
You can use EZO CMMS to add a new User and Location when reserving an item. Simply click ‘Add’ next to Location or Reservation For on the above overlay. Another dialog box will pop up, prompting you to create a new User or Location for that reservation.
This makes it easy to add details when you’re planning equipment movement for the future – especially when you’re dealing with elements that don’t already exist on the system.
You can add new Users and Locations while reserving items in the following ways:
- Item Reservation (from the Item Details page)
- Mass Reservation (From the Item Listings page)
- Cart Reservation (from the Cart Details page)
Note: To add new Locations, the ‘Ask on Checkout’ option must be enabled in Settings → Company Settings & Add Ons → Locations.

Mass Reservation
Multiple items (assets only) can be reserved in one go.

However, an error message will show up if the items have any conflict with other reservations. Enable conflict-free reservations from Settings → Company Settings & Add Ons → Reservations.

Items’ Reservation via Cart
You can also add multiple items to a cart and then reserve it. This comes into play if the ‘Cart Module’ is enabled from Settings → Company Settings & Add Ons.

Select relevant items and click ‘Add to Cart’. You can now go the Cart and click ‘Reserve’ to reserve the cart.

Reserved cart items can now be edited on the fly. Items can be removed or added, giving businesses more control over their equipment management. Say you reserved items for a CES exhibition but underestimated the number of VR headgear you’d need. With the latest enhancement, last-minute reservations to a cart are nothing to fret over.
Reservations Tab within the Asset Detail Page
While reserving an asset, easily view its availability schedule i.e. other reservations and current checkouts. You can do so by clicking the Reservations tab on the details page.

With this information, one may choose a suitable date for a reservation and avoid conflicts. Notice in the screen below, how the Reservation Tab on the Asset Detail page provides this info in a nifty view.

You may also take appropriate actions from within this view to schedule a new reservation without any time clashes, as shown in the following screen.
If multiple reservations result in clashes at checkout time, you may override them as an administrator. A staff user can only do so for his/her own reservation (if this asset is visible to this staff user as per company settings). Alternatively, one could choose a different checkout date and hence avoid any scheduling conflicts.

The top-level reservations page (which can be accessed from the bell icon) has also been enhanced to give you quick access to reservations for all the items and carts (see in the screen below).

Moreover, as an Admin, you may review reservations made by all members and take necessary actions.
However, as a staff user, you may only review your own reservations and take action on them. A historical record of past reservations is also available under the “Fulfilled Reservations” Tab.
Some reservations may appear in red. This is because the quantity reserved is not available at the time of the new sale at that location. You can find out what other color dates/stock quantity means from the help section on the reservations page.
An admin may edit the quantity and location for a reservation at any time and remedy such situations. (as seen in the screen below).

2. Reservation Actions
You can access the reservations page from the bell icon on the top-right of your screen.

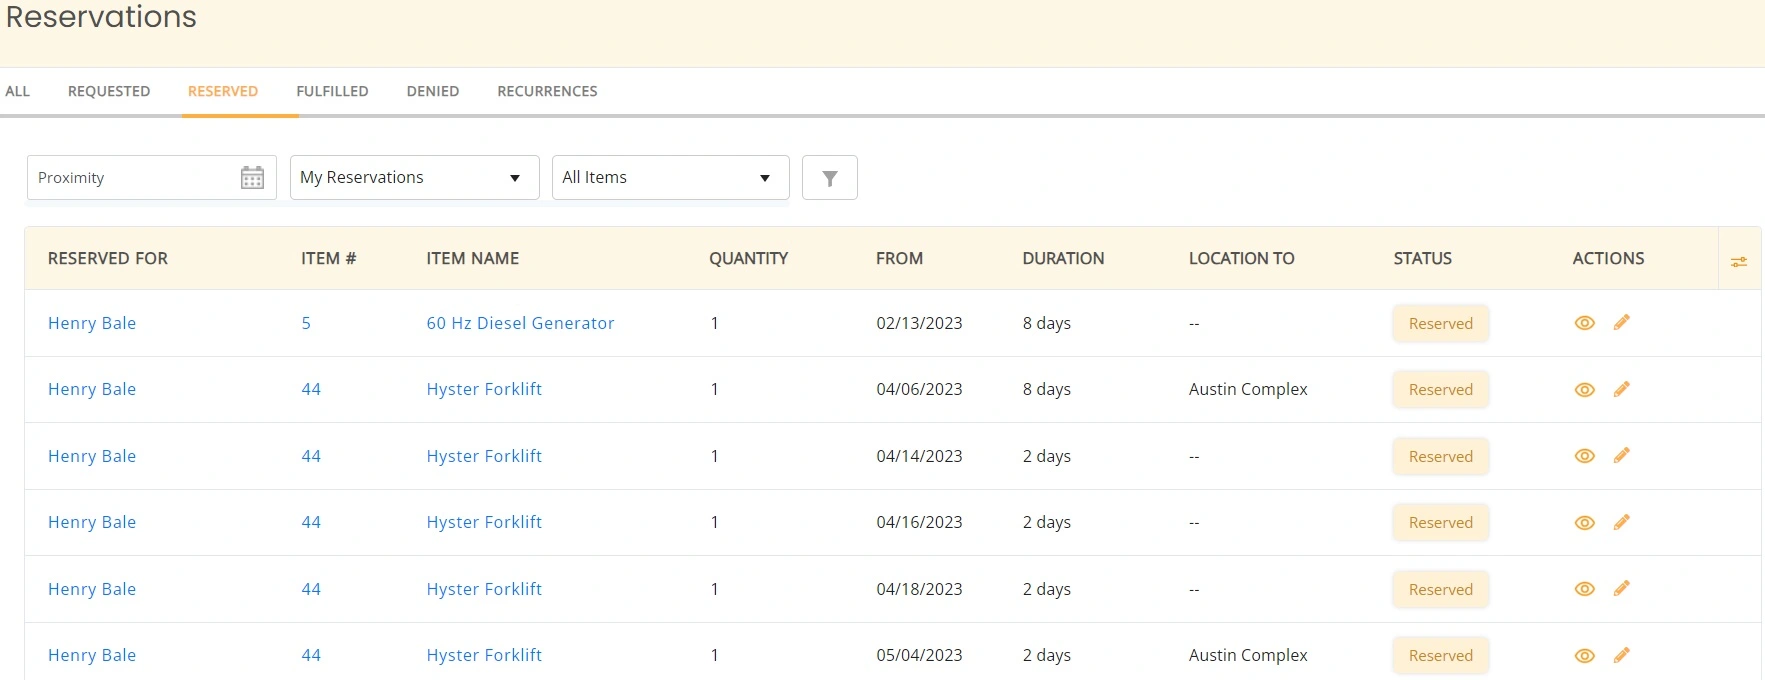
When you click on ‘My Reservations’, you will be taken to the following Reservation Details Page that shows details of all the reservations. You can take multiple actions from here, like filter and edit the reservation.
Moreover, as an Admin, you may review reservations made by all members and take necessary actions.
You can check ‘Reserved’, ‘Fulfilled’, ‘Denied’, reservations and ‘Recurrences” as well.
Here are some important elements on the Reservation Details Page that are important to note:
a) Proximity
You can define the time period for which you want to display the reservations. These are the number of days between the current date and the reservation starting date (both in the past and future). For instance, if we select ‘Within 15 days’, then all reservations 15 days from now and 15 days before the current date will be displayed.

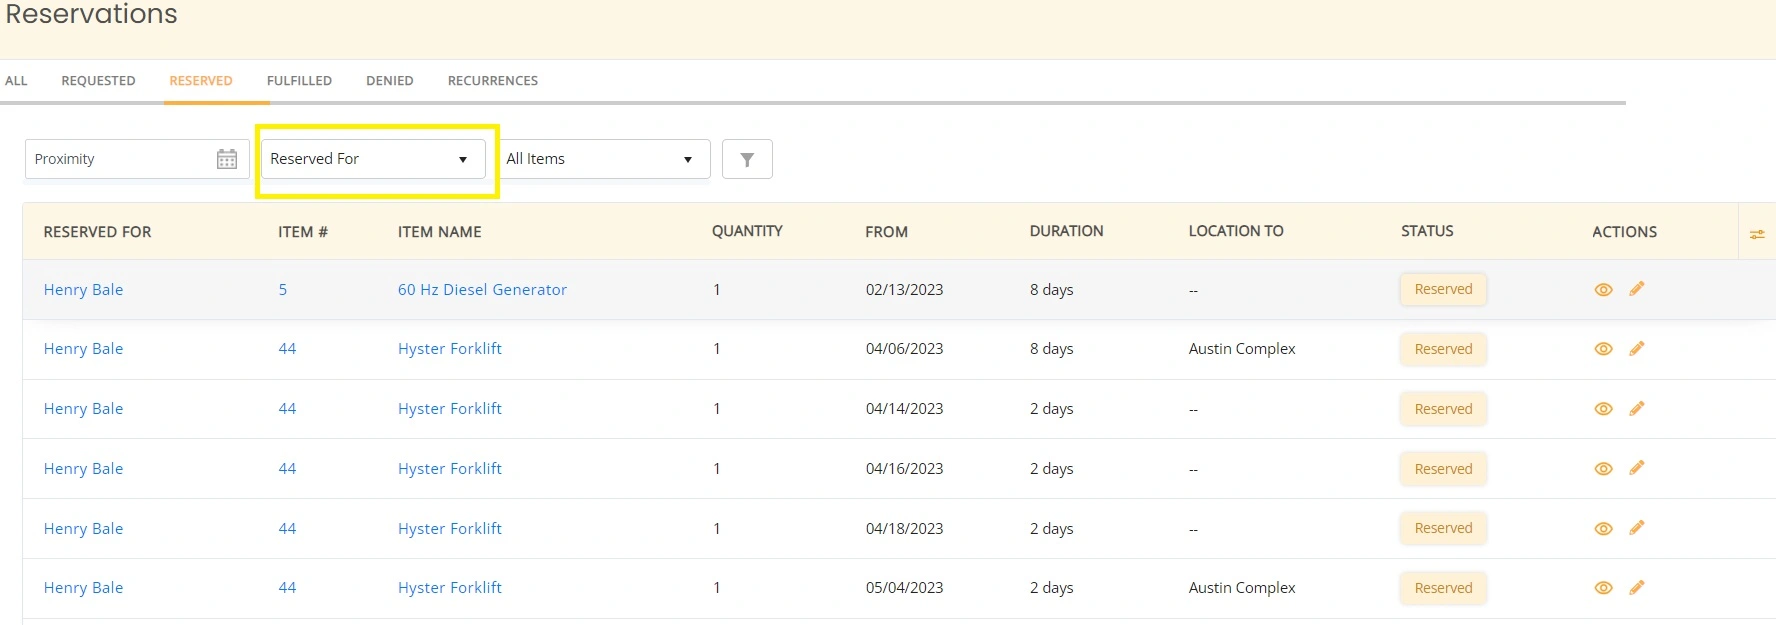
b) Reserved for
When you click on the ‘Reserved for’ filter, you will be able to access all the reservations. This field is searchable, so you can type the member’s name to see reservations against their name:

c) Filters
You can apply multiple filters to look for your reservation. Simply click on the filters icon.

This will take you to a window where you can enter the reservation duration, user name, asset name, and type of reservation (single or recurring) to look for the relevant reservation.

d) Editing item quantity
An admin may edit the quantity and location for a reservation at any time and remedy such situations. To do this go to the Reservation details page → Click on the edit icon.

You will be taken to the following page where you can edit the location.

e) View icon
You can cancel a reservation by clicking on the following eye icon.

3. Staying on Top of Reservations
Always stay updated on reservations with the Dashboard Calendar. You can toggle for actionable metrics between the ‘Items’ and ‘Carts’ widgets.

4. Capture Signatures on Reservations
Add an extra layer of security to maintenance tracking by recording signatures with reservations and reservation approvals from Settings → Add Ons → Capture Signatures. This enables a user to sign whenever he/she makes a reservation on an item or when an admin approves a reservation (if arbitration on the reservation is enabled).
5. Reservation Cancellation
Reservations can be cancelled by staff users and admins both. Simply go to the notification bell and click on ‘Pending Reservations’ as shown below:

This will redirect you to the Reservations page. Here you can go to ‘All Reservations’ and select Asset, Asset Stock or Inventory. After this, you can mass check the Items you want to cancel the reservations for as shown in the image below:


