Automations in EZO offer a highly configurable way for organizations to automate asset management workflows across various operational processes. Managers can create custom automations to streamline asset tracking and purchase order approvals.
By enabling users to define triggers, conditions, and actions– automations reduce manual workload, enhance reliability, and minimize human error. Automated workflows ensure that critical asset operations are executed automatically and consistently.
Benefits of EZO Automations
EZO automations are ideal for organizations that rely on asset management for optimized business processes and have a growing need for workflow automation to ensure scalability and efficiency. Here is how automated asset management workflows can add value to your business:
- Flexible Internal Workflows Tailored to Your Needs
Automated workflows offer complete flexibility in managing assets. Whether you need to trigger maintenance plans for specific asset groups or automate depreciation updates upon checkout, you can create workflows that are fully customizable to your organization’s unique needs. This flexibility ensures that your workflow adapts to your processes, not the other way around. It also ensures that niche requirements are addressed, even for use cases that aren’t covered by standard features available in asset management tools. - Automated Data Population for Better Insights
Automated data field updates, eliminate the risk of human error and ensure that all asset attributes are consistently updated. This leads to better data hygiene and allows for more granular insights, such as tracking asset depreciation accurately over time. These insights enable more informed decision-making and prevent operational inefficiencies caused by incorrect or missing data. - Boosted Operational Efficiency & Reduced Admin Workload
Through custom automations critical asset operations—such as tracking, managing purchase orders, and handling asset lifecycle events—are executed automatically and consistently. Automating these processes that drain considerable time and resources when executed manually, allows users to eliminate repetitive tasks & boost operations with less employee workload.
Now let’s delve deeper to see how we can build these automations and put them to test:
1. Automations and Workflows Overview
Automations and Workflows main page gives an overview of all the automations that you have created. There are two filters available for Automations. The first filter allows you to choose Assets, and the second filter enables you to choose Purchase Orders. Please note that Assets is the default list.
Based on the module you choose (i.e Assets/ Purchase Orders), you’ll be able to view different triggers. Here are the snippets of triggers that appear for every module.
- Choosing Assets will allow you to create automations on different actions, stages, and statuses of assets as shown below:

- Choosing Purchase Orders will enable you to create an automated action on PO approval:
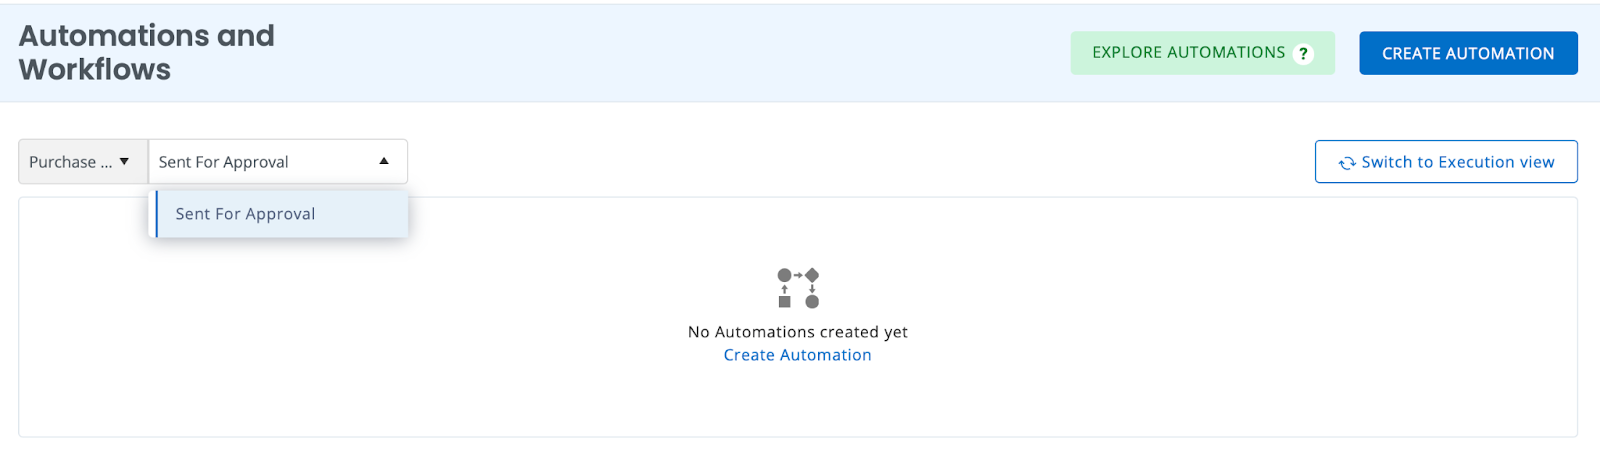
Please note that even though automations module is extensive and has various use cases, it cannot cater to every use case. If you have need for a specific automation to be created, please feel free to contact us at support@ezo.io
Now let’s start creating asset automation.
2. Creating an automation
To create a new automation, click on the ‘Create Automation’ button on the top right corner of the main page.
A new window will open up from where you can get started. A new automation can be created in 3 steps.
3. Creating an automation with webhooks and sub-trigger
4. Creating a custom email notification for automation workflows
5. Automation filters, actions and logs
6. Inserting Placeholders
Users can insert placeholders while creating automations to import data from another field to populate the field of their selection. For instance, if we want the description of a newly created asset to automatically be its location, we can insert the “Location” placeholder. The EZO system will then automatically set the description to be the asset’s location whenever a new asset is created.
Note: The Placeholder functionality is only available for Assets at the moment.
Here’s how it works:
7. Automatically Check In Assets When They Are Due
Here’s an example of how you can use Workflow Automations to automatically check in assets when their check-in is due. This is useful when assets in specific groups need to be checked in at a set time without requiring users to manually check them in. In this example, we’ll create a workflow that runs daily at 23:59 and checks in assets from the Laptop group when their check-in is due that day.
To configure this automation, navigate to More → Workflow Automations and click + Create New Workflow. Provide a name and optional description for your workflow and follow the steps below.

7.1. Create a Trigger node
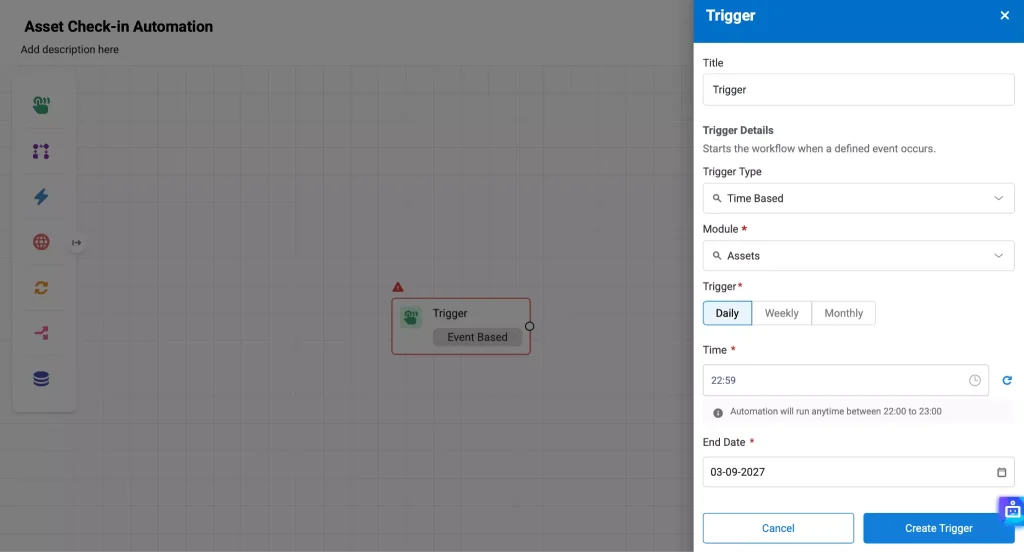
A Trigger determines when an automation starts. For this workflow, we’ll use a Time-Based Trigger that runs every day at 23:59 and checks assets that have been checked out.
To create the Trigger:
- Click the Trigger icon and drag it onto the canvas.
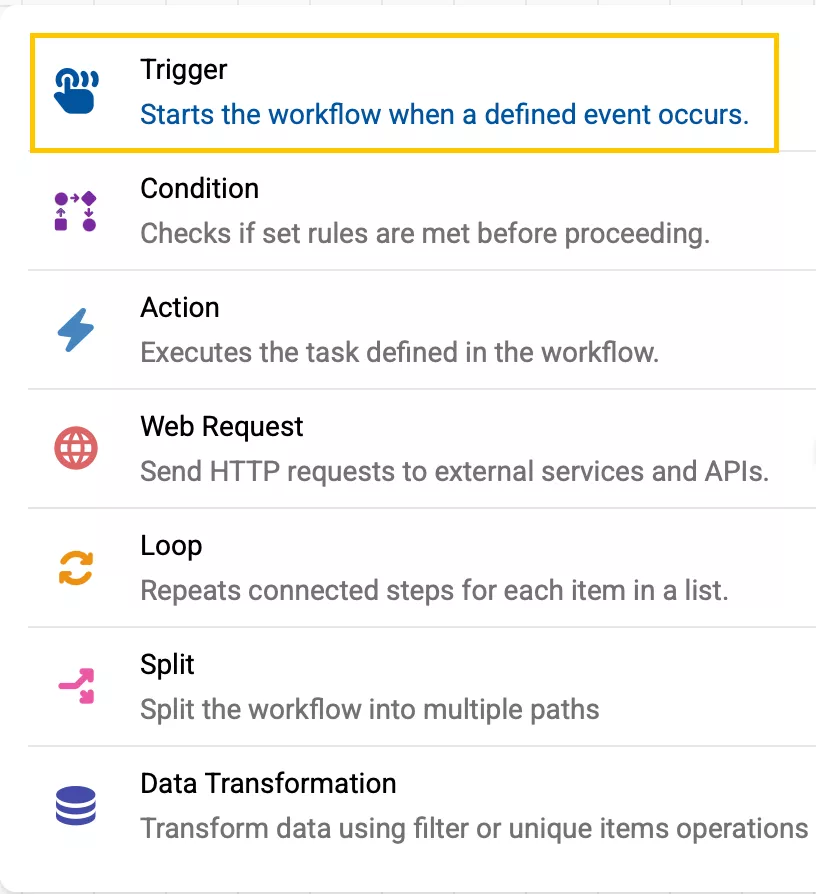
- In the trigger modal:
- Select Time Based as the Trigger Type.
- Select Assets as the Module.
- Select Daily as the Trigger and 23:59 as the time.
- Provide an End Date.
- Click Create Trigger.
7.2. Add the Condition node
A Condition determines whether an Action should be performed after the Trigger occurs. You can use one or more conditions to make sure the workflow only applies to the assets that meet your requirements.
For this workflow, we’ll check that the asset belongs to the Laptop group and that its check-in is due today.
To add the Conditions:
- Click the Condition icon and drag it onto the canvas.
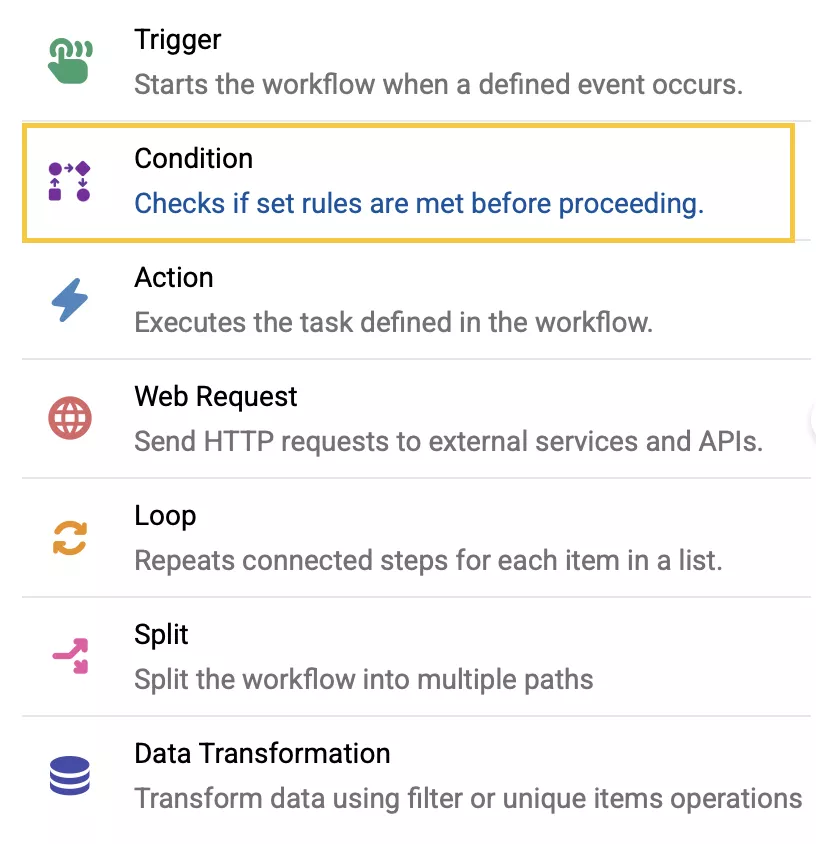
- In the Condition modal:
- Set the condition to Group Equals Laptop.
- Click the Add Filter button.
- Now, set the condition to Checkin Due On Equals / During Today and click the Add Filter.
- Configure the conditions using the appropriate AND/OR logic.
- Click the Done button.
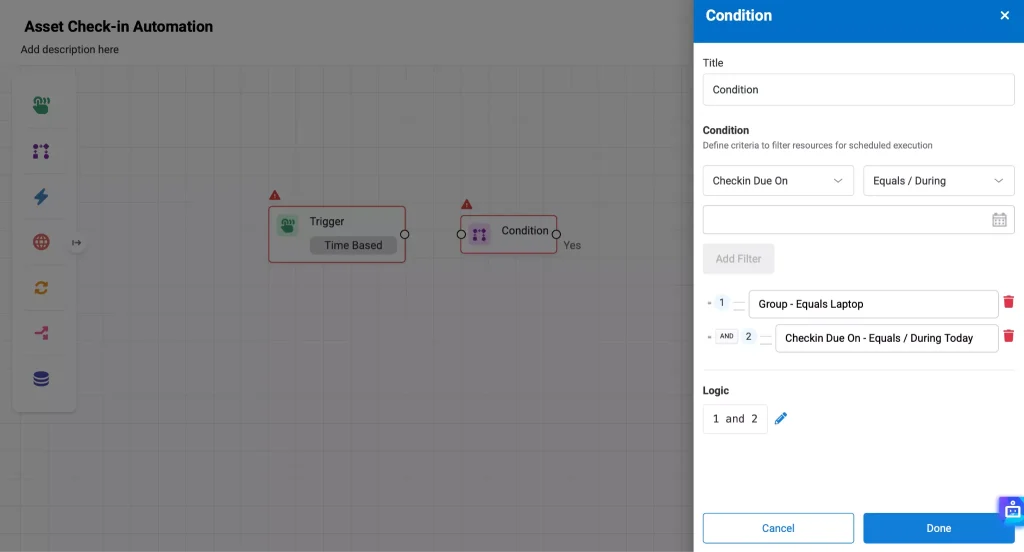
Once you’ve configured the Condition node, link it to the Trigger node by dragging the arrow from one node to the other.
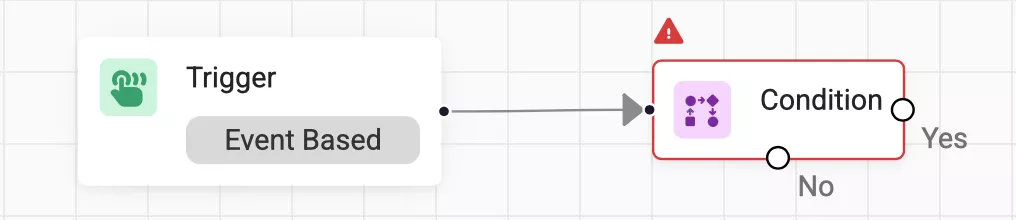
Note: The canvas automatically creates Yes and No branches, which can then be linked to the relevant actions depending on what you want to automate when the condition is true or false.
7.3. Add the Action node
An Action defines what EZO should do when the Trigger and Conditions are met. The Check-in Asset Action allows you to automatically check in an asset that meets the conditions in your workflow.
To add the Action node:
- Click the Action icon and drag it onto the canvas.
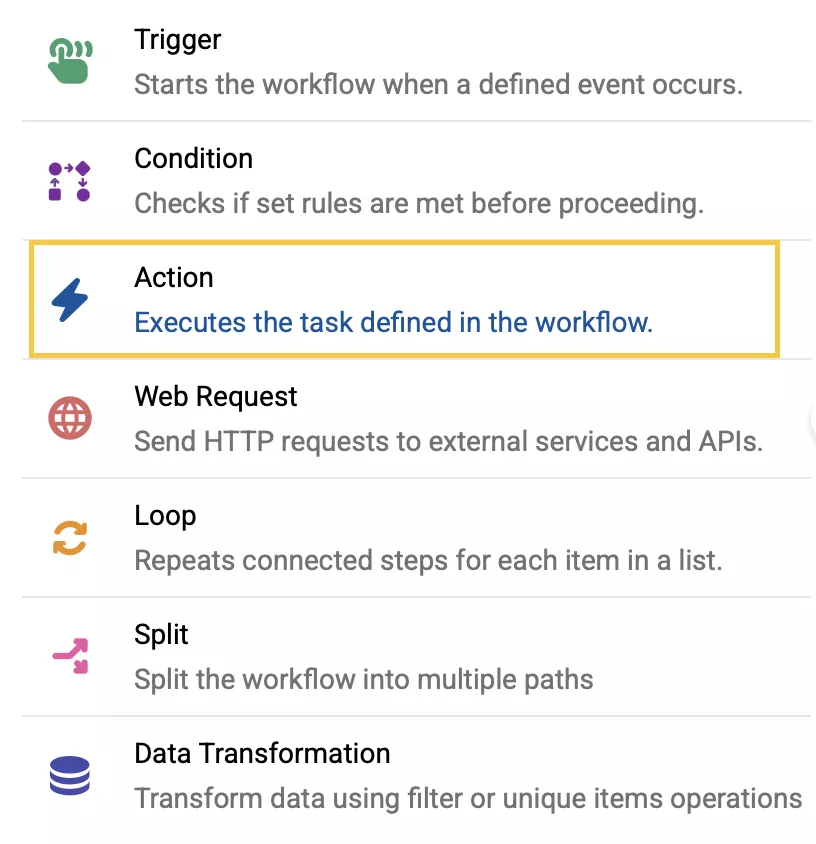
- In the Action modal, select Check-in Asset from the Action dropdown.
- Click the Update Form button and configure it according to your requirements and then save your changes.
- Click Add Action.
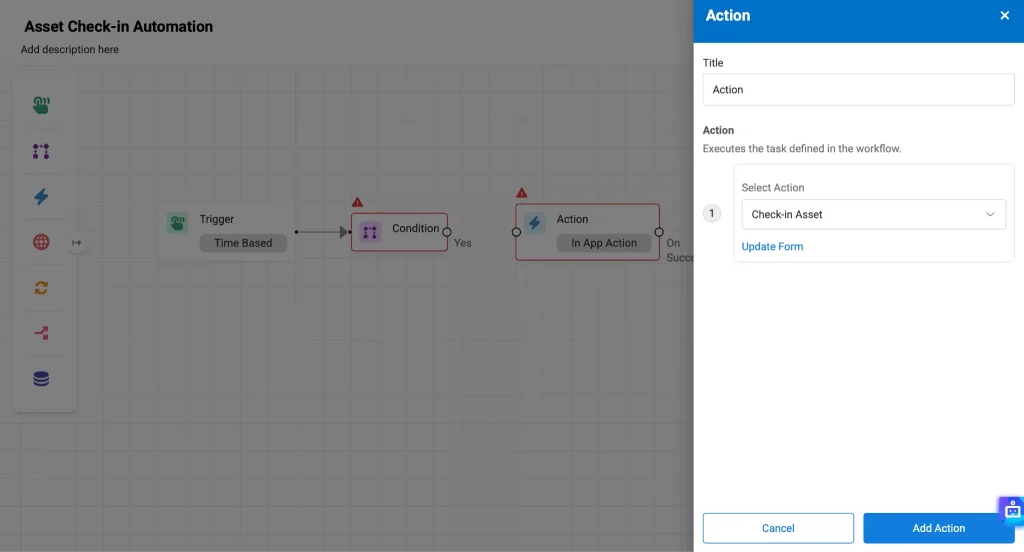
Once configured, link the Action node to the Condition node by dragging the arrow from one node to the other.
Once the workflow is complete, click Save Changes and activate it by toggling the Activate switch. In the confirmation pop-up, click Activate.
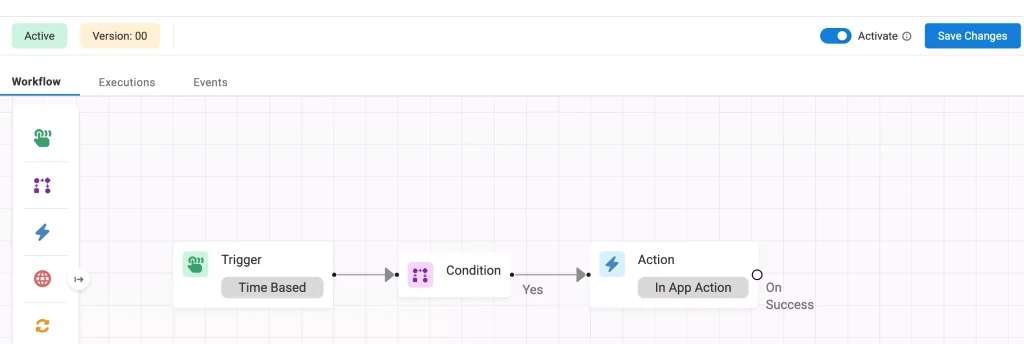
Once you activate the workflow, EZO will run it daily at 23:59 and automatically check in assets that belong to the specified groups and have a check-in due date of today.
Note: Existing Auto Check-in settings and permissions continue to apply. This automation provides an additional way to automate check-ins based on your defined workflow criteria.
Get Started with Asset Automations
Asset Automations help you streamline routine asset management tasks by automating actions based on events, conditions, and schedules. By reducing manual work, you can ensure recurring tasks are handled consistently and on time.
For further assistance with setting up or using automations, please reach out at support@ezo.io.