
EZO supports enterprise-grade asset operations by enabling standardized, auditable workflows across distributed locations. Audits are designed not just for record verification, but for enforcing accountability, ensuring data integrity, and maintaining control over asset movement at scale. Whether managing assets across multiple sites, departments, or regions, EZO provides a centralized system of record to validate inventory, track discrepancies, and support compliance-driven operations.
Audit in EZO provides inventory managers the ability to run location audits on items that are located in different warehouses or secondary locations to ensure transparency and accuracy of records. By having instant access to location-wide stock records, you can quickly identify items that are not present in their designated location and avert possible asset and financial loss to the organization.
Users can instantly verify the condition of Assets by carrying out regular Audits for each of their sites. As verification can only be carried out by the designated Auditors, chances of unauthorized access to Assets is minimal.
Audits in EZO is divided into two parts:
- Location audits: Enable you to save time and ensure accountability by having up-to-date verifications of inventory stock at all times. While performing audits, you can scan the barcodes available on items and the app will automatically verify if the item matches its designated location and has the correct quantity available within EZO.
- Custody Audits: Sometimes Items at an Audit Location can be checked out at the time of an Audit. In order to ensure Items are in possession of the assigned members, you can verify custody for checked out Items at an Audit Location.
Let’s look at the workflow to help you get started with Audits:
1. Enable Location Audits
Go to Settings → Add Ons → Audit Items
→ Location Audit and select Enable.

Once you have enabled the settings, you will be able to view Audits in the main navigation bar menu.

2. Create an Audit

On the Audit Listing page, click Add Audit.
Fill in the following details including the assigned Auditor for the Audit you want to schedule:

Next, choose the Locations and the Groups for your Audit. If you select a location with the toggle “Select all the nested locations” enabled, the sub-locations of a primary available location will be automatically selected as shown below. For example, for the Los Angeles Head Office, California Office Buildings 1, 2, and 3 have been checked.

Whereas, if you choose the location with the toggle disabled then you can choose each available sub-location manually. For example, only California Buildings 1 and 2 have been selected in the example below.

Once this is done, you will be able to see your Audit on the Listings page as Scheduled:

3. Start Audit
Go to the Audit details page and click on ‘Start Audit’. An overlay will appear displaying the following message:

Click on ‘Start Audit’. Once the Audit starts, you will be able to see the following information on the details page:

The ‘Audit Items and Progress’ tab shows the total cost of Items within an Audit and the Assets selected for the Audit Location.
The Pending list shows all the Items waiting to be Audited. During an Audit you have the option to either Verify or Deny the Item present at the Audit Location. Flagged state includes any Items that the Auditor wants to highlight due to any issue at the site.
Read more: Custody Verification in EZO
4. Actions on Audit Items
When you select an Item to verify, the following overlay will appear asking you to submit the following details:

While verifying the Items, you can change the Quantity you want to verify for the Audit.
Similar will be the case for denying an Item in Audit:

When taking mass actions you will be able to verify individual quantities for all Items as shown below:

Here you can also add the reason for denying items in the Audit:

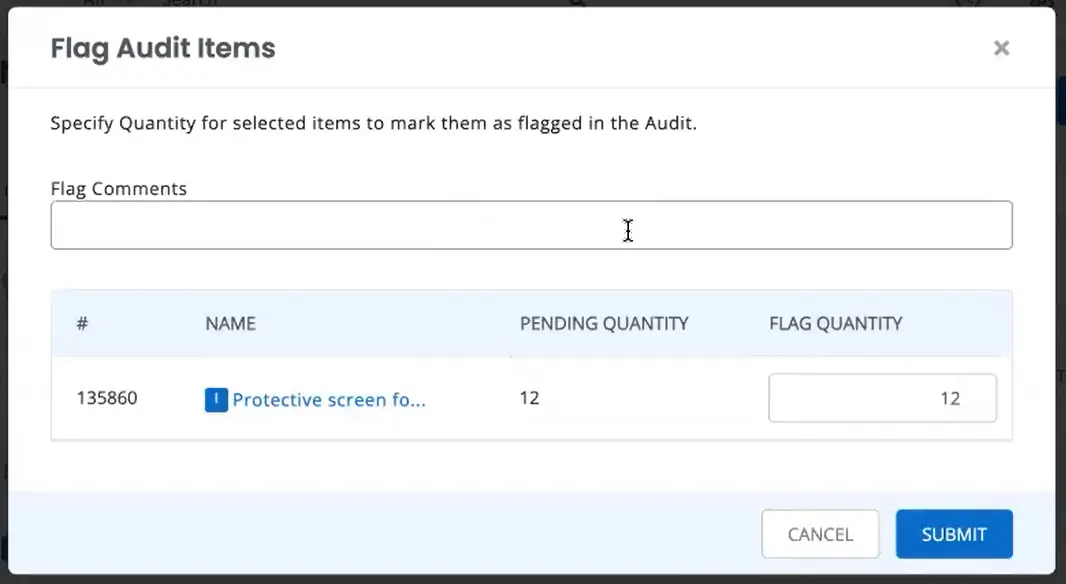
Lastly, for Flagged Items you will need to submit your comments and the Item quantity as shown below:
Results for verified, denied, flagged Items will be displayed as follows:

Note: When an Item is verified/denied/flagged from the Audit list, it will be available for actions on the Listings page.
5. Scan and verify Audit Items
On the Audit details page, users can take actions on the Audit Items through scanning as well.

When you click on Scan and Verify, the following overlay will appear asking you to select the Audit Location to start the scan:

Once you have selected the Location for Audit, you will be able to scan Items:

The option to scan an Item will only appear after you have selected the Location for the Audit.
After you have entered the location, scanned Items will appear as follows:
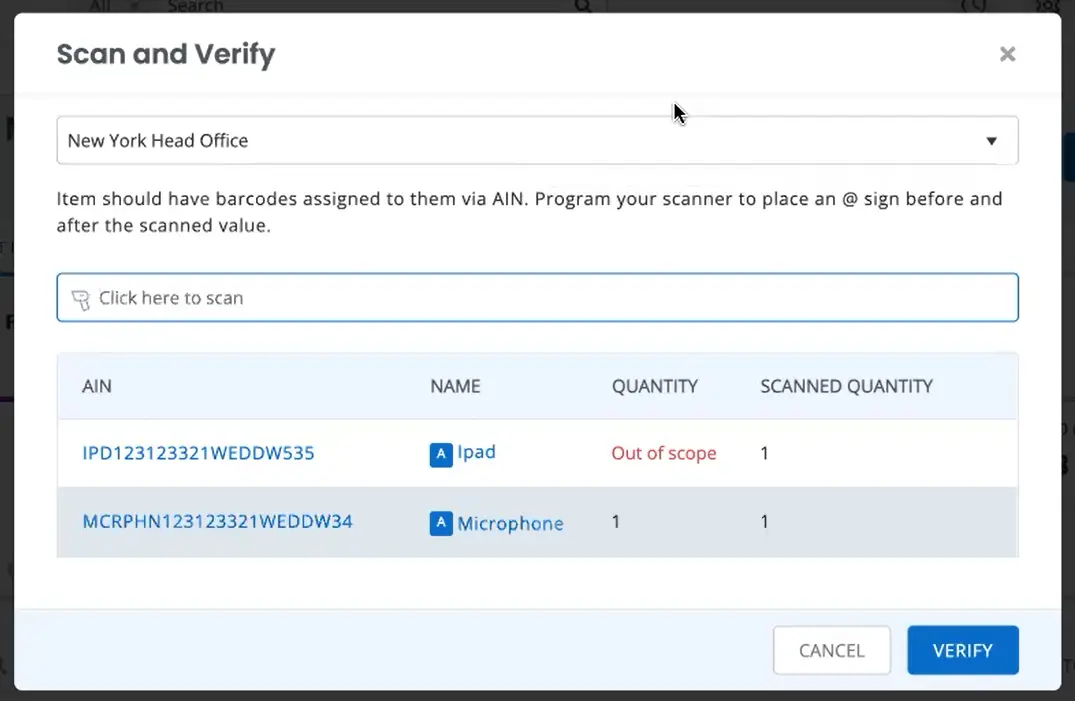
If you scan an Item not present at the selected Location, the Item will be flagged as ‘Wrong Location’ and will be displayed in the results as follows:

Any item flagged for being ‘Out of Scope’ means that the scanned Asset is not part of the Audit.
You can also scan and verify Asset Stock in Audits shown as follows:
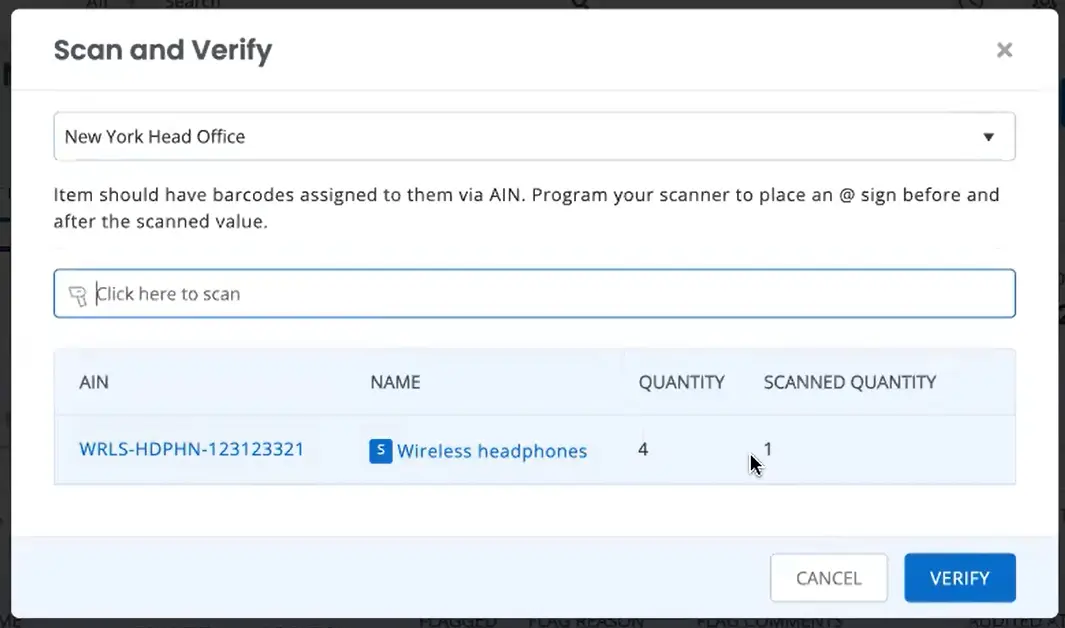
On scanning a single unit of the Asset Stock, the scanned quantity will be displayed as 1. This will increase as you scan more units:

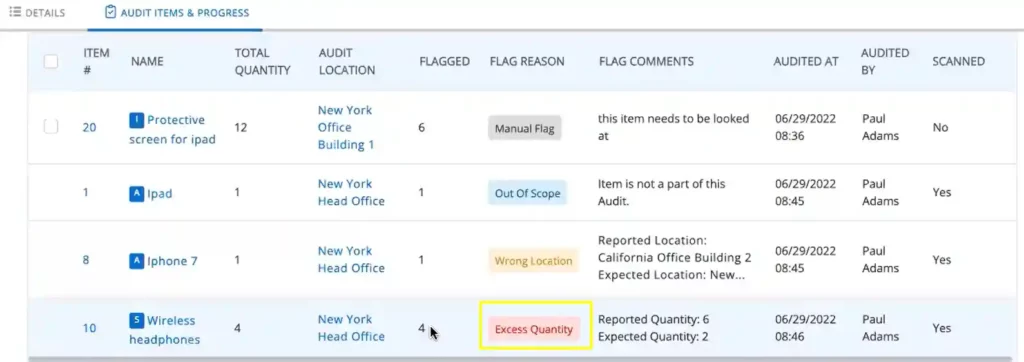
If you scan more than the quantity available at the Audit Location, the Item will be flagged for excess quantity as shown below:
6. Blind Audits
Audits are used to verify that the physical stock on hand matches the quantity of items recorded in the system. Normally, when an auditor performs an audit, they can see the system’s expected quantity alongside it. This can unintentionally bias the audit: an auditor who sees the system expects 50 units may be more likely to report 50, even if the actual count is different.
Blind Audit removes this risk by hiding the system’s expected quantity during the count, so auditors record only what they physically find. When enabled, quantity figures appear as “Hidden” across all tabs, pop-ups, and printouts. Auditors can still verify, deny, and flag items as normal, only the expected quantities are hidden from view.
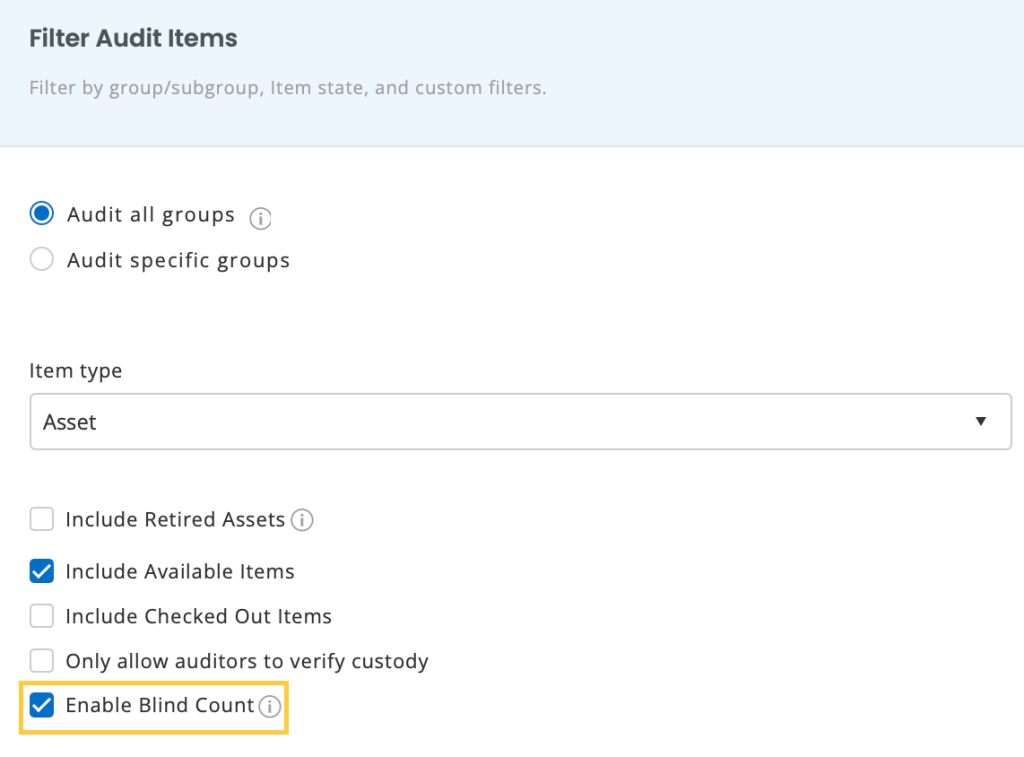
To enable Blind Count for the audit, check the Enable Blind Count checkbox under the audit filters while creating the Audit.
Admins and audit creators always see the full audit view with no quantities hidden, regardless of whether Blind Count is enabled. If an auditor is also the creator of the audit, they will see the full view as well.
To make Blind Audits easy to identify:
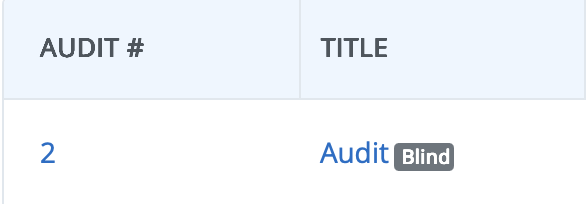
- A Blind badge appears on the audit row in the Audit listing page next to the audit status.
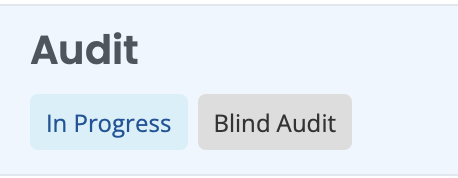
- The audit detail page and print view are tagged as Blind Audit next to the status chip.
6.1. Blind Audits: Unrestricted Input Quantity
In a standard audit, auditors cannot enter a quantity greater than what the system has on record. With Blind Count enabled, this restriction is removed entirely, allowing auditors to report whatever quantity they physically count, with no upper limit. This is useful when auditors discover unregistered items, misallocated stock, or returns that haven’t been recorded in the system yet.
This behaviour applies exclusively when:
- The audit was created with Blind Count enabled, and
- The user performing the count is an Auditor
Standard audits, admin experiences, and audit creator experiences are unaffected.
Surplus Variance and Auditor Reported Count
When Blind Count is enabled, two additional columns appear in the All and Verified tabs of the audit, visible to Admins and the Audit Creator only:
- Auditor Reported Count: The total quantity entered by the auditor during verification.
- Surplus Variance: The extra quantity found during the audit compared to what the system had on record. This is calculated as Auditor Reported Count minus the system quantity. If the auditor’s count does not exceed the system quantity, this column shows a dash (—).

7. Complete Audit
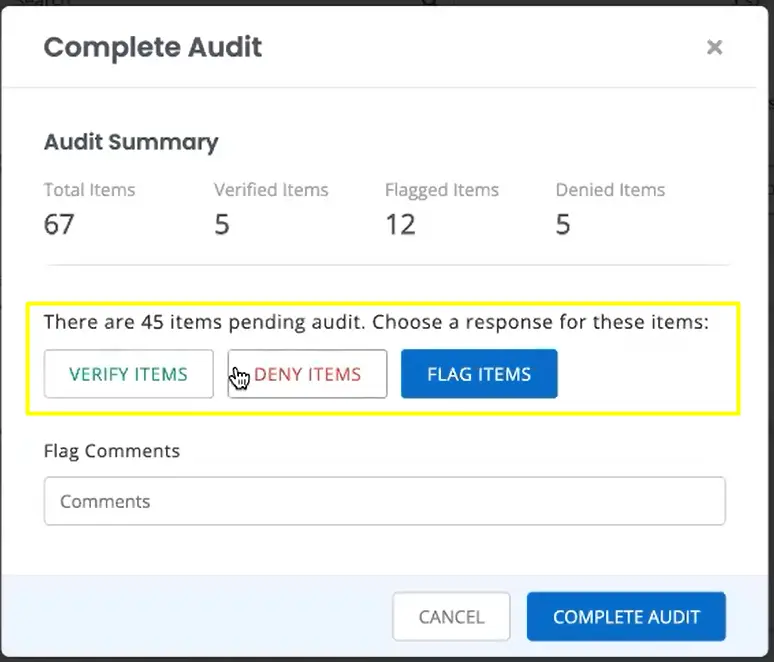
After the Auditors have marked the relevant Items at the Audit Location as verified, denied or flagged, then the Account Owner can mark the Audit as complete.

In case there are pending Items, the Account Owner will need to take action for the pending Items to complete the Audit.
Once action has been taken for all the pending Items, then the completed Audit appears as follows:
8. Audit Item details

For audited Items, you can view the related Audit information right on the details page.
To view Audit history, , go to the Item details page→ More→Audit History
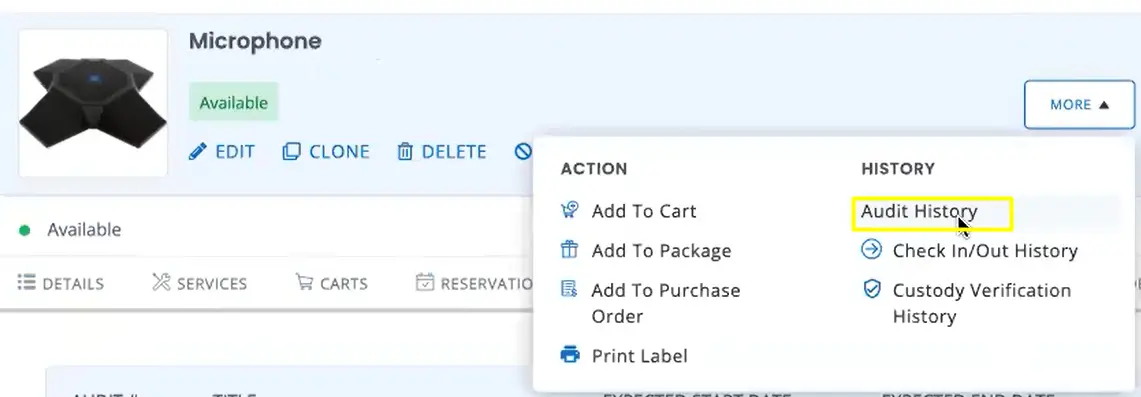
Here you will be able to view all details of the Audit for the Item including whether it was verified/denied/flagged and the Audit Location:

9. Audit Alerts
Go to the main Navigation bar → Alerts → Item Audit. Here you can enable Alerts for when the Audit is created, started, assigned and more:

10. Audit Reports
For Audits, you can run two reports: All Audits and Audit Line Items as shown below:

This what a Line Items Audit Report will look like:

You can also generate a Custom Report for Audits including Members and Line Items.
11. Dashboard KPIs
You can add a Dashboard KPI displaying all details for Audits in Progress as follows:

12. Custody Audit
Go to Settings → Add Ons → Audit Items → Custody Audit.

After this, when creating an Audit, you have to check the option ‘Include Checked Out Items’ when creating an Audit as shown below:

Once the Audit is in progress, you will be able to see two tabs for the Audit pending Items:


For Items available at the Audit Location, you can simply verify, deny or flag them. However for checked out Items, a custody request will be sent as soon as you Start the Audit.
The custody verification request will be visible on the Item’s details page. The status of the Item is changed to ‘Audit Pending’ and the user will have the option to either Acknowledge Custody or Cancel Verification.

The verification requests can also be viewed under the Notifications Bell:

Here you can see custody verification requests for the Audit Location:

Checked out Items can only be verified or denied not flagged and the action can only be taken once.
An email will also be sent requesting custody for all checked out Items to the owner:

When the owner acknowledges the custody you will be able to view the Item under Verified:

The status on the Item details page will be changed as shown below:

Note: You cannot verify/deny checked out Items by scanning them. Checked out Items cannot be flagged
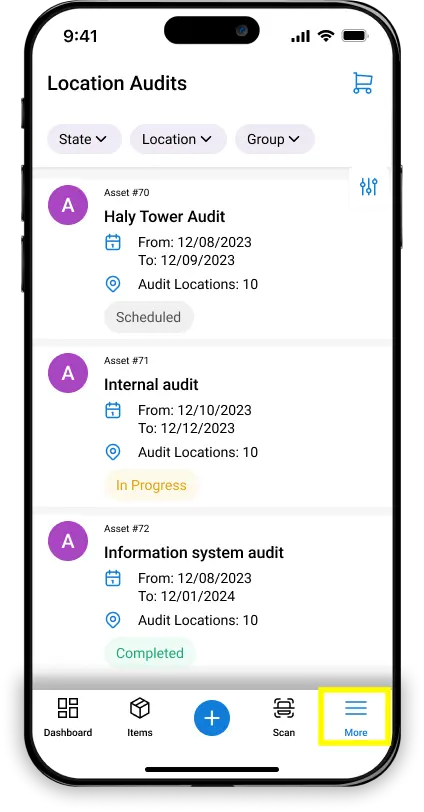
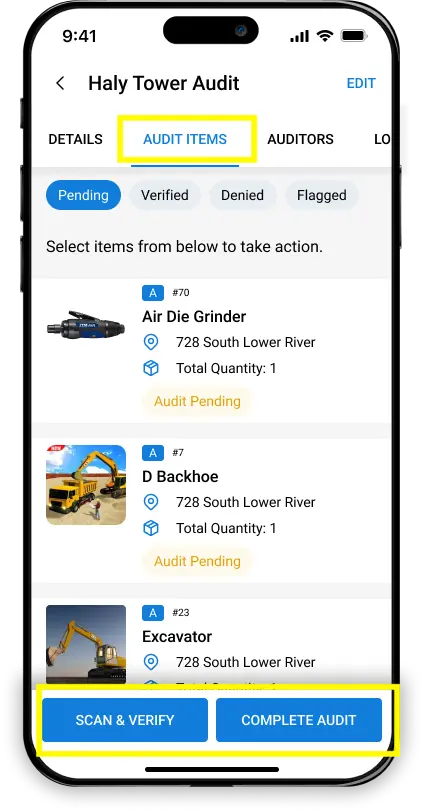
13. Location Audits in Mobile App
The EZO mobile app offers the ability to run location audits in a few simple steps. Access ‘Location Audits’ from More button at the bottom right of the navigation bar:
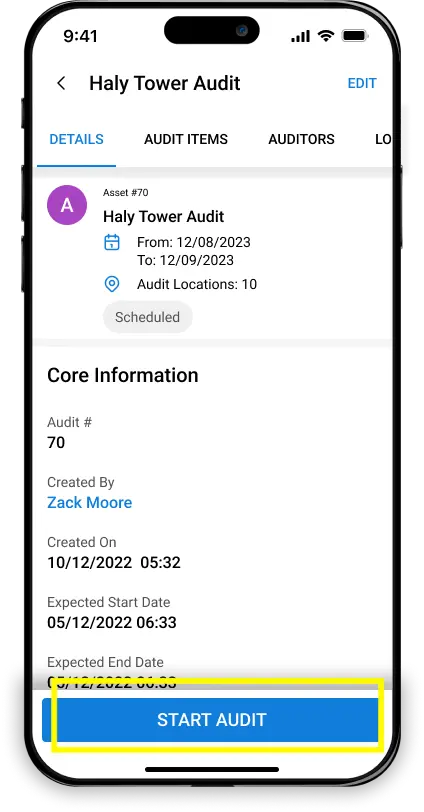
From here tap on an audit that is scheduled, go to its Details page and hit ‘Start’:
Once you start the audit, the status will be changed to ‘In Progress’ and you will be able to scan and verify items:
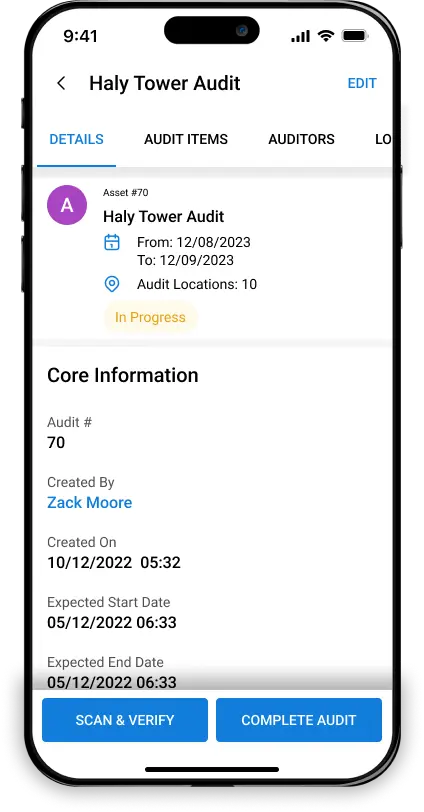
Once the Audit is ‘In Progress’, the items at the specific location will be visible under the ‘Audit Items’ tab. From here the items can be verified either manually or by scanning.
In order to manually audit assets, tap the items you want to verify/deny and select the required action from the blue bar at the top:
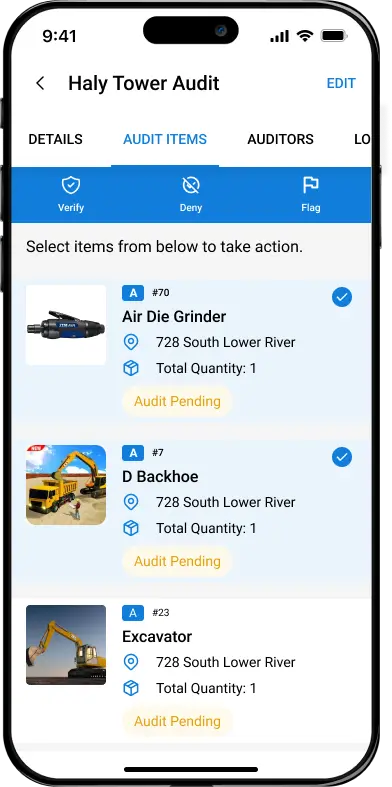
In case the selected items are present at the Location, tap ‘Verify’ and complete the action.

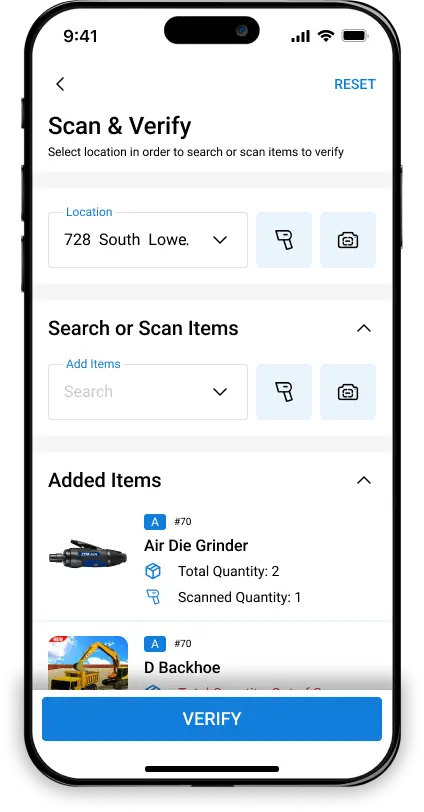
To scan items present at the Location, Tap ‘Scan and Verify’ . Next, you will be prompted to either search for the item or scan it.

Once you have scanned the items, they will be populated under ‘Added Items’ :

After adding the items for verification, select a location and complete the action:
The listings page will be updated, once you have verified all the items.


