
The Request Portal Page Builder enables enterprise teams to standardize service access, enforce structured request intake, and deliver a consistent user experience across departments and workflows.
Page Builder in Request Portal is an essential tool that grants account owners the flexibility to customize the portal in alignment with their branding and functional requirements. The Page builder comprises a central banner and menu cards, each leading to distinct pages –offering extensive configurability.
Administrators can tailor banners and cards to meet specific business requirements. For ease of access, the menu page seamlessly integrates into both the EZO web app and the request portal. The customizations offered through the page builder are aimed at providing a user-friendly interface and can be disabled based on their intended use, ensuring a dynamic and tailored user experience.
Benefits of Page Builder in Request Portal
The Page Builder provides a customized experience with easy accessibility to locate the required items. Here are a few other benefits:
1. User-Friendly Navigation:
Menu cards provide a clear and organized structure, making it easy for users to navigate through the portal. Users can quickly locate the specific request type or service they are looking for, reducing confusion and frustration.
2. Efficient Request Submission:
By categorizing catalogs into menu cards, users can easily identify and select the appropriate option for their needs. This streamlined process accelerates the request submission, saving users time and making the portal more user-friendly.
3. Information Hierarchy:
Menu cards allow you to prioritize and present information in a hierarchical manner. Important or commonly requested items can be prominently displayed, while less frequent options can be nested under relevant categories. This helps users find what they need more efficiently.
4. Visual Appeal:
Menu cards can be designed with relevant images and colors to enhance the overall aesthetic appeal of the homepage. This not only makes the portal more visually engaging but also aids users in quickly identifying and selecting the desired options.
5. Clear Communication:
The use of menu cards helps in communicating the available services or request types clearly. Requesters can easily understand the range of options available to them, promoting transparency and reducing the likelihood of errors in request submission. Clear communication also reduces the time it takes to reach the value.
Using Page Builder in Request Portal
Let’s take a look at how you can customize your request portal:
Go to Settings → Request Portal → Page Builder.
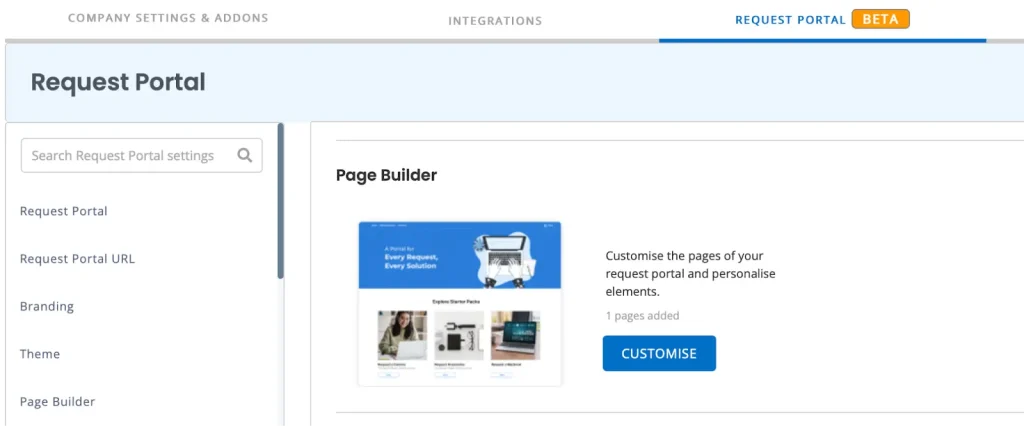
You will be redirected to the Page Builder where you can add and customize pages.
1. Create a new page
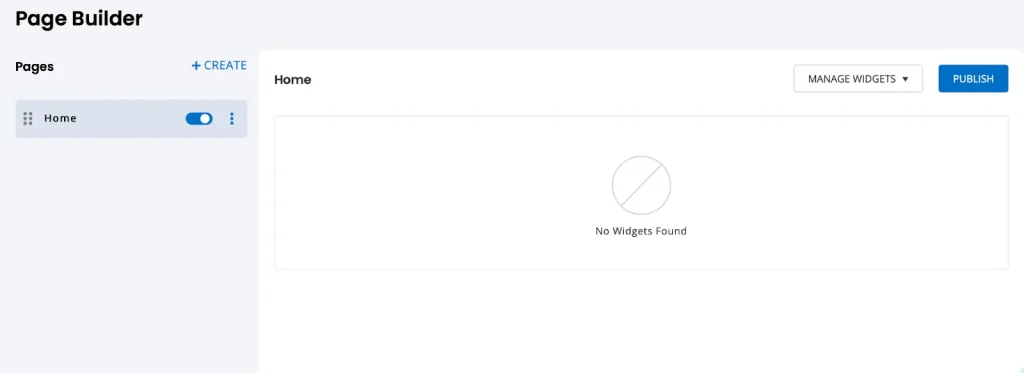
Click on the ‘Create’ button on the top left to start making your Menu Page as shown below:
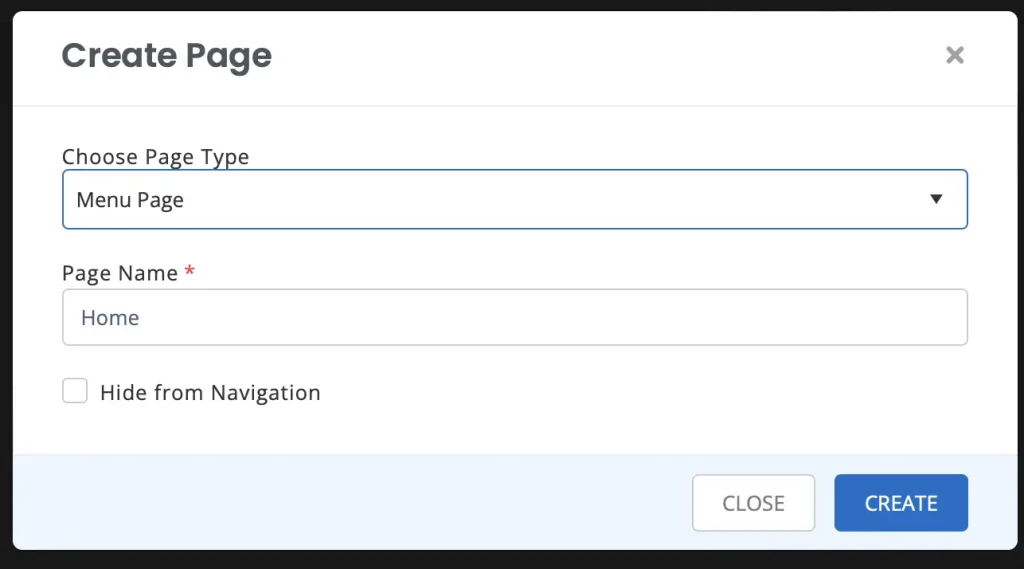
You have the option to ‘Hide from Navigation’ if you don’t want the page to be displayed in the Navigation bar. All hidden pages can be accessed by placing their links on menu cards.
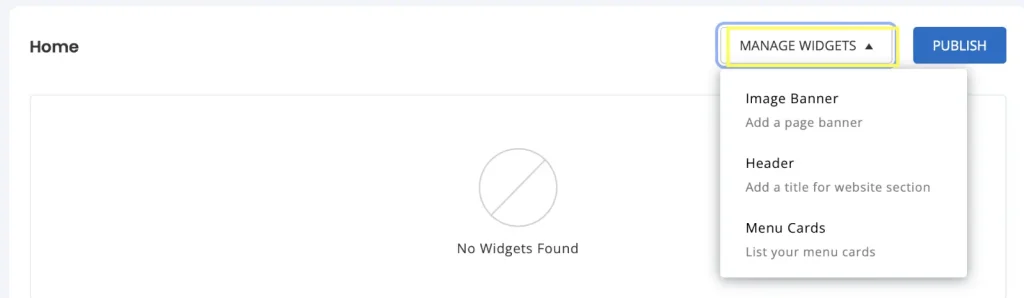
2. Manage Widgets
Once your page is created you can start customizing it. Go to the ‘Manage Widgets’ → Add Banner/Header/Menu Cards.
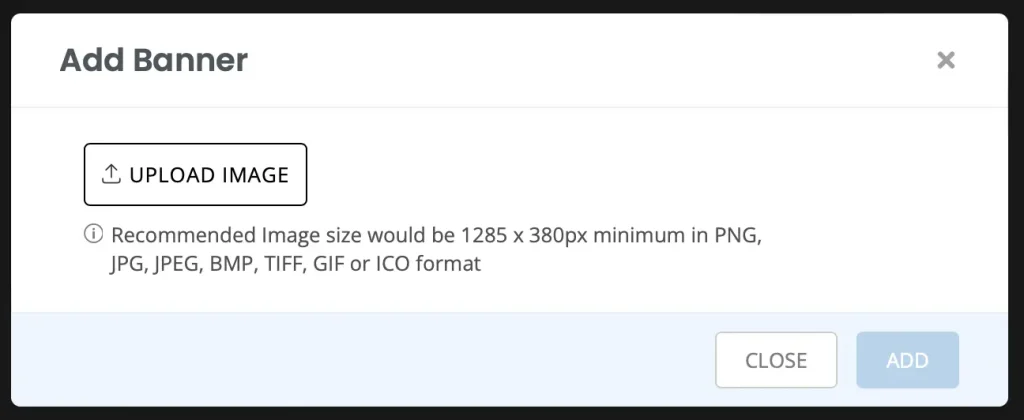
When you select to add an image banner, the size requirement will be displayed in the pop-up:
The uploaded banner will appear like this:
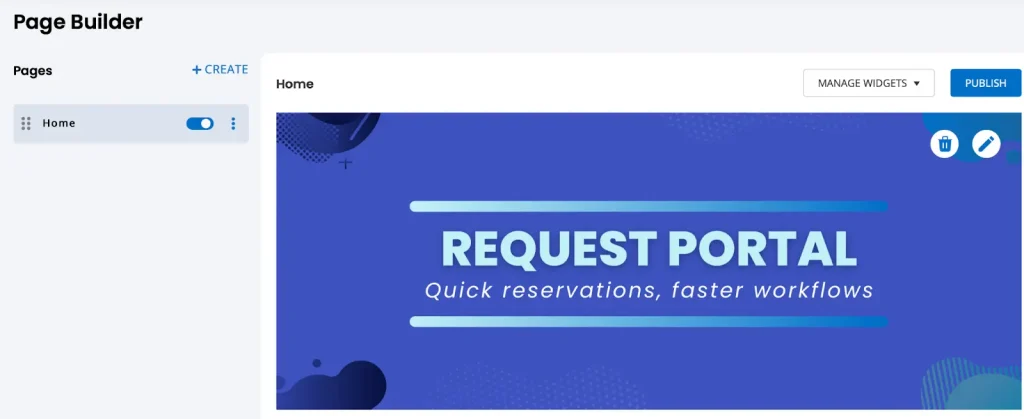
On the top right corner, you will have the option to delete or edit the banner.
Next go to ‘Manage Widgets’ → Add Header. It will appear as shown below, you can edit the header title by clicking on the ‘Edit’ button on the right side:

By using the drag and drop button on the left side of the Header you can move its position.
Next, add the menu cards from the ‘Manage Widgets’ button. An overlay will appear as shown below:

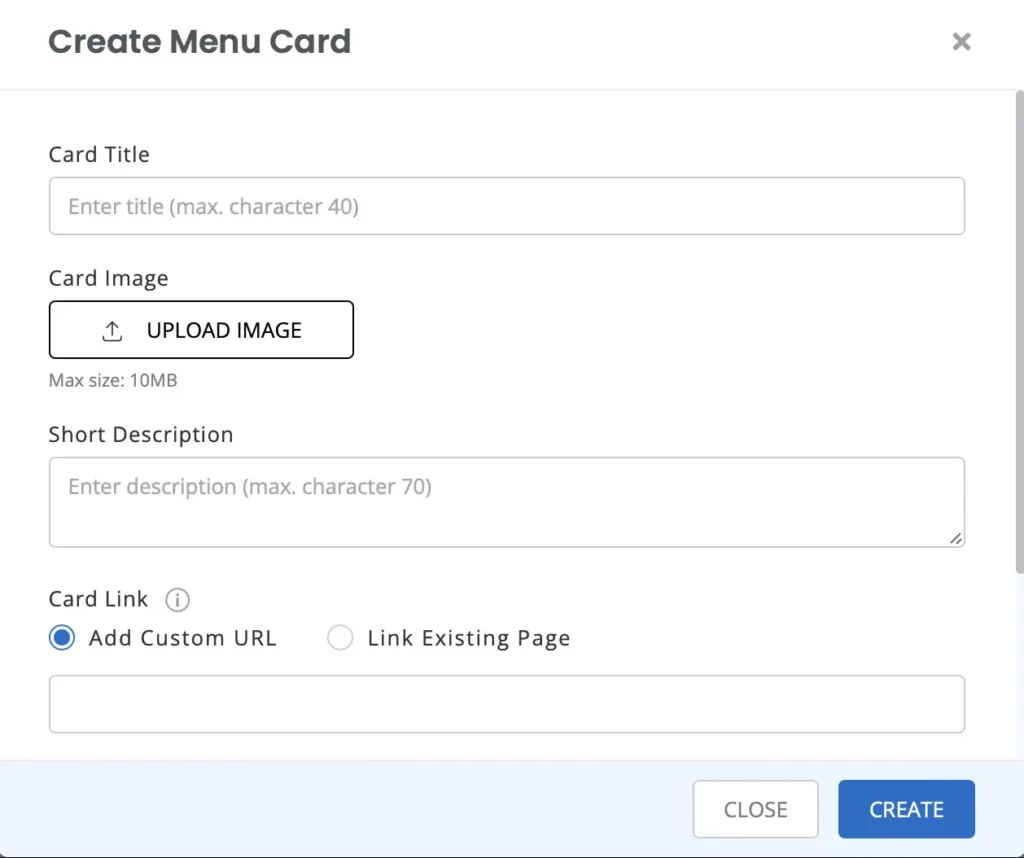
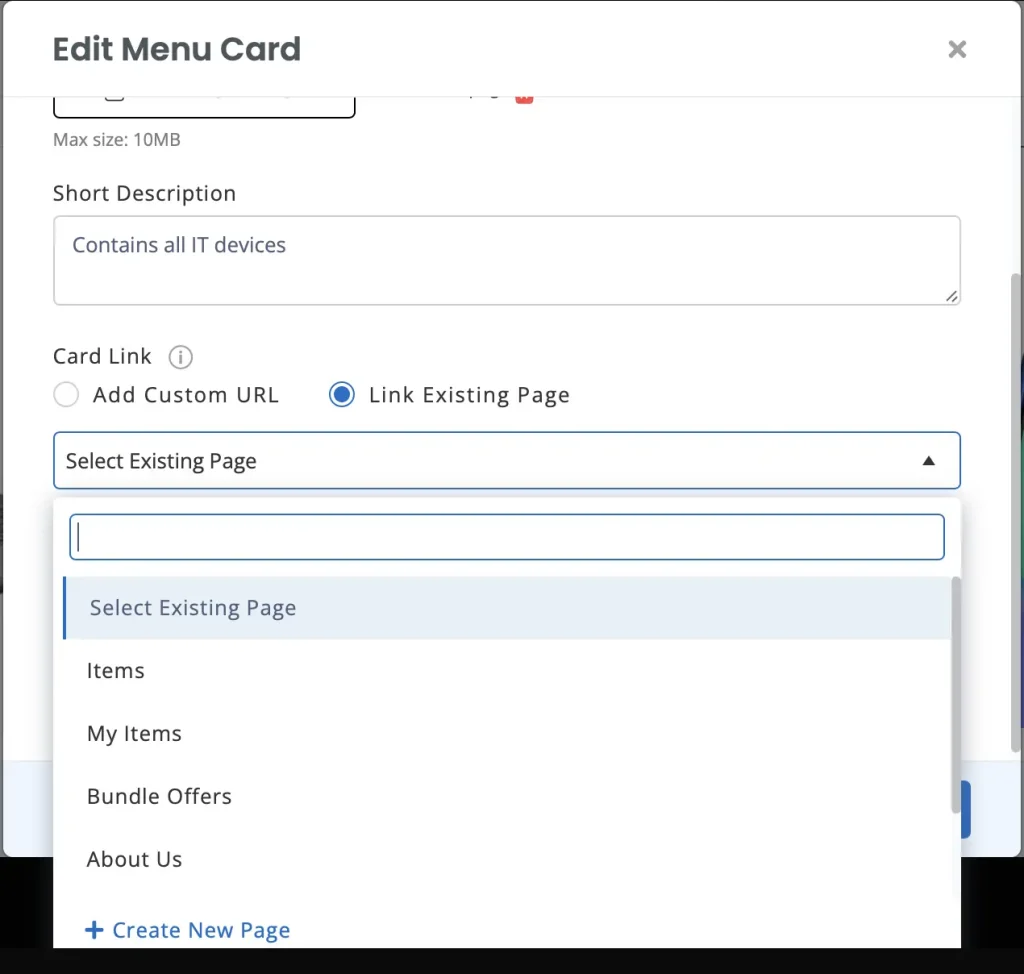
Click on ‘Create New Menu Card’. Enter the card title, description and upload the relevant image. As shown below you will have two options to link the menu card to: Add Custom URL or Link Existing Page.
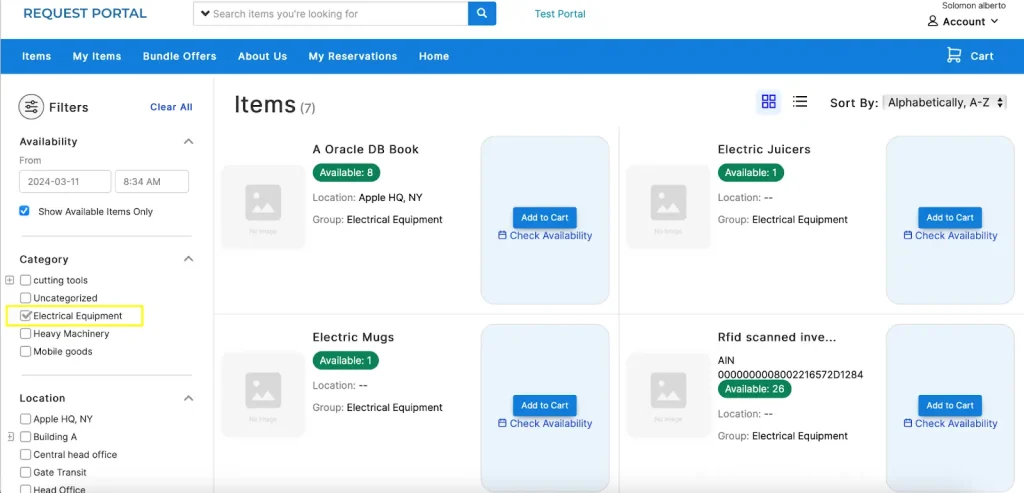
By using a custom URL you can add a link within the portal which doesn’t have a stand alone page. For example, for the ‘IT Essentials’ menu card, you want to link all the electrical equipment you have added in your Items. Go to the ‘Items’ page, select electrical equipment under categories and copy the link in the Card Link:
Alternatively, if you want to link an existing page you can do so from the dropdown:
Next, you can add a Button Name and Link for the Menu card:
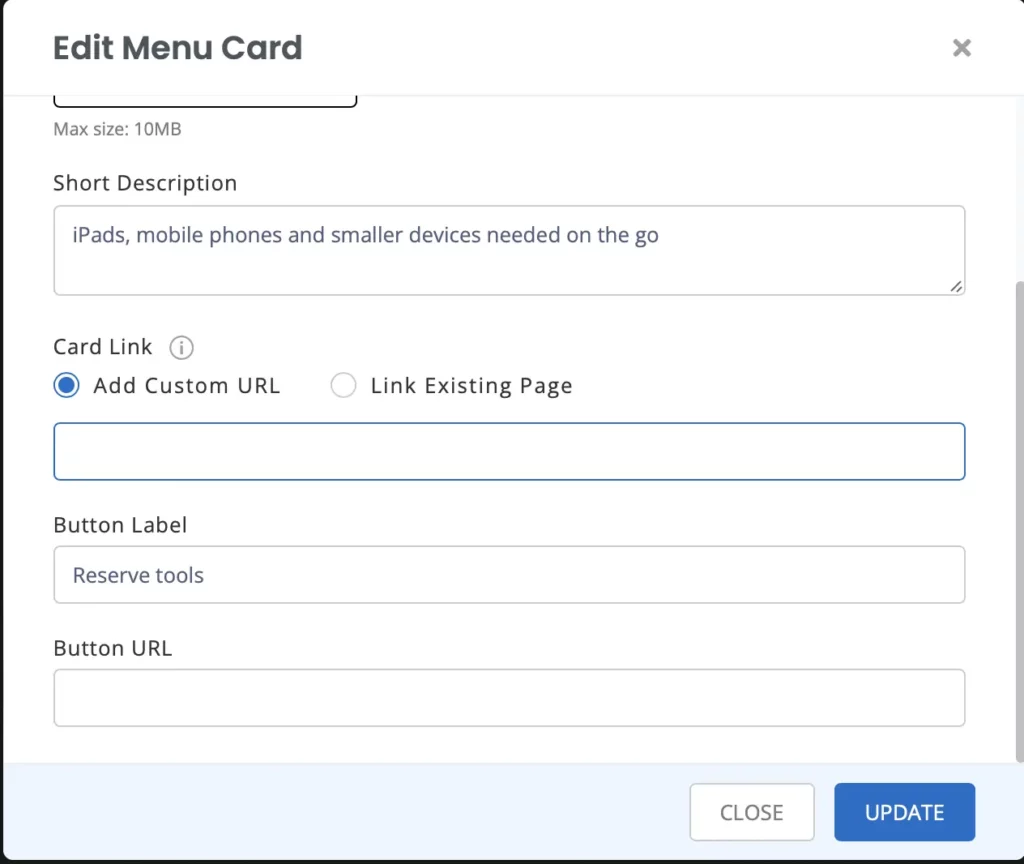
If you want to redirect requesters to a specific page through the button you can add its link in the ‘Button URL’ textbox. When you have added all the necessary links and text, click ‘Update’.
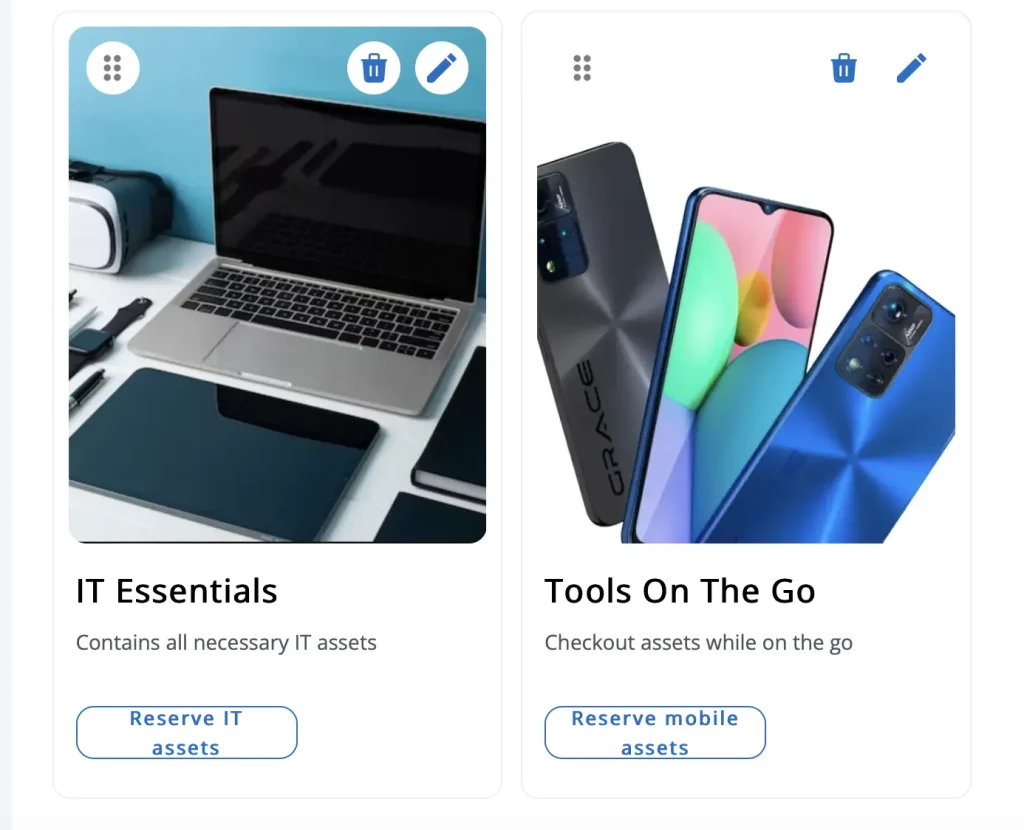
Once done, the Menu Cards will look like this:
3. View your Page
To view how this page looks in your portal, go to the EZO web app and open the portal link from settings. Since we have set up a home page from the Page Builder, the portal link will open up to the custom page designed.


