
Checking out hundreds of items daily can be time-consuming and delay business operations if the process is not automated and streamlined.
In enterprise environments, such inefficiencies can scale rapidly, leading to operational bottlenecks across multiple locations, teams, and workflows.
For example, if you are working at a school district, then checking out several IT devices individually for students based in different schools can create bottlenecks and would take a significant amount of time.
Similarly, in enterprise asset operations, large-scale checkouts across departments, projects, or regions require streamlined workflows to maintain operational continuity.
With EZO’s new Quick Checkout feature, you can check out hundreds of items quickly – straight from the top navigation bar.
This enables enterprise teams to manage high-volume asset movements efficiently without compromising on control or visibility.
Benefits of Quick Checkouts
For enterprise operations, these efficiencies translate into reduced manual effort, faster turnaround times, and improved service delivery across teams.
Quick Checkouts has an optimized and efficient workflow that can save an organization considerable time and also help improve employee productivity.
At enterprise scale, even marginal time savings per transaction can result in significant productivity gains across thousands of asset interactions.
Here is a step-by-step guide on how to use the feature.
In enterprise contexts, standardizing such workflows ensures consistency and reduces variability in how assets are issued and tracked.
1. Item checkout
First, navigate to the ‘Quick Actions’ icon at the top of the navigation bar.
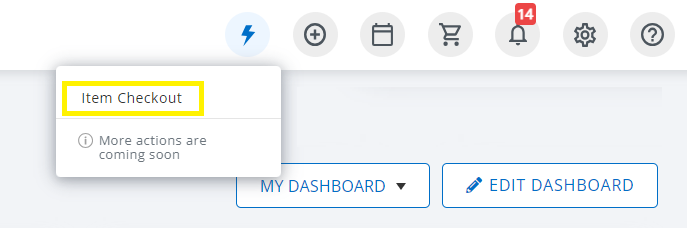
This will take you to a drop-down showing an option for Item Checkout.
Once you click on it, you will be redirected to a form asking you to fill out the item details, as shown below:

In the ‘Select Item(s)’ field, you can scan the asset or enter its name or Asset Identification Number.

If you add inventory or asset stock to the list, you can increase or decrease its quantity. You can also delete an item if you no longer want to check it out.
Note: The field for ‘Return On’ populates automatically based on the pre-set default settings.
The date that you set in the ‘Default Return Date and Time’ will appear automatically on the ‘Return On’ field when you checkout an item.
Set Default Return Date and Time by going to Company Settings → Default Return Date and Time as shown below.

You can also check out an item indefinitely, which eliminates the need to set a ‘Return On’ date. With this, the field for ‘Return On’ date vanishes automatically. You can return the item anytime in the future, and the item will not be returned based on a set date.

2. Optimized navigation for multi-item checkout
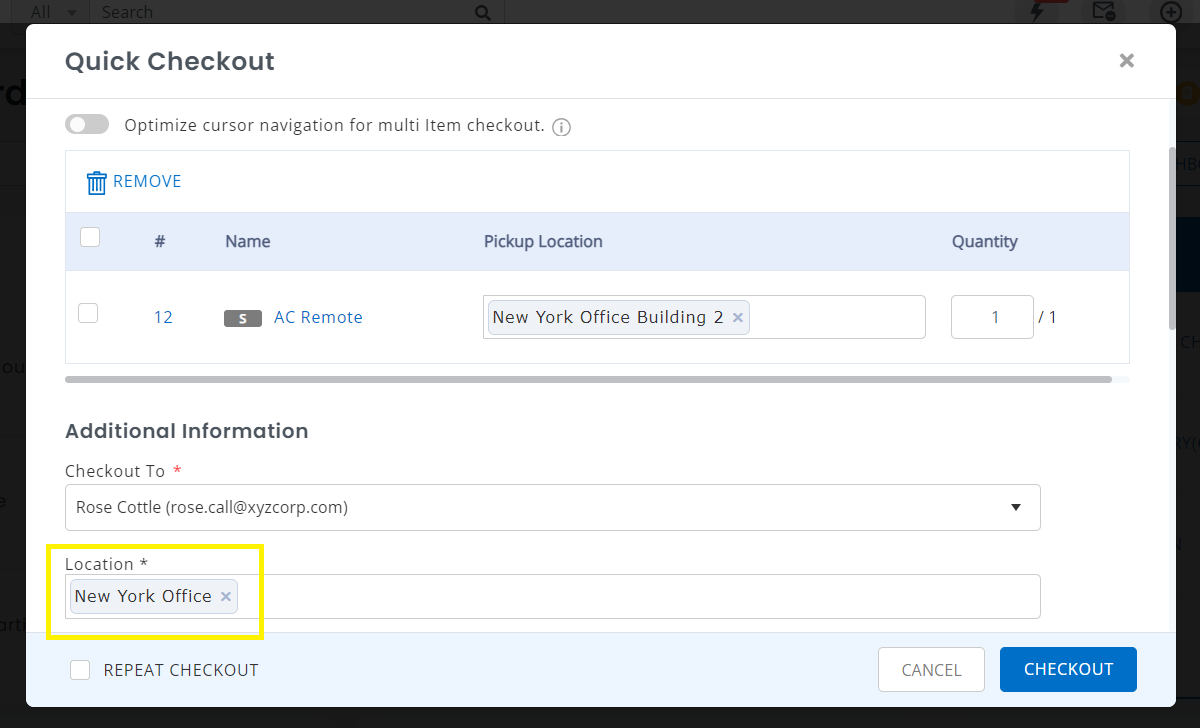
You can scan multiple items with the ‘Optimize cursor navigation for multi-item checkout’ option. If you enable the toggle, the cursor will not move to the next field, allowing you to add multiple items at once.

Adding items with the toggle disabled takes you to the next field, i.e., in this case, the ‘Checkout to’ field (containing user name) when you add a new item. You will see the respective field’s borders highlighted in blue.

You can select the location of the member you are checking out the asset to by selecting the location from the ‘Location’ dropdown. If you have set a Work Location for the member already, then the field will automatically populate as shown below.
Here is a video showing how you can quickly checkout items:

By following these simple steps, you are on the way to improving your productivity and saving time!
For enterprise organizations, adopting such streamlined workflows is key to scaling asset operations while maintaining control, visibility, and operational efficiency.


