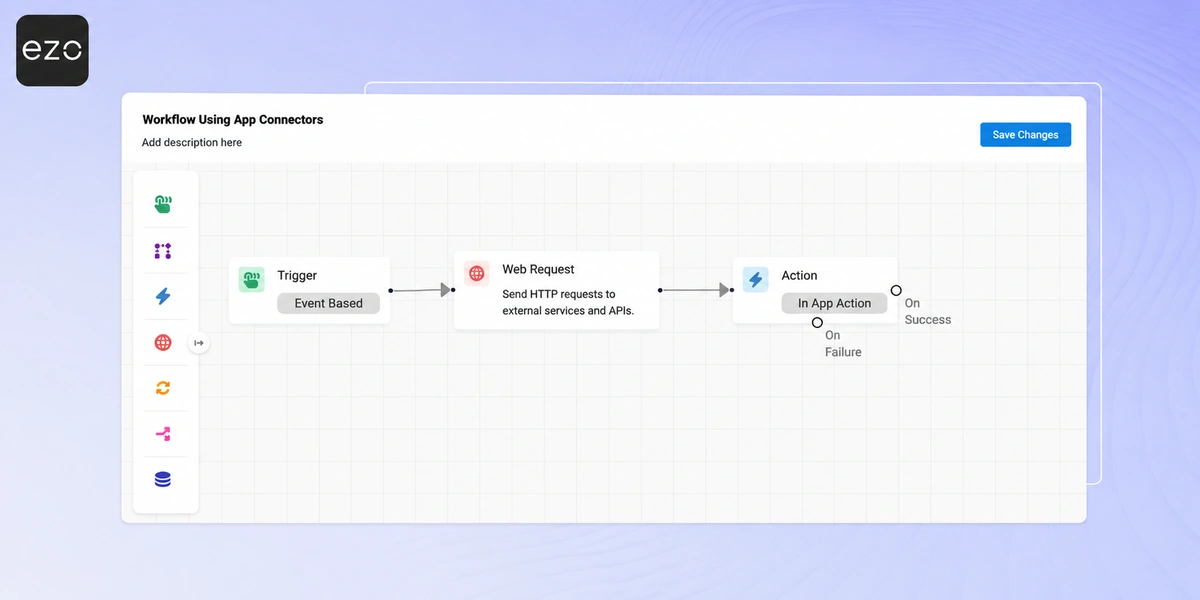
When your EAM workflows need to communicate with external systems: identity providers, ticketing tools, license systems, HRIS, or internal APIs, the Web Request Node in EZO’s Automation Engine becomes the bridge. It lets you call any API, pull or push data, and chain those results into downstream logic automatically.
This guide focuses specifically on how to configure, test, and use Web Request Nodes end-to-end, while the broader concepts of triggers, conditions, and actions are covered in our master automation engine blog.
For full engine fundamentals, refer to the main guide: Automate EAM Workflows in EZO.
This blog gives you a complete, standalone flow to help you build working Web Request (HTTP-based automations) from scratch.
1. Enable Automations
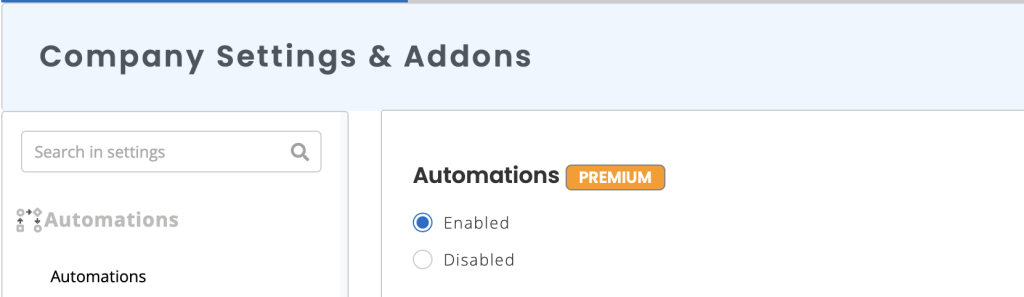
Before you can use Web Requests, ensure the automations module is enabled.
- Go to Settings → Company Settings & Add-ons → Automations.
- Select Enabled, then click Update.
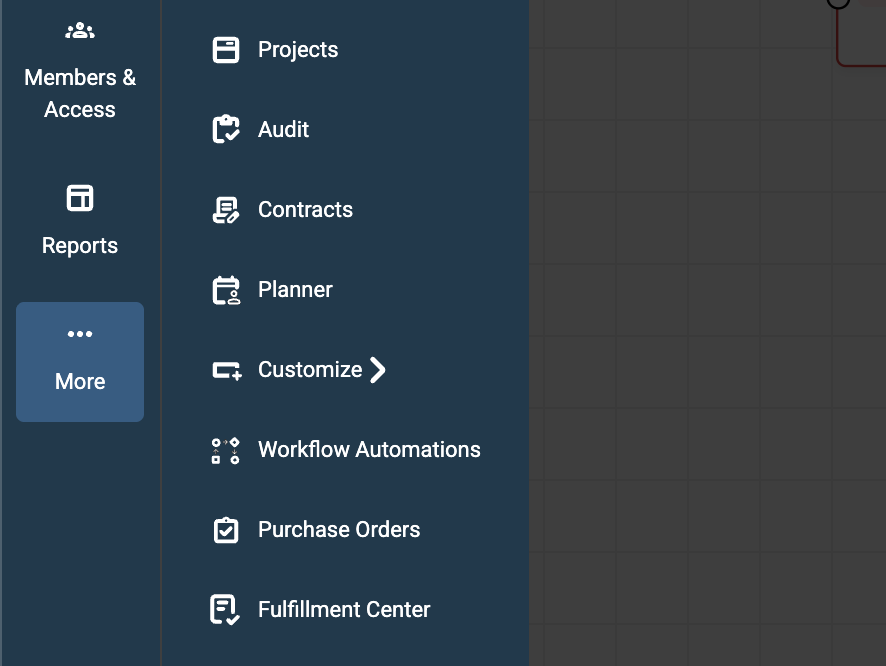
Once enabled, go to More → Workflows & Automations to create or edit workflows.
2. Create a New Workflow and Add a Trigger
Every automation must begin with a Trigger. Web Request nodes are fully supported in both Time-based and Event-based workflows, allowing you to trigger external API calls on a schedule or in real-time when an action occurs in EZO (e.g., sending a Teams message the exact moment an asset is updated).
1. Click Create New Workflow.

2. Enter a Title and optional Description.
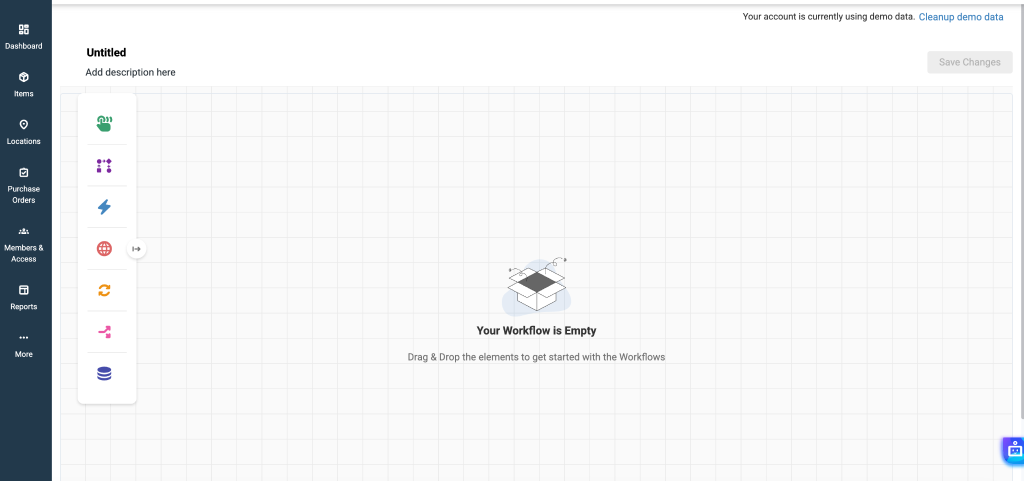
3. Drag a Trigger onto the canvas.
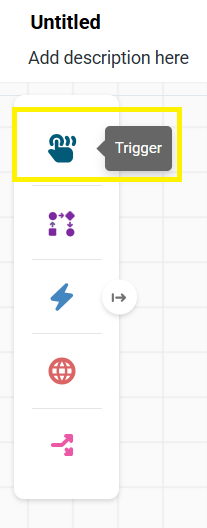
4. Choose a trigger type (Event-based or Time-based) and configure the options.
Note: The Module selection in Trigger decides which module’s field will be available as placeholders. Also the module selection and trigger decides the condition and in-app actions
For complete Trigger behavior, see the main automation blog.
3. Add the Web Request Node to Your Workflow
Now drag the Web Request Node onto the canvas.
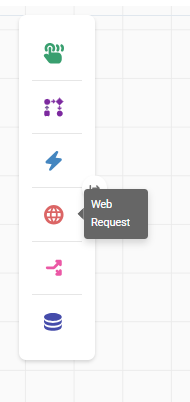
In the web request modal, you will see the different Web Request options:
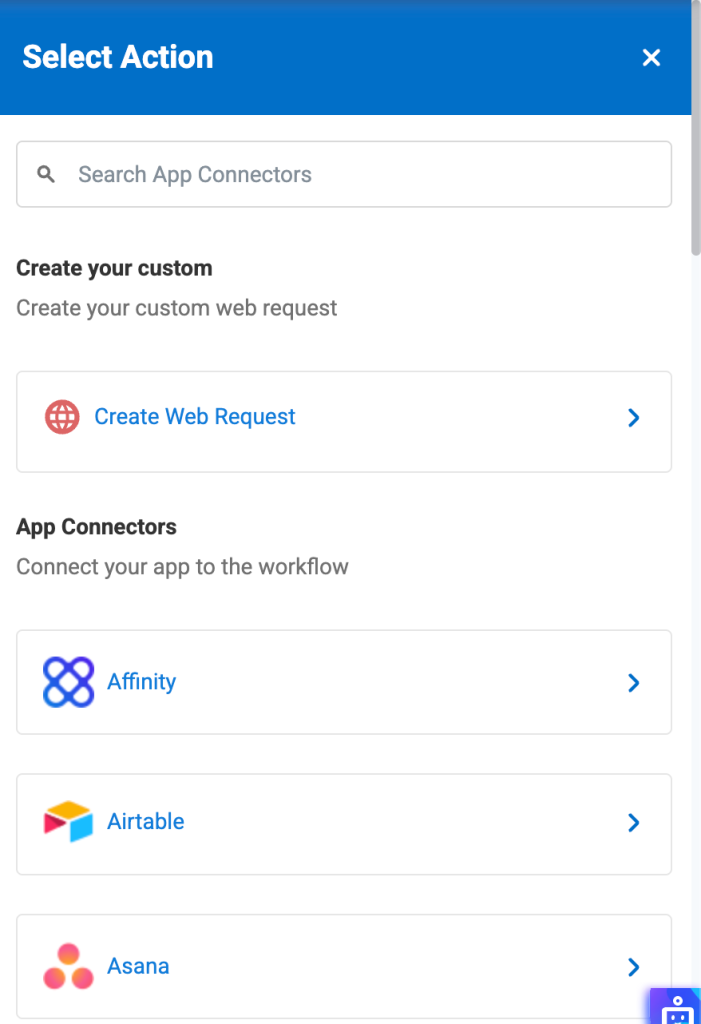
You may use one of our pre-built app connectors. For more details, read our blog on app connectors.
Meanwhile, if you are looking to create a custom web request, click on Create Web Request. This option allows you to:
- Send GET, POST, PUT, PATCH, or DELETE requests.
- Pass headers, query params, and bodies.
- Authenticate with Basic, Header Token, OAuth 2, or No Auth.
- Handle pagination.
- Parse JSON responses into reusable placeholders.
- Test everything from inside the node.
4. Select the Request Method and Enter the API URL
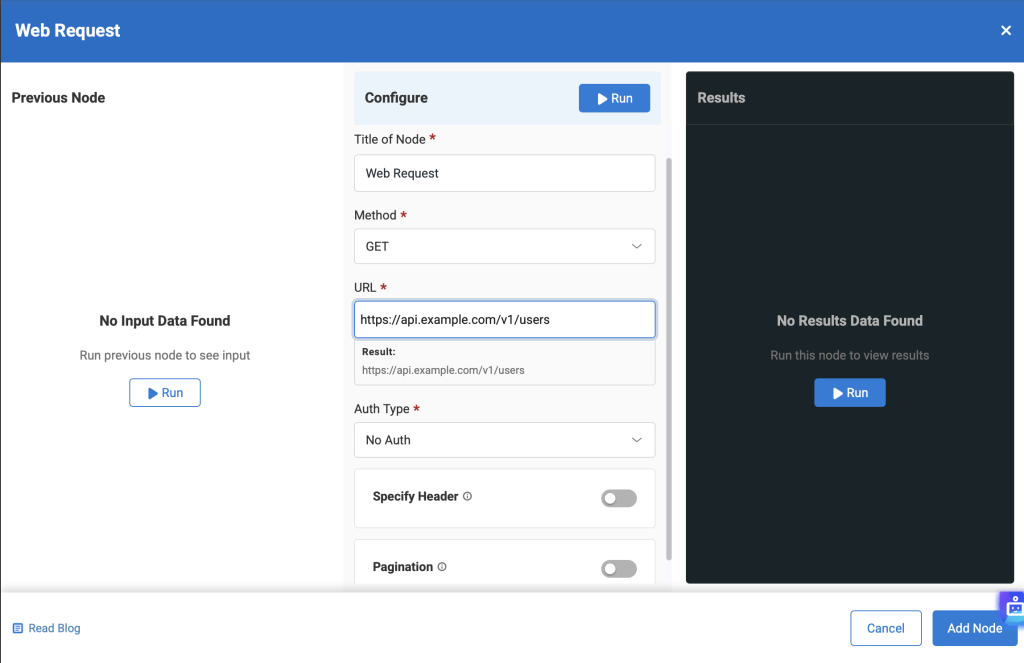
Click the node to open its configuration panel.
- Method
- Choose GET for retrieving data.
- Choose POST for sending data (enables the Body section).
- Choose PUT for fully replacing an existing resource.
- Choose PATCH for partially updating an existing resource.
- Choose DELETE to remove a resource.
- URL
- Enter the full endpoint, e.g.
https://api.example.com/v1/users
- Enter the full endpoint, e.g.
You can also insert placeholders such as {{$node_title.item.json.field_key}} while replacing “node_title” and “field_key” based on your input.
5. Configure Authentication
Under Authentication, select the appropriate type:
Available Auth Types
- No Auth
- Basic Auth (Username + Password)
- Header Auth (Name + Value, e.g., Authorization: Bearer token)
- OAuth 2 (Authorization Code, Client Credentials, etc.)
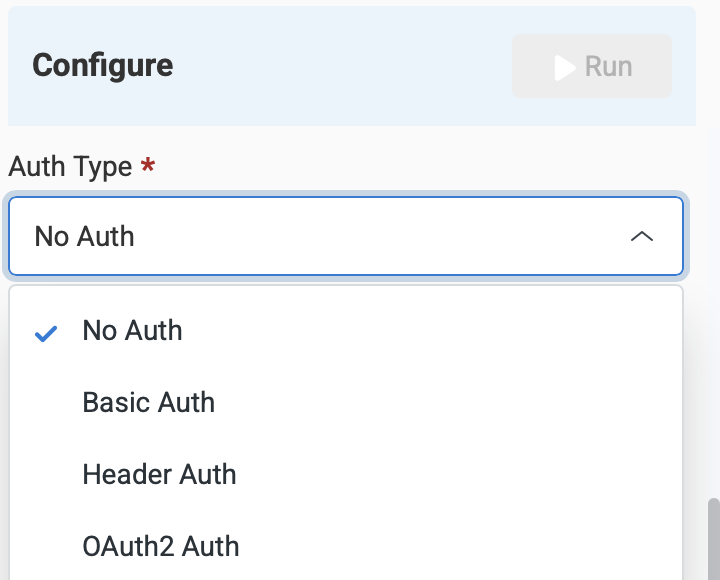
After entering credentials, they are securely saved in the credentials vault for reuse. You may also create new credentials on the fly.
6. Add Headers (Optional)
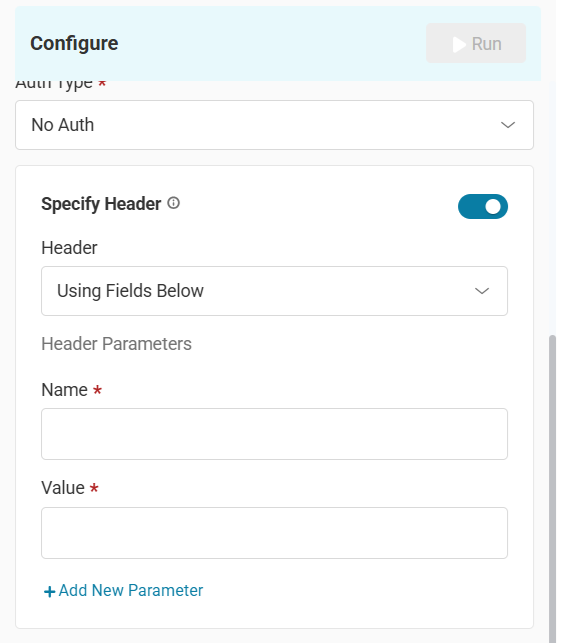
Toggle the Header button to enable the headers and then choose one of two modes:
Using Fields
Add Name–Value pairs such as:
- Content-Type: application/json
- Accept: application/json
You may also add additional parameters by clicking Add New Parameter.
Using JSON
Paste header JSON directly:
{
  "Content-Type": "application/json",
  "X-API-Key": "123456"
}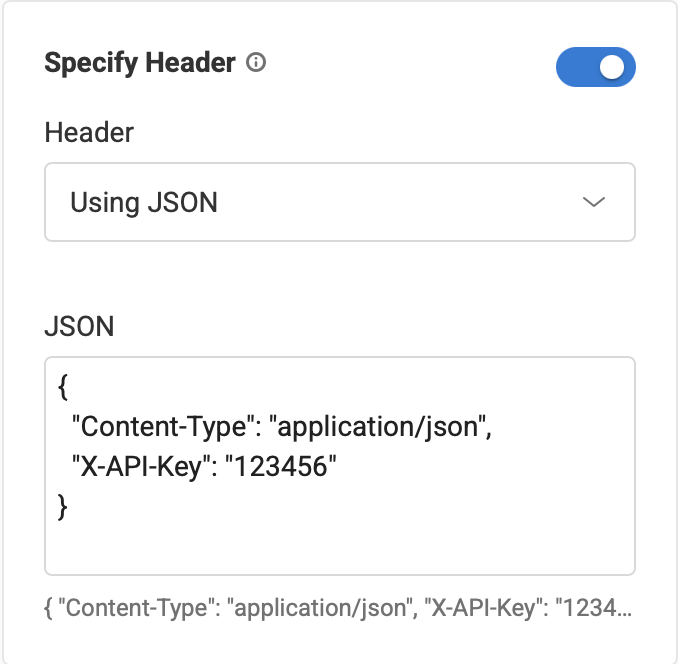
Note: Placeholders can be added to both Name and Value fields, and in the JSON body as well.
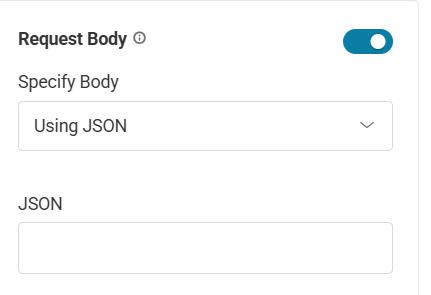
7. Configure the Request Body (POST, PUT, PATCH, DELETE Only)
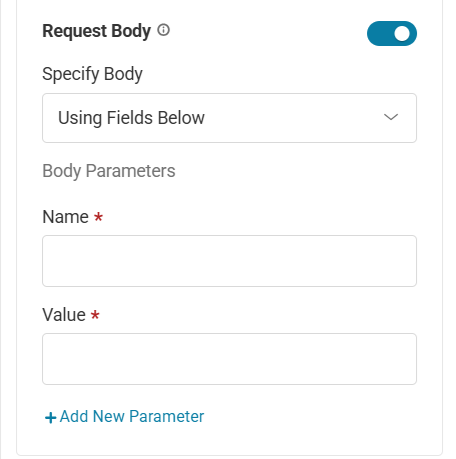
When the POST, PUT, PATCH, or DELETE method is selected, the Body section appears.
Toggle Request Body, then choose one of two modes:
Using Fields
Add Name–Value pairs such as:
- Content-Type: application/json
- Accept: application/json
You may also add additional parameters by clicking Add New Parameter.
Using JSON
Paste header JSON directly:
{

  "Content-Type": "application/json",

  "X-API-Key": "123456"

}
Placeholders can be added to both Name and Value fields.
You may also add additional parameters by clicking Add New Parameter.
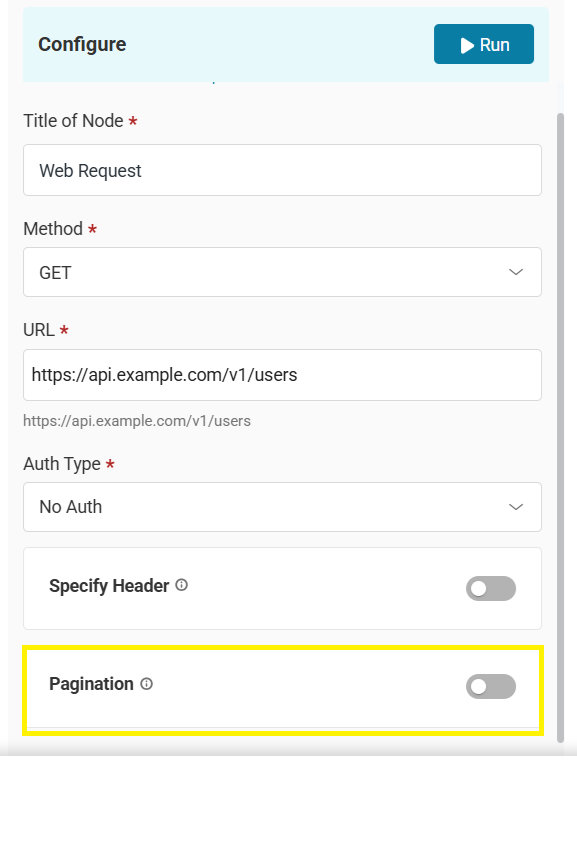
8. Enable Pagination (GET only) (Optional)
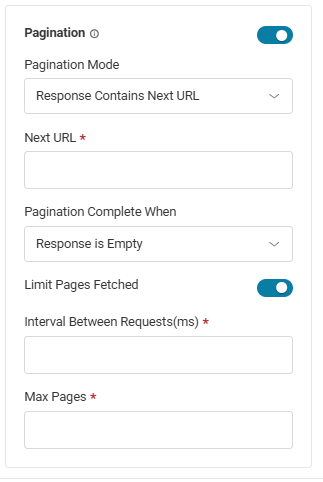
If the API returns paged data, toggle Enable Pagination, and define the pagination configuration:
Pagination Mode
- Update Parameter in Each Request
- When this is selected, add the parameters (Query, Body, or Header)
- Response Contains Next URL
- When this is selected, add the Next URL
Select when the pagination will be completed. Currently, “Response is Empty” is supported only.
You can limit pages fetched and define the maximum pages to Get.
Define Interval between Requests in milliseconds (ms)
9. Process Lists of Data Using the Split Node
Often, an API response contains a list of items (an array) rather than a single record. The Split Node enables you to break down this array so that every item is processed individually by downstream nodes.
Note: The Split Node can only be placed immediately following an HTTPS Node.
Define the Field to Split
- Drag the Split Node onto the canvas and connect it to your Web Request Node.
- In the Field to split text box, enter the JSON path pointing to the array (e.g., users).
Configure Data Inclusion
Decide how much data from the original HTTP response stays with each split item using the Include dropdown:
- All Fields: Each split record carries the full original API response.
- No other fields: Only the data within the specific array item is passed forward.
- Specific Fields: Manually specify which fields from the original response to retain.
10. Handling Downstream Logic and Iteration
Once the Split Node is configured, any node connected to its output will automatically iterate (loop) through the array, processing each item sequentially. For example, if your Web Request fetches 50 users from an HRIS, an “Update Member” action connected after the Split Node will run 50 times automatically.
Visualizing Data Flow: The workflow canvas displays the exact number of input and output items directly on the node connection lines, allowing you to easily track how many records are passing between steps.
11. Execute Steps to Test It
At the top of the node, click Execute Steps.
During test:
- The request is built with all configured components.
- The API call executes immediately.
If successful:
- Status code is shown.
- Response is shown in the output window on the right.
If failed:
- The error details are shown in the output window on the right.
Execute Steps is not part of the automation execution; it exists only to validate the configuration.
Note: The execute step action will perform the request in real-time
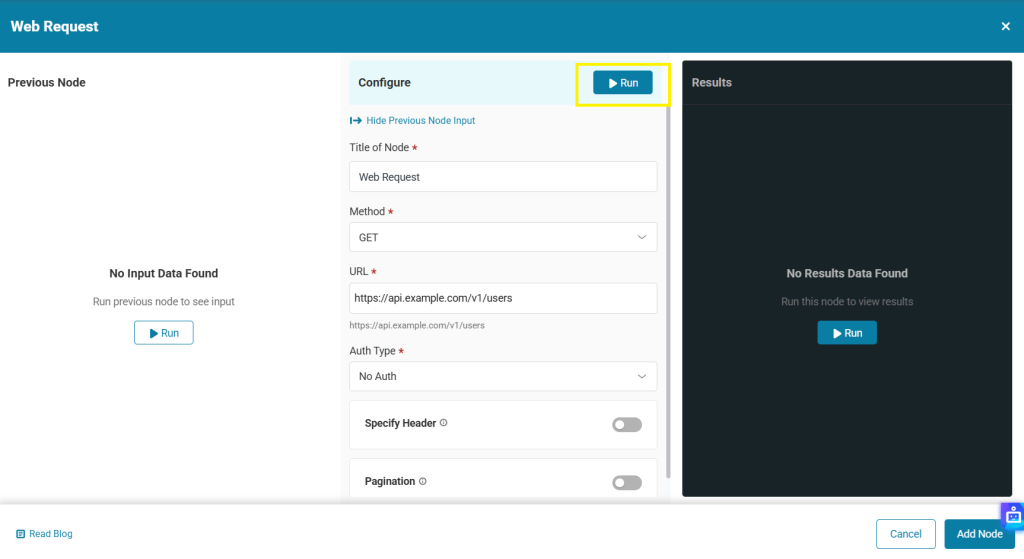
12. Explore Input and Output Views
Every Web Request Node includes the Previous Node and Results panels.
Previous Node
Shows:
- Data passed from previous nodes
- All available placeholders
- Schema view for selecting fields to reuse
Result
Shows:
- The parsed response (schema)
- The raw JSON
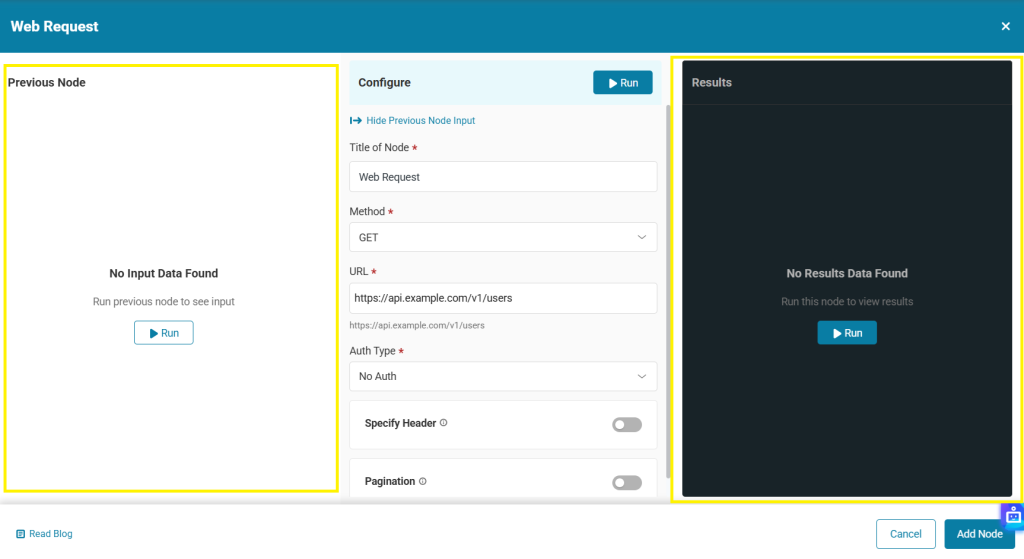
Every key in the output becomes a usable placeholder variable. These placeholders can then be used in subsequent nodes, whether another HTTP call, a condition, or an action.
You can access these placeholder keys by typing curly brackets {{ then Node title such {{$node_title.item.json.field_key}} while replacing “node_title” and “field_key” based on your input.
Every Web Request Node includes Input and Output panels to help you map your data perfectly.
Input Preview and Event Data
When a Web Request is used in an Event-based workflow, the Input panel will automatically display the data schema of your selected trigger module, populated with dummy data.
This snapshot allows you to see exactly what fields are available to use in your request. You can pull this event data into your Web Request (such as the headers, URL, or body) using the Expression syntax.
- For example, if your workflow triggers when an asset is updated, you can type {{asset.id}}, {{asset.name}}, or {{asset.assigned_user.email}} directly into your Web Request configuration.
Output and Response Data
The Output panel shows the parsed response (schema) and the raw JSON returned by the external API after you click Execute Steps.
- Every key in the output becomes a namespaced variable, such as {{http1.req_status}} or {{http1.data.id}}.
- Note: While Web Request outputs can be passed to other Web Request nodes or data transformation nodes, passing them directly into in-app Action nodes is currently limited and will be fully supported in an upcoming Expression View update.
13. Configuring Node Inputs: Fixed Text vs. Expressions
To give you even more control over how data is mapped and processed, every input field across the Automation Engine now offers two distinct input modes: Fixed Text and Expression.
When configuring any node, you can toggle between these two types based on your needs:
- Fixed Text: Ideal for static values that never change during a workflow run (e.g., hardcoding a status to “Retired” or a location to “New York”).
- Expression: Used for dynamic data mapping. This allows you to reference objects, arrays, and variables from any previously connected node in your workflow.
Using the Expression Builder and Live Preview
The Expression view simplifies how you pull data from prior steps. Instead of memorizing complex placeholders, you can now search for and preview data contextually.
- Reference by Node Title: In an Expression field, begin typing the Title of a previously connected node.
- View the Preview Box: As you type or insert a reference, a live Preview Box will appear directly below the field.
- Select Available Fields: The preview box displays the actual structure and all available fields outputted by that specific previous node, ensuring you select the exact data point you need (e.g., pulling member.email from an earlier node).
Processing Arrays with the “.item” Function
When referencing a node that outputs multiple records (such as an array of devices or a list of users), the preview box will also provide applicable functions.
- Currently, you can use the .item function to reference and process all individual items within the selected node. This is especially useful when looping actions over a list of returned data.
14. Link Web Request Output to Downstream Steps
After your Web Request Node is configured and tested, link its output to:
- Another Web Request Node
- Data Transform Node
- Split Node
- Loop Node
This allows you to build advanced workflows like:
- Fetch users from HRIS → loop through each user → assign EZO licenses.
- Query a security system → trigger alerts for flagged devices.
- POST cleanup events to your SIEM.
- Sync EZO data into internal dashboards.
15. Save and Monitor Your Workflow
When everything is configured:
- Click Save Changes.
- Use Execution Logs to monitor success/error for each run.
Execution logs work the same for workflows with Web Request nodes as for any others.
Ready to Integrate EZO With Any External System?
With the Web Request Node, you can connect EZO to virtually any API—HRIS, IAM, helpdesk, messaging platforms, internal microservices, or financial systems. Build end-to-end EAM automations that eliminate manual data entry, ensure compliance, and keep your asset environment synchronized.
If you’d like help building your first Web Request workflow, contact us at support@ezo.io. Our team is here to assist.

![[How-to] Orchestrate EAM Workflows Using App Connectors in EAM Automation Engine](https://cdn.ezo.io/wp-content/uploads/2026/08/12084608/ezo_workflow_connectors_1200x600.webp)
![[How-to] Process Arrays and Lists Using the Loop Node in EZO Automation Engine](https://cdn.ezo.io/wp-content/uploads/2026/08/12113939/loop_original_1200x600.webp)
![[How-to] Automate Request Routing in EZO](https://cdn.ezo.io/wp-content/uploads/2024/12/20125540/support-blog-19-dec.jpg)