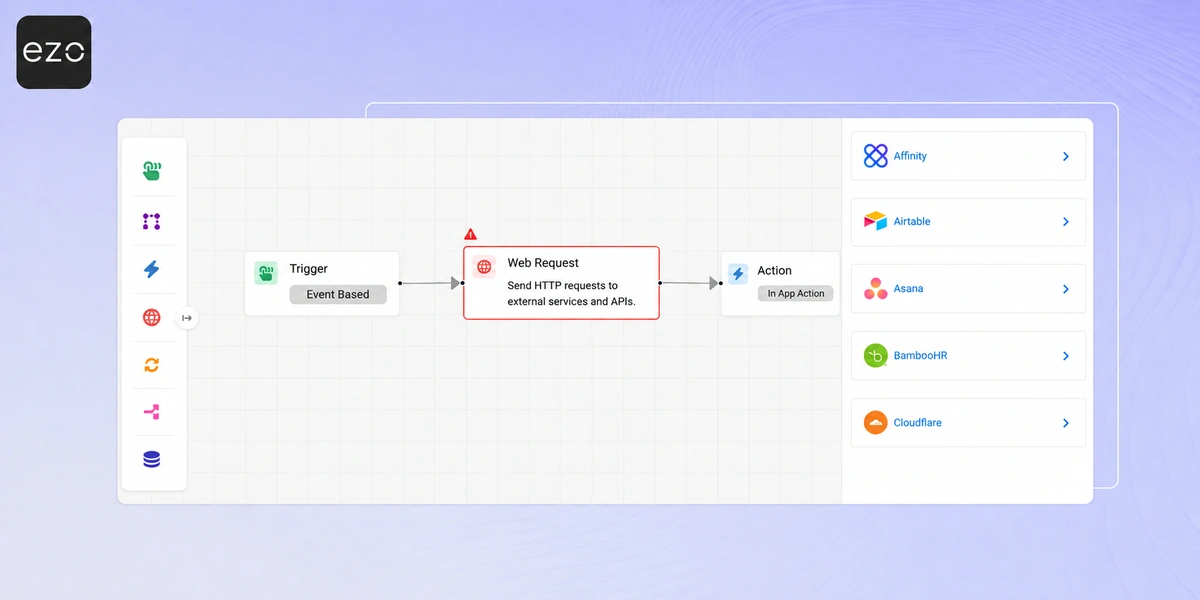
While Web Request (HTTP) nodes allow you to connect EZO to external systems, setting up a custom web request can be complex, requiring you to manually configure API endpoints, JSON payloads, and authorization protocols.
To simplify this, EZO’s Automation Engine features a vast library of pre-built App Connectors. These nodes allow your workflows to talk directly to dozens of third-party apps (such as HRIS, communication tools, and identity providers) to orchestrate complex EAM processes like employee onboarding, without writing a single line of code. You can also use the native EZO connector to push data back into your own account intelligently.
Here is a general guide on how to configure and use any App Connector in your workflow.
Related Guides:
- Automation Fundamentals: To learn how to set up basic triggers, conditions, and actions, read Automate EAM Workflows in EZO.
- Custom Web Requests: To learn how to configure web requests from scratch, read Build Web Request Automations Using the Workflow Automation Engine in EZO.
If you are ready to utilize the pre-built App Connectors already available in EZO, read on below.
1. Add a Web Request Node and Select an App
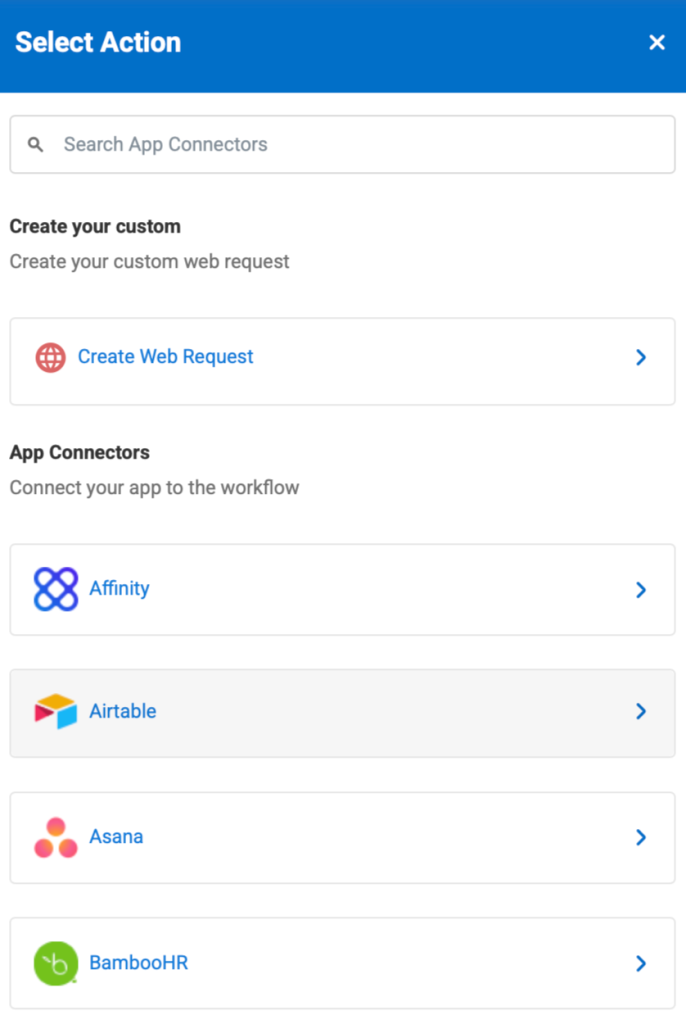
To use an App Connector, you initiate the process using the standard Web Request node.
- Drag the Web Request Node onto your workflow canvas.
- You will be presented with different Web Request options. Select one of the pre-built App Connectors (e.g., Microsoft Entra or Microsoft Teams).
2. Select the App Action
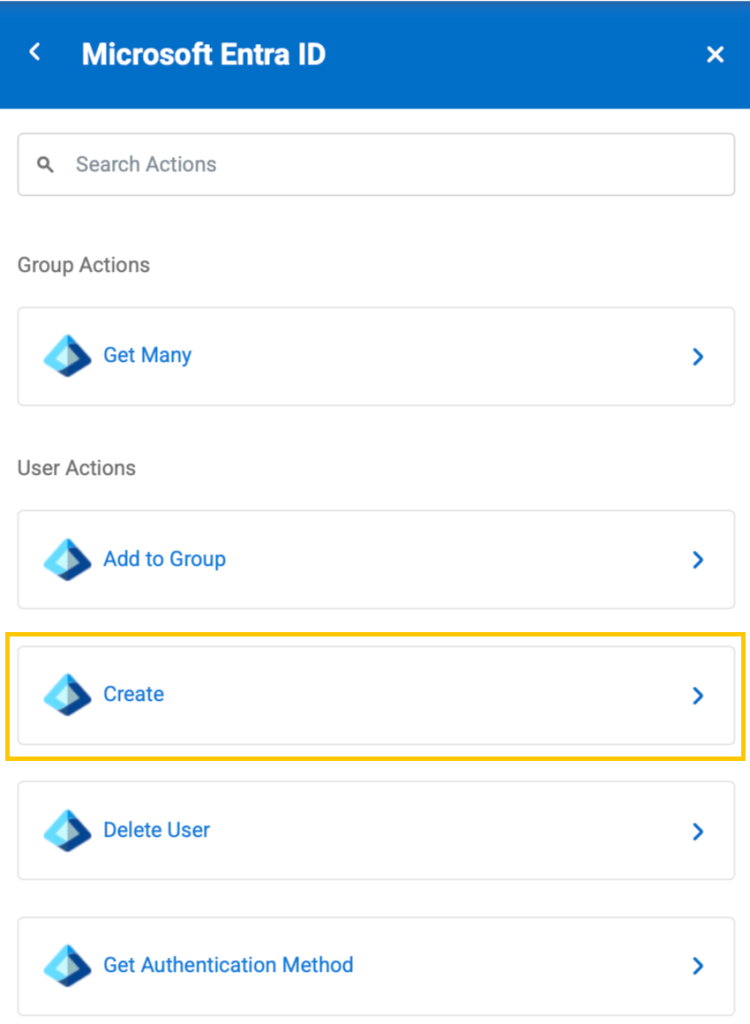
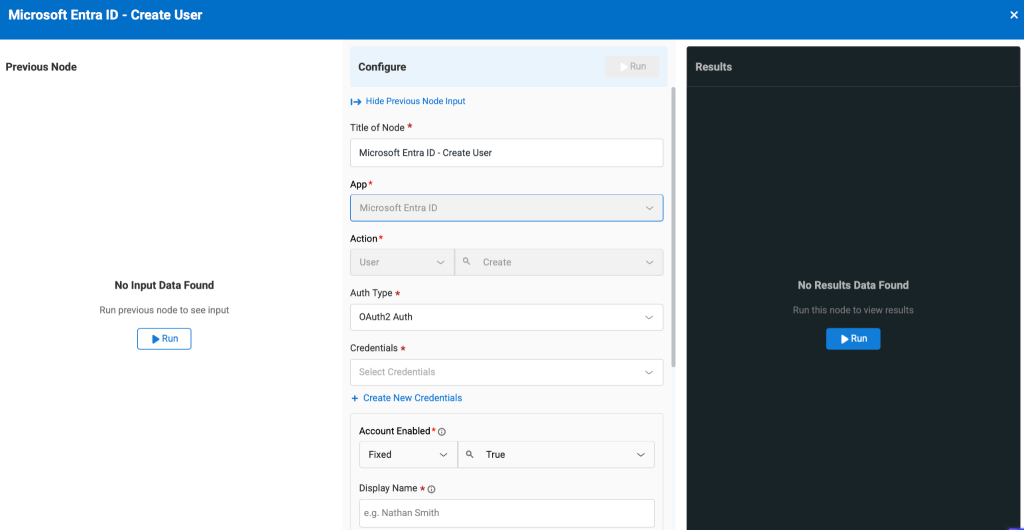
Once you select your target app, you must define exactly what you want the connector to do. As a blueprint, here is how you would configure the Microsoft Entra connector to automate creating a new user:
- Action Type: Choose the category of the action (e.g., User, Group, or Chat Message).
- Action: Choose the specific operation. For this example, select Create User. (Other common actions across apps include Get Details, Update, or Delete).
3. Configure the Action Form
After selecting the action, the node will automatically generate a configuration form specific to that request.
Step 1: Authenticate (Add Credentials)
Before the connector can act on your behalf, you must add credentials. You only need to set this up once per app.
- If you have already added credentials previously, you select them from the Credentials dropdown, otherwise click Create New Credentials.
- When creating new credentials, EZO will prompt you for the specific authentication details required by that third-party app (for example, OAuth 2.0). Once saved, these credentials can be reused across any workflow.
- Enter the details and then click Connect Account.
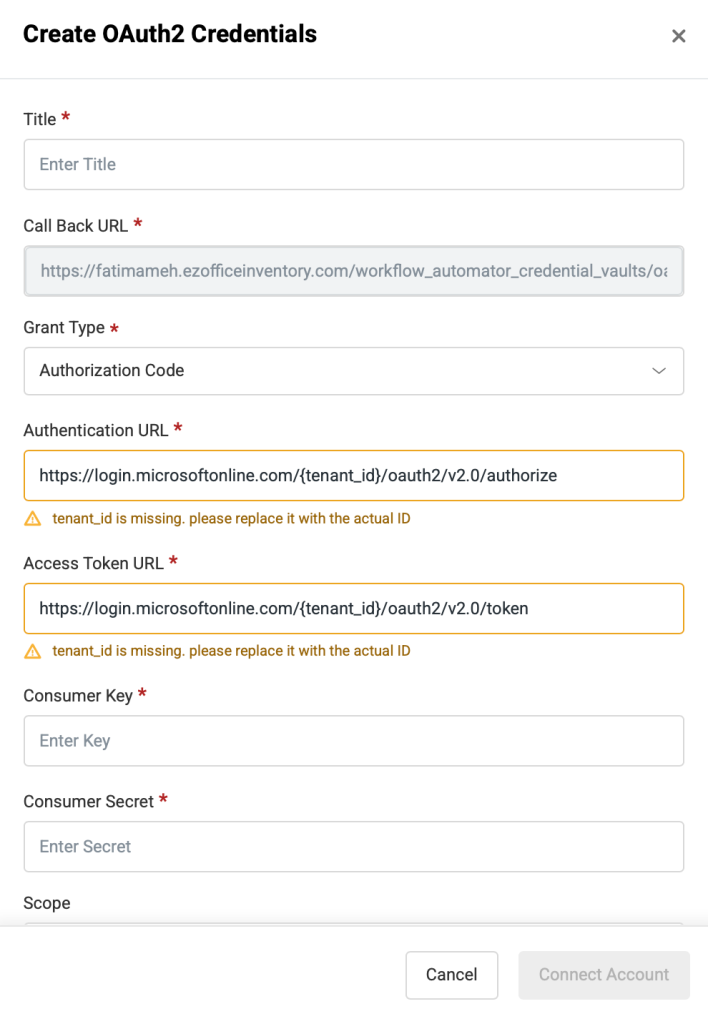
Step 2: Fill in the Action Fields
Next, map the data required to execute your chosen action.
- Required Fields: You must fill these out to proceed (e.g., Display Name, User Principal Name, and Password).
- Dynamic Dropdowns: For many connectors, EZO will directly fetch data from the third-party app to make selection easier.
- Additional/Optional Fields: You can map extra data like Department, Job Title, or Usage Location to enrich the action.
4. Map Dynamic Data with Placeholders
App Connectors are fully integrated with the Automation Engine’s dynamic data mapping, allowing you to pass information seamlessly between external tools and EZO..
Input Placeholders
Except for fixed dropdown menus, all input fields accept placeholders related to their data type via the Expression view.
- Example: If your workflow triggers when a new Employee is created in EZO, you can pass {{member.first_name}} and {{member.last_name}} directly into the MS Entra “Create User” node.
Output Placeholders
Once a connector executes successfully, its complete JSON response is immediately available as variables for subsequent steps.
5. Monitor App Connector Executions
Tracking the success or failure of your connector actions is handled exactly the same way as standard HTTP nodes.
Simply navigate to Workflows & Automations → Executions. Click on any specific run to view the exact payload sent to the app and the response or error message returned, making debugging straightforward.
Ready to Build Cross-Platform EAM Workflows?
With dozens of App Connectors available out-of-the-box, you can centralize your EAM operations –automating everything from ticket creation to user provisioning—directly from EZO.
Need help configuring a specific app connector for your workflows? Contact us at support@ezo.io — our team is ready to assist.

![[How-To] Clean and Process Data Using the Data Transformation Node in EZO Automation Engine](https://cdn.ezo.io/wp-content/uploads/2026/08/12103040/ezo_workflow_original_1200x600.webp)
![[How-to] Process Arrays and Lists Using the Loop Node in EZO Automation Engine](https://cdn.ezo.io/wp-content/uploads/2026/08/12113939/loop_original_1200x600.webp)
![[How-to] Set up Multi-tier Automation to Efficiently Manage Business Workflows](https://cdn.ezo.io/wp-content/uploads/2023/09/EZOoffice-support-blog.jpg)