You can now view all your Item Group and Subgroup hierarchies with the tree view in EZO.
Subgroups help define precise categories for all your items so you can look them up based on all kinds of specifications. With EZO, create however many Subgroups and hierarchical levels within groups as you like.
The benefits of Item Group Hierarchies
Here’s how this helps companies optimize their processes.
- Since every group can have its own visibility level, you are able to utilize groups and subgroups for different purposes under the same umbrella.
- For large teams, subgroups make it easier to specify permissions and access. This is useful when User Listings are enabled in the Company Settings.
- Subgroups make it easier to manage people and control visibility. You can give people different permissions depending on their group association.
1. Create a Subgroup
- Go to Groups → <Group Name> → Add Subgroup.
- A dialog box will appear that gives you the option to nest this Subgroup (as a child Subgroup) under another Subgroup (aka parent Subgroup).

- To assign assets to groups or subgroups, go to the Item details page from Items → Assets. Here, select an Item and click ‘Edit’. You can also associate groups with items when adding new items in the system. The same method can be applied to asset stock and inventory items.
Learn more about organizing groups in EZO.
Note: A Subgroup cannot be deleted if it contains items or other associated records. If you try to delete it, EZO displays a message explaining why the Subgroup cannot be deleted.
2. View Subgroups
Nested Subgroups are mapped in the Groups→<Group Name> → Subgroups.
Clicking a subgroup in the list view will take you to its page where you can view all nested subgroups associated with it. You can also expand or collapse subgroups to alter your view.

Please note, nested subgroups do not affect the workflow of User Listings.
3.Choose How Subgroups Are Displayed
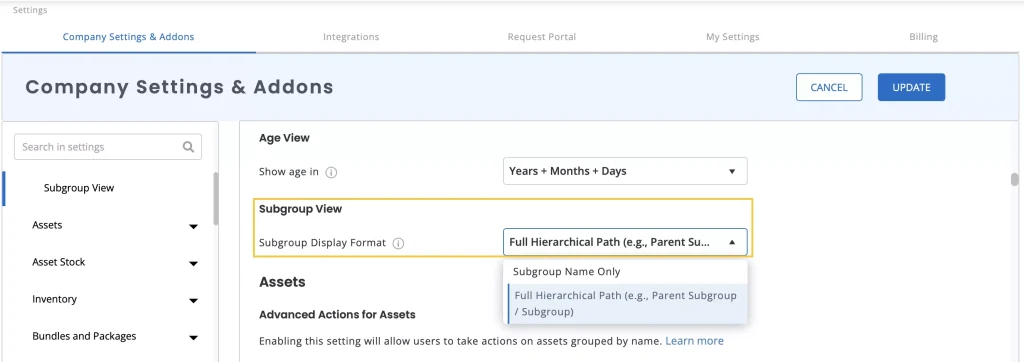
You can choose how subgroups appear when selecting or searching for items. The Subgroup Display Format setting lets you display either the subgroup name alone or its complete hierarchical path, making it easier to identify subgroups with the same name.
To set up how subgroups are displayed,
- Navigate to Settings → Company Settings & Addons → Items Settings.
- Go to Subgroup View in Items and for the Subgroup Display Format, choose one of the following from the given drop-down:
- Subgroup Name Only: Displays only the subgroup name.
- Full Hierarchical Path: Displays the subgroup along with its parent hierarchy.
- Click the Update button to save your changes.
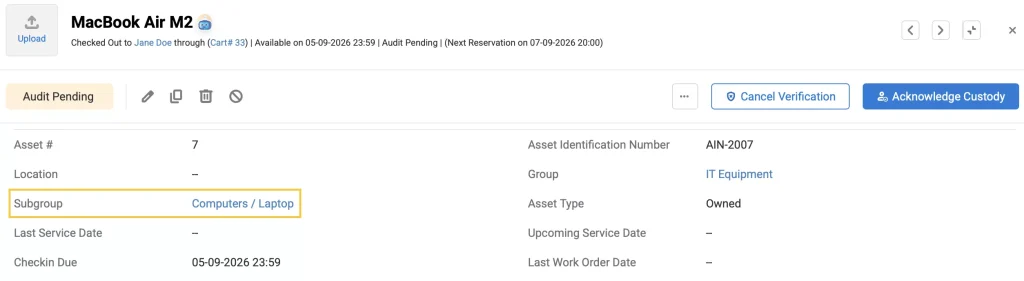
When Full Hierarchical Path is enabled, the complete subgroup hierarchy is shown when selecting, editing or creating an Asset, Asset Stock, or Inventory item. This makes it easier to identify the correct subgroup when multiple subgroups have similar names.
Have Questions?
If you have any questions about EZO, feel free to reach out to our support team at support@ezo.io.
