Use the EZO EAM mobile app to manage assets and Work Orders from the field, without switching to the web app. You can check out equipment on the spot, add assets by scanning a barcode or taking a photo, create purchase orders from scanned items, and open Work Order checklists directly from the listing page.
1. Quick Checkout from the Mobile App
Quick Checkout in the EZO mobile app lets you check out equipment directly, without creating a separate request and dispatching it. Add items by scanning their barcodes or searching the catalog, then enter the checkout details on the same screen. It’s useful when equipment needs to be handed over right away, such as at a service counter or on a job site.
To check out equipment:
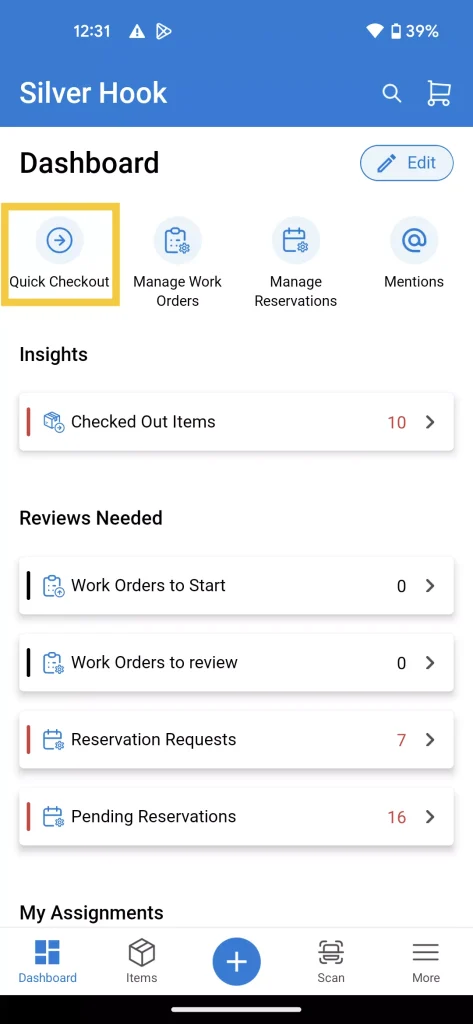
- Open the EZO mobile app and click Quick Checkout on the dashboard.
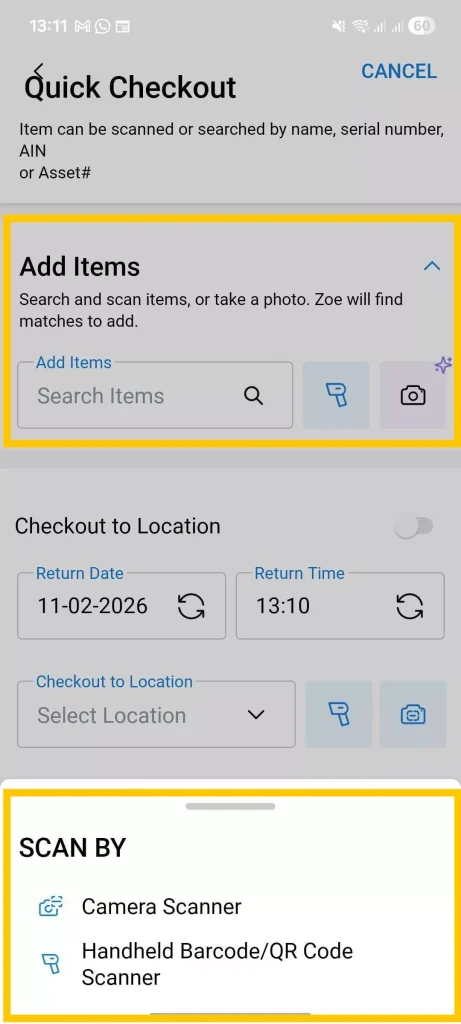
- Add equipment to the checkout list using one of the following methods:
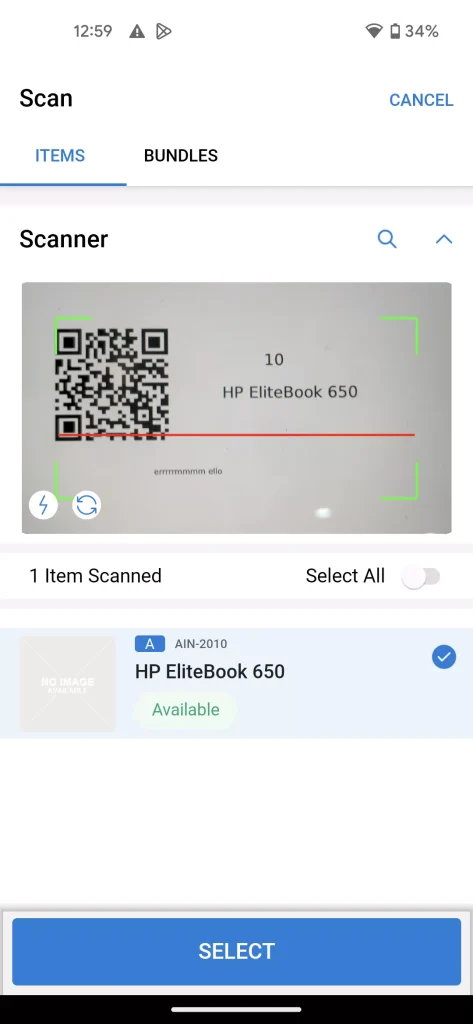
- Scan: Scan the equipment’s barcode to identify it and add it to the list.
- Photo: Take a picture of the equipment. EZO uses AI to match it against your existing catalog and adds the matched item to the list.
- Search: Search the catalog to find and add equipment.
- Select the items you want to check out and click Done to proceed.
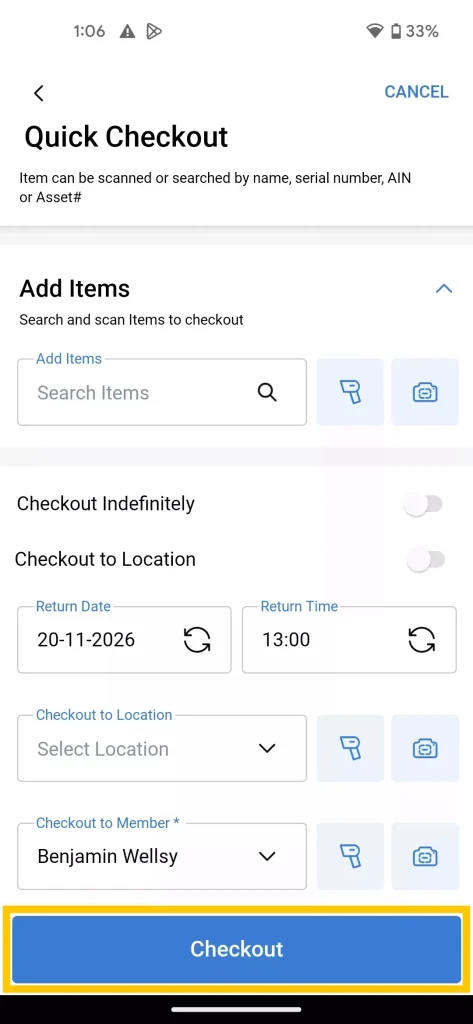
- Enter the checkout details. EZO can suggest an expected return date based on the equipment’s previous checkout history. Review the suggestion and enter the return date and time. The equipment’s location can also be captured using your device’s location or scan coordinates.
- Click Checkout to complete the process.
2. Create Purchase Orders From Scanned Items
You can create a Purchase Order directly from a scanned item in the EZO mobile app. This lets field technicians start the purchasing process from the item itself, reducing manual steps and helping ensure the item is linked to the purchasing record.
To create a Purchase Order from a scanned item:
- Open the EZO mobile app, click the Scan button, and scan the item you want to replenish.
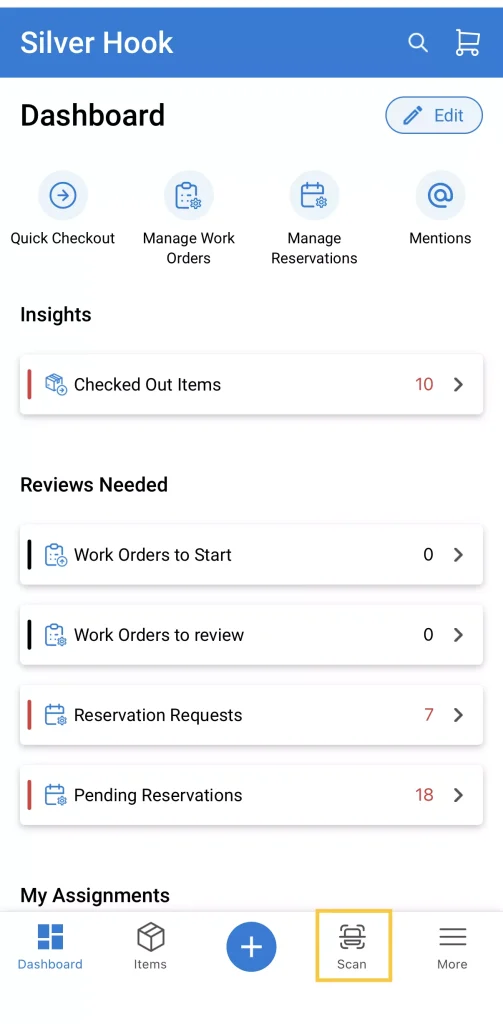
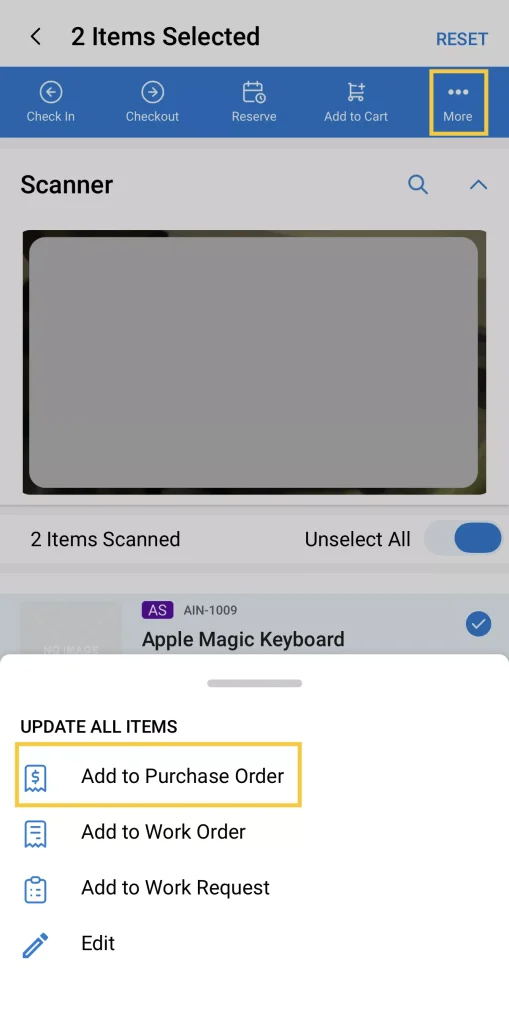
- Select the scanned item and click More.
- In the pop-up, select Add to Purchase Order.
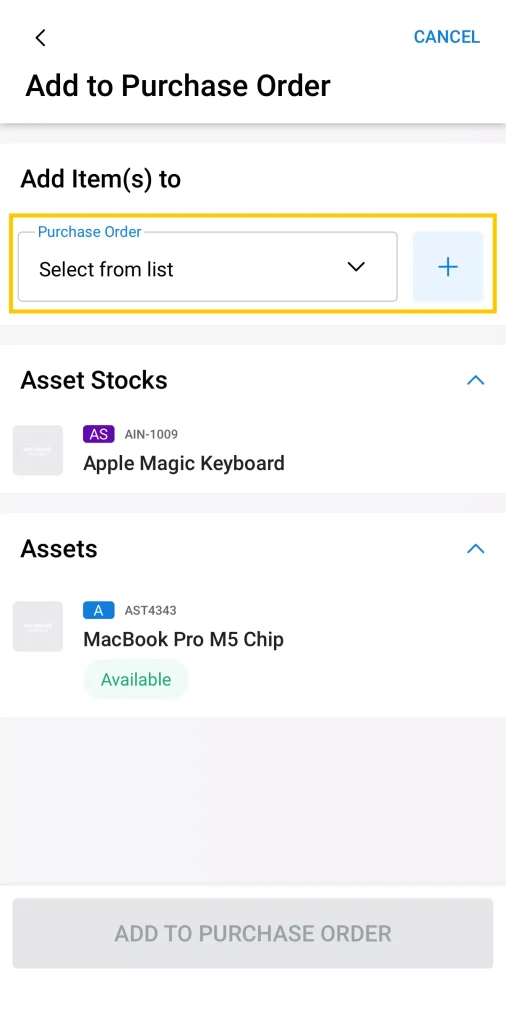
- On the Add to Purchase Order page, select an existing purchase order from the dropdown or click the Plus (+) button to create a new one.
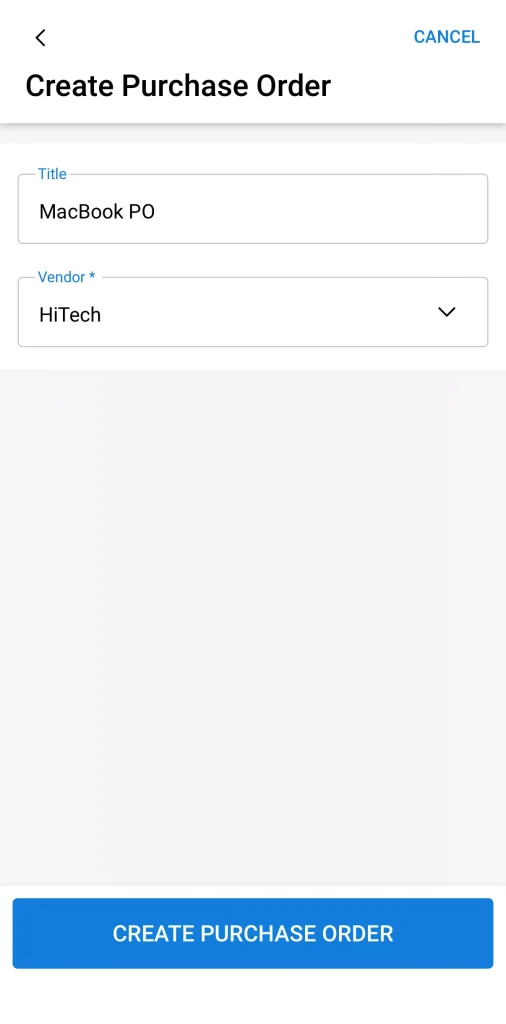
- If you’re creating a new purchase order, enter a title and vendor on the Create Purchase Order page.
- Click CREATE PURCHASE ORDER.
- On the Add to Purchase Order page, click ADD TO PURCHASE ORDER to link the scanned item to the purchase order.
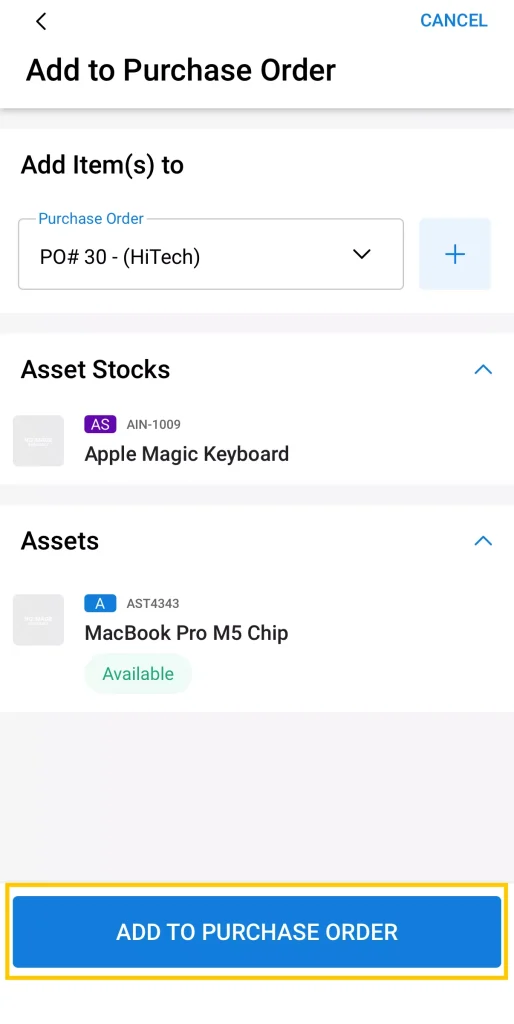
Note: Depending on the permissions assigned to your role, you may be able to create a Purchase Request instead of a Purchase Order. The available options and creation workflow may vary accordingly.
3. Access Checklists Directly From the Work Order List
You can now access checklists directly from the Work Order listing page in the EZO mobile app. This saves time by letting you open a Work Order’s checklist without navigating through the Work Order details.
To access a checklist:
- Open the EZO EAM mobile app and navigate to More → Work Orders.
- Find the Work Order you want and click the View Checklists button.
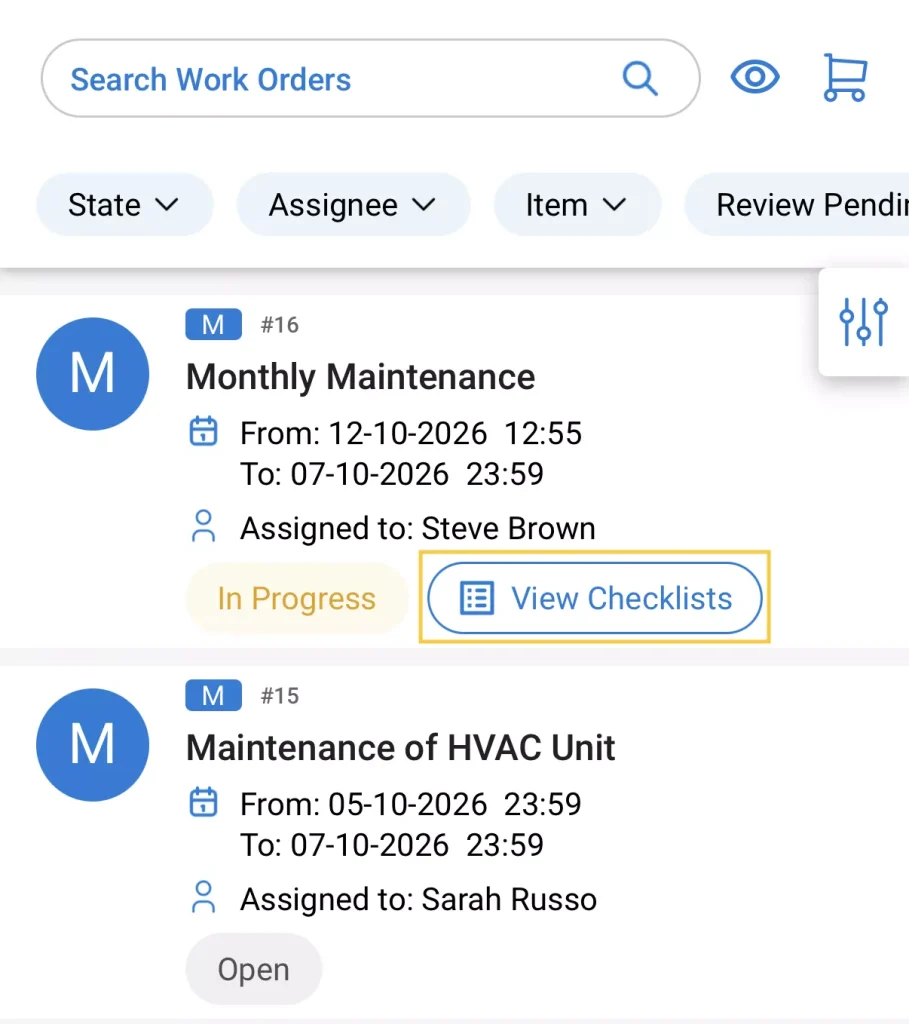
- Review or fill out the checklist as needed.
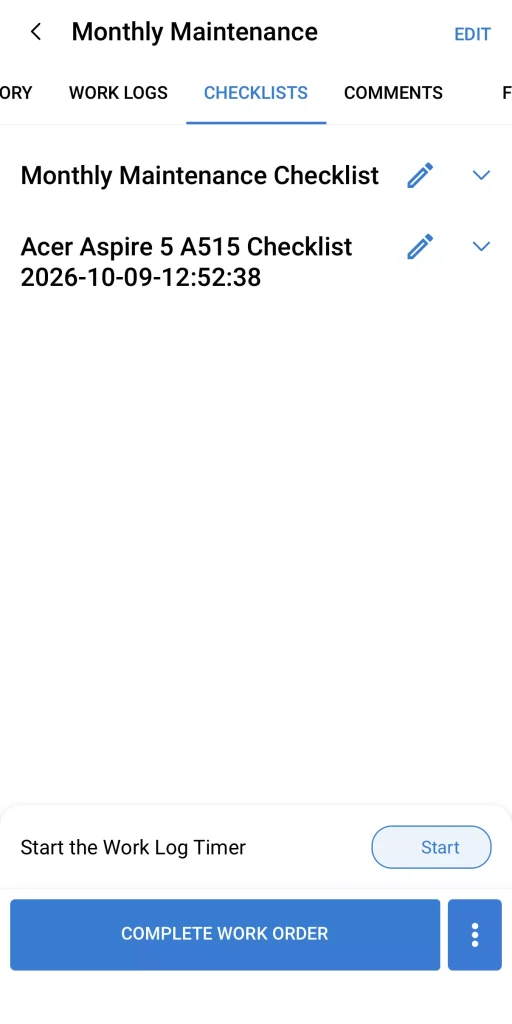
The View Checklist option appears only on Work Orders that have an associated checklist. If the checklist has already been submitted or completed, you can still access it to review the historical data.
If you have any questions or need help with these features, feel free to reach out to our support team at support@ezo.io.
