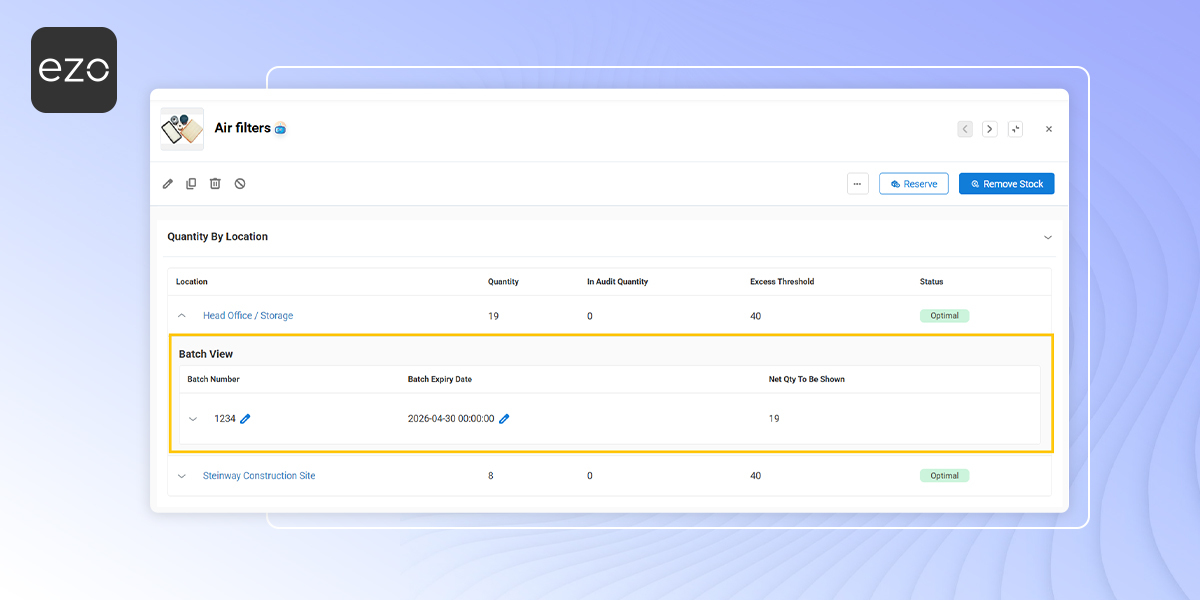
When the same inventory item exists in bulk across locations, tracking it without batch-level visibility can make stock handling messy. You may end up adding quantity to the wrong batch, transferring stock without clear traceability, or removing inventory from the wrong lot.
EZO lets you manage inventory in batches so you can view quantity by batch, assign batch numbers and expiry dates, and add, transfer, or remove stock from a specific batch. This guide walks you through enabling batch management, viewing batch details, and updating stock from the inventory details page.
1. Enable Inventory Batch Management
Before you can manage inventory by batch, you need to enable the setting first:
Go to Settings → Items → Inventory and check Manage Inventories in Batches.
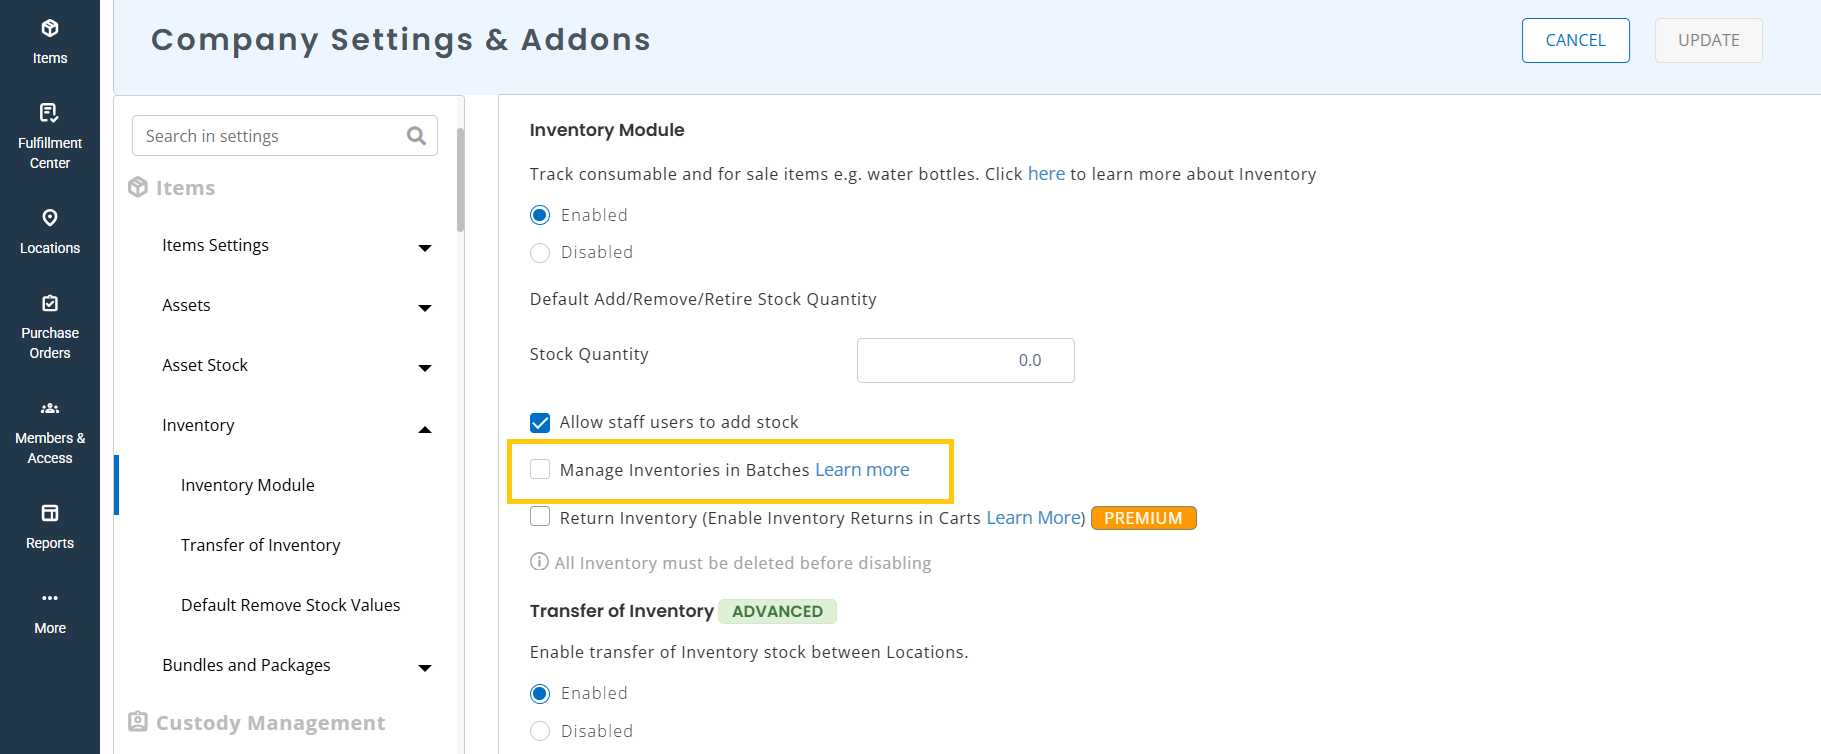
Click Update to save your changes.
2. Open an Inventory Item and View Its Batch Details
To manage stock by batch, start from the inventory item itself.
From the Navigation Menu, go to Items → Inventory and open the inventory item you want to manage. On the inventory details page, scroll down to Quantity by Location.
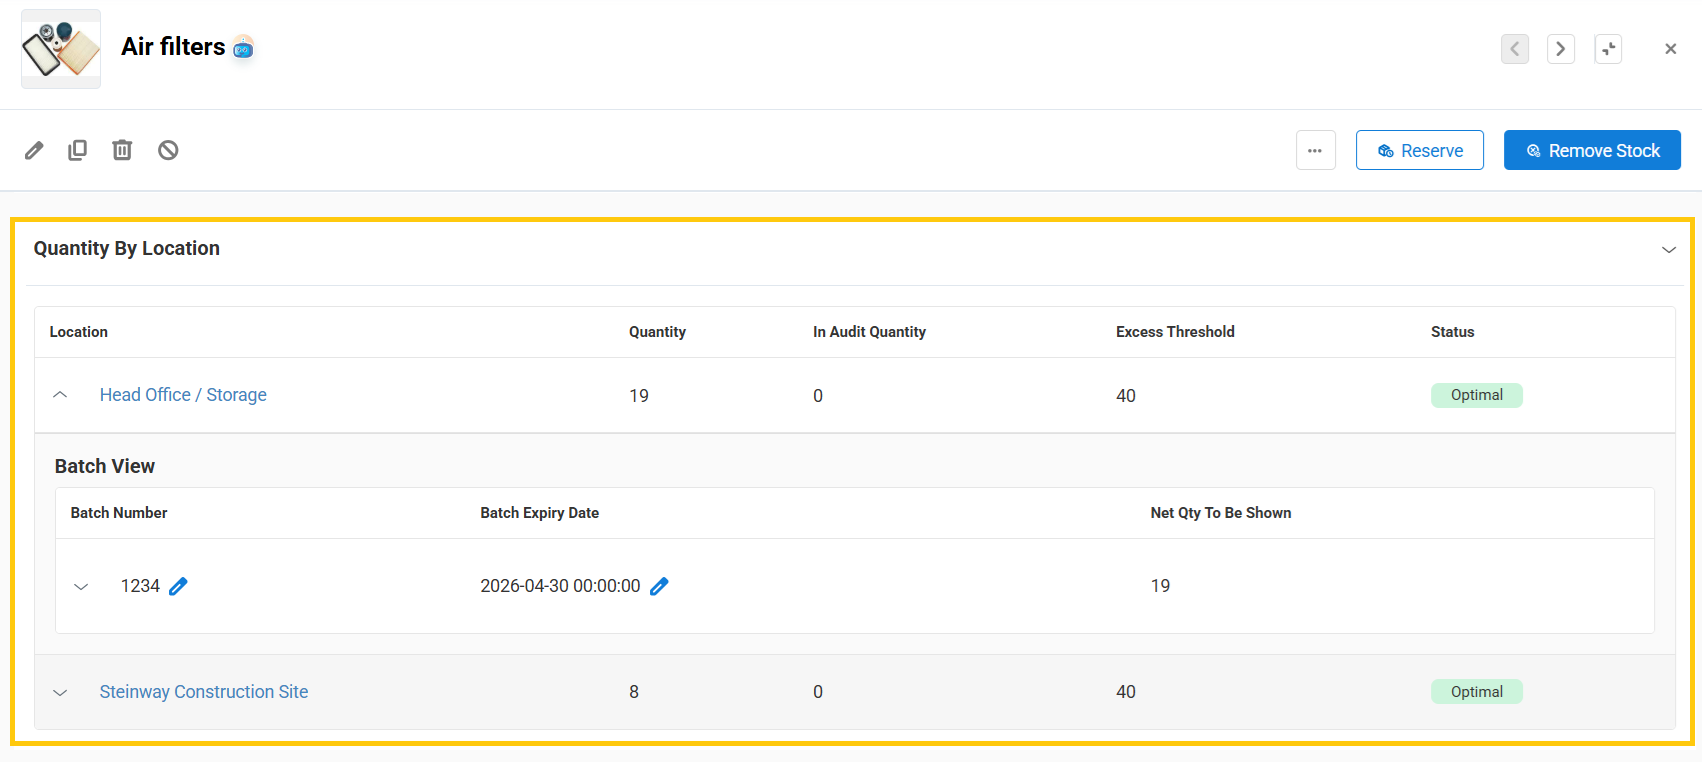
Here, you can view the item’s quantity across locations. Expand any row to open the Batch View, where you can see inventory details by batch number.
From this same section, you can also update batch information for existing inventory, including:
- Batch Number
- Batch Expiry Date
This gives you a direct way to review and maintain batch-level inventory without leaving the item details page.
3. Add Stock to a Specific Batch
You can add stock to an existing batch or create a new batch from the inventory details page.
From the Navigation Menu, go to Items → Inventory and click on any inventory item.
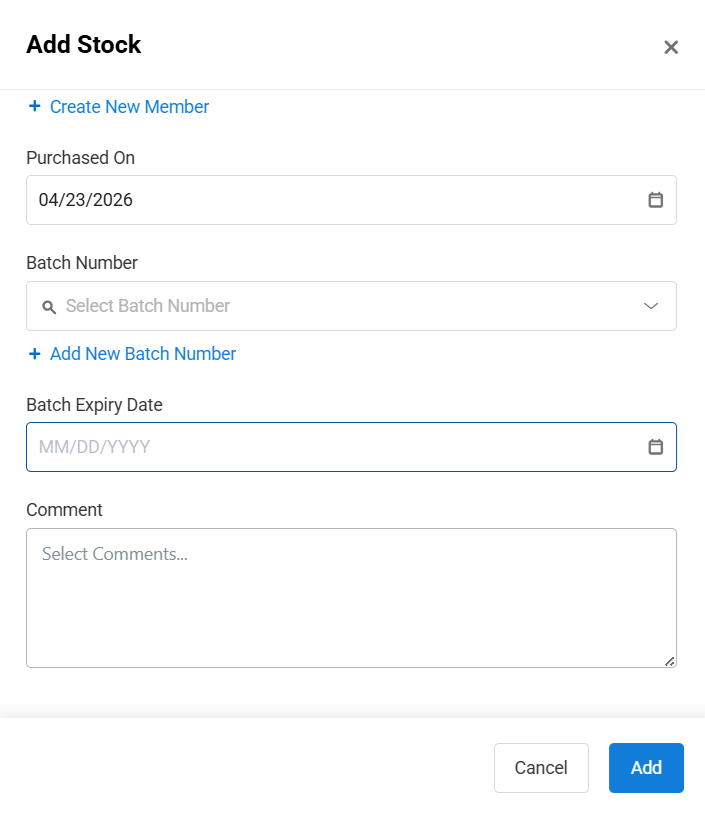
On the inventory details page, click the Ellipses (…) menu and select Add Stock.
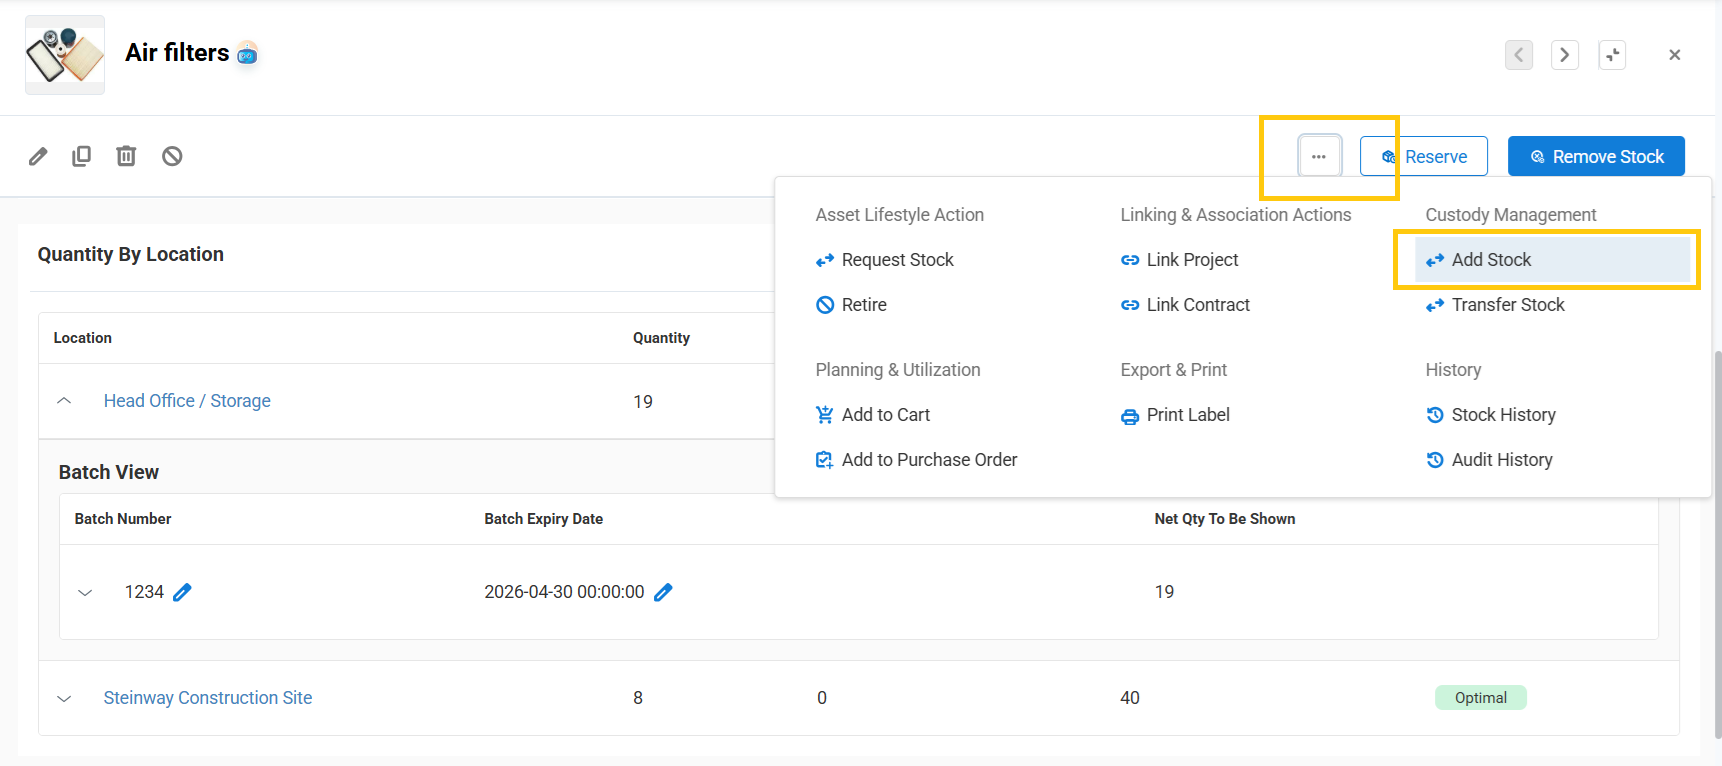
In the pop-up, scroll down to the Batch Number field.
From here, you can:
- Add stock to an existing batch, or
- Click Add Batch Number to create a new batch
Complete the rest of the required stock details and click Add.
4. Transfer Stock from a Specific Batch
You can transfer inventory between locations at the batch level and select multiple batches in a single transfer.
From the Navigation Menu, go to Items → Inventory and click on any inventory item.
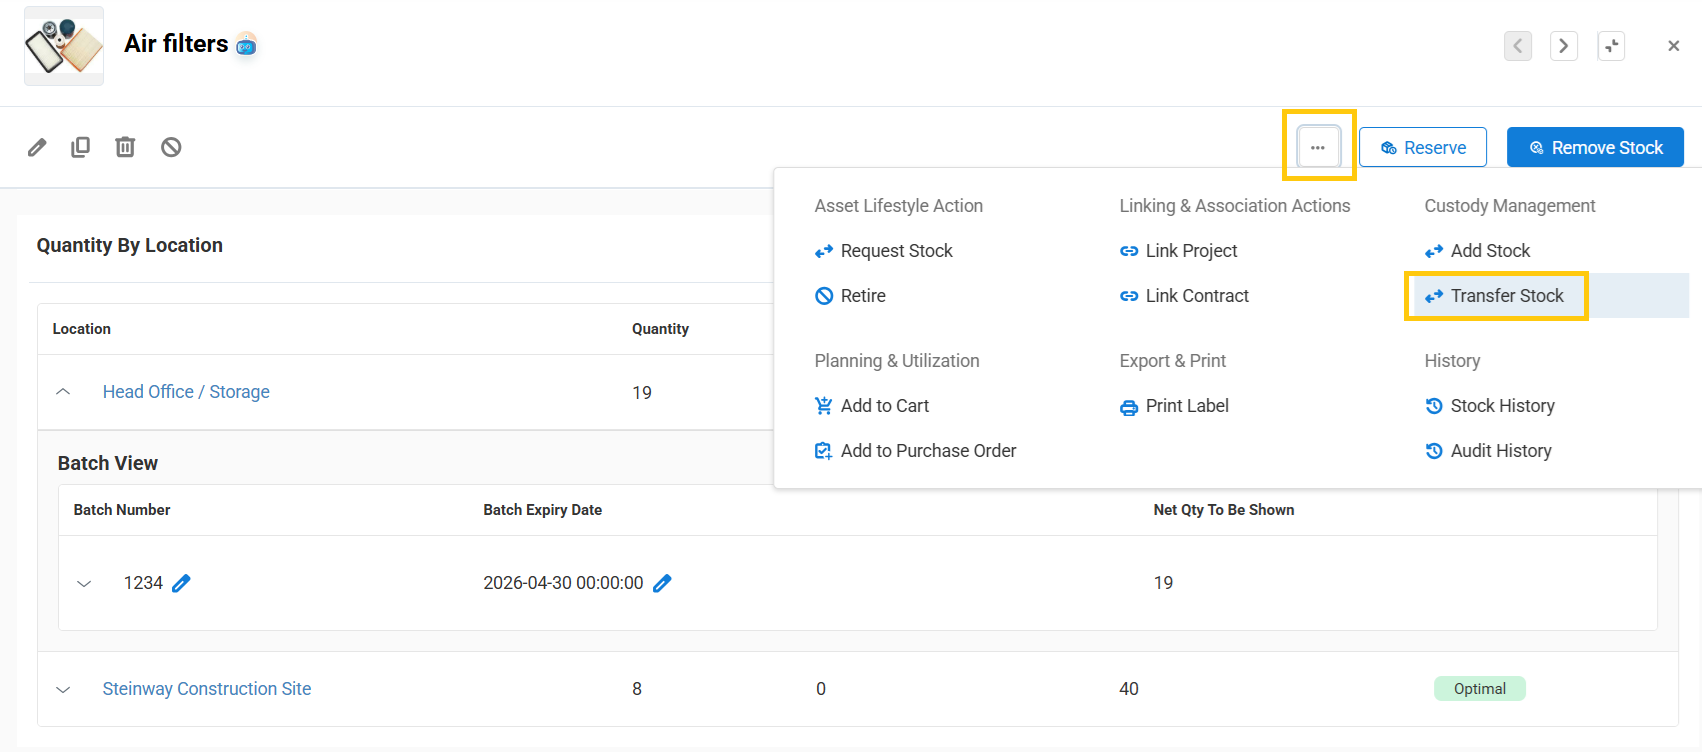
On the inventory details page, click the Ellipses (…) menu and select Transfer Stock.
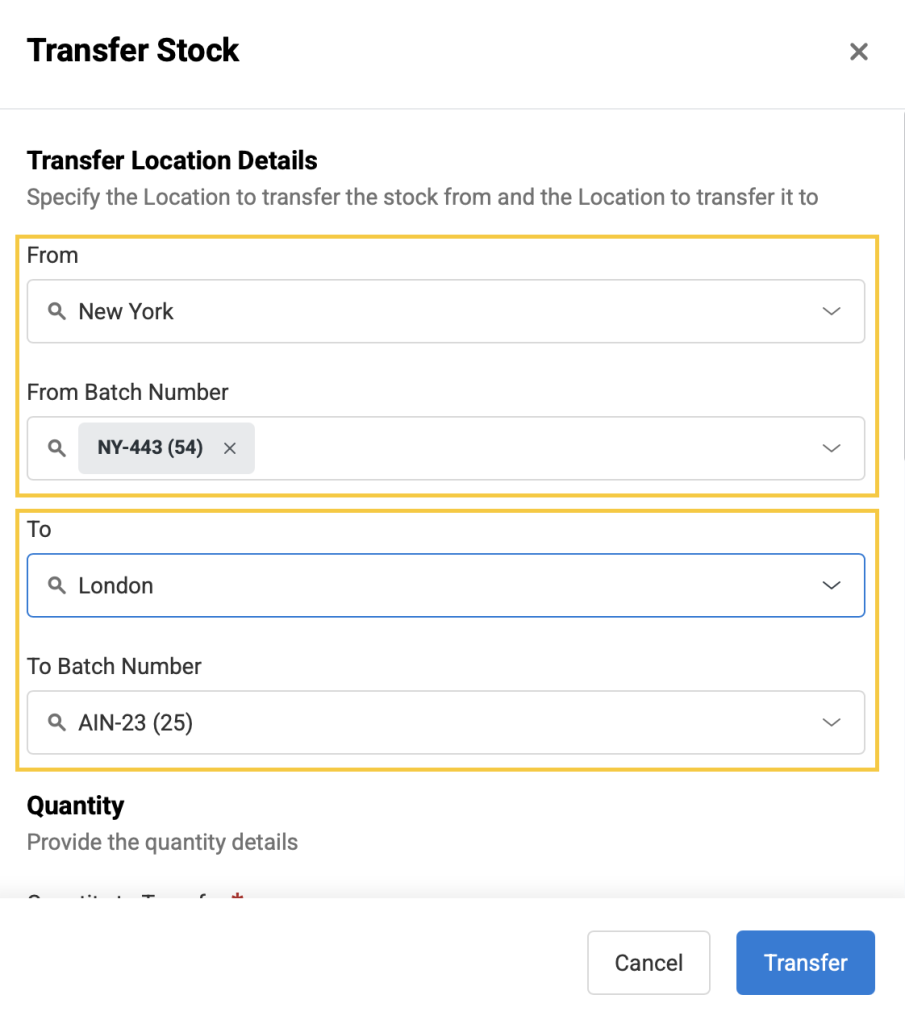
In the pop-up:
- Choose the relevant source location from the dropdown under From.
- Select the batches you want to transfer inventory from using the dropdown under From Batch Number.
- Choose the destination location under To and the destination batch under To Batch Number.
- Enter the quantity you want to transfer, fill in any remaining details, and click Transfer.
5. Remove Stock from a Specific Batch
To remove stock from a specific batch, use the Remove Stock action on the same inventory details page.
From the Navigation Menu, go to Items → Inventory and click on any inventory item. On the inventory details page, click Remove Stock.
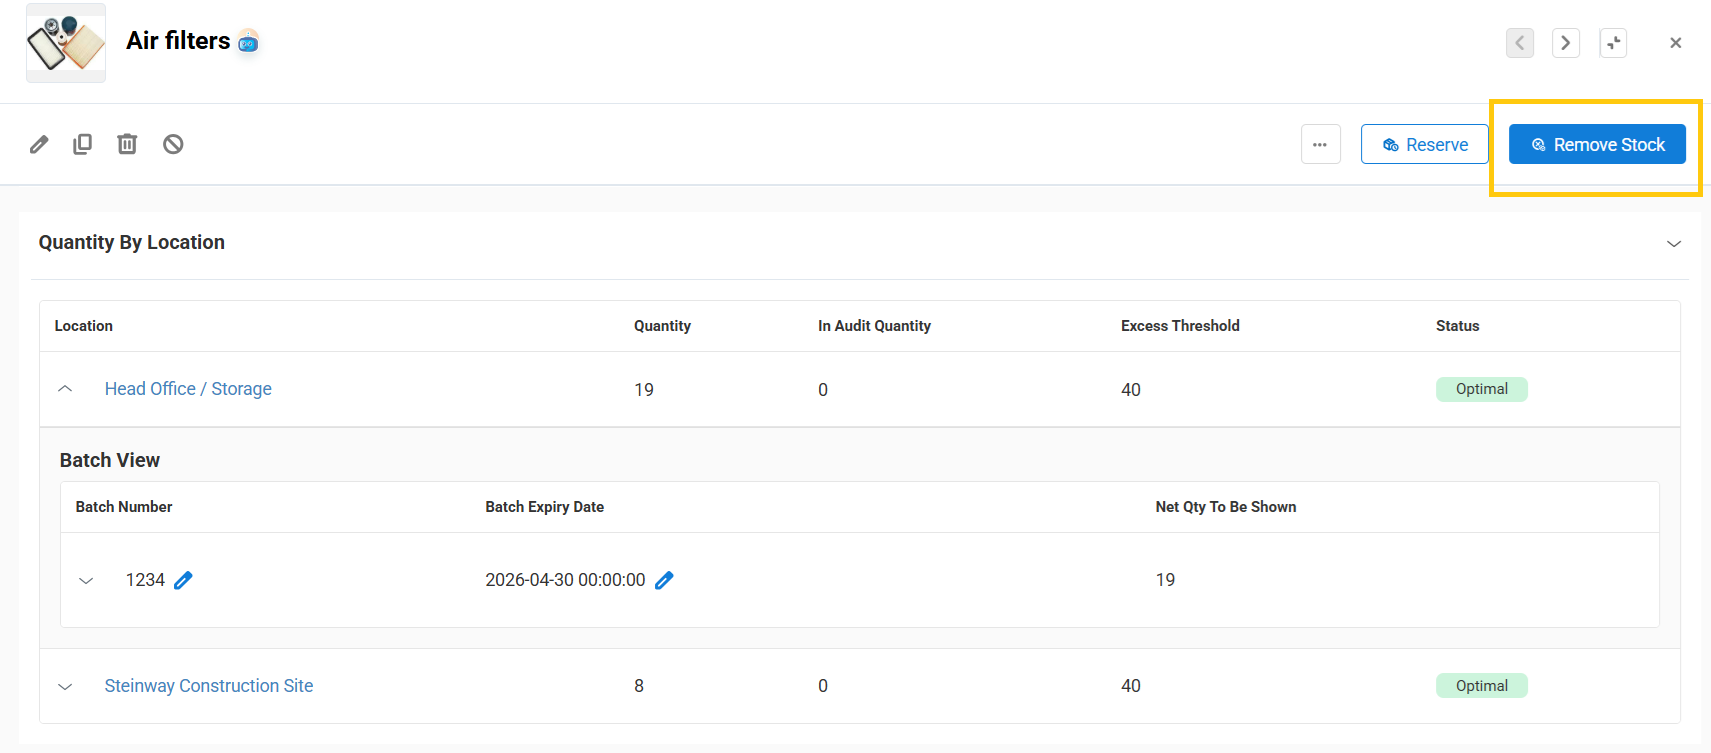
In the pop-up, select the relevant Location and Batch Number. Then enter the quantity you want to remove and click Remove Stock.
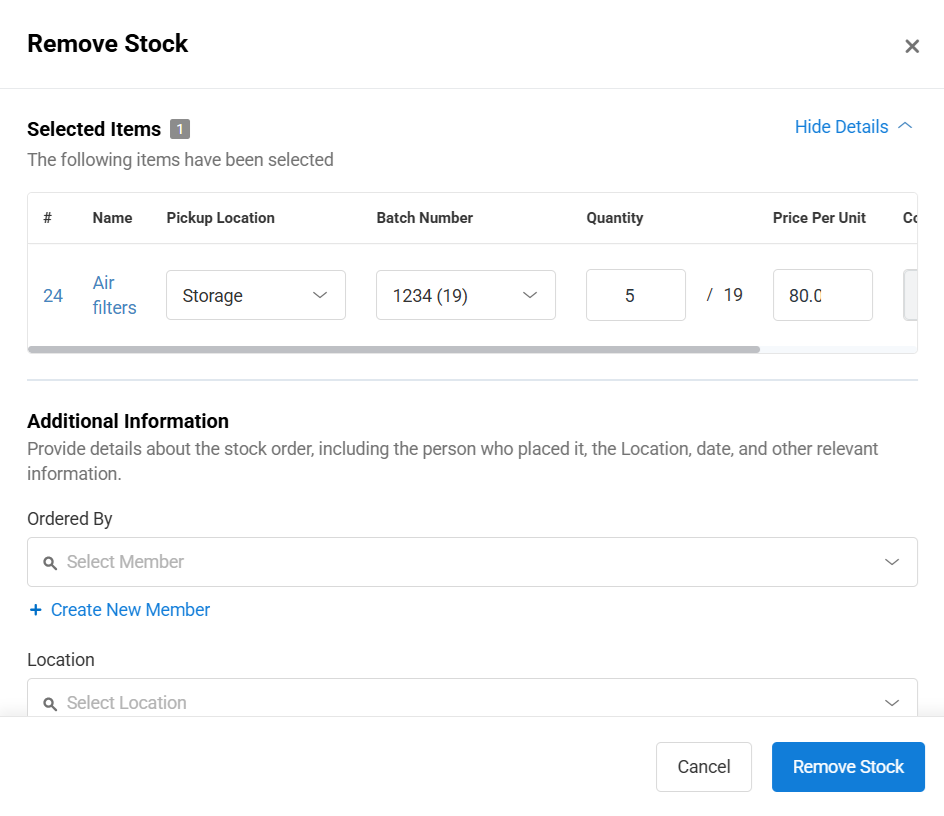
This updates that specific batch instead of affecting inventory more generally, which helps keep your stock records accurate.
6. Print Unique Batch Barcodes
You can now generate and print unique barcode labels for individual inventory batches. This makes it easier to identify and track different batches of the same item, even when the same Batch Number is used across different items.
To enable batch barcodes:
- Navigate to Company Settings & Addons → Items.
- Locate Batch Barcode Generation and select Enable Batch Barcodes (Format: AIN + DIV + Batch Number)
6.1 Generate and Print a Batch Barcode
Once your barcode format is configured, you can print a barcode for a specific batch:
- Navigate to Items → Inventory and click on any item.
- On the inventory details page, click the Ellipses (…) menu and select Print Label.
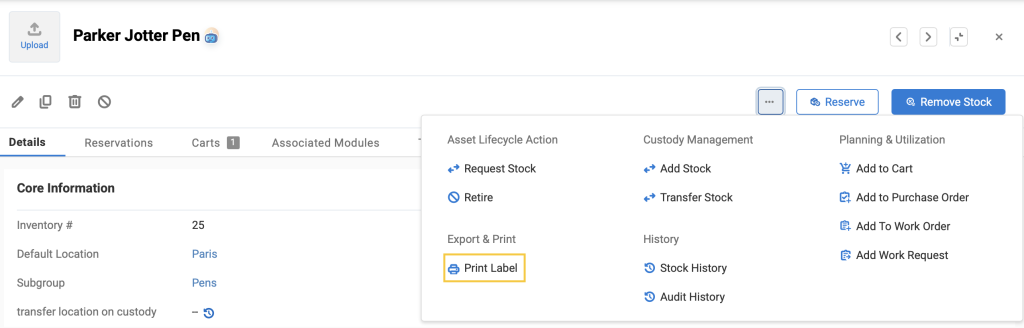
In the Print Labels pop-up:
- Select the number of copies to print and the printout template.
- Select a batch from the Select Batch Number dropdown.
- Click Print to generate the batch label.
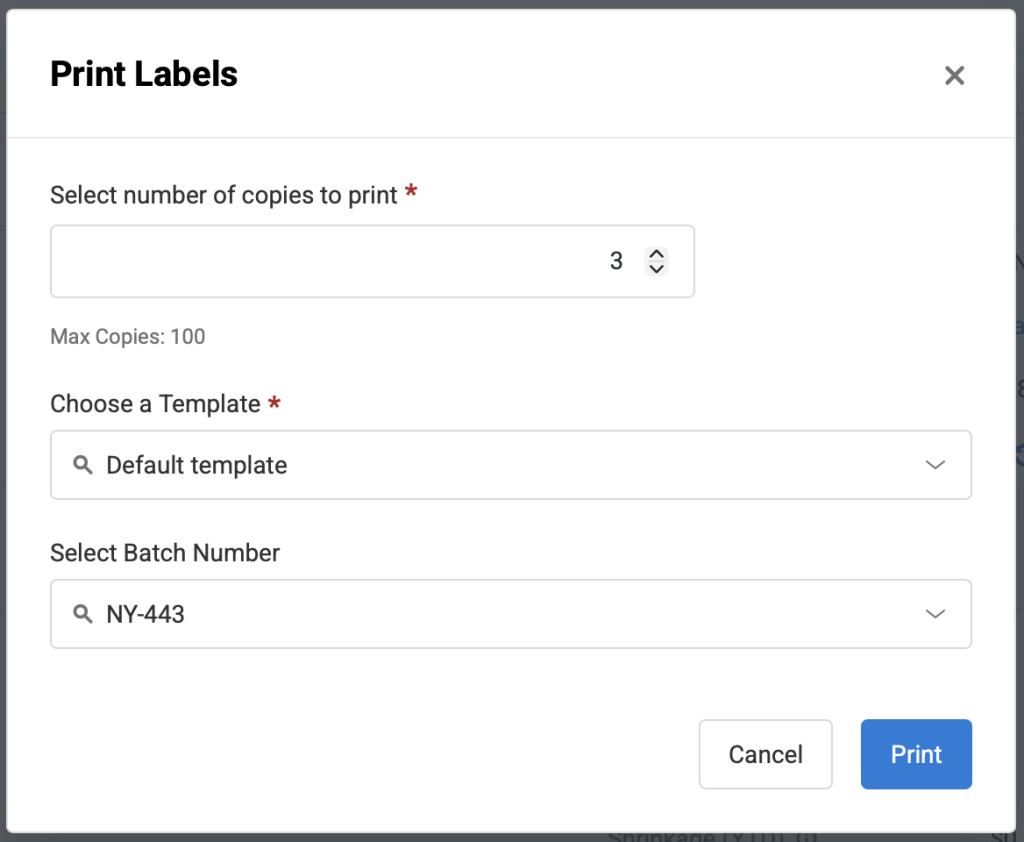
When you select a specific batch, the printed label uses the format Inventory Name – Batch Number for the display name.
If you do not select a batch, the system prints the standard AIN barcode instead.
You can also customize your printout template to include the Batch Expiry Date, allowing staff to see important expiry information directly on the physical label.
6.2 Scan a Batch Barcode
Once batch-specific barcodes have been printed, scanning one in a supported workflow automatically identifies the corresponding inventory item and selects the specific batch.
The batch selection is locked after the barcode is scanned, helping ensure that the correct batch is used for the transaction. This allows staff to scan a batch barcode and work with the correct batch without having to manually search for and select it.
Batch barcodes can be scanned in supported workflows such as Carts, Checkout, Check-in, Reserve, Move Items, Extend Checkout, Work Orders, Audits, and Purchase Orders.
Keep Batch-Level Inventory Clean and Accurate
Managing inventory by batch gives you better control over how stock is added, moved, and removed across locations. Instead of treating the entire quantity as one undifferentiated pool, you can work against the exact batch you need and maintain cleaner records over time.
Need help getting started with inventory batching in EZO? Reach out to support@ezo.io.

![[How-to] Enable Mass Check-In/Partial Return of Asset Stock in EZO Mobile App](https://cdn.ezo.io/wp-content/uploads/2021/02/EZO-custom-substate-copy-1.png)
![[How-to] Track Cost Of Carts in EZO](https://cdn.ezo.io/wp-content/uploads/2023/06/tracking-cost-of-cart-2.jpg)
![[How to] Import Items to EZO- A Data Dictionary](https://cdn.ezo.io/wp-content/uploads/2019/10/Data-dictionary-EZO-1-1.jpg)