Employee departures involve more than collecting a laptop. IT teams often need to revoke access, recover assets, reclaim software licenses, notify stakeholders, and keep HR and managers aligned throughout the process.
AssetSonar’s Offboarding Center helps you create structured offboarding workflows so your team can standardize every exit process from a single place. You can define the form that starts the workflow, organize the process into stages, add tasks, tickets, emails, and approvals, and activate the workflow when it is ready to use.
Here’s how to create and manage offboarding workflows in AssetSonar.
1. Go to the Offboarding Center
From the navigation menu, go to Automations → Offboarding.
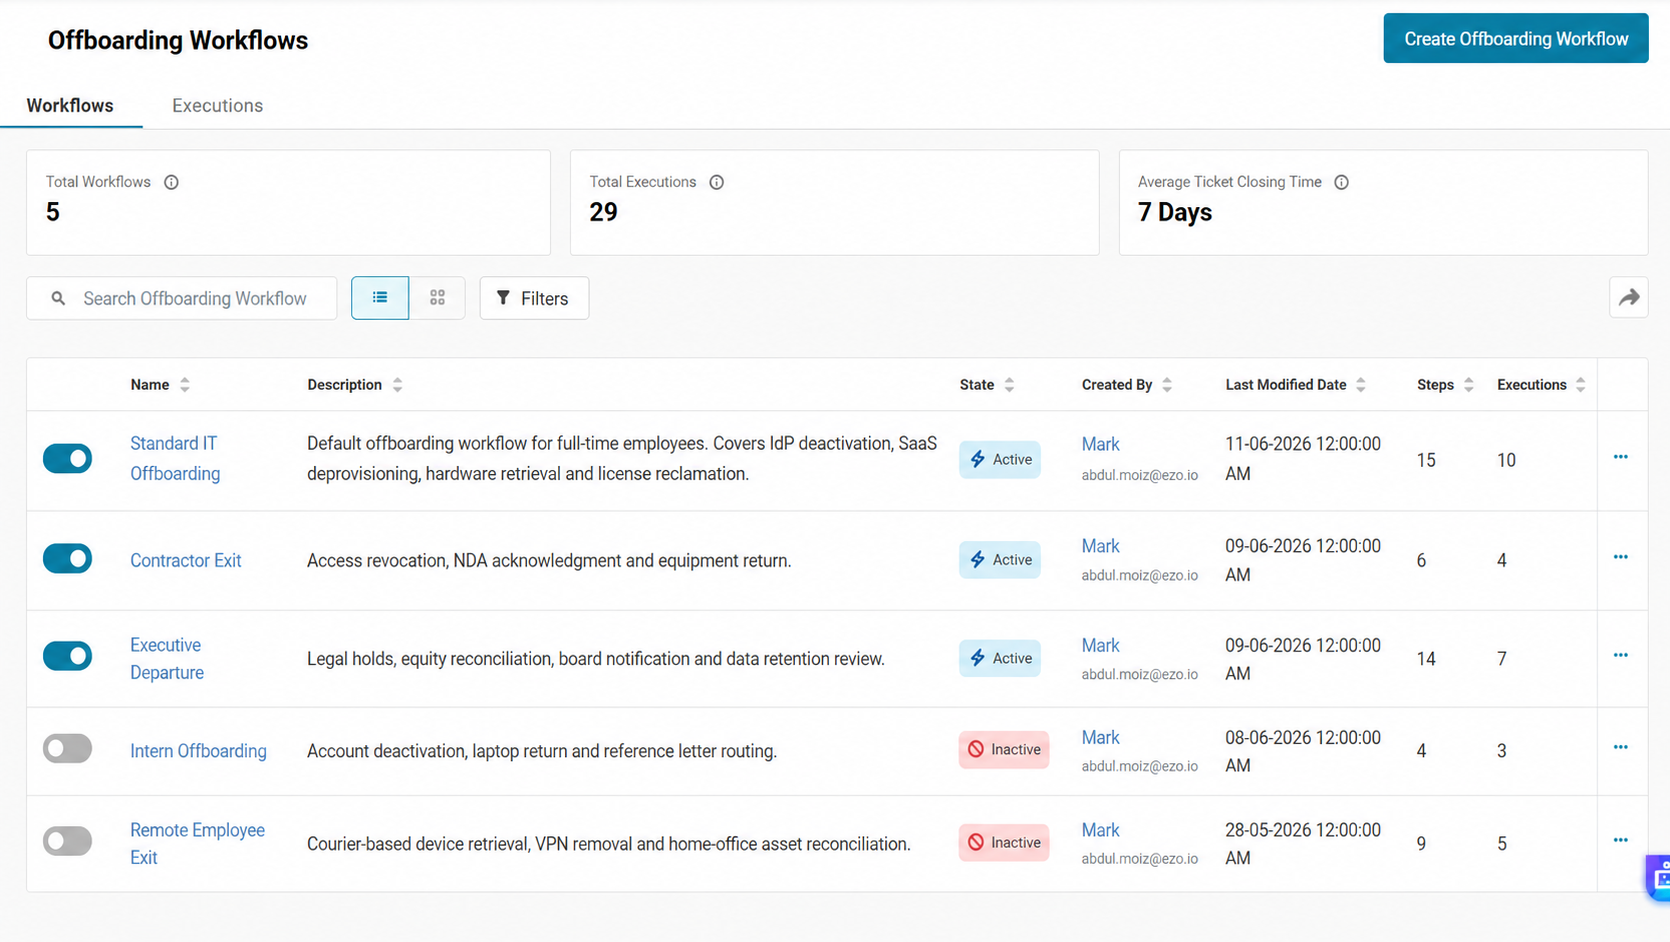
This opens the Offboarding Workflows page. You’ll see two tabs:
- Workflows: Shows saved offboarding workflow templates.
- Executions: Shows offboarding requests that have been initiated from workflows.
The Workflows tab gives you an overview of all offboarding workflows in your account, including their status, number of steps, and execution count.
2. Create a new offboarding workflow
To create a new workflow, click Create Offboarding Workflow.
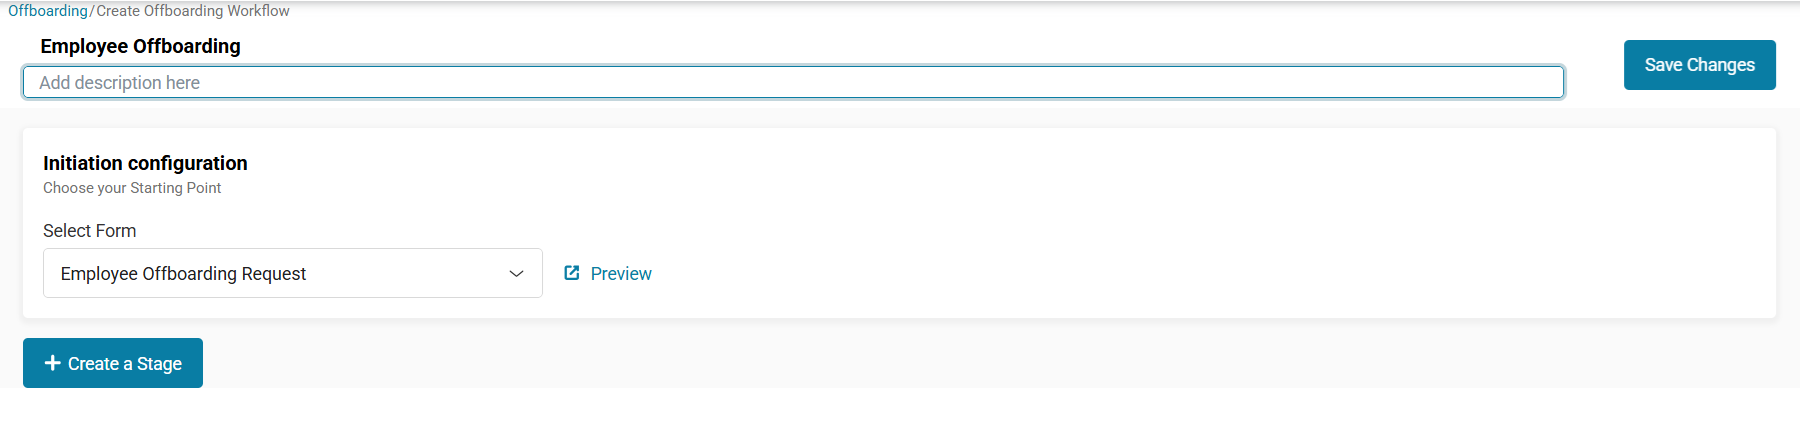
You’ll be taken to the workflow builder. At the top of the page, add a workflow name and description.
3. Select the initiation form
The Initiation Configuration section defines how the offboarding workflow starts.
Go to Initiation Configuration → Select Form and choose the relevant Service Catalog form. The picker lists only forms assigned to the default Offboarding Service Catalog category.
If no forms appear, assign an existing form to the Offboarding category or create a form under that category in the ITSM Service Catalog.
Click Preview to view the selected form fields.
Note: The form preview is read-only. To edit the form itself, go to the ITSM Service Catalog where the form is configured.
The selected form should include a member selection field so AssetSonar knows which employee is being offboarded. It may also include fields such as the employee’s last working day and additional notes.
The same Service Catalog form can be used to initiate multiple offboarding workflows. When multiple workflows use the same form, you can add conditions to determine which workflow should run for the member being offboarded.
4. Add Conditions to the Workflow
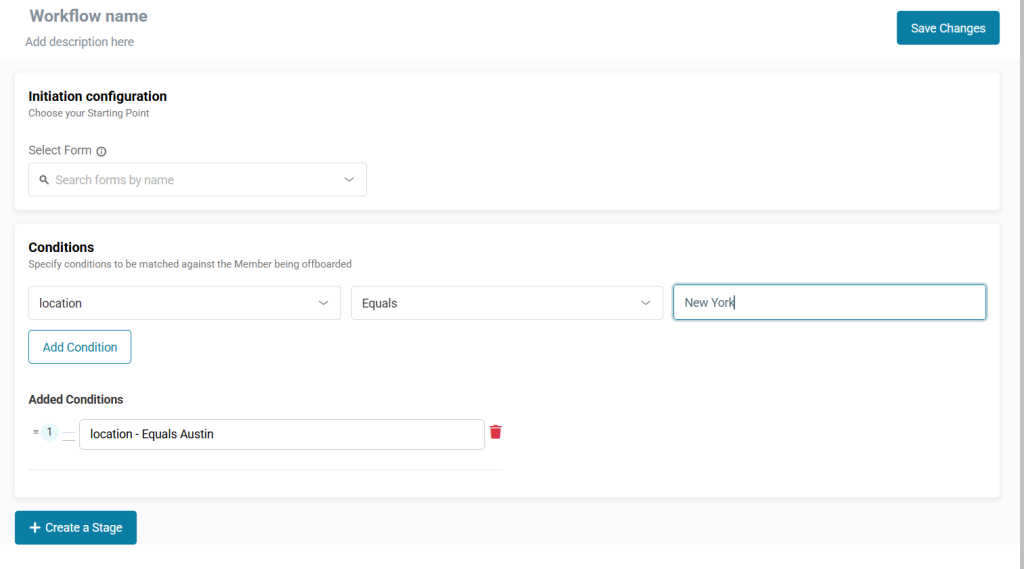
Use the Conditions section to define which members should use this offboarding workflow.
Add conditions based on member attributes to narrow the workflow to the relevant employees. For example, you can create different workflows for employees in different departments or for different types of workers while using the same offboarding form.
You can add multiple conditions to further refine when the workflow should run.
If you leave the Conditions section empty, the workflow acts as the default or fallback workflow when no other workflow using the same trigger matches the member being offboarded.
5. Set the Workflow Sequence
When multiple offboarding workflows use the same initiation form, AssetSonar evaluates them according to their Sequence.
Workflows with a lower sequence number are evaluated first. AssetSonar runs the first workflow whose conditions match the member being offboarded and skips the remaining workflows for that trigger.
For example, if two workflows use the same Employee Offboarding form, AssetSonar first evaluates the conditions for Sequence 1. If they do not match, it evaluates Sequence 2, and so on.
A workflow without conditions acts as the fallback and is evaluated after the conditioned workflows.
6. Create a stage
Stages help you organize the offboarding process into logical phases. For example, you may have separate stages for approval, separation confirmation, handoff, last-day actions, and closure.
To add a stage, click Create a Stage.
In the Create a Stage popup, enter a title and select when the stage should begin.
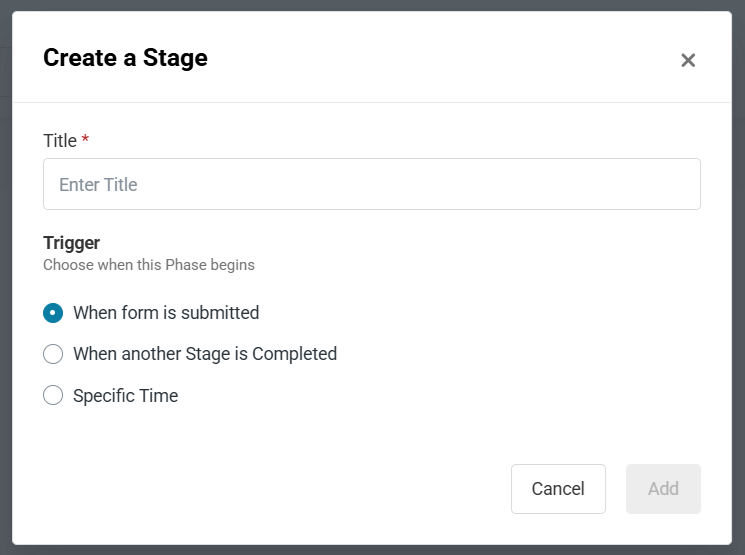
Available trigger options include:
- When form is submitted
- When another Stage is Completed
- Specific Time
For example, you can create a first stage called After Initiation and set it to begin When form is submitted.
Click Add to create the stage.
7. Add steps to a stage
Steps are the individual actions inside a stage. Each step can be a task, ticket, email, or approval.
To add a step, open the relevant stage and click Add a Step.
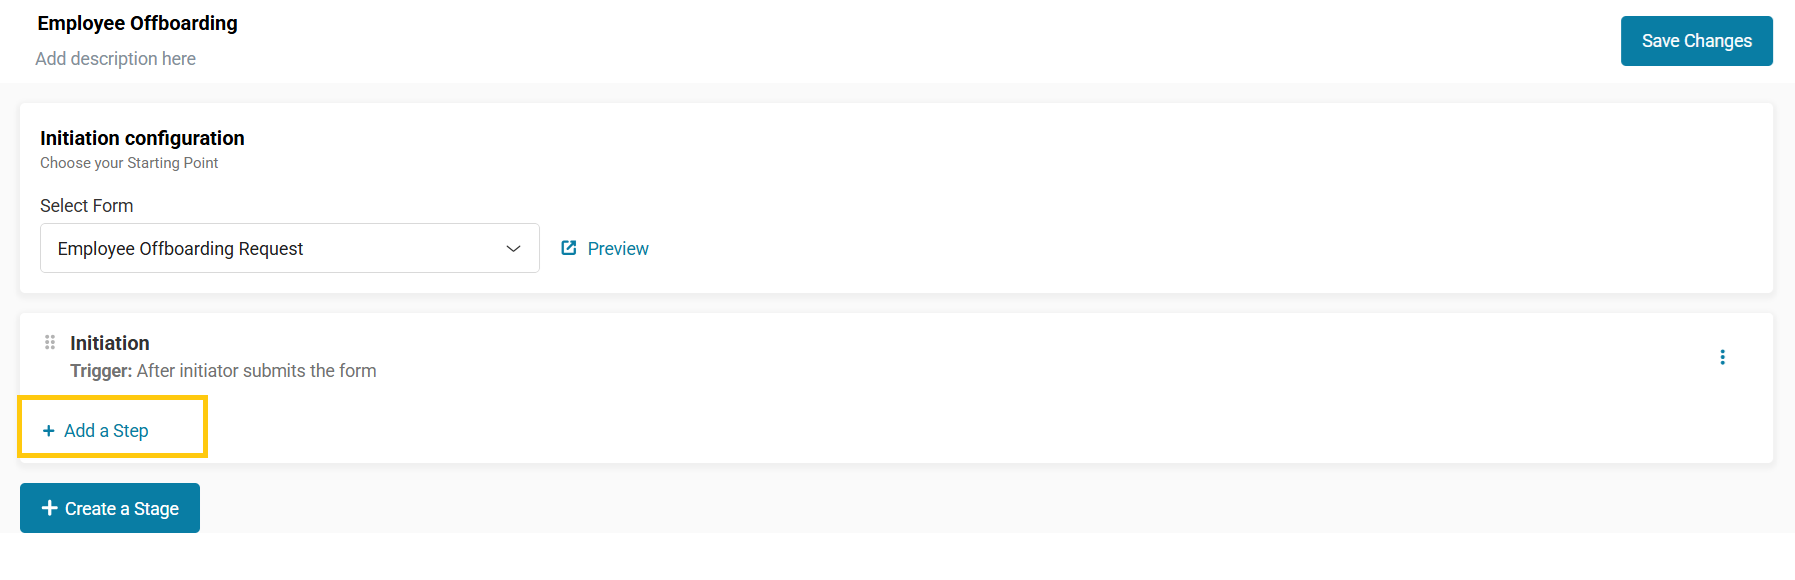
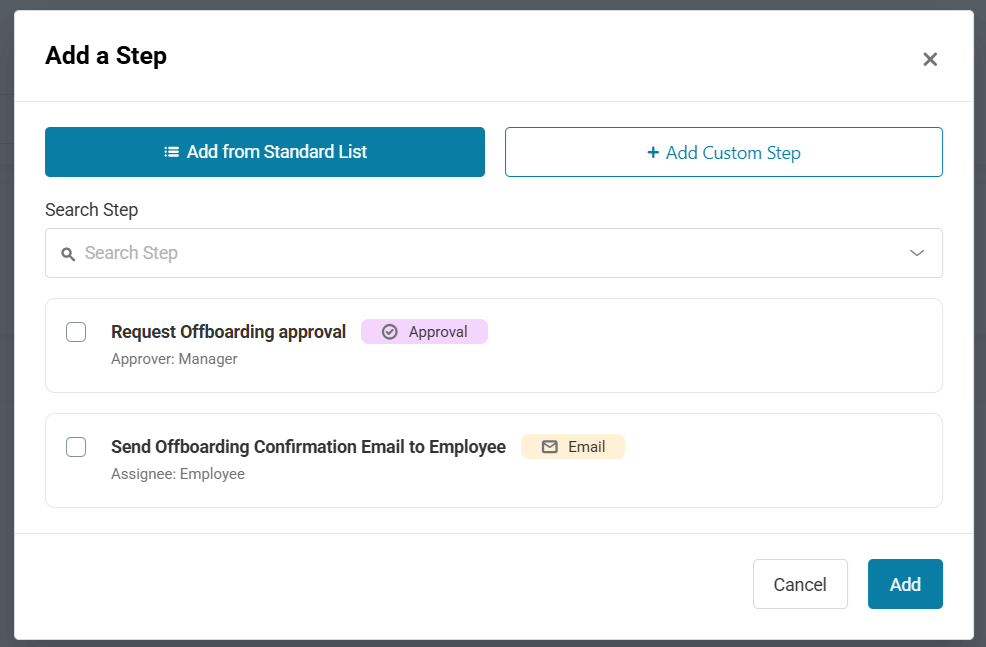
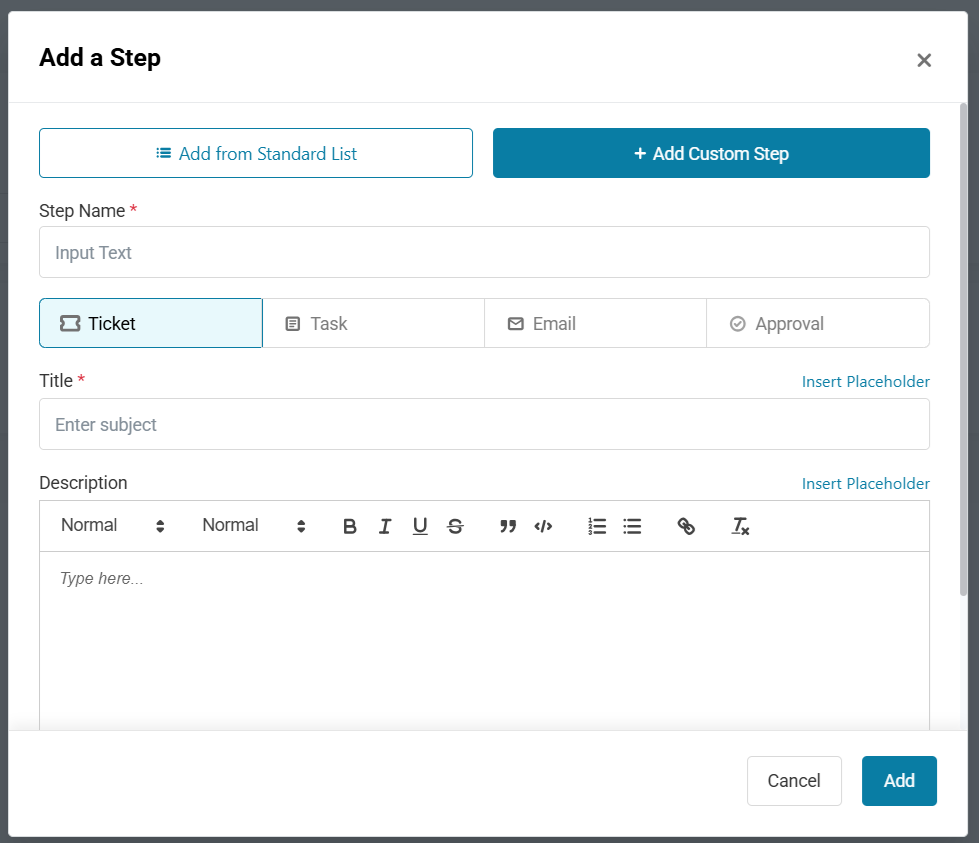
The Add a Step popup includes two options:
- Add from Standard List
- Add Custom Step
Use Add from Standard List to quickly add common offboarding actions, such as approvals, device recovery, item retrieval, software license removal, or email auto-replies. Search for the step you want to add, select one or more steps using the checkboxes, and click Add.
Use Add Custom Step when you need to define a ticket, task, email, or approval step specific to your organization’s offboarding process.
7.1 Link an Action or Automation to a Task
When configuring a Task step, use the Linked Action selector to choose what users can execute from the offboarding ticket.
Select Action or Automation in the first dropdown.
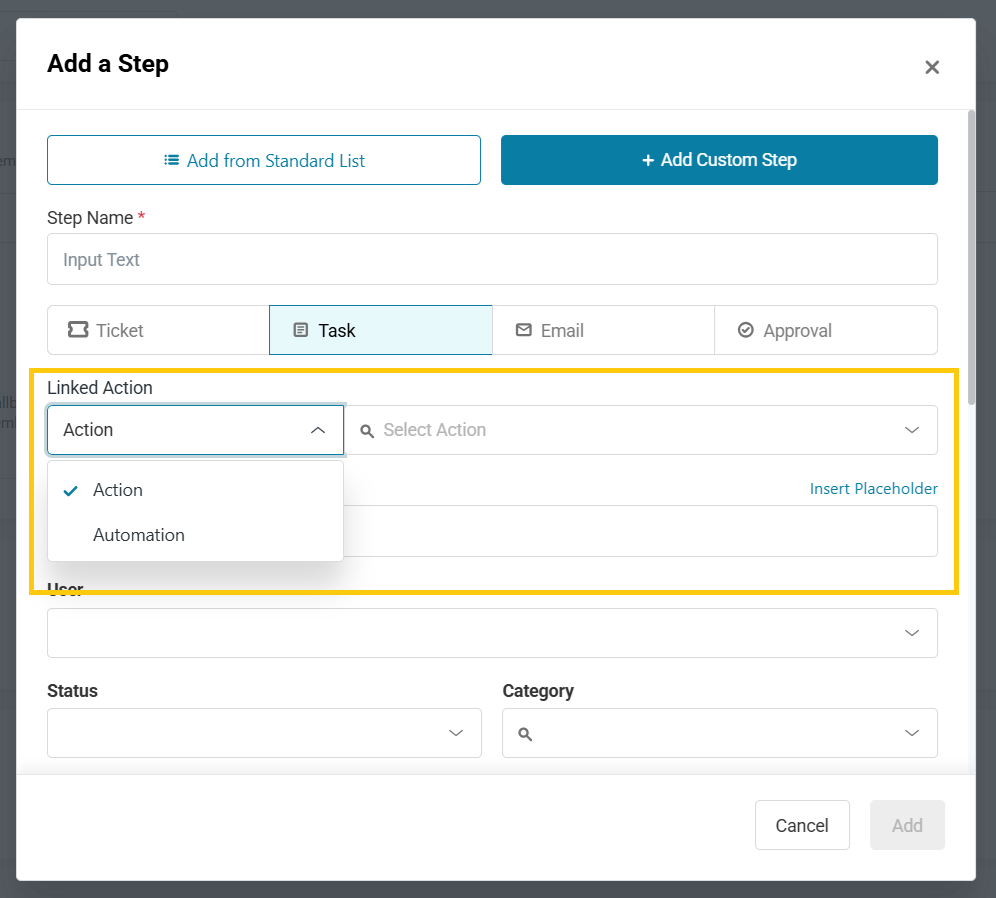
- Select the relevant action or automation in the second dropdown.
- Complete the remaining task settings and click Add.
The automation list includes only active automations configured with the Custom Action trigger. If an automation is missing, check its activation status and trigger.
For instructions on running a linked automation, see Initiate and Track Employee Offboarding Requests.
8. Manage workflow stages, steps, and activation
Once you’ve added the required stages and steps, you can make changes to the workflow before saving it.
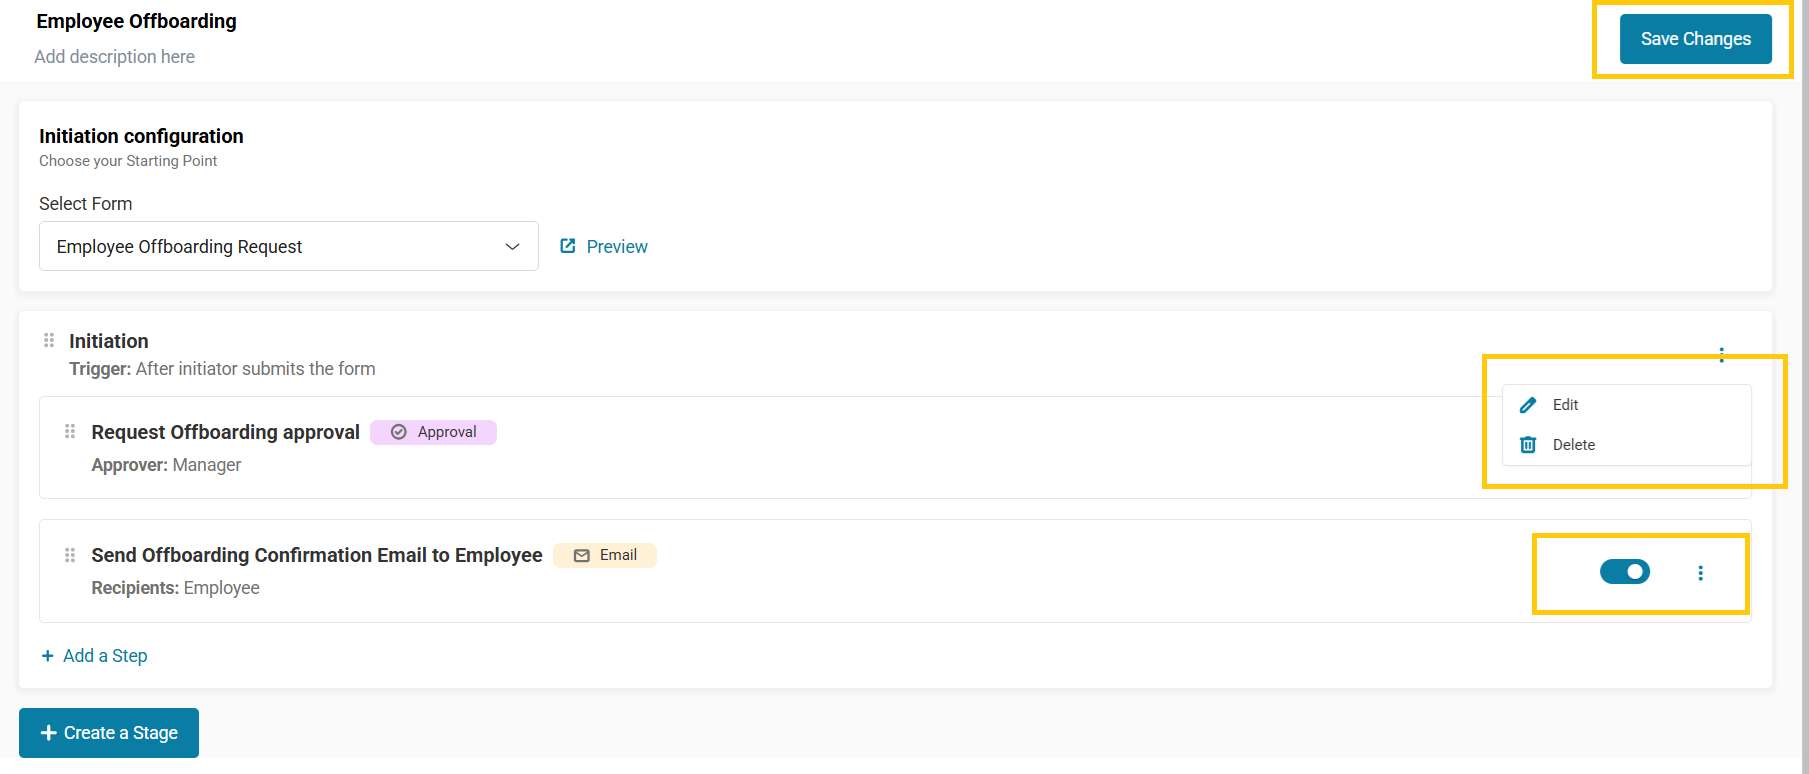
Use the drag handle beside a stage or step to reorder it. Stages can be moved up or down in the workflow, while steps can be reordered within their stage.
You can also use the toggle beside a step to enable or disable it. Disabled steps remain in the workflow but are skipped during the workflow execution.
To edit or delete a stage or step, click the three-dot menu beside it and select Edit or Delete.
When the workflow is ready, click Save Changes. To make it available for use, turn on the Activate toggle in the workflow header.
To edit an existing workflow later, go to Automations → Offboarding → Workflows, click the three-dot menu beside the workflow, and select Edit.
Note: If an active workflow has already been used for an offboarding request, editing it may create a cloned version. This helps preserve the workflow history for previous offboarding requests.
Once your workflow is created and activated, users can initiate offboarding requests through the selected Service Catalog form and track their progress from the Executions tab. To learn how submitted requests move through the offboarding process, read our guide on Initiate and Track Employee Offboarding Requests.
Start standardizing employee offboarding
With AssetSonar’s Offboarding Center, IT teams can build repeatable offboarding workflows for employees, contractors, interns, executives, and remote workers. By organizing the process into stages and steps, you can make sure every required action is captured before an employee exit is completed.
Need help setting up your first offboarding workflow? Reach out to us at support@ezo.io — we’re happy to assist.
