Manually documenting every router, switch, printer, server, and computer connected to your network is both time-consuming and unreliable. Devices can be added, replaced, or reconfigured without being recorded in your asset inventory, leaving IT teams with incomplete information.
AssetSonar’s Network Discovery capability helps you identify connected devices through automated network scans and bring them into AssetSonar for centralized tracking.
Using AS Network Scanner, you can:
- Scan specified networks and subnets for connected devices
- Collect device information using SNMP, SSH, and Windows credentials
- Schedule recurring network scans
- Review newly discovered devices before adding them to your inventory
- Provision devices individually or in bulk
- Report on discovered and provisioned assets
This guide explains how to download and configure AS Network Scanner, run a discovery, and provision the resulting devices in AssetSonar.
Important: AS Network Scanner is currently supported natively on Linux. For questions about using it in a Windows environment, contact support@ezo.io
1. Enable Network Discovery and download AS Network Scanner
Sign in to AssetSonar as an Account Owner or an administrator with the required permissions.
Go to:
Settings → Integrations → Network Discovery
Enable the Network Discovery option.
Click Download preconfigured Linux Connector.
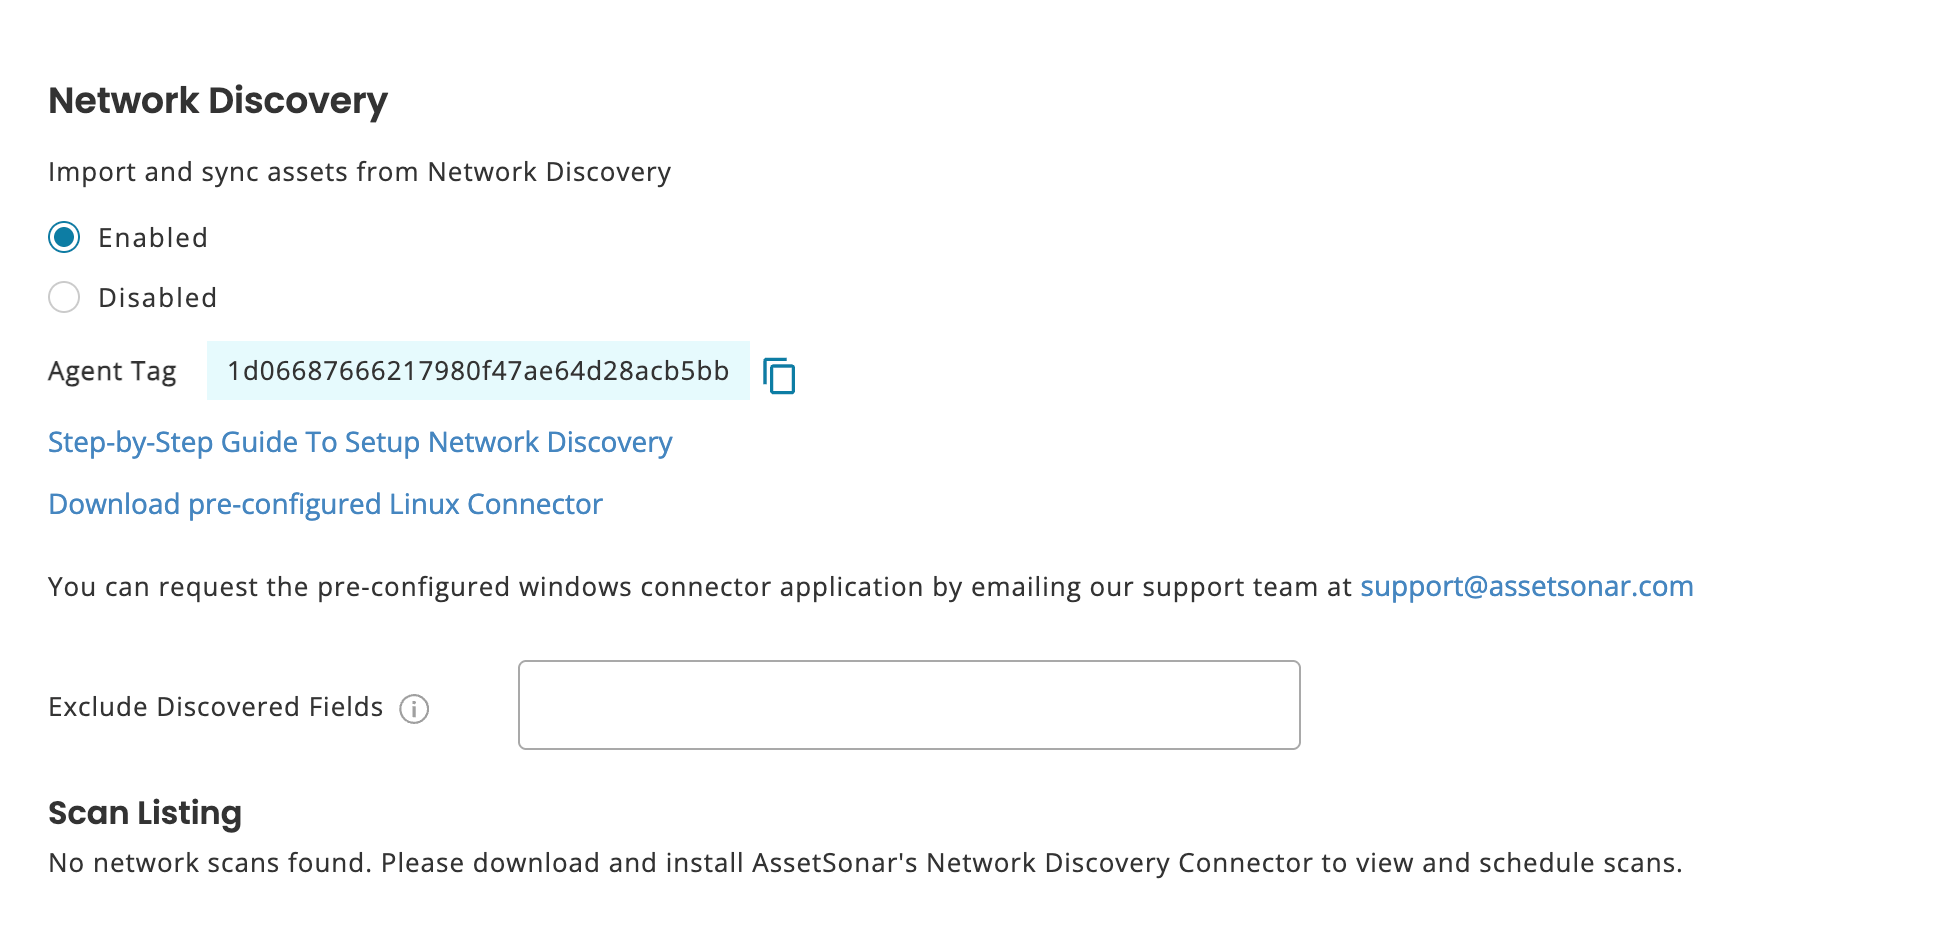
The download provides a single package containing the components required to run Network Discovery:
- AS Network Scanner
- Nmap
- AS Linux Connector
You do not need to download or configure these components separately.
Note: Download a new package directly from the AssetSonar account in which you intend to import the discovered devices. The package contains configuration information associated with that account.
2. AS Network Scanner Installation
AS Network Scanner must be installed on a Linux server that can communicate with the networks or subnets you want to scan.
Before beginning the installation, confirm that:
- The server can reach the target IP addresses or subnets.
- Your firewall permits the required network traffic.
- You have administrator or root access to the server.
- You have the credentials required to collect detailed information from the target devices.
Open the downloaded package and follow its included installation instructions to install AS Network Scanner on the Linux server.
Because the scanner, Nmap, and the AS Linux Connector are provided together, you do not need to install a separate connector or manually connect the scanner to your AssetSonar account.
Once the installation is complete, open AS Network Scanner in your browser and sign in using the credentials provided during setup.
For security, change any default administrative password before running scans in a production environment.
If your organization operates multiple isolated networks or locations, you may need an AS Network Scanner installation that can reach each applicable network.
3. Add credentials for network discovery
AS Network Scanner can detect some surface-level information without device credentials. However, an uncredentialed scan may return only limited information, such as an IP address or MAC address.
For reliable hostnames, operating-system details, hardware information, and device classification, configure the appropriate credentials before running the discovery.
In AS Network Scanner, go to:
Discover → Credentials → Create Credentials

Enter the credential name, description, type, username, password, or other requested authentication information. Save the credential when finished.
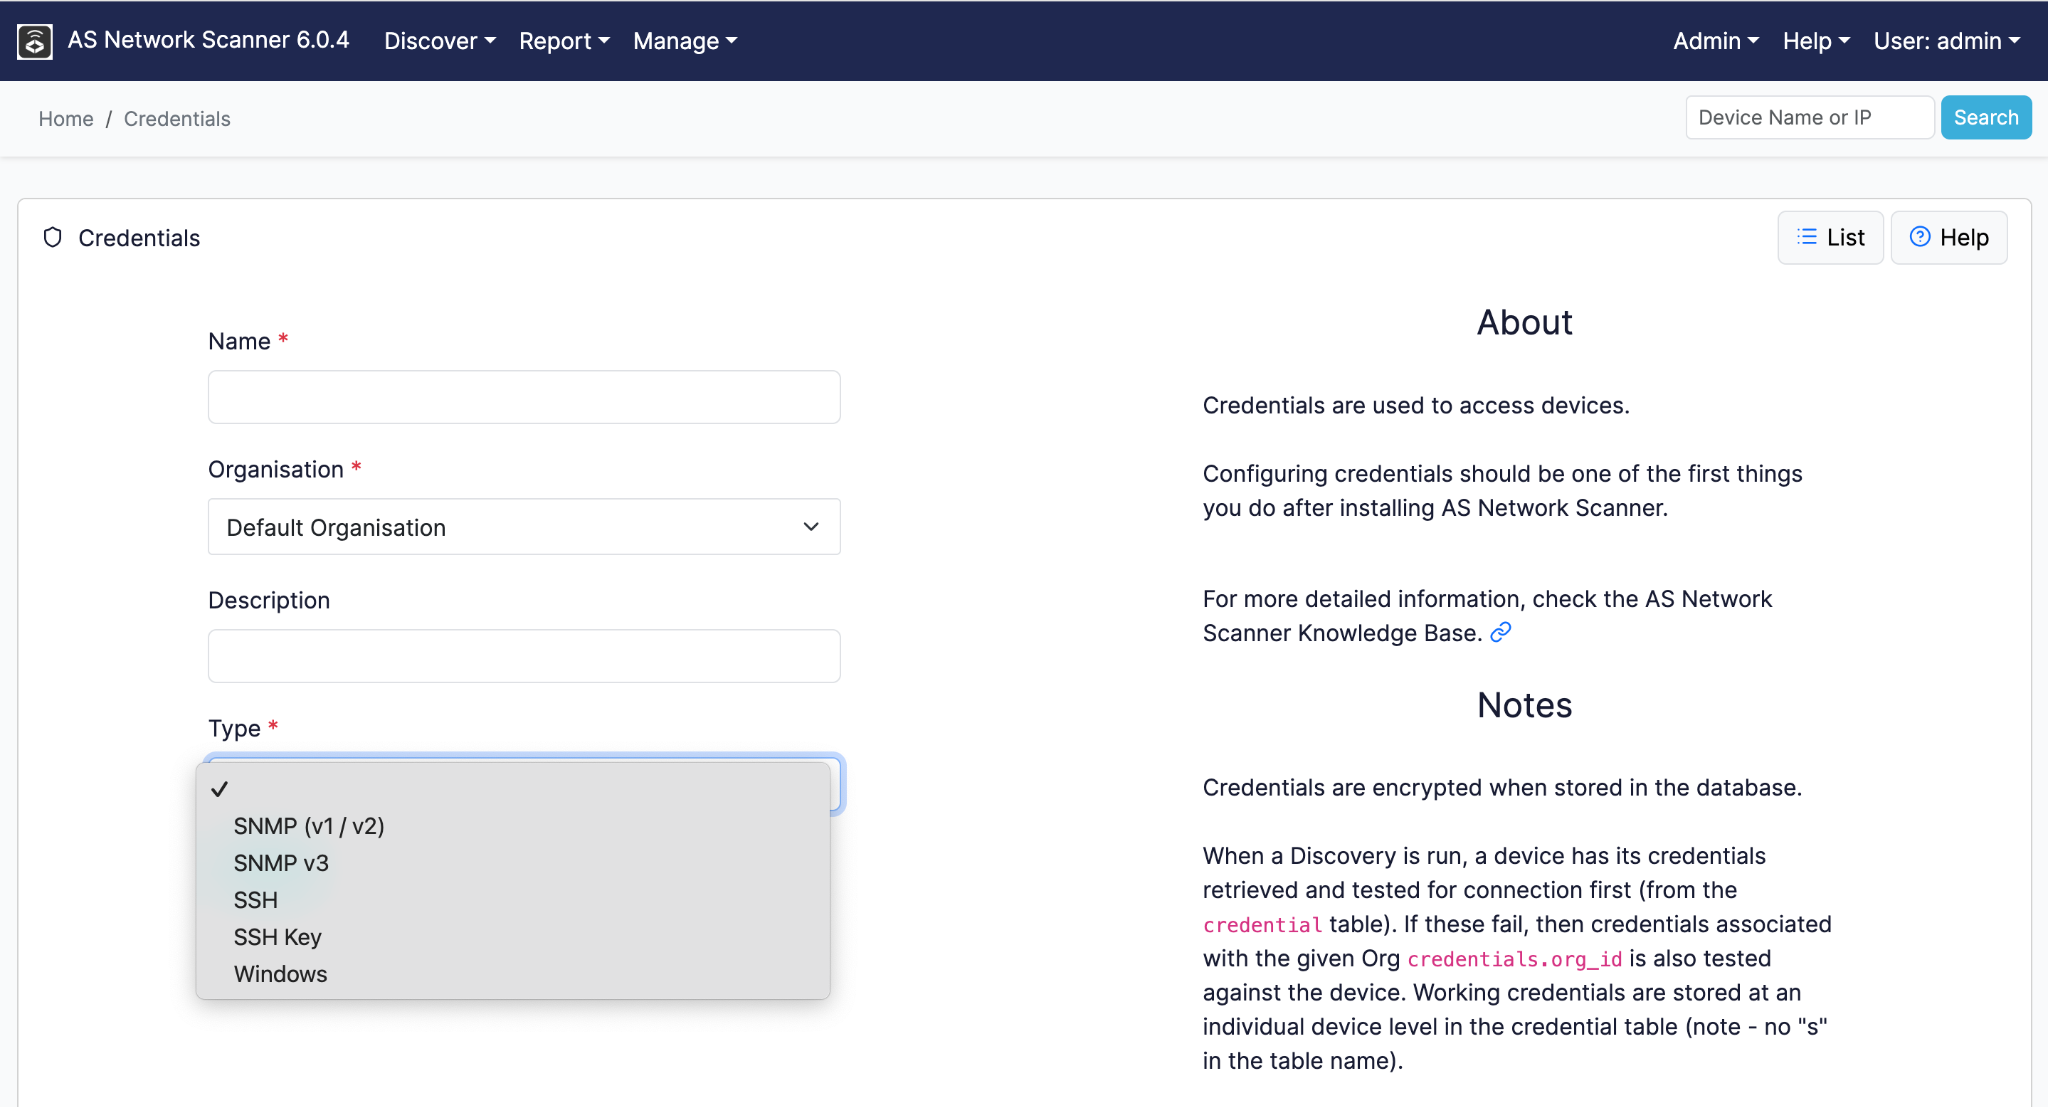
The credential type depends on the devices you intend to scan.
SNMP credentials
Use SNMP credentials for devices managed through the Simple Network Management Protocol, including:
- Routers
- Switches
- Firewalls
- Wireless access points
- Printers
- Storage devices
- UPS devices
Enter the applicable community string or SNMP credentials configured for your devices.
Providing valid SNMP credentials allows AssetSonar to receive more detailed network-device information, such as the model, uptime, ports, connections, and interface status.
SSH credentials
Use SSH credentials to collect information from supported Linux and macOS devices.
Depending on your environment, you can configure a username and password or the applicable SSH key.
Windows credentials
Add administrative credentials for the Windows devices you want the scanner to inspect.
If devices are managed through Active Directory, an authorized domain administrator account may be used to scan multiple Windows devices, subject to your organization’s security policies.
Only add credentials that your organization has authorized for network discovery. Follow your internal password-management and security requirements when selecting an account.
You can create multiple credentials when different devices, domains, or network segments require different authentication methods.
4. Create and execute a discovery
A discovery defines the network or range of addresses AS Network Scanner will inspect.
In AS Network Scanner, go to:
Discovery → Discoveries → Create Discovery
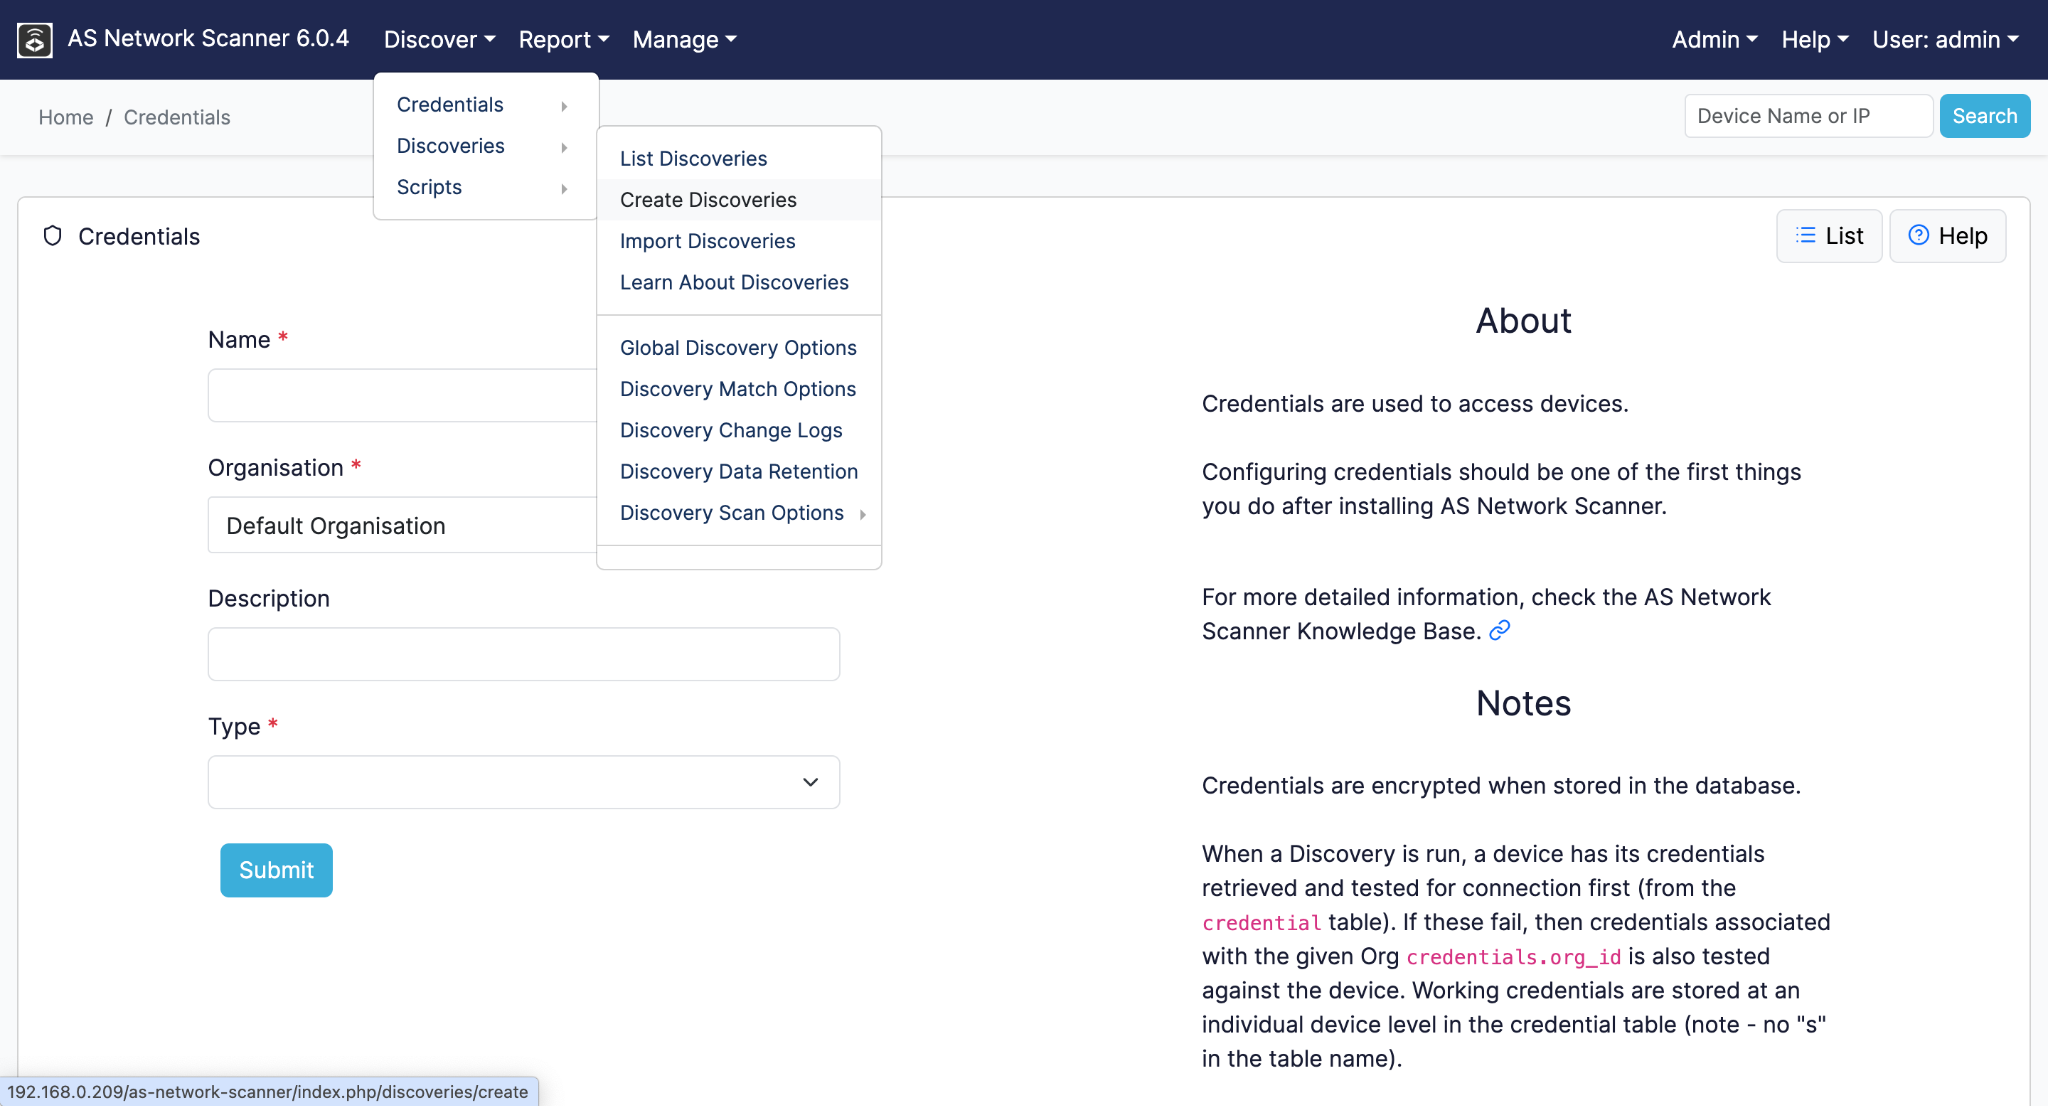
Enter the required discovery information and click Submit to save the discovery.
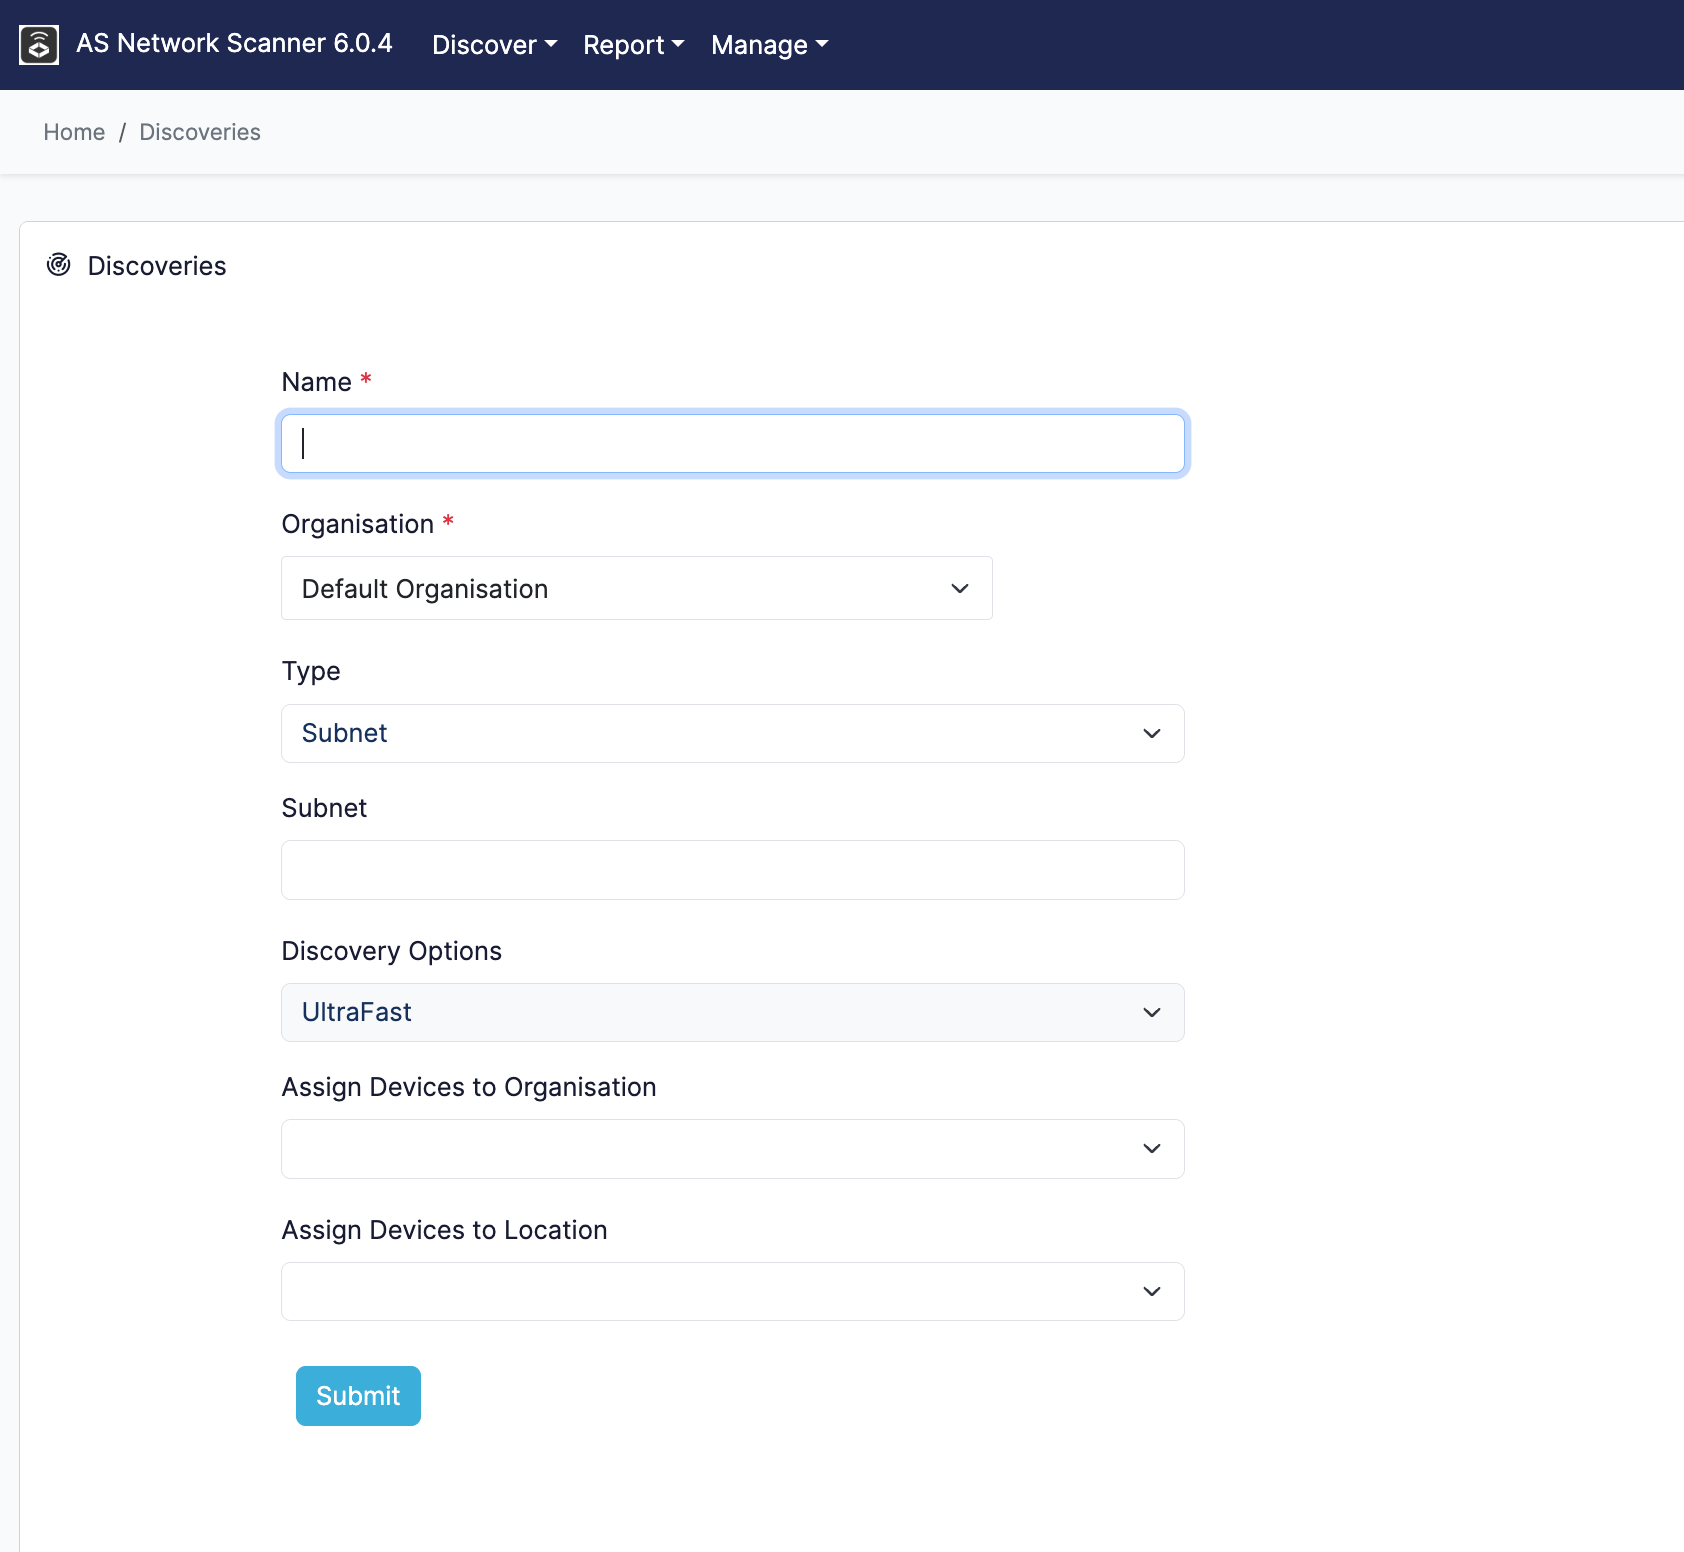
Give each discovery a recognizable name, particularly if you are scanning several offices, networks, or subnets. For example, you might use names such as New York Office Network or Chicago Data Center.
Execute the discovery
Go to:
Discovery → Discoveries → List Discoveries
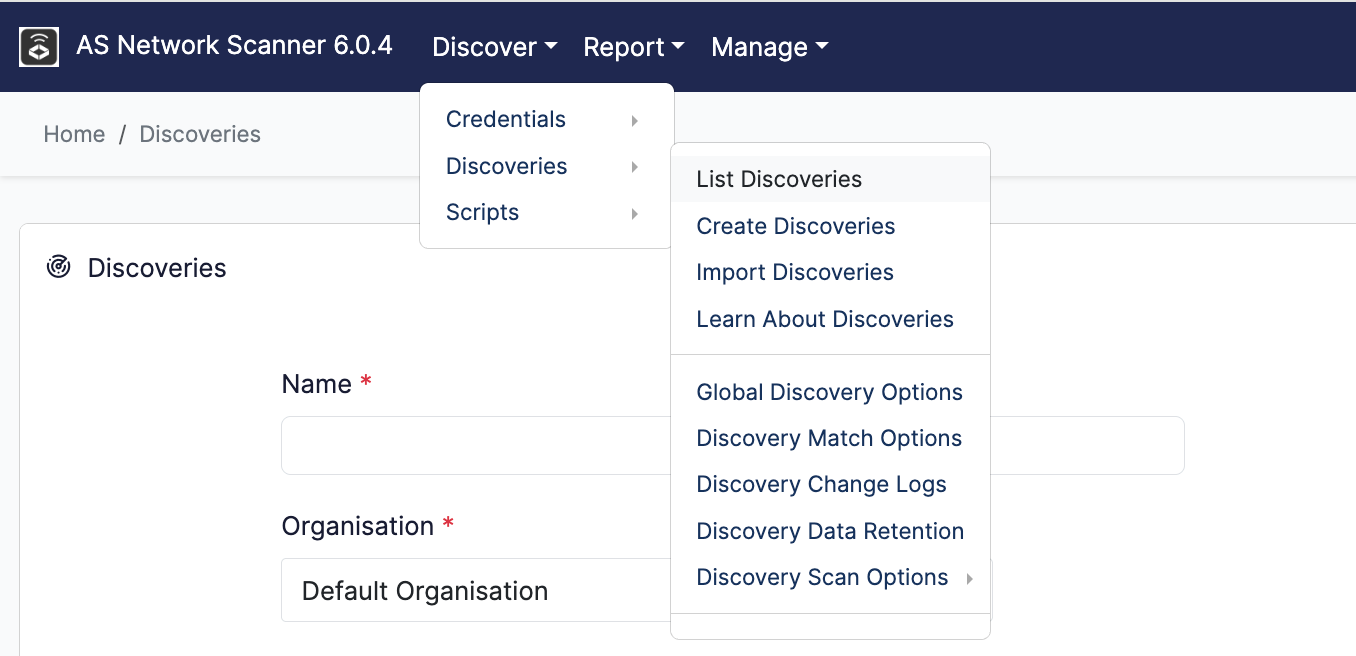
Open the discovery you want to run and click Execute.
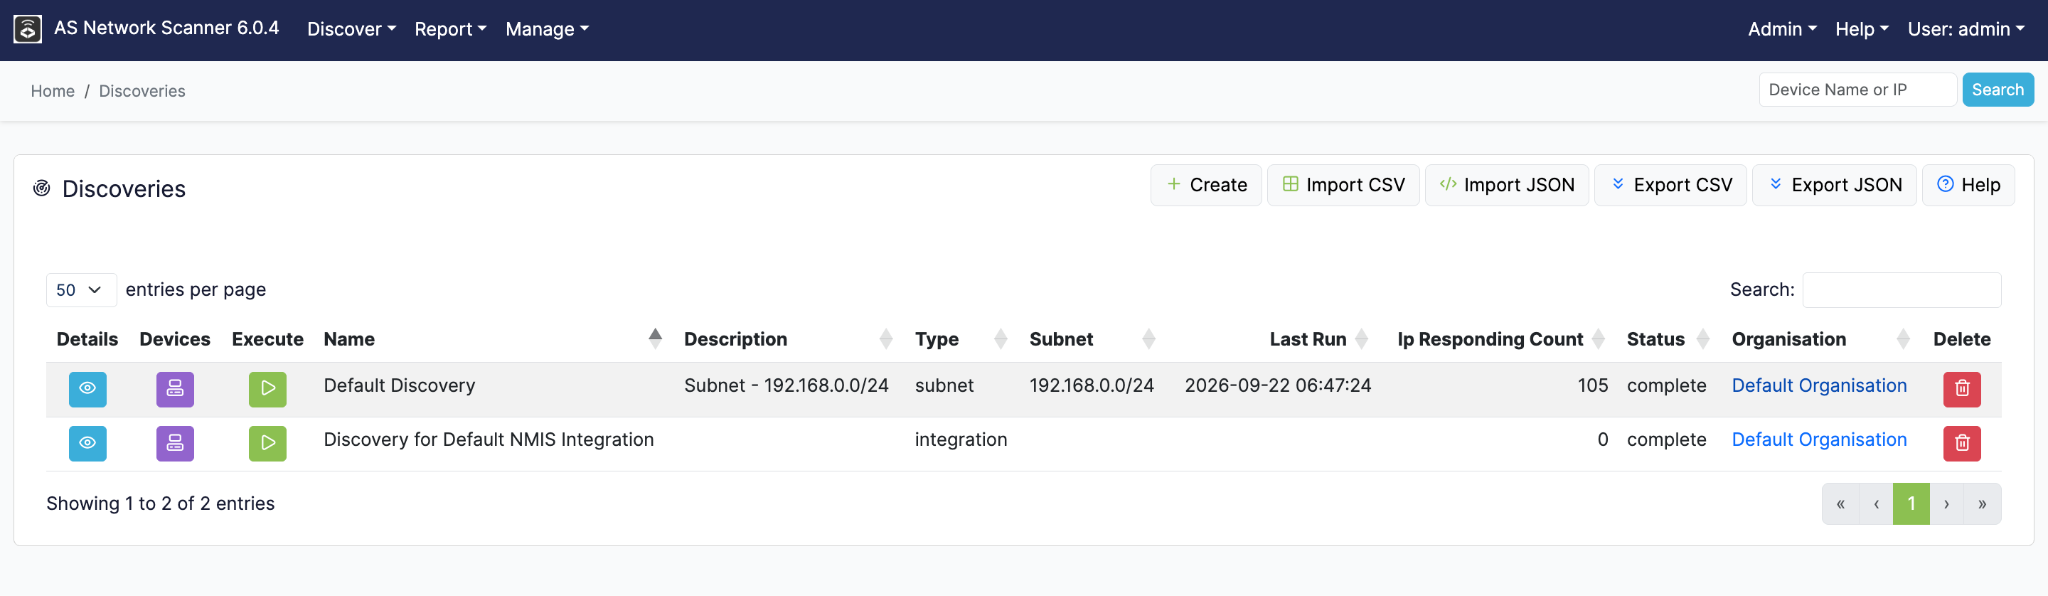
AS Network Scanner displays a log while it scans the selected network. The time required depends on the size of the IP range, network conditions, available credentials, and the number of connected devices.
After the discovery is complete, review its results in AS Network Scanner.
The included AS Linux Connector synchronizes the discovered device information with AssetSonar. Allow the next synchronization cycle to complete before reviewing newly discovered devices in your AssetSonar account.
5. Schedule network scans from AssetSonar
You can schedule recurring discoveries so that AssetSonar continues receiving updated information about devices on your network.
In AssetSonar, go to:
Settings → Integrations → Network Discovery
Under Scan Listings, locate the discovery you want to schedule and click the scheduling action.
Configure the schedule based on how frequently the network should be scanned, and then click Schedule.
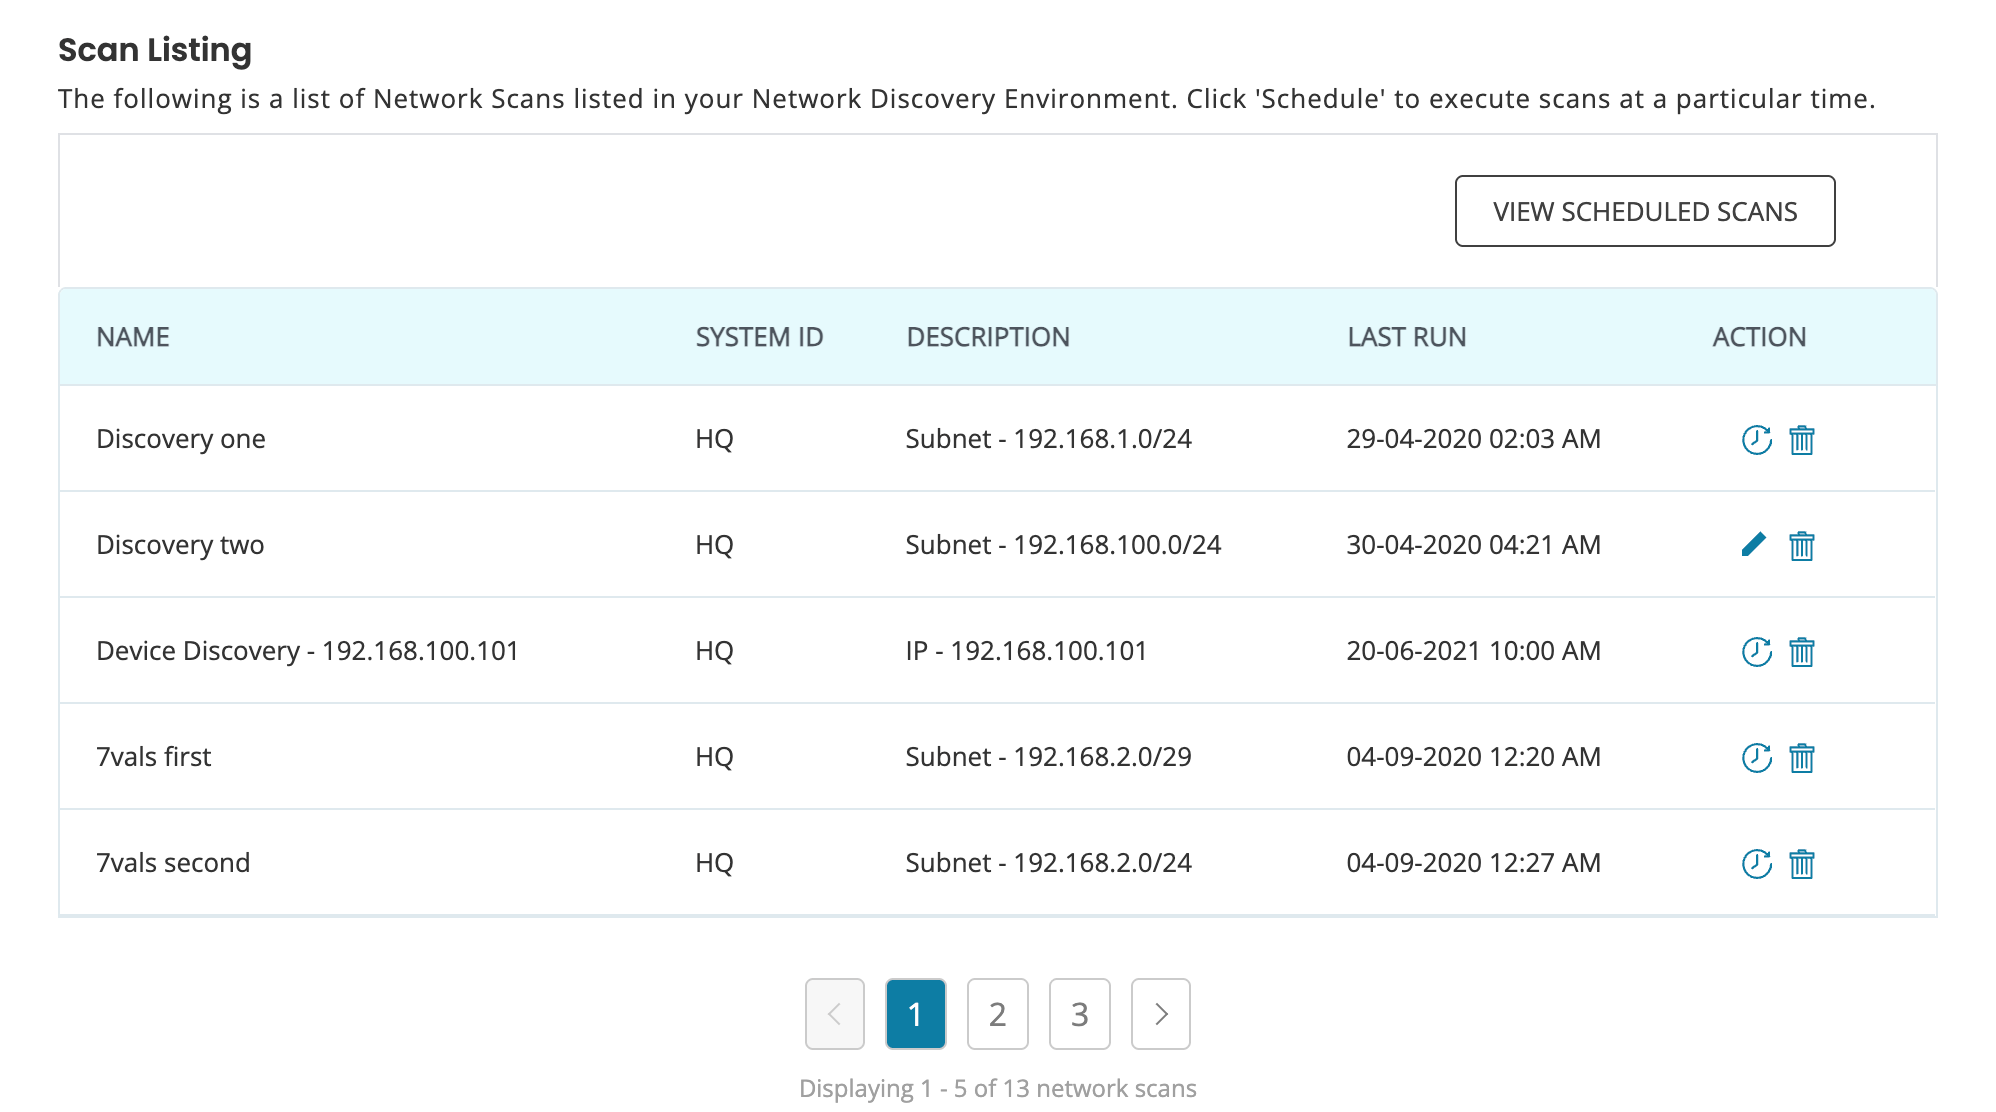
The AS Linux Connector retrieves the schedule and initiates the discovery at the configured time.
You can return to the same page to review or edit an existing schedule.
Choose a frequency that reflects how often your network changes. A network with frequent device additions or replacements may require more frequent scanning than a stable network segment.
6. Review and provision discovered devices
Discovered devices are not automatically added to your permanent asset inventory. AssetSonar places them in the Provisioning area so that you can review their information first.
To find recently imported devices, go to:
More → Provisioning
This opens the Provisioning module, where the Provisioning tab displays devices synchronized by AS Network Scanner.
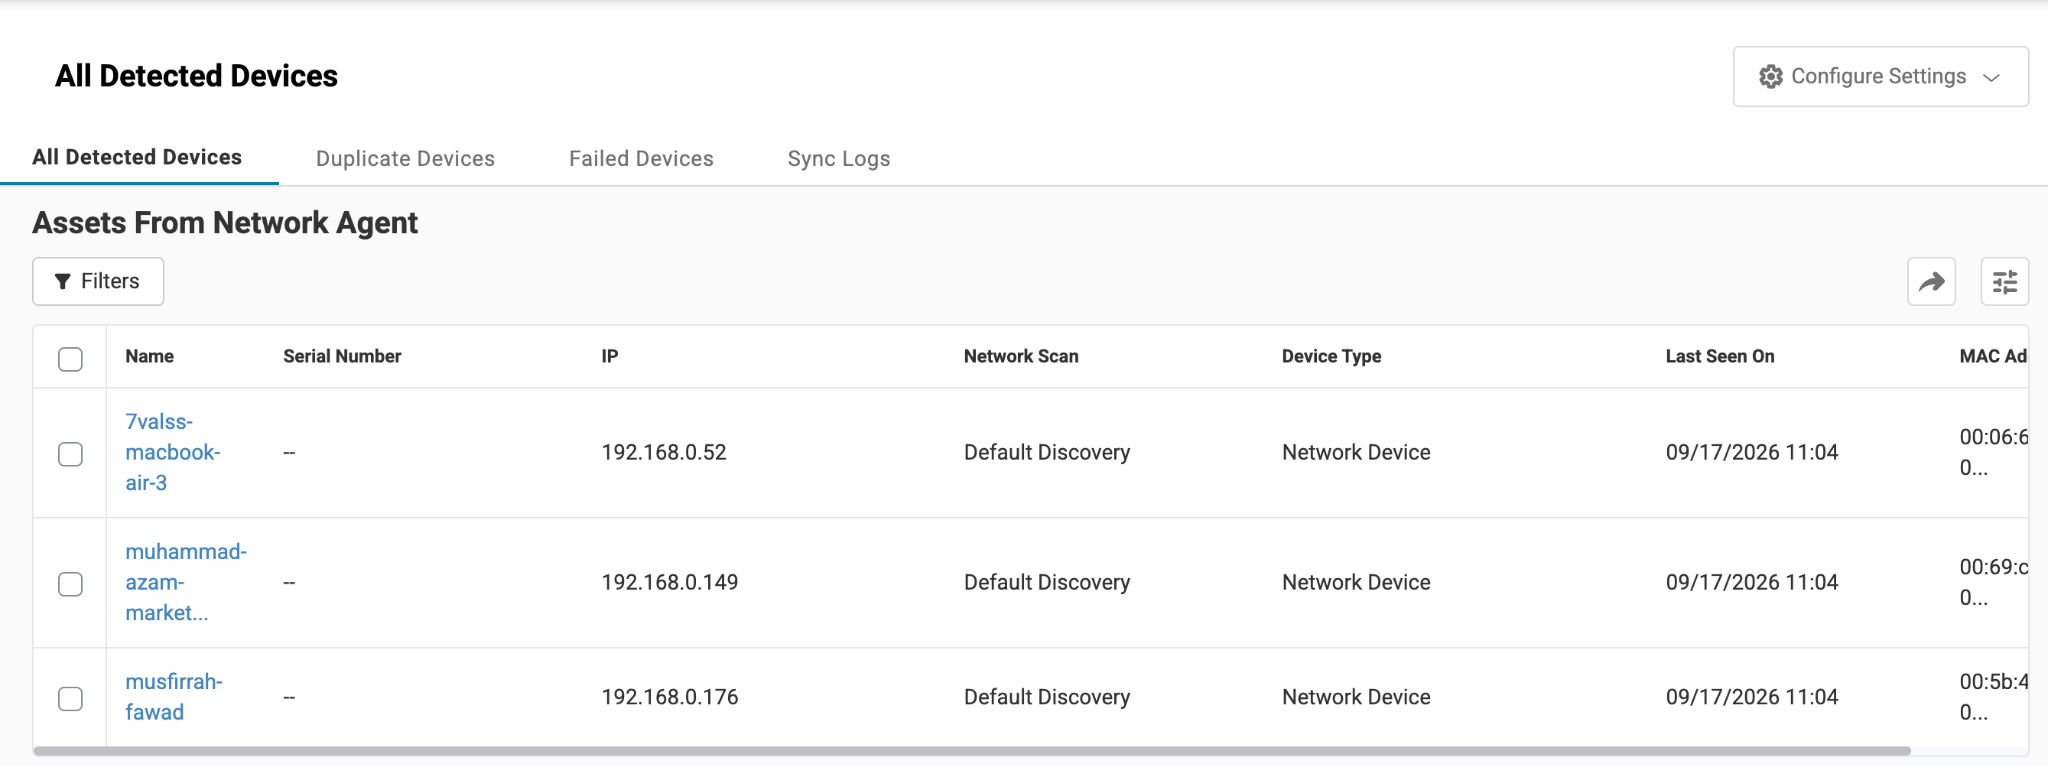
Review the available information to confirm that each device should be added to your inventory.
AssetSonar can provision two primary categories of discovered devices.
IT devices
IT devices have an operating system and can include:
- Windows computers
- Linux computers
- Mac computers
- Chromebooks
- Servers
These devices are provisioned as IT Assets in AssetSonar.
Network devices
Network devices enable communication between systems and can include:
- Routers
- Switches
- Hubs
- Bridges
- Firewalls
- Wireless access points
- Network printers
These devices are provisioned as Network Assets.
Valid SNMP credentials are required to obtain detailed information from supported network devices.
Provision an individual device
Open the discovered device’s Details page and click Add as an Asset.
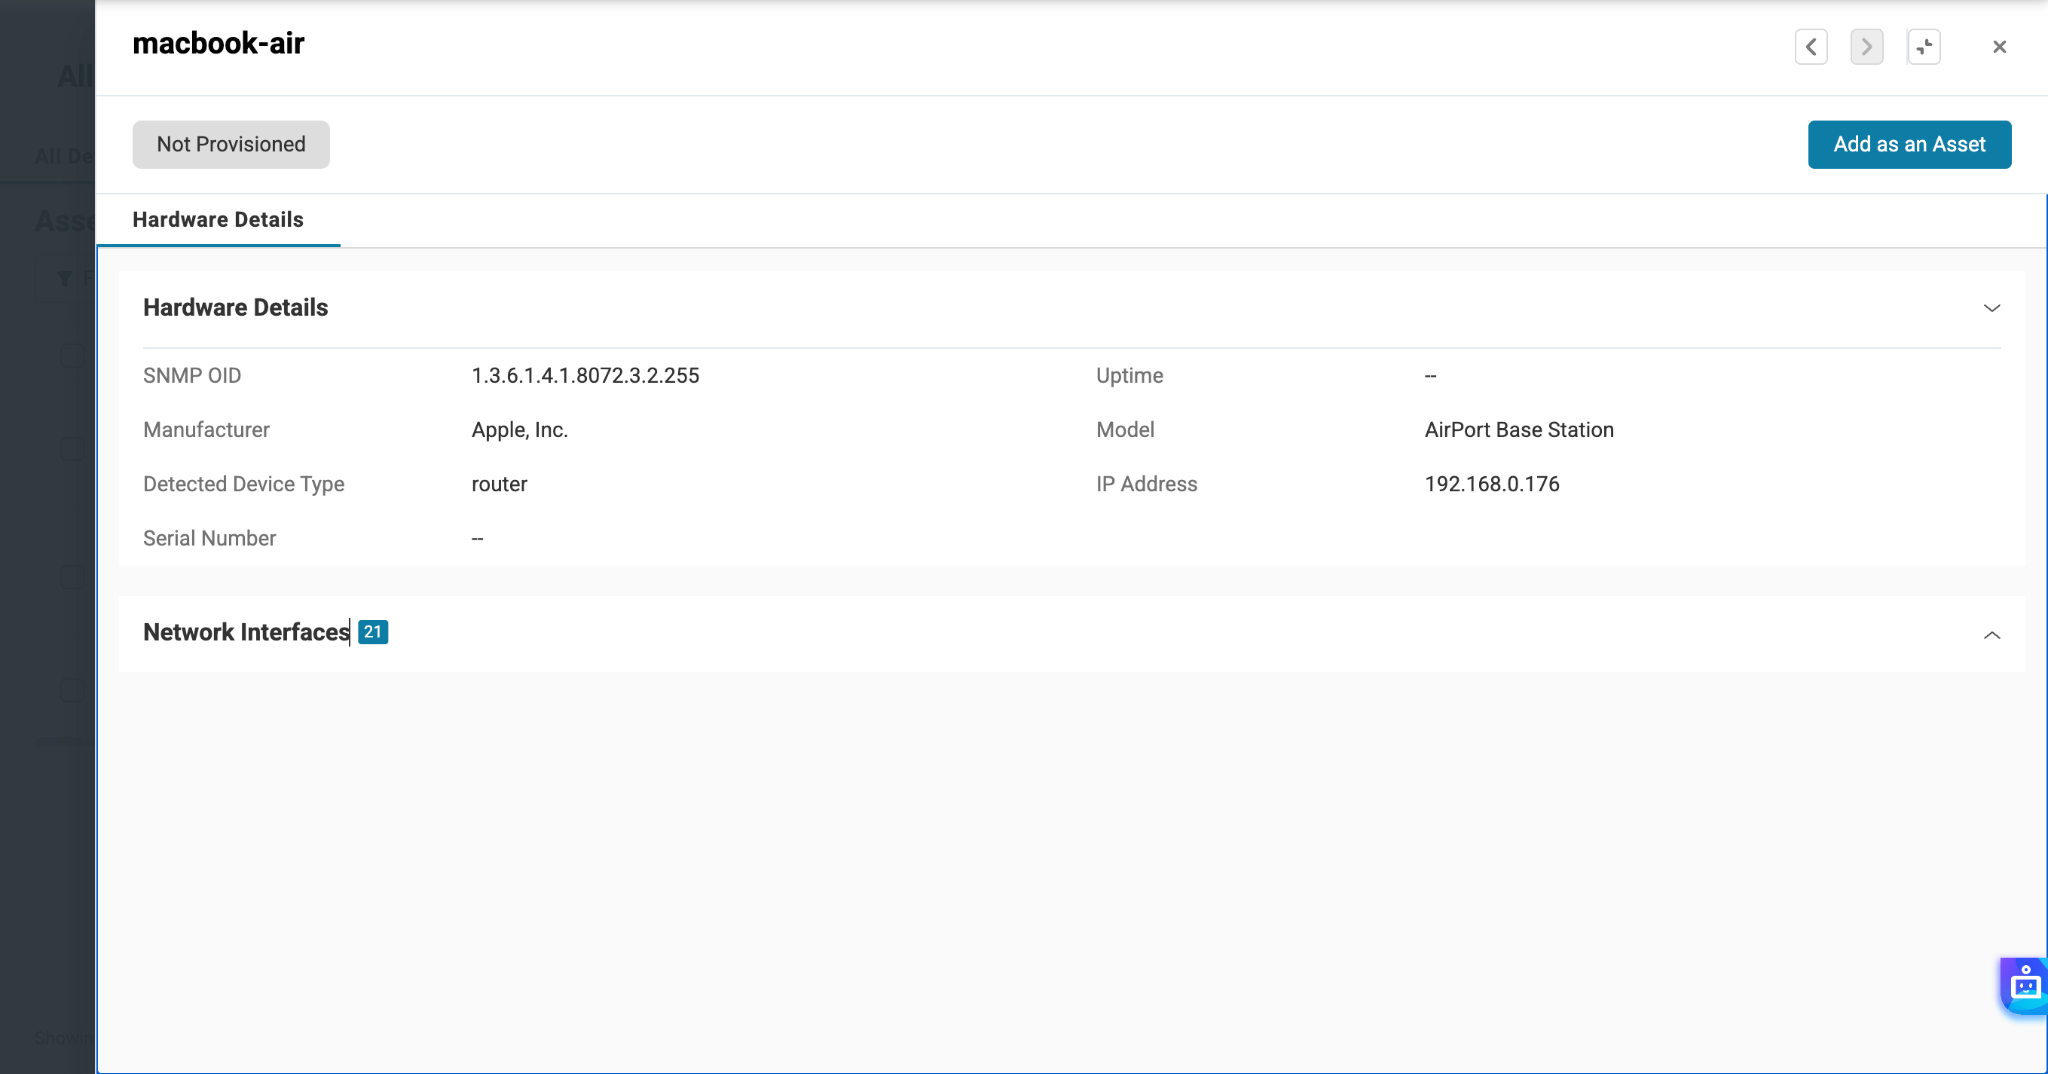
Select the appropriate Location and Group, along with any other required information, and click Add.
The device is added to AssetSonar as an IT Asset or Network Asset based on its detected device type.
Provision multiple devices
To add several devices simultaneously, return to the Provisioning listing and select the applicable devices.
Use the bulk provisioning action to add the selected devices to AssetSonar.
Review the devices carefully before completing the bulk action. If a device could not be classified correctly, verify its credentials and discovery results before provisioning it.
Review devices from the latest scan
You can filter the Provisioning listing using Detected on Last Scan.
Select the applicable discovery and run the filter to distinguish newly detected devices from devices already reviewed during an earlier scan.
This helps you identify:
- Devices found during the latest scan
- Devices that have already been provisioned
- Devices that still require review
- Devices that are no longer being detected
7. Ignore devices you do not want to provision
A discovery may detect obsolete, temporary, personal, or otherwise irrelevant devices that you do not want to add to AssetSonar.
From the Provisioning tab, select the applicable devices and click:
Actions → Ignore
The selected devices move to the Ignore state. You can use the status filter to view ignored devices later.
If you decide that an ignored device should be reconsidered, select it and click:
Actions → Undo Ignore
Ignoring a device removes it from your active provisioning queue without requiring you to create an unnecessary asset record.
8. Run Network Discovery reports
AssetSonar’s Custom Reports can help you analyze discovered devices, including devices that have not yet been provisioned.
Go to:
Reports → Create Custom Report
Select:
- Primary module: Network Scans
- Related module: Discovered Assets
Choose the columns relevant to your report.
Useful columns can include:
- Discovery name
- IP address
- MAC address
- Device name
- Detected device type
- Operating system
- First detected date
- Last detected date
- Provisioning status
Complete the remaining report settings and click Run Report.
Including the Detected Device Type column helps you compare computers, routers, switches, wireless access points, and other detected form factors.
Devices may appear as Unclassified or Unknown when the scanner cannot collect enough information to determine their type. If this occurs, confirm that the appropriate SNMP, SSH, or Windows credentials were added and that the target device allows the required network access.
Maintain an accurate network inventory
Once AS Network Scanner is installed and your discoveries are scheduled, AssetSonar can regularly receive information about devices connected to your network.
Review the Provisioning page after each scan to add legitimate devices, ignore irrelevant discoveries, and investigate devices that cannot be classified. This process helps keep your AssetSonar inventory aligned with the equipment operating across your network.
For additional help setting up AS Network Scanner or questions about Windows environments, contact support@ezo.io
