The Scalefusion integration imports supported devices enrolled in Scalefusion and keeps their asset records updated through scheduled synchronization. IT teams can review hardware, operating system, network, storage, encryption, location, and user details alongside the device’s asset information.
This guide covers connecting Scalefusion, configuring device assignments, syncing devices, reviewing imported information, and creating reports.
Before You Begin
You will need:
- An AssetSonar account with permission to manage integration settings.
- A Scalefusion account with access to Developer API.
- Devices enrolled in Scalefusion on operating systems supported by the integration.
Note: ChromeOS devices are not imported by the current integration.
1. Get Your Scalefusion API Key
AssetSonar uses a Scalefusion API key to connect to your account.
- Sign in to the Scalefusion dashboard.
- Go to Integrations → Developer API → Manage API Key.
- If you do not already have a key, select Generate API Key.
- Copy the API key for use when connecting Scalefusion to AssetSonar.
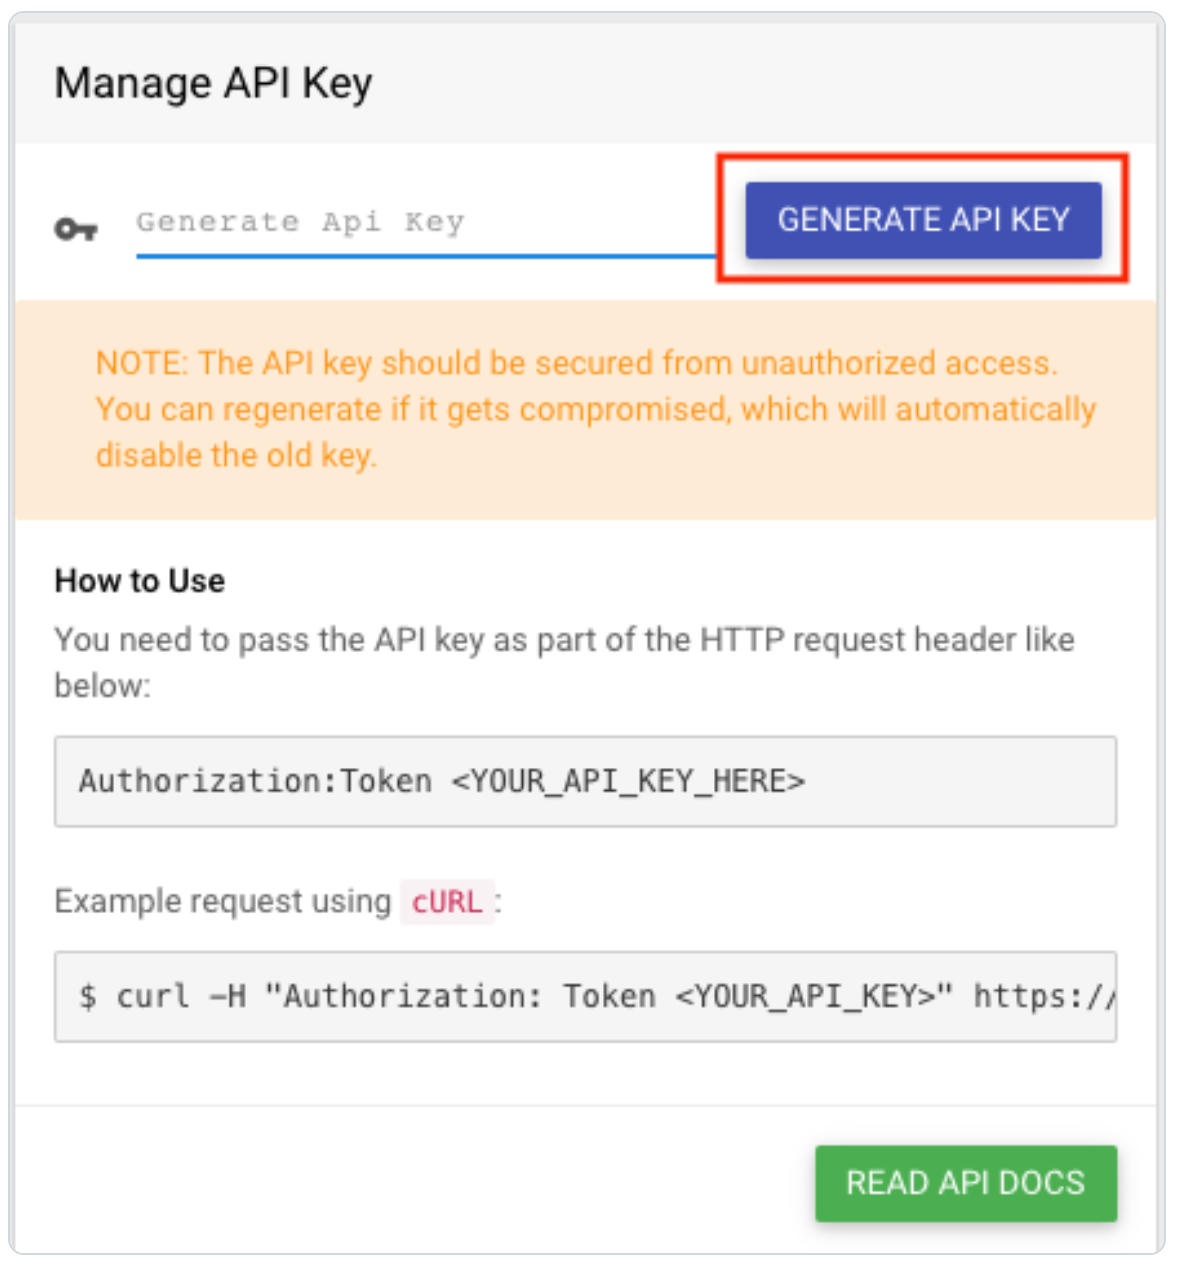
Regenerating an API key disables the previous key. If you replace a key already used by AssetSonar, update the integration’s saved credentials.
For additional guidance, see Scalefusion Developer API.
2. Enable the Scalefusion Integration
- In AssetSonar, go to Settings → Integrations.
- Under Mobile Device Management & Network Discovery, locate Scalefusion Integration.
- Select Enabled.
- Follow the connection prompts and enter the API key you copied from Scalefusion.
- Save your changes.
If you want newly imported devices assigned to groups or checked out to matching users, review the optional configuration below before importing them.
3. Configure Device Assignments
The integration supports AssetSonar’s standard assignment and checkout workflows. Configure the workflows your team needs before running the first sync.
3.1 Assign Newly Imported Devices to Groups
Assignment rules let you organize devices into AssetSonar groups using their discovery source and reported characteristics.
- Go to Workflows & Automations → Assignment Rules.
- Select Add Rule and then Assignment Rules.
- Choose Scalefusion as the Source and select the relevant asset type and destination group.
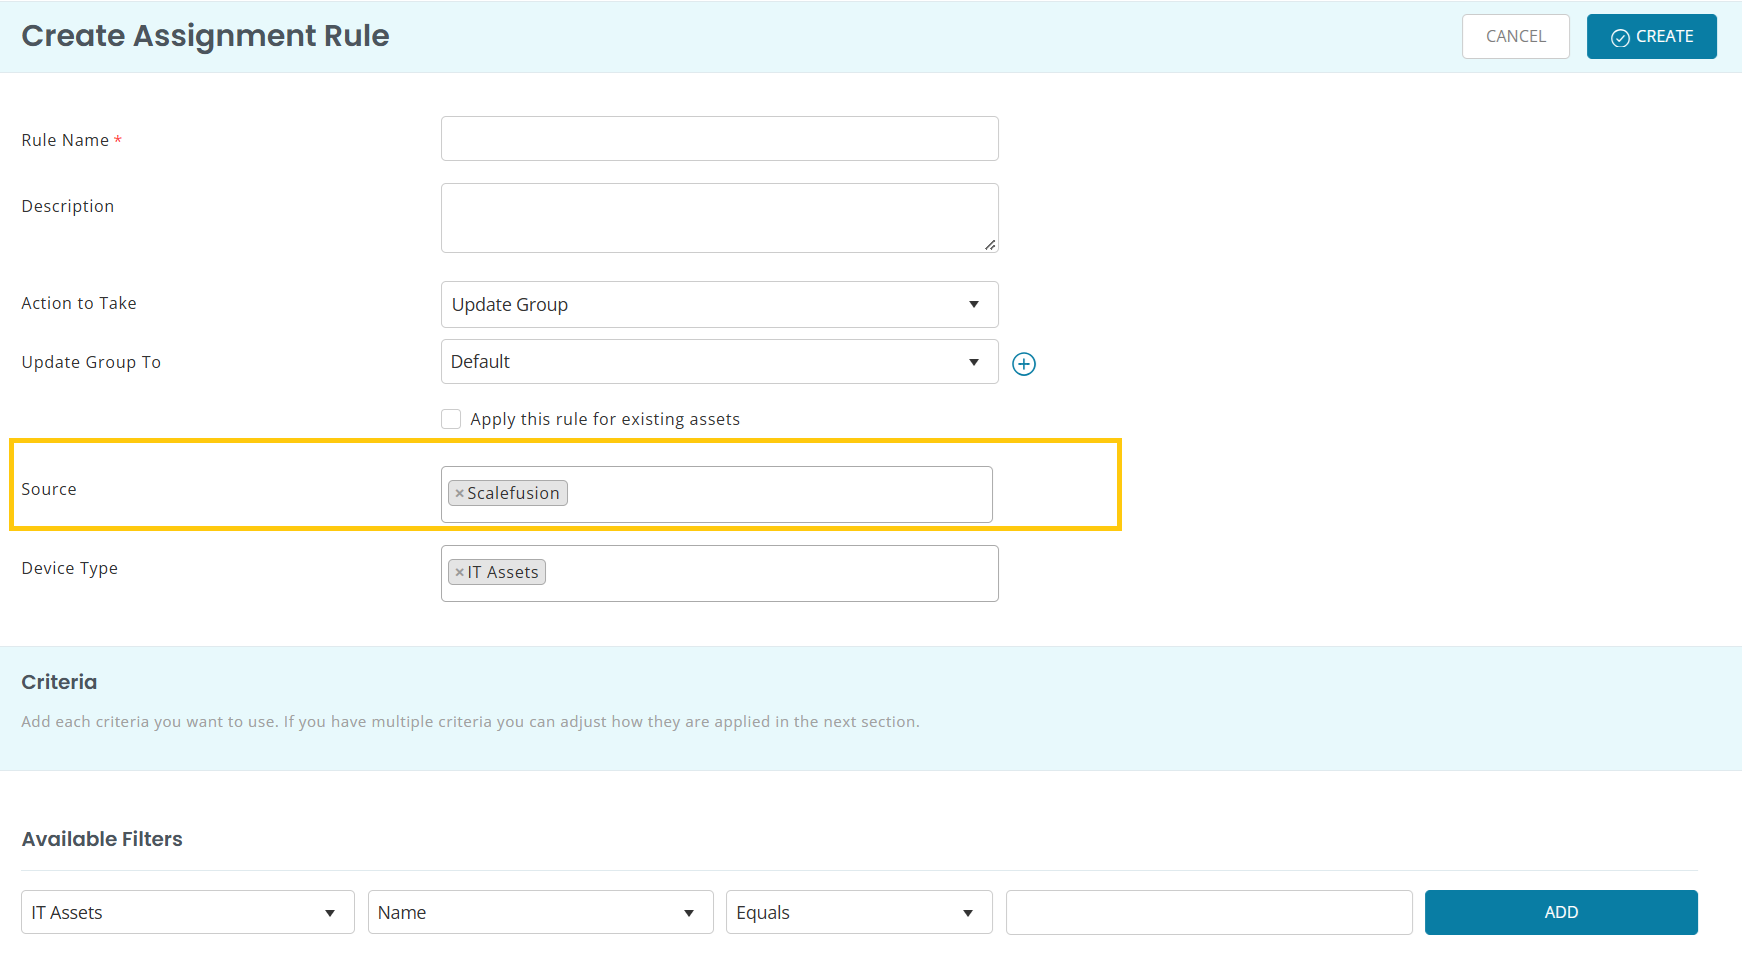
- Add criteria using available device fields, such as manufacturer, model, or operating system.
- Create the rule and make sure it is active.
For example, create a rule that assigns Windows devices imported from Scalefusion to your Windows Laptops group.
Group assignment rules apply to subsequent imports. They do not reorganize devices already in your inventory. These rules assign AssetSonar groups; Scalefusion group names are not imported.
For the complete workflow, see Auto-Assign Devices to Groups.
3.2 Configure Auto Checkout
Auto Checkout uses eligible user information from device integrations to match devices to AssetSonar members.
- Go to Settings → Automations → Auto Checkout.
- Select Enabled.
- Review the field used to match discovered user information to a member. Email is the default for MDM-discovered devices.
- Select Enable Automatic Checkouts if matching devices should be checked out without manual review.
- Save your changes.
Automatic checkout depends on the information Scalefusion provides and a matching member being available in AssetSonar. A reported login name alone does not guarantee that a device can be assigned to a member.
For matching options, exclusions, and custody transfers, see Enable Autocheckout and Automatic Checkout.
4. Sync Devices from Scalefusion
The first sync is queued automatically after the integration connects successfully. Scheduled synchronization then keeps imported device records updated.
Once the initial sync completes, review the imported devices:
- Go to Items → Assets.
- Apply the Discovery Source filter and select Scalefusion.
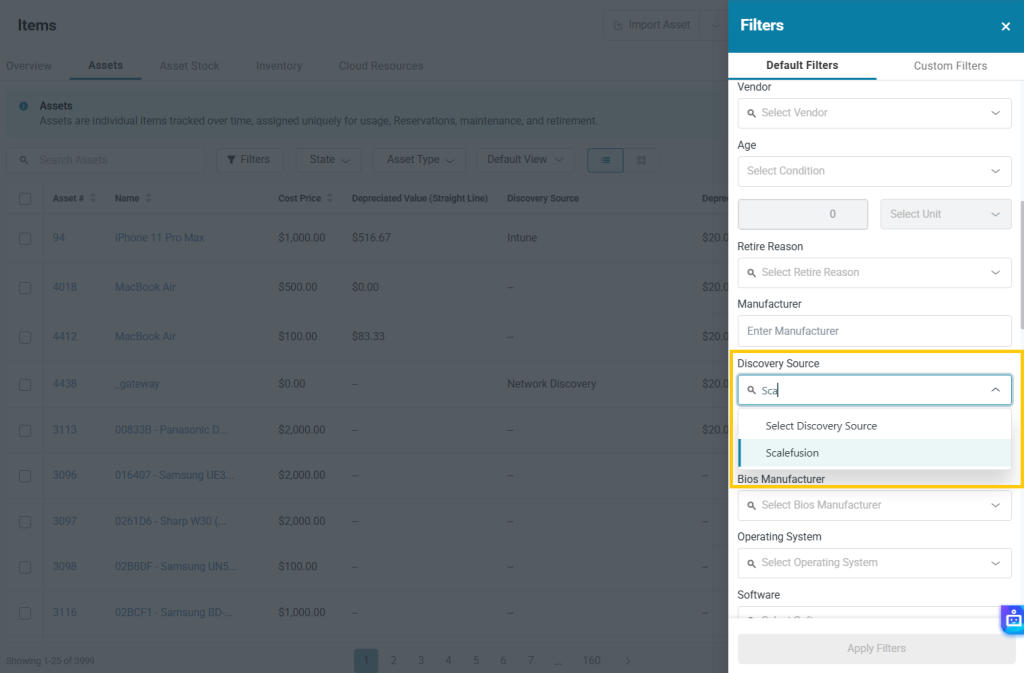
- Open an imported asset and review its device information and sync details.
To run an additional sync manually, go to Settings → Integrations → Scalefusion Integration and select Sync Now.
For help reviewing serial numbers and duplicate records, see Review and Improve IT Asset Accuracy.
5. Review Imported Device Information
Open an imported asset to review its core information and System Details. The fields populated depend on the device’s operating system and the values Scalefusion returns.
| Device information | Fields available in AssetSonar |
| Name and identifiers | Name, Device Reported Name, Serial Number, Device ID, UUID, UDID, IMEI 1, and IMEI 2 |
| Hardware | Manufacturer, Model, and Physical Memory |
| Operating system | Operating System and Operating System Version |
| Management profile | Profile ID and Profile Name |
| Device status | Device Status |
| Connectivity | Last Connected At, Local IP Address, Public IP Address, and MAC Address |
| Storage | Internal Storage Capacity, External Storage Capacity, Internal Free Space, and External Free Space |
| Encryption | Encryption and Encryption Method |
| Location | GPS Location, using the reported latitude and longitude |
| Login activity | Last Login User and Last Login Time |
When Scalefusion supplies a login email address, it appears in brackets alongside the Last Login User.
Last Connected At is the connection timestamp reported by Scalefusion. Review the asset’s sync information separately to check when AssetSonar last fetched its data.
When Scalefusion reports a device as Locked, that status appears in the device’s System Details. It is separate from Asset Status in AssetSonar.
6. Create a Report for Scalefusion Devices
Custom reports let you combine synced device information with asset details such as location, group, and custodian.
- Go to Reports → Custom Reports and create a report.
- Select Asset as the primary module.
- Add System Details and Sync Sources as related modules. Add other modules as needed, such as Disk & Drives for storage and encryption information.
- Choose the columns relevant to your review. For example:
- Asset name
- Device ID
- Device Status
- Operating System Version
- Profile Name
- Last Connected At
- Last Login User
- Apply the available source and asset filters to focus on Scalefusion devices and the locations or groups you want to review.
- Select Run Report.
- After the report runs, select Save Report if you want to reuse its configuration.
For example, include the asset name, operating system version, profile name, and last connection timestamp to review device configuration and connectivity across your imported inventory.
For additional guidance on filters, exports, and scheduling, see Generate Custom Reports.
For setup or synchronization assistance, contact support@ezo.io.
